Month: May 2023
Mouse intelligence and problem-solving abilities offer invaluable insights for understanding not only their own cognitive capacities but also broader implications in various fields. From their sophisticated neurobiology to the myriad ways they adapt and learn within their environments, the study of these small rodents has garnered significant attention. This essay delves into the fascinating world of mouse intelligence, examining the relevant neurobiology, problem-solving capabilities, social behavior, impact of environmental factors, research methods, and the applications and implications of these findings in other fields.
Cracking the Code to Mouse Intelligence
Mouse intelligence is often studied in relation to the neurobiology of their brain structure, which is relatively simpler compared to the human brain, yet sophisticated enough to provide valuable insights into cognitive functions.
Murine models (mice and rats) offer critical information about neural networks and cerebral regions responsible for complex cognitive activities like learning, memory consolidation, and problem-solving.
With over 71 million neurons, a mouse brain shares a similar organization to that of the human brain, albeit with fewer gyri and sulci, which renders it useful for investigating mammalian cognitive processes.
One of the primary brain structures implicated in mouse intelligence is the hippocampus. This region plays an essential role in declarative memory formation and spatial navigation, both of which contribute to problem-solving ability.
The hippocampus exhibits synaptic plasticity, which means it can adapt and reorganize its neuronal connections in response to new experiences or environmental stimuli. This plasticity allows mice to better navigate and remember locations, helping them adapt to changes in their surroundings, and make informed decisions based on spatial information.
Another crucial brain region indicative of mouse intelligence is the prefrontal cortex (PFC). PFC is involved in executive functions like planning, decision-making, and behavioral inhibition.
Research has shown that when a mouse is exposed to a challenging situation requiring problem-solving or decision-making, the PFC activity plays a vital role in processing and integrating relevant information. Neurons in the PFC of mice exhibit advanced computational abilities and an extensive range of adaptability, which allows them to flexibly and efficiently switch between cognitive strategies.
The cerebellum is another vital brain structure in understanding mouse intelligence. Traditionally seen as responsible for motor coordination, recent research has shown that the cerebellum has a significant role in cognitive processing as well.
Moreover, animal studies have demonstrated that the cerebellum is involved in processes such as learning and habituation, which are not only important for adaptive motor behavior but also for the development of higher cognitive skills.
In addition, the cerebellum is known for its ability to form specific neuronal patterns that underlie conditioning and procedural memory, ultimately contributing to problem-solving and decision-making in mice.
Mouse intelligence has been a subject of interest for many researchers, especially their problem-solving and learning abilities. One of the key aspects of mouse intelligence is spatial navigation. Mice have an excellent sense of spatial awareness, which allows them to quickly navigate through their environment and find their way to food or shelter. Researchers have found that mice use landmarks in their environment to create cognitive maps, which they then navigate using a combination of memory and sensory inputs, such as scent, sound, and light. The ability to form these mental maps provides mice with a selective advantage, as it enables them to solve spatial problems effectively.

Mice Intelligence and Problem-Solving Capabilities
Furthermore, another aspect of mouse intelligence that warrants further study is the complex interplay between genetics and environmental factors. Mouse models in different strains exhibit a variety of behavioral traits and cognitive abilities, which can be influenced by their genetic makeup, as well as external stimuli. Considering recent advancements in optogenetics and other genetic manipulation techniques, it is becoming increasingly clear that targeted interventions can profoundly influence neural circuits, and ultimately, the expression of cognitive functions. Thus, a comprehensive understanding of the neurobiology of mouse intelligence would necessitate examining how genetics, neural networks, and specific brain regions work in concert to facilitate their cognitive and problem-solving abilities.
Another essential aspect of mouse intelligence is their memory capacity. Mice have shown impressive long-term memory, which allows them to remember locations and specific routes effectively. Researchers who study mice memory typically use maze experiments, in which mice learn to navigate a maze to receive a reward. Mice can quickly memorize the correct path to the reward and even remember it weeks later. This long-term memory ability is crucial for their survival in the wild, as it enables them to remember the locations of resources such as food, water, and shelter.
Mice also exhibit a remarkable ability to use tools to solve problems. While their tool use is not as elaborate as that of primates or even some bird species, mice can still use simple tools to their advantage. In laboratory settings, researchers have observed mice using small objects, such as sticks or small blocks, to reach and acquire food that would otherwise be out of reach. This ability to manipulate objects indicates a degree of creativity and ingenuity in problem-solving, reflecting the cognitive capabilities of these small mammals.
In addition to their tool-use capabilities, mice can also exhibit social learning by observing other mice to acquire new knowledge and solve problems. This form of learning, known as observational learning, allows them to learn from the experiences of others without having to engage in the same activities themselves. This can be highly useful in the wild, as it allows mice to quickly adapt to new environments and potential threats. Researchers have observed mice learning from one another in experiments that involve acquiring food, avoiding risks, and navigating complex environments.
Finally, the ability of mice to adapt to changing environments is an indication of their problem-solving abilities. They possess an innate flexibility in their behavior, allowing them to modify their actions in response to new challenges or situations. This adaptability is critical for their survival in the face of an ever-changing environment, as they must constantly find new ways to locate resources and evade predators. Additionally, this intelligence also extends to their complex social behaviors, highlighting the cognitive capabilities of these small yet resourceful mammals.

Complex Social Behaviors of Mice
Mice have been found to exhibit a wide range of communication methods that facilitate their interactions with other group members, further demonstrating their problem-solving abilities. These communication techniques not only help them maintain their intricate social structures, but also provide them with additional means to address ever-evolving issues, as they navigate their dynamic surroundings.
Within a group, mice establish well-defined social hierarchies that determine each member’s access to resources, mates, and territory. The dominant male is usually responsible for defending the territory and maintaining order, while subordinate individuals must avoid antagonizing the dominant member or risk being expelled from the group.
Communication among mice is primarily mediated through chemical signals, called pheromones, which are released by specialized scent glands. These pheromones facilitate key aspects of social behavior, such as reproduction, kin recognition, and territorial marking. In addition to chemical communication, mice also employ vocalizations, body postures, and tactile cues to convey information to their conspecifics. Ultrasonic vocalizations, emitted outside the human range of hearing, are used by mice to communicate within their groups, particularly during mating and social bonding.
Social learning plays a crucial role in the development of problem-solving abilities in mice, as they often rely on the experiences of other group members to adapt to new situations or environments. For example, mice have been found to use social cues and observational learning to avoid novel foods that might be harmful. In a phenomenon known as social transmission of food preferences, mice will avoid consuming a particular food if they smell the scent of another mouse on their breath that has consumed the food and fell ill.
In laboratory settings, research has demonstrated that mice are capable of learning and remembering complex tasks through trial and error, and that they are able to adapt their problem-solving strategies in response to changes in environmental conditions. Moreover, mice have shown the ability to navigate through complex mazes, solve simple puzzles, and even exhibit spontaneous innovation when faced with novel challenges.
Mice have been documented to possess complex social interactions and cognitive abilities, such as empathy and prosocial behavior. In various experiments where mice were given the chance to assist others in distress, they displayed significant empathetic concern and even participated in consoling behaviors towards the victim. These findings have crucial implications for understanding the neural and genetic basis of social cognition in mice, and could assist in developing new therapeutic interventions for human disorders related to social dysfunction.
Environmental Factors Affecting Mouse Cognition
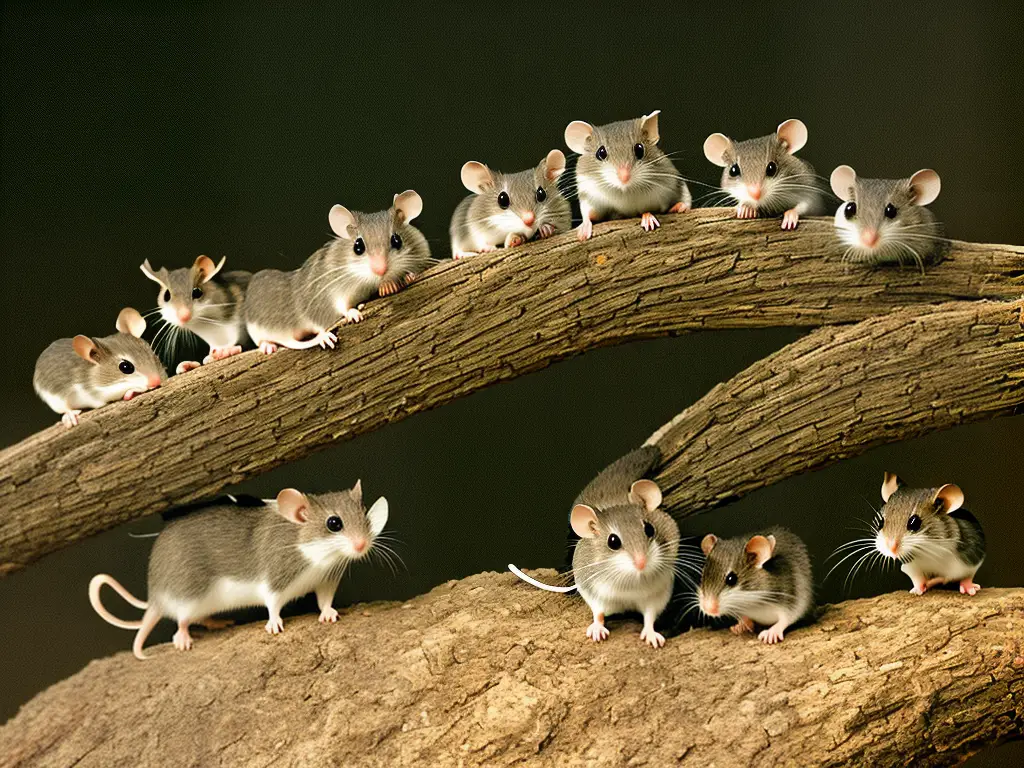
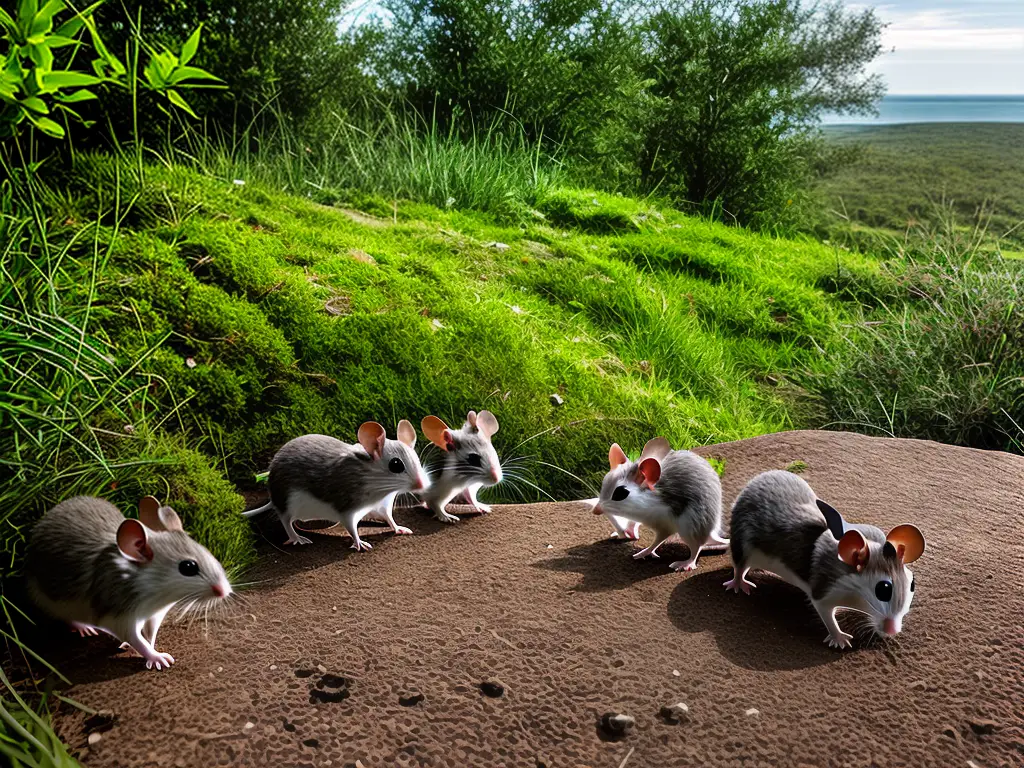
Environmental factors, like habitat, considerably influence mouse cognition, including their intelligence and problem-solving abilities. Mice living in complex or challenging ecosystems, such as large burrows or diverse terrains, may develop more advanced problem-solving skills than those in simpler environments. By examining how habitat impacts mouse cognition, we can gain important insights into how these animals learn, adapt, and respond to new challenges and obstacles in their surroundings. Essentially, connecting the demonstrated social cognition in mice with their environmental adaptability helps us form a more comprehensive understanding of their overall intelligence and problem-solving capabilities.
Another important environmental factor that affects mouse intelligence and problem-solving abilities is stress. Exposure to stressors, such as predator presence or a shortage of resources, can lead to physiological and behavioral changes in mice. It has been shown that chronic stress can impair cognitive functions, such as learning and memory, while acute stress can sometimes enhance these functions. Understanding the effects of stress on mouse cognition can help researchers develop strategies to mitigate adverse consequences on animal populations in changing environments.
Stimulation is yet another significant factor that influences mouse intelligence and problem-solving abilities. Mice raised in enriched environments, which provide opportunities for physical, cognitive, and social stimulation, are known to exhibit enhanced brain development, improved learning, and increased problem-solving skills. These environments may include various objects, such as tunnels and climbing structures, as well as social encounters with other mice. Such stimulation positively impacts the growth and function of neurons in the mouse brain, leading to a more significant capacity for learning and handling challenges in their environment.
Social structure also plays a vital role in shaping the cognitive abilities of mice. Mice are social animals that live in hierarchical groups, which can affect their problem-solving skills and intelligence. Mice that hold higher-ranking positions within their social group may be more likely to develop improved problem-solving abilities, as their status requires them to make better decisions, defend resources, or engage in strategic social behavior. Moreover, group living can lead to cooperative problem-solving, where mice work together to solve complex tasks that would be difficult for an individual to complete.
Mice have long been a subject of fascination for researchers due to their intelligence and problem-solving abilities, which are intricately linked to various environmental factors such as habitat, stress, stimulation, and social structure. Understanding how these factors impact mouse cognition can lead to the development of novel strategies and interventions to improve both the welfare of laboratory animals and the conservation and management of wild populations. Moreover, shedding light on the evolutionary forces that shape animal intelligence has broader implications for the understanding of diverse species.
Methods for Assessing Mouse Intelligence and Problem-solving Abilities
One of the key aspects of mouse intelligence is their capacity for spatial learning and memory, and researchers have developed various methods to study these abilities. One such method is the Morris water maze, a test that challenges mice to locate a submerged platform in a pool filled with water and non-toxic, opaque liquid. By observing how mice learn to locate the platform over time, scientists can gather valuable insights into their problem-solving skills. Thus, the meticulous study of mouse cognition and behavior contributes significantly to our understanding of the factors that drive animal intelligence and problem-solving abilities, paving the way for improved welfare and conservation efforts.
Another popular method for assessing problem-solving abilities in mice is the radial arm maze. This maze consists of a central platform connected to multiple arms, with food at the end of each arm. Mice are placed in the maze and allowed to explore the arms to locate and remember the food sources. Their working and reference memory is then assessed based on their ability to recall which arms they have visited and which arms still contain food. This searching strategy provides insights into the decision-making processes of mice as they navigate complex environments.
The T-maze test is another widely utilized method to study the learning and decision-making abilities of mice. The maze is shaped like a “T,” with mice starting at the bottom and choosing between two arms containing food rewards. To assess their working memory, changing reward contingencies can be introduced, requiring mice to adapt their choices accordingly. The T-maze test has been used to study cognitive flexibility in mice as well as their ability to learn associations between specific environmental cues and rewards.
The conditioned place preference (CPP) paradigm is also employed to examine the learning and memory processes in mice. It involves conditioning animals to associate a particular environment or context with a reward, such as food, water, or a drug. Researchers then test whether the mice exhibit a preference for the context associated with the reward. This paradigm represents an indirect measure of learned associations and can provide valuable insights into the cognitive processes underlying preference formation in mice.
Recent advancements in genetic and optogenetic techniques have provided researchers with tools for manipulating specific neural circuits in mice, allowing scientists to investigate the causal relationships between brain activity and cognitive abilities such as problem-solving, decision-making, and learning. By selectively activating or inhibiting specific neurons or brain regions, researchers can examine the contributions of these neural circuits to mouse intelligence and behavior. Overall, the combination of well-established behavioral tasks and advanced neuroscientific tools offers a powerful framework for understanding the intricacies of mouse intelligence and problem-solving abilities.
The Implications of Studying Mouse Intelligence
The study of mice intelligence and problem-solving abilities is not only significant in understanding the cognitive processes and capabilities of these small animals, but also has far-reaching implications in various scientific disciplines. As humans and mice share a close evolutionary relationship and possess similar neural structures, understanding mouse intelligence can provide valuable insights into human cognitive science. This research contributes to our understanding of neurobiology, genetics, and evolution, forming a significant base for exploring the complex cognitive functions of the human mind.
In the field of psychology, research on the cognitive and problem-solving abilities of mice has implications for understanding mental disorders and cognitive diseases in humans. Scientists are using mouse models to investigate the underlying genetic and neurological mechanisms affecting cognition, learning, and memory in conditions such as Alzheimer’s disease, autism, and schizophrenia. By observing the behavioral changes and problem-solving abilities of mice subjected to genetic manipulations, scientists can identify potential therapeutic targets and develop appropriate interventions for human mental disorders.
Moreover, the study of mouse intelligence can also impact artificial intelligence (AI) and machine learning. By mimicking the neural circuitry and learning strategies observed in mice, scientists can generate novel algorithms and improve computational models used in robotics and AI systems. Such research facilitates the development of AI systems that can better adapt to complex environments, learn from experience, and exhibit robust problem-solving abilities, much like their biological counterparts.
Another application of mouse intelligence research is in human-machine interfaces and the development of complex neural prosthetics. By understanding the neurobiology and problem-solving abilities of mice, scientists can create direct interfaces between the brain and electronic devices, such as prosthetic limbs or sensory substitution systems. Developing such intricate systems would have significant implications for individuals with paralysis, amputations, or sensory deficits, potentially improving their quality of life drastically.
In summary, mouse intelligence research has significant implications and applications that extend beyond the domain of animal cognition. By understanding these rodents’ intellectual abilities and problem-solving mechanisms, various fields such as human cognitive science, psychology, artificial intelligence, and neural prosthetics can benefit significantly. The knowledge derived from mouse research can lead to breakthroughs, innovations, and discoveries that ultimately improve our understanding of cognitive processes in both human and artificial systems.

Ultimately, the study of mouse intelligence and problem-solving abilities sheds light on both the complexities of their cognition and the universality of certain cognitive processes. By examining the neurobiology, behavior, and environmental influences on mouse intelligence, researchers can gain an understanding of not only the inner workings of these rodents but also the broader implications for disciplines such as human cognitive science, psychology, and artificial intelligence. This journey into the fascinating world of mouse cognition not only uncovers the vast abilities they possess but also emphasises the power of interdisciplinary research in advancing our knowledge and fostering a deeper understanding of the complexities underlying intelligence and problem-solving in various species.
Mouse intelligence and problem-solving abilities offer invaluable insights for understanding not only their own cognitive capacities but also broader implications in various fields. From their sophisticated neurobiology to the myriad ways they adapt and learn within their environments, the study of these small rodents has garnered significant attention. This essay delves into the fascinating world of mouse intelligence, examining the relevant neurobiology, problem-solving capabilities, social behavior, impact of environmental factors, research methods, and the applications and implications of these findings in other fields.
Cracking the Code to Mouse Intelligence
Mouse intelligence is often studied in relation to the neurobiology of their brain structure, which is relatively simpler compared to the human brain, yet sophisticated enough to provide valuable insights into cognitive functions.
Murine models (mice and rats) offer critical information about neural networks and cerebral regions responsible for complex cognitive activities like learning, memory consolidation, and problem-solving.
With over 71 million neurons, a mouse brain shares a similar organization to that of the human brain, albeit with fewer gyri and sulci, which renders it useful for investigating mammalian cognitive processes.
One of the primary brain structures implicated in mouse intelligence is the hippocampus. This region plays an essential role in declarative memory formation and spatial navigation, both of which contribute to problem-solving ability.
The hippocampus exhibits synaptic plasticity, which means it can adapt and reorganize its neuronal connections in response to new experiences or environmental stimuli. This plasticity allows mice to better navigate and remember locations, helping them adapt to changes in their surroundings, and make informed decisions based on spatial information.
Another crucial brain region indicative of mouse intelligence is the prefrontal cortex (PFC). PFC is involved in executive functions like planning, decision-making, and behavioral inhibition.
Research has shown that when a mouse is exposed to a challenging situation requiring problem-solving or decision-making, the PFC activity plays a vital role in processing and integrating relevant information. Neurons in the PFC of mice exhibit advanced computational abilities and an extensive range of adaptability, which allows them to flexibly and efficiently switch between cognitive strategies.
The cerebellum is another vital brain structure in understanding mouse intelligence. Traditionally seen as responsible for motor coordination, recent research has shown that the cerebellum has a significant role in cognitive processing as well.
Moreover, animal studies have demonstrated that the cerebellum is involved in processes such as learning and habituation, which are not only important for adaptive motor behavior but also for the development of higher cognitive skills.
In addition, the cerebellum is known for its ability to form specific neuronal patterns that underlie conditioning and procedural memory, ultimately contributing to problem-solving and decision-making in mice.
Mouse intelligence has been a subject of interest for many researchers, especially their problem-solving and learning abilities. One of the key aspects of mouse intelligence is spatial navigation. Mice have an excellent sense of spatial awareness, which allows them to quickly navigate through their environment and find their way to food or shelter. Researchers have found that mice use landmarks in their environment to create cognitive maps, which they then navigate using a combination of memory and sensory inputs, such as scent, sound, and light. The ability to form these mental maps provides mice with a selective advantage, as it enables them to solve spatial problems effectively.

Mice Intelligence and Problem-Solving Capabilities
Furthermore, another aspect of mouse intelligence that warrants further study is the complex interplay between genetics and environmental factors. Mouse models in different strains exhibit a variety of behavioral traits and cognitive abilities, which can be influenced by their genetic makeup, as well as external stimuli. Considering recent advancements in optogenetics and other genetic manipulation techniques, it is becoming increasingly clear that targeted interventions can profoundly influence neural circuits, and ultimately, the expression of cognitive functions. Thus, a comprehensive understanding of the neurobiology of mouse intelligence would necessitate examining how genetics, neural networks, and specific brain regions work in concert to facilitate their cognitive and problem-solving abilities.
Another essential aspect of mouse intelligence is their memory capacity. Mice have shown impressive long-term memory, which allows them to remember locations and specific routes effectively. Researchers who study mice memory typically use maze experiments, in which mice learn to navigate a maze to receive a reward. Mice can quickly memorize the correct path to the reward and even remember it weeks later. This long-term memory ability is crucial for their survival in the wild, as it enables them to remember the locations of resources such as food, water, and shelter.
Mice also exhibit a remarkable ability to use tools to solve problems. While their tool use is not as elaborate as that of primates or even some bird species, mice can still use simple tools to their advantage. In laboratory settings, researchers have observed mice using small objects, such as sticks or small blocks, to reach and acquire food that would otherwise be out of reach. This ability to manipulate objects indicates a degree of creativity and ingenuity in problem-solving, reflecting the cognitive capabilities of these small mammals.
In addition to their tool-use capabilities, mice can also exhibit social learning by observing other mice to acquire new knowledge and solve problems. This form of learning, known as observational learning, allows them to learn from the experiences of others without having to engage in the same activities themselves. This can be highly useful in the wild, as it allows mice to quickly adapt to new environments and potential threats. Researchers have observed mice learning from one another in experiments that involve acquiring food, avoiding risks, and navigating complex environments.
Finally, the ability of mice to adapt to changing environments is an indication of their problem-solving abilities. They possess an innate flexibility in their behavior, allowing them to modify their actions in response to new challenges or situations. This adaptability is critical for their survival in the face of an ever-changing environment, as they must constantly find new ways to locate resources and evade predators. Additionally, this intelligence also extends to their complex social behaviors, highlighting the cognitive capabilities of these small yet resourceful mammals.

Complex Social Behaviors of Mice
Mice have been found to exhibit a wide range of communication methods that facilitate their interactions with other group members, further demonstrating their problem-solving abilities. These communication techniques not only help them maintain their intricate social structures, but also provide them with additional means to address ever-evolving issues, as they navigate their dynamic surroundings.
Within a group, mice establish well-defined social hierarchies that determine each member’s access to resources, mates, and territory. The dominant male is usually responsible for defending the territory and maintaining order, while subordinate individuals must avoid antagonizing the dominant member or risk being expelled from the group.
Communication among mice is primarily mediated through chemical signals, called pheromones, which are released by specialized scent glands. These pheromones facilitate key aspects of social behavior, such as reproduction, kin recognition, and territorial marking. In addition to chemical communication, mice also employ vocalizations, body postures, and tactile cues to convey information to their conspecifics. Ultrasonic vocalizations, emitted outside the human range of hearing, are used by mice to communicate within their groups, particularly during mating and social bonding.
Social learning plays a crucial role in the development of problem-solving abilities in mice, as they often rely on the experiences of other group members to adapt to new situations or environments. For example, mice have been found to use social cues and observational learning to avoid novel foods that might be harmful. In a phenomenon known as social transmission of food preferences, mice will avoid consuming a particular food if they smell the scent of another mouse on their breath that has consumed the food and fell ill.
In laboratory settings, research has demonstrated that mice are capable of learning and remembering complex tasks through trial and error, and that they are able to adapt their problem-solving strategies in response to changes in environmental conditions. Moreover, mice have shown the ability to navigate through complex mazes, solve simple puzzles, and even exhibit spontaneous innovation when faced with novel challenges.
Mice have been documented to possess complex social interactions and cognitive abilities, such as empathy and prosocial behavior. In various experiments where mice were given the chance to assist others in distress, they displayed significant empathetic concern and even participated in consoling behaviors towards the victim. These findings have crucial implications for understanding the neural and genetic basis of social cognition in mice, and could assist in developing new therapeutic interventions for human disorders related to social dysfunction.

Environmental Factors Affecting Mouse Cognition
Environmental factors, like habitat, considerably influence mouse cognition, including their intelligence and problem-solving abilities. Mice living in complex or challenging ecosystems, such as large burrows or diverse terrains, may develop more advanced problem-solving skills than those in simpler environments. By examining how habitat impacts mouse cognition, we can gain important insights into how these animals learn, adapt, and respond to new challenges and obstacles in their surroundings. Essentially, connecting the demonstrated social cognition in mice with their environmental adaptability helps us form a more comprehensive understanding of their overall intelligence and problem-solving capabilities.
Another important environmental factor that affects mouse intelligence and problem-solving abilities is stress. Exposure to stressors, such as predator presence or a shortage of resources, can lead to physiological and behavioral changes in mice. It has been shown that chronic stress can impair cognitive functions, such as learning and memory, while acute stress can sometimes enhance these functions. Understanding the effects of stress on mouse cognition can help researchers develop strategies to mitigate adverse consequences on animal populations in changing environments.
Stimulation is yet another significant factor that influences mouse intelligence and problem-solving abilities. Mice raised in enriched environments, which provide opportunities for physical, cognitive, and social stimulation, are known to exhibit enhanced brain development, improved learning, and increased problem-solving skills. These environments may include various objects, such as tunnels and climbing structures, as well as social encounters with other mice. Such stimulation positively impacts the growth and function of neurons in the mouse brain, leading to a more significant capacity for learning and handling challenges in their environment.
Social structure also plays a vital role in shaping the cognitive abilities of mice. Mice are social animals that live in hierarchical groups, which can affect their problem-solving skills and intelligence. Mice that hold higher-ranking positions within their social group may be more likely to develop improved problem-solving abilities, as their status requires them to make better decisions, defend resources, or engage in strategic social behavior. Moreover, group living can lead to cooperative problem-solving, where mice work together to solve complex tasks that would be difficult for an individual to complete.
Mice have long been a subject of fascination for researchers due to their intelligence and problem-solving abilities, which are intricately linked to various environmental factors such as habitat, stress, stimulation, and social structure. Understanding how these factors impact mouse cognition can lead to the development of novel strategies and interventions to improve both the welfare of laboratory animals and the conservation and management of wild populations. Moreover, shedding light on the evolutionary forces that shape animal intelligence has broader implications for the understanding of diverse species.

Methods for Assessing Mouse Intelligence and Problem-solving Abilities
One of the key aspects of mouse intelligence is their capacity for spatial learning and memory, and researchers have developed various methods to study these abilities. One such method is the Morris water maze, a test that challenges mice to locate a submerged platform in a pool filled with water and non-toxic, opaque liquid. By observing how mice learn to locate the platform over time, scientists can gather valuable insights into their problem-solving skills. Thus, the meticulous study of mouse cognition and behavior contributes significantly to our understanding of the factors that drive animal intelligence and problem-solving abilities, paving the way for improved welfare and conservation efforts.
Another popular method for assessing problem-solving abilities in mice is the radial arm maze. This maze consists of a central platform connected to multiple arms, with food at the end of each arm. Mice are placed in the maze and allowed to explore the arms to locate and remember the food sources. Their working and reference memory is then assessed based on their ability to recall which arms they have visited and which arms still contain food. This searching strategy provides insights into the decision-making processes of mice as they navigate complex environments.
The T-maze test is another widely utilized method to study the learning and decision-making abilities of mice. The maze is shaped like a “T,” with mice starting at the bottom and choosing between two arms containing food rewards. To assess their working memory, changing reward contingencies can be introduced, requiring mice to adapt their choices accordingly. The T-maze test has been used to study cognitive flexibility in mice as well as their ability to learn associations between specific environmental cues and rewards.
The conditioned place preference (CPP) paradigm is also employed to examine the learning and memory processes in mice. It involves conditioning animals to associate a particular environment or context with a reward, such as food, water, or a drug. Researchers then test whether the mice exhibit a preference for the context associated with the reward. This paradigm represents an indirect measure of learned associations and can provide valuable insights into the cognitive processes underlying preference formation in mice.
Recent advancements in genetic and optogenetic techniques have provided researchers with tools for manipulating specific neural circuits in mice, allowing scientists to investigate the causal relationships between brain activity and cognitive abilities such as problem-solving, decision-making, and learning. By selectively activating or inhibiting specific neurons or brain regions, researchers can examine the contributions of these neural circuits to mouse intelligence and behavior. Overall, the combination of well-established behavioral tasks and advanced neuroscientific tools offers a powerful framework for understanding the intricacies of mouse intelligence and problem-solving abilities.

The Implications of Studying Mouse Intelligence
The study of mice intelligence and problem-solving abilities is not only significant in understanding the cognitive processes and capabilities of these small animals, but also has far-reaching implications in various scientific disciplines. As humans and mice share a close evolutionary relationship and possess similar neural structures, understanding mouse intelligence can provide valuable insights into human cognitive science. This research contributes to our understanding of neurobiology, genetics, and evolution, forming a significant base for exploring the complex cognitive functions of the human mind.
In the field of psychology, research on the cognitive and problem-solving abilities of mice has implications for understanding mental disorders and cognitive diseases in humans. Scientists are using mouse models to investigate the underlying genetic and neurological mechanisms affecting cognition, learning, and memory in conditions such as Alzheimer’s disease, autism, and schizophrenia. By observing the behavioral changes and problem-solving abilities of mice subjected to genetic manipulations, scientists can identify potential therapeutic targets and develop appropriate interventions for human mental disorders.
Moreover, the study of mouse intelligence can also impact artificial intelligence (AI) and machine learning. By mimicking the neural circuitry and learning strategies observed in mice, scientists can generate novel algorithms and improve computational models used in robotics and AI systems. Such research facilitates the development of AI systems that can better adapt to complex environments, learn from experience, and exhibit robust problem-solving abilities, much like their biological counterparts.
Another application of mouse intelligence research is in human-machine interfaces and the development of complex neural prosthetics. By understanding the neurobiology and problem-solving abilities of mice, scientists can create direct interfaces between the brain and electronic devices, such as prosthetic limbs or sensory substitution systems. Developing such intricate systems would have significant implications for individuals with paralysis, amputations, or sensory deficits, potentially improving their quality of life drastically.
In summary, mouse intelligence research has significant implications and applications that extend beyond the domain of animal cognition. By understanding these rodents’ intellectual abilities and problem-solving mechanisms, various fields such as human cognitive science, psychology, artificial intelligence, and neural prosthetics can benefit significantly. The knowledge derived from mouse research can lead to breakthroughs, innovations, and discoveries that ultimately improve our understanding of cognitive processes in both human and artificial systems.

Ultimately, the study of mouse intelligence and problem-solving abilities sheds light on both the complexities of their cognition and the universality of certain cognitive processes. By examining the neurobiology, behavior, and environmental influences on mouse intelligence, researchers can gain an understanding of not only the inner workings of these rodents but also the broader implications for disciplines such as human cognitive science, psychology, and artificial intelligence. This journey into the fascinating world of mouse cognition not only uncovers the vast abilities they possess but also emphasises the power of interdisciplinary research in advancing our knowledge and fostering a deeper understanding of the complexities underlying intelligence and problem-solving in various species.
DIY Slippers: How to Make Your Own
Discover the satisfaction of creating your own cozy and stylish slippers with this comprehensive guide to DIY slipper-making. By learning about materials, measuring, design selection, cutting and sewing, and assembling, you will be on your way to crafting the perfect pair for yourself or as a thoughtful gift for someone special. Along the way, you’ll also gain valuable insights into personalizing your creations and properly caring for them, as well as troubleshooting and exploring advanced techniques.
DIY Slippers: How to Make Your Own
Making your own slippers requires you to choose the right materials for the upper part, the sole, and the padding to ensure comfort and warmth. Here’s an overview of the various materials you can use:
Fabrics for the upper part:
- Fleece: This soft, warm, and lightweight fabric is an ideal choice for making cozy slippers. It’s easy to work with, doesn’t fray when cut, and comes in various colors and patterns.
- Wool: Wool is an excellent insulating material, keeping your feet warm in colder temperatures. You can use felted wool or knitted wool fabric for your slippers. However, be aware that wool can be more expensive than other fabrics and may require special care during washing.
- Cotton: Cotton is a natural and breathable fabric that can be used for making slippers. While it’s not as warm as fleece or wool, it can still provide adequate comfort for indoor use. Choose a heavier-weight cotton, like flannel or canvas, for better durability.
Materials for soles:
- Leather: Leather soles provide a sturdy, durable, and moisture-resistant base for your slippers. You can use soft, high-quality leathers like cowhide or suede for the most comfort.
- Suede: This type of leather has a softer, more suede-like finish that provides a good grip on smooth surfaces. It’s an excellent choice for indoor slippers, but may not be as moisture-resistant as other leather types.
- Rubber: Rubber soles offer excellent grip and durability for your slippers, making them suitable for both indoor and outdoor use. You can choose a thin rubber sheet (such as a yoga mat or a rubber floor mat) or purchase pre-made rubber soles from a craft store.
Padding materials:
- Memory foam: Memory foam padding is comfortable and can conform to the shape of your feet, providing excellent cushioning for your slippers.
- Cotton batting: This soft, fluffy material can be used as padding for your slippers, providing extra warmth and comfort. Make sure to use a thick layer to ensure adequate cushioning.
- Polyester fiberfill: This synthetic padding material is lightweight and can retain its shape well, making it an excellent choice for padding your slippers.
Based on your preferences and budget, you can experiment with various combinations of the above-mentioned materials. For example, if you want warm slippers for cold weather, you could use wool fabric for the upper part, leather or suede for the sole, and memory foam padding for added comfort. Alternatively, if you’re looking for summer slippers, you can go for a lightweight cotton upper part, a rubber or suede sole, and thinner padding.
In summary, when making your DIY slippers, it’s essential to consider the materials for the upper part, sole, and padding. Make sure to look at the pros and cons of each material to choose the best combination that will meet your needs for comfort and warmth.
DIY Slippers: Measuring and Creating a Pattern
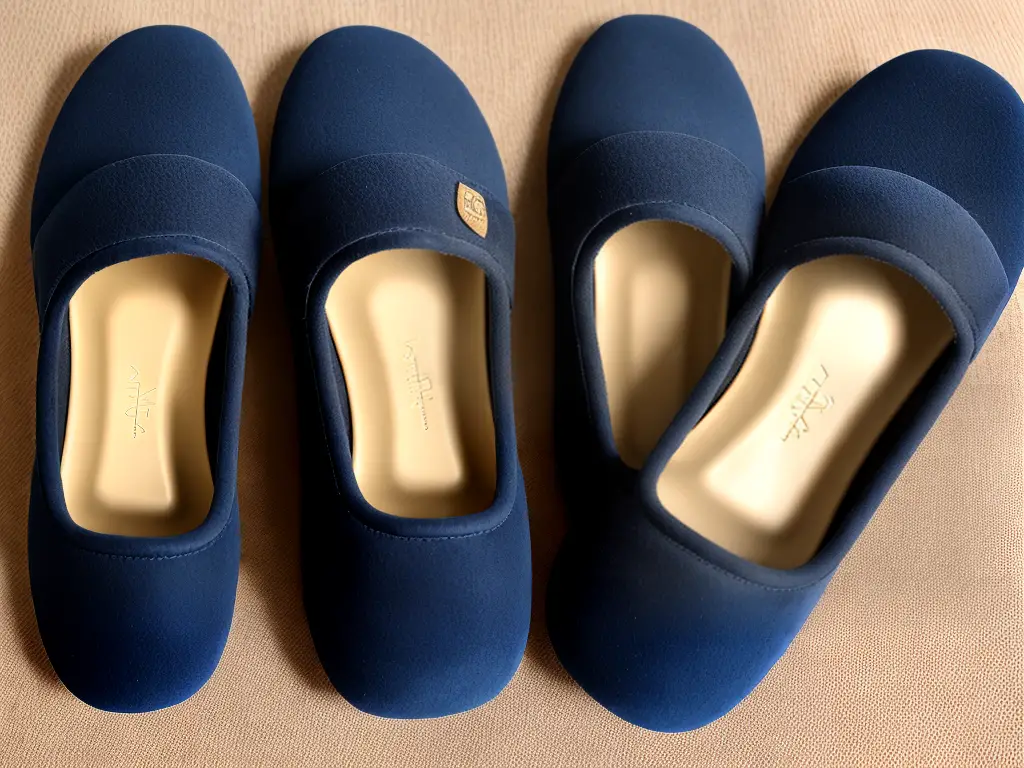
Creating your own pair of cozy slippers can be a fun and practical project. In order to make your own slippers, you will need to first measure your feet and create a pattern. Follow these instructions to ensure a perfect fit and a comfortable pair of slippers.
Materials:
- Pen or pencil
- Ruler
- Scissors
- Cardboard or stiff paper (for pattern)
- Tape
Step 1: Measure your feet
- Stand on a blank piece of paper on a flat surface with your full weight on your feet.
- Trace around each foot with a pen or pencil, keeping the pen upright and close to the edge of your foot.
- Measure the length of each foot tracing at the longest points (from the tip of your big toe to the tip of your heel).
- Measure the width of each foot tracing at the widest points (from the edge of your little toe to the edge of your big toe joint).
Step 2: Determine the dimensions for the slipper pattern
- Add 1 inch (2.5 cm) to both the length and width measurements to account for seam allowances and a small amount of wiggle room.
- Record the adjusted measurements for both feet. This will be used to create the pattern for your slippers.
Step 3: Create the slipper pattern
- Draw a rectangle on the stiff paper or cardboard using the adjusted measurements for the length (longer side) and width (shorter side).
- Cut out the rectangle for each foot. These rectangles will be the base of your slipper pattern.
- In order to create a pattern for your slippers, you will need to create two more templates: one for the top part of your foot (the vamp) and one for the heel of your slipper.
- For the vamp, draw a half-circle on the longer side of the rectangle, with the flat side of the half-circle touching the rectangle. The diameter of the half-circle should be the same as the width of the rectangle. Cut out the half-circle.
- For the heel, draw a small square at one of the shorter sides of the rectangle, the side which will be the back of the slipper. This square should measure about 2 inches (5 cm) wide and 2 inches (5 cm) high. Add an extra 0.5 inches (1.25 cm) to each side of the square for seam allowance. Cut out the square.
- Label each template according to which foot it corresponds to (left or right foot).
Now that you have measured your feet and created a pattern, you’re all set to begin sewing your DIY slippers. Choose the fabric and other materials you want to use and follow a sewing tutorial to construct your comfortable and stylish slippers.

Instructions for Selecting a Design and Style for your DIY Slippers:
Step 1: Research different slipper designs/styles
Begin by researching various slipper designs and styles to get a better understanding of what options are available for you to make. Some popular designs and styles include:
- Moccasins
- Booties
- Open-toe slippers
- Slip-on slippers
- Ballet flats
- Ankle boots
Look for images, examples or patterns online and in crafting books that can provide inspiration for your project.
Step 2: Consider your skill level
Before settling on a design, it’s important to consider your skill level in terms of sewing, knitting, or crocheting. Some slipper designs may be more complicated and time-consuming to make than others. For example, moccasins or booties might require more intricate stitching, while open-toe or slip-on slippers may be simpler to make.
Step 3: Determine your preferred material
When selecting a DIY slipper design, consider the type of material you would like to work with. Materials such as fabric, yarn, or felt will impact the final outcome of your project. Each material has its benefits and drawbacks, so it’s essential to choose one that best suits your comfort level and desired slipper design.
Step 4: Choose a design based on your foot size and measurements
It’s important to select a slipper design that fits your foot size and shape. Be sure to measure your foot accurately and use these measurements to choose a pattern or design that accommodates your feet. Additionally, consider if you prefer a tighter fit, more room for your toes, or extra support around your ankle.
Step 5: Pick a pattern or design template
Select a pattern or design template to help guide your DIY slipper-making process. There are plenty of free and paid patterns available online, as well as in crafting books. Ensure that the pattern you choose comes with clear instructions and is suitable for your chosen material and skill level.
Step 6: Add personal touches and customization
Once you have chosen a slipper design and pattern, consider adding personal touches or customizations to make it unique. This could include embellishments, embroidery, color combinations, or even monograms. Remember to consider the overall comfort and functionality when adding these customizations.
Step 7: Gather materials and tools
Before you start making your DIY slippers, ensure you have all the necessary materials and tools required for your chosen design. This may include scissors, fabric, thread, sewing machine or knitting/crocheting needles, and a pattern or template.
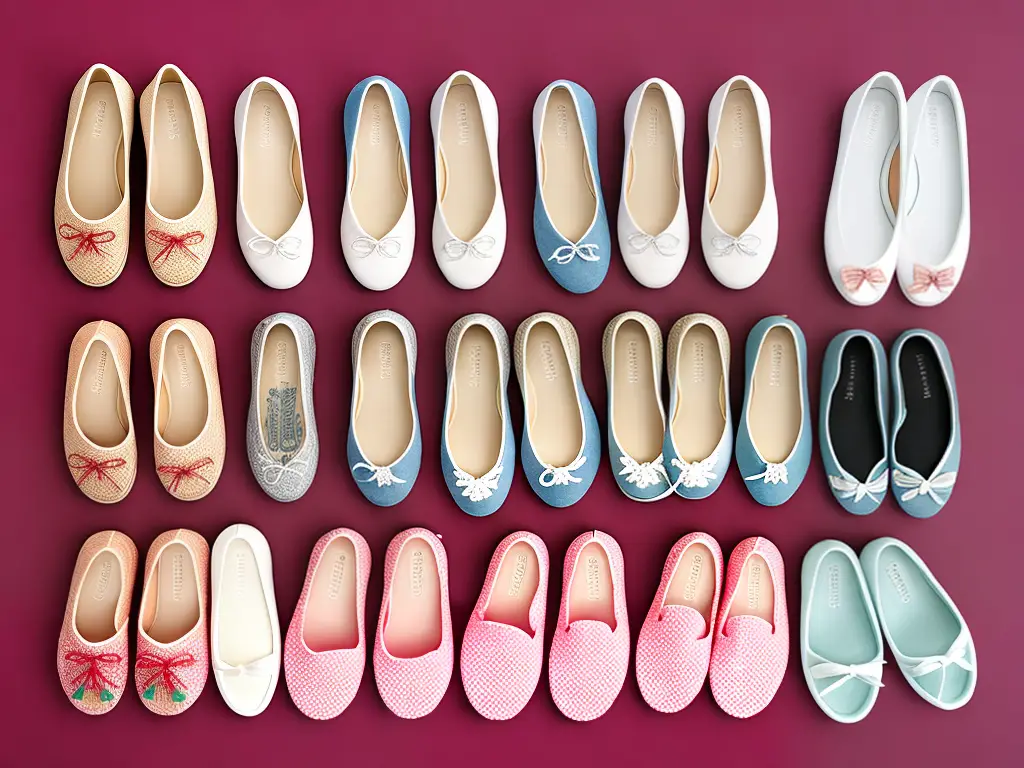
DIY Slipper Making Instructions
Materials Needed:
- Fleece or another soft, comfortable fabric
- Non-slip fabric for the sole (such as a felt, rubber, or an old yoga mat)
- Sewing machine or needle and thread
- Rotary cutter or fabric scissors
- Pins
- Measuring tape
- Pen or fabric chalk
- Ruler or straight edge
- Cardboard or thick paper for making templates
- Optional: ribbon or other decorations
Instructions:
- Measure your feet:
Place your foot on a piece of paper and trace around it, leaving about a 1/2 inch extra for seam allowance. Measure the length and width of your foot to create the bottom of the slipper. - Create pattern templates:
Using your foot measurements, draw the bottom of the slipper onto a piece of cardboard or thick paper. Then, draw the top of the slipper, which should be a rounded shape slightly smaller than the bottom, making sure to leave room for seam allowance. Cut out both templates. - Cut out the fabric:
Using your templates, cut out two bottom pieces and two top pieces from your chosen fabric. Make sure to cut a left and right foot by flipping the template over. Also, cut out two bottom pieces from your non-slip fabric for the soles. - Pin and sew the top and bottom pieces together:
With the right sides of the fabric facing each other, pin the top piece of fabric to the corresponding bottom piece along the curved edge. Sew along this curved edge with a 1/2 inch seam allowance, then trim the seam and turn it right side out. Repeat for the other slipper. - Attach the non-slip sole:
Place the non-slip fabric on a flat surface, then align the sewn slipper pieces on top, ensuring the right sides are facing down. Pin the fabric together, and then sew along the edge of the slipper with a 1/2 inch seam allowance. Trim the excess fabric, then turn the slipper right side out. Repeat for the other slipper. - Optional – Add decorations:
You can add decorative elements such as bows, ribbons, or appliques to personalize your slippers. Sew or glue these embellishments onto the finished slippers. - Try on your new slippers:
Put on your slippers to ensure a comfortable fit. Make any necessary adjustments to the seams, trimming excess fabric as needed.
Once you’ve completed these steps, you’ll have a cozy pair of DIY slippers to wear and enjoy. Add them to your loungewear collection, or give them as a thoughtful handmade gift. With basic cutting and sewing techniques, you can make the slippers in various sizes, fabrics, and styles to suit every member of your household. Happy sewing!
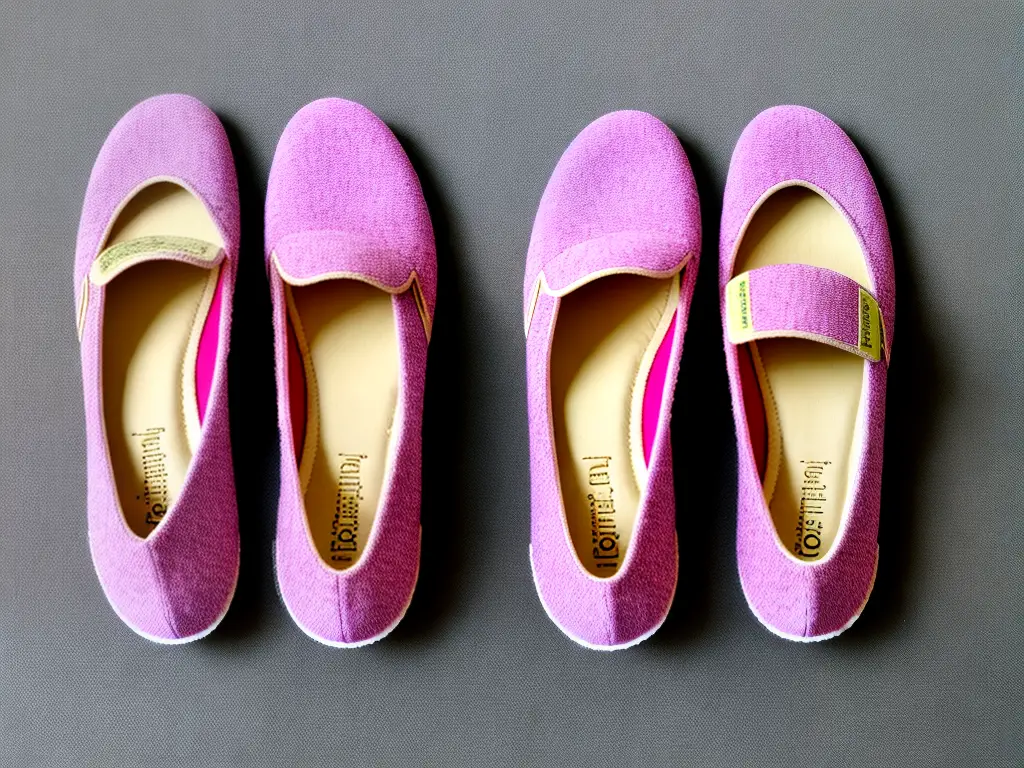
DIY Slipper Making Guide
Creating your own DIY slippers is a fun and rewarding experience. You can customize them to fit your feet perfectly and choose the colors and materials that suit your style.
Materials required:
- Slipper soles: rubber, cork, or craft foam
- Fabric for the upper part (choose a soft, comfortable material such as fleece or felt)
- Padding/stuffing (e.g., foam or cotton batting)
- Fabric adhesive or sewing supplies (thread, needles, pins)
- Scissors
- Pen or fabric marker
- A template or stencil (optional)
- Sewing machine (optional)
Instructions:
- Prepare your slipper template:
- You can either find a slipper template online, or you can create your own by tracing your foot on a piece of cardboard or paper. Add approximately half an inch around the traced foot for seam allowance.
- Cut out your template and use it to trace and cut out two pieces of fabric for each slipper – one for the outside and one for the lining.
- Assemble the upper part of the slipper:
- Place the outside and lining pieces of fabric with the right sides facing each other.
- Using fabric adhesive, apply a thin layer of adhesive along one long edge, leaving a half-inch seam allowance. Alternatively, you can sew along the long edge with a straight stitch, using a half-inch seam allowance.
- Wait for the adhesive to dry, or press the seam open if you’re using a sewing machine.
- Turn the upper fabric right side out, and insert the padding or stuffing evenly between the outside and lining layers.
- Attach the upper fabric to the sole:
- Place the upper fabric on the sole, aligning the back seam with the center of the heel. Ensure that the upper fabric is properly centered on the sole.
- Starting from the center and working your way out to the edges, apply fabric adhesive to the edge of the sole and press the upper fabric onto it. If you prefer sewing, use pins to attach the upper fabric to the sole, and then sew them together using a whipstitch or a similar strong, flexible stitch.
- Work your way around the sole, ensuring that the upper fabric is stretched smoothly and evenly over the sole. Allow the adhesive to dry, or finish sewing and remove the pins.
- Add finishing touches:
- If desired, you can now add any additional embellishments to your slipper, such as bows, buttons, or appliqués.
- Repeat the process above in order to make the other slipper for your matching pair.
Your DIY slippers are now complete! You can now enjoy the comfort and style of your homemade slippers, perfect for relaxing at home or giving as a thoughtful, personalized gift.
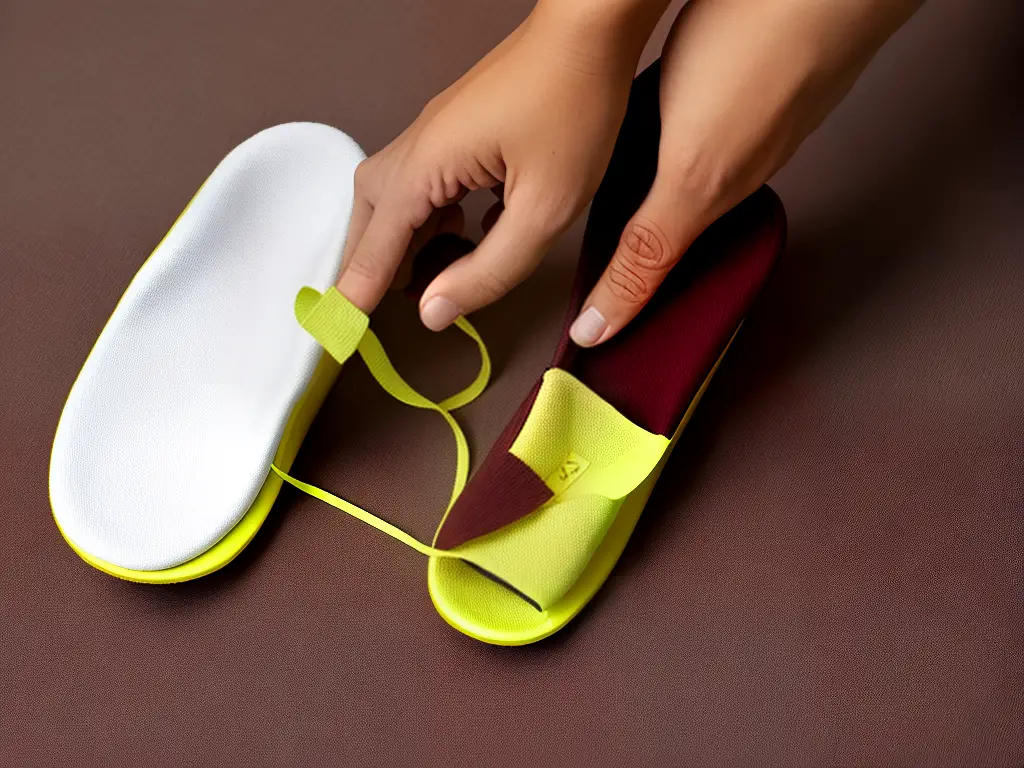
DIY Slippers: Adding Embellishments and Details
Making your own slippers can be a fun and rewarding project. To personalize your slippers and make them unique, you can add decorative elements, such as appliqué, embroidery, or fabric trims. The following instructions will show you how to add these embellishments to your DIY slippers.
Materials:
- DIY slippers
- Fabric scraps for appliqué or fabric trims (ribbon, lace, etc.)
- Thread for embroidery
- Sewing needle
- Scissors
- Pins
- Fabric glue (optional)
- Embroidery hoop (optional)
Instructions:
- Choose your embellishments:
Select the type of embellishments you would like to add to your slippers. You can choose one decoration or use a combination of different embellishments. - Prepare the appliqué (if using):
- Choose a fabric that complements your slippers.
- Cut shapes or designs out of the fabric. You can draw the designs on the fabric first, using a fabric pen or any washable pen, or use a stencil.
- Pin the cutout fabric on the desired location on your slippers.
- Apply fabric trims (if using):
- Measure the length of the fabric trims (such as ribbon or lace) needed to go around the edge of your slippers. Cut the trim accordingly.
- Apply fabric glue to the back of the trim or use pins to keep it in place on the slippers. – Make sure the trim is centered and placed evenly on the slippers.
- Embroidery (if using):
- Select an embroidery design or pattern that you would like to add to your slippers.
- If you are new to embroidery, there are many free online sources with basic techniques and tutorials for beginners.
- Place your slippers in an embroidery hoop (if possible) to keep the fabric taut while you work. This step is optional but can make it easier to work with the fabric.
- Thread your needle with the embroidery thread and follow the design or patter you have chosen, stitching it onto your slippers.
- Attaching the appliqué or trim:
- If you’ve pinned the appliqué or fabric trim in place, now is the time to permanently attach it.
- Thread your needle with a matching or contrasting color, depending on your preference.
- Sew the appliqué or fabric trim onto your slippers using small, even, and secure stitches.
- Finishing touches:
- After adding the desired embellishments, take a moment to check your work and ensure everything is securely attached.
- Remove any visible pins or basting stitches.
- Trim any loose threads.
- Your DIY embellished slippers are complete! Enjoy wearing them or giving them as a thoughtful handmade gift. Remember, the possibilities are endless with the types of decorations and personal touches you can add to your slippers, so have fun experimenting with different designs and techniques.
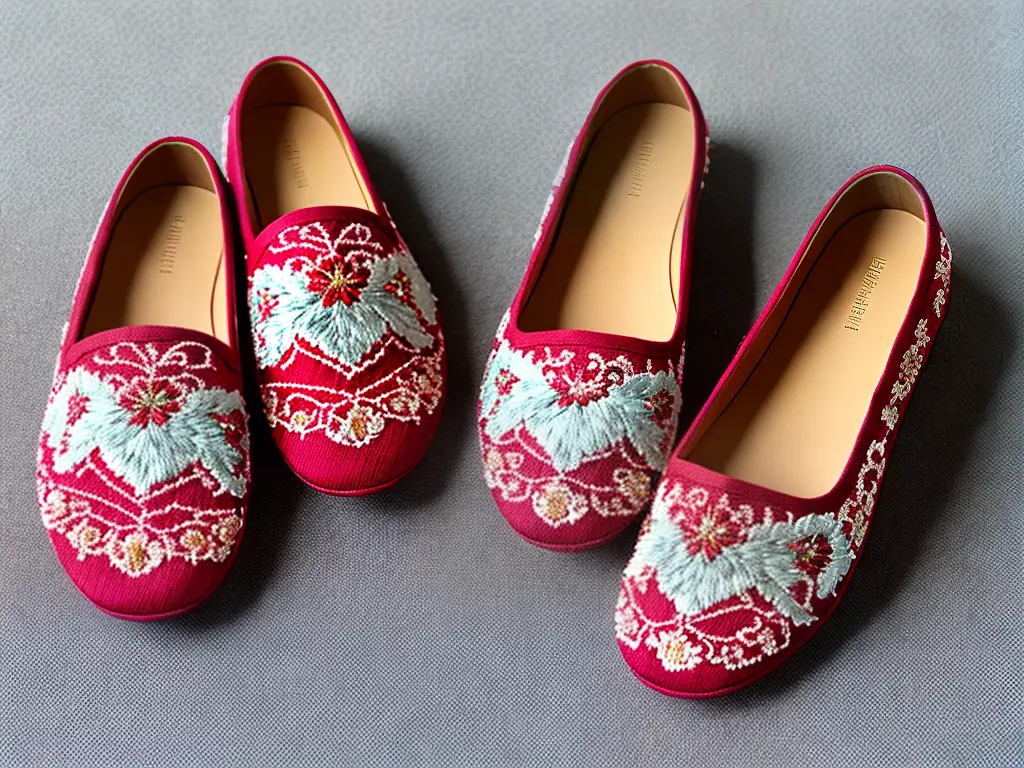
DIY Slippers: How to Make Your Own
If you’re interested in making your own slippers, follow these simple instructions using materials you likely already have at home:
Materials:
- Two pieces of fabric (fleece, cotton, or any comfortable material)
- A pair of scissors
- Sewing machine or needle and thread
- Pins or fabric clips
- Marker or chalk
- Cardboard or thick paper for making template
- Measuring tape
- Soft, cushioning material for insoles (like foam or quilt batting)
Instructions:
- Trace your feet: Stand on the cardboard or thick paper and trace the outline of both of your feet with a marker or chalk. Ensure you are standing steadily and upright while doing this to get accurate measurements.
- Create a template: Draw an additional 1/2 inch around the traced outline of your feet to allow for seam allowance. Cut out these templates – you should have two separate and matching pieces.
- Cut your fabric: Fold your chosen fabric with the right sides together, and pin the template onto the fabric. Cut along the template, making sure you go through both layers of fabric. In the end, you should have four separate fabric pieces (two for each foot).
- Sew the slippers: Place the two matching fabric pieces with their right sides facing each other. Sew along the traced line using either a sewing machine or a needle and thread, leaving about 1/2 inch for the seam allowance. Don’t forget to leave a gap at the heel, which will allow you to turn the slipper inside out and insert the insole later.
- Turn the slipper right side out: Pull the slipper through the hole in the heel to turn it right side out. Push out any curves, and ensure the seams are well shaped. Repeat this process for the other slipper.
- Create insoles: Using the template you’ve created, cut out insoles from the cushioning material (foam or quilt batting).
- Insert insoles: Insert the insoles through the gap in the heel, ensuring they sit flat within the slippers.
- Close the gap: Sew the opening in the heel closed neatly by hand or using a sewing machine.
- Enjoy your new slippers!
It’s also important to understand how to care for and maintain your DIY slippers to keep them fresh and comfortable for as long as possible. Here are some tips:
Understanding Care and Maintenance:
- Cleaning: To keep your slippers clean and fresh, hand-wash them in cold water with mild detergent. Gently squeeze and release the fabric to clean it, avoiding excessive twisting or wringing. Rinse thoroughly with cold water.
- Drying: After washing, gently press your slippers between two towels to remove excess water, then lay them flat in a well-ventilated area to air dry. Avoid placing them in direct sunlight or using a dryer, as doing so may cause fabric shrinkage or damage.
- Insole replacement: Over time, the insoles may lose their cushioning or wear out. To maintain the comfort of your slippers, replace the insoles as needed. Simply remove the old insoles, and follow the steps above to create new ones using your template.
- Repairing any damage: If your handmade slippers experience tears or holes, promptly repair them using a needle and thread to prevent further damage. You can also reinforce seams if they begin to loosen over time.
By following these care and maintenance tips, your DIY slippers will stay comfortable, clean, and durable for a long time. Enjoy the cozy feeling of your homemade slippers while knowing you’ve created them yourself!
DIY Slippers: How to Make Your Own
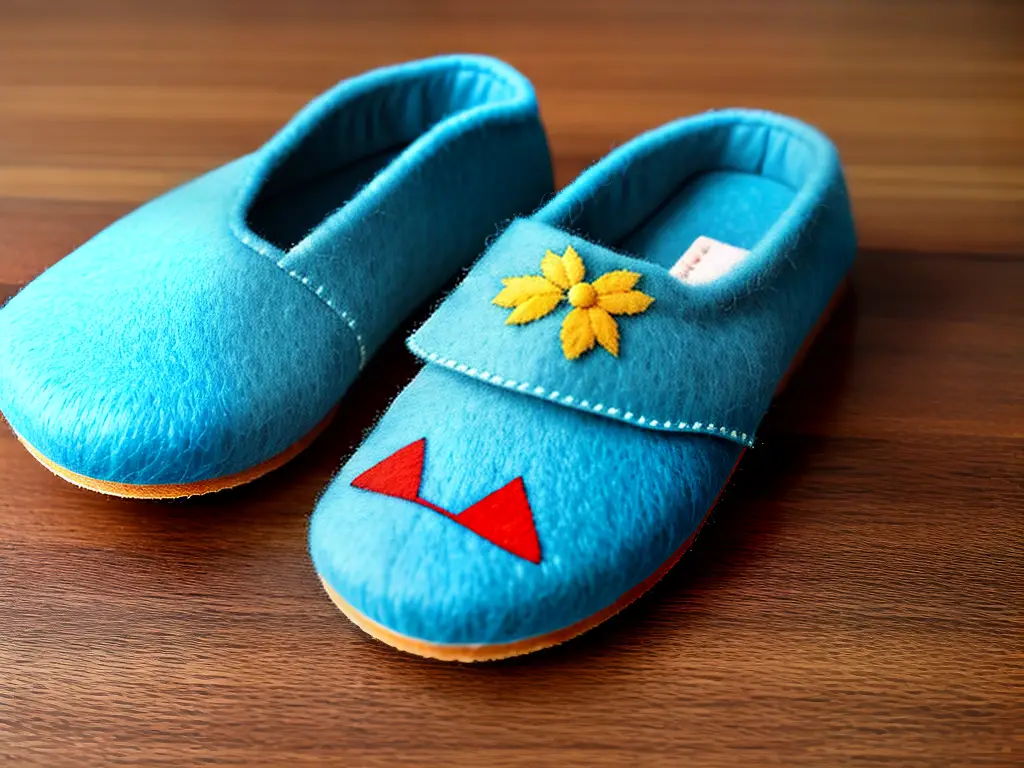
Making your own pair of slippers can be fun and rewarding. Here’s how you can do it:
Materials:
- Felt, fleece, or fabric of your choice
- Sewing needle and thread
- Scissors
- Pins
- Measuring tape
- Pen or fabric marker
- Cardstock or paper for making a pattern
- Optional: cushioning foam or padding, non-slip material or nonslip fabric paint, embellishments
Instructions:
- Measure your foot: Using the measuring tape, measure the length and width of your foot. Add 1 inch to both measurements for seam allowance and comfort. Write down these measurements.
- Create a pattern: Draw three rectangles on the cardstock or paper. The first rectangle should be the length and width of your foot (including the additional 1 inch). The second rectangle should be the length of your foot and half the width of your foot. The third rectangle should be half the width of your foot and half the length of your foot.
- Cut out your pattern pieces: Carefully cut out the three rectangles from the paper. These will be your pattern pieces for the slipper top, side, and heel.
- Pin the pattern pieces to your fabric: Lay out your fabric, fold it in half (with the right sides together), and pin the pattern pieces to it. This ensures that you’ll have mirrored pieces for each slipper.
- Cut out the fabric pieces: Using sharp scissors, carefully cut around the pattern pieces to create two of each fabric piece (top, side, and heel).
- Assemble the slippers: Take one side piece and one heel piece, and align them along the long edge. Sew them together, using a 1/2-inch seam allowance. Repeat this step for the second side and heel piece.
- Attach the top piece: Lay one top piece next to one of the assembled side/heel pieces, aligning the edges. Sew along the edge, attaching the top piece to the side/heel piece with a 1/2-inch seam allowance. Repeat this step for the second slipper.
- Sew the slippers together: With the right sides of the fabric together, sew the two half circles (from the heel piece) together, using a 1/2-inch seam allowance. Turn the slipper right side out.
- Optional: Add cushioning and non-slip material or fabric paint to the bottom of the slipper for extra comfort and safety.
- Add any desired embellishments, such as buttons or embroidery.
Troubleshooting and Adjustments:
- Uneven seams: If your seams are uneven, use a seam ripper to carefully remove the stitching and align the edges again. Pin the pieces together to ensure accurate alignment, and sew the seam again.
- Size adjustments: If the slipper size is too small, you can add additional fabric by sewing panels to the side and heel pieces, or enlarge the pattern pieces and recut the fabric to create a larger slipper. If the slipper is too big, you can take in the seams by sewing just inside of the original seam line.
Remember, it may take a few attempts to perfect the fit and customization of your slippers. Be patient with yourself and practice – soon, you’ll have cozy and comfortable DIY slippers that are just right for you!
DIY Slippers: How to Make Your Own
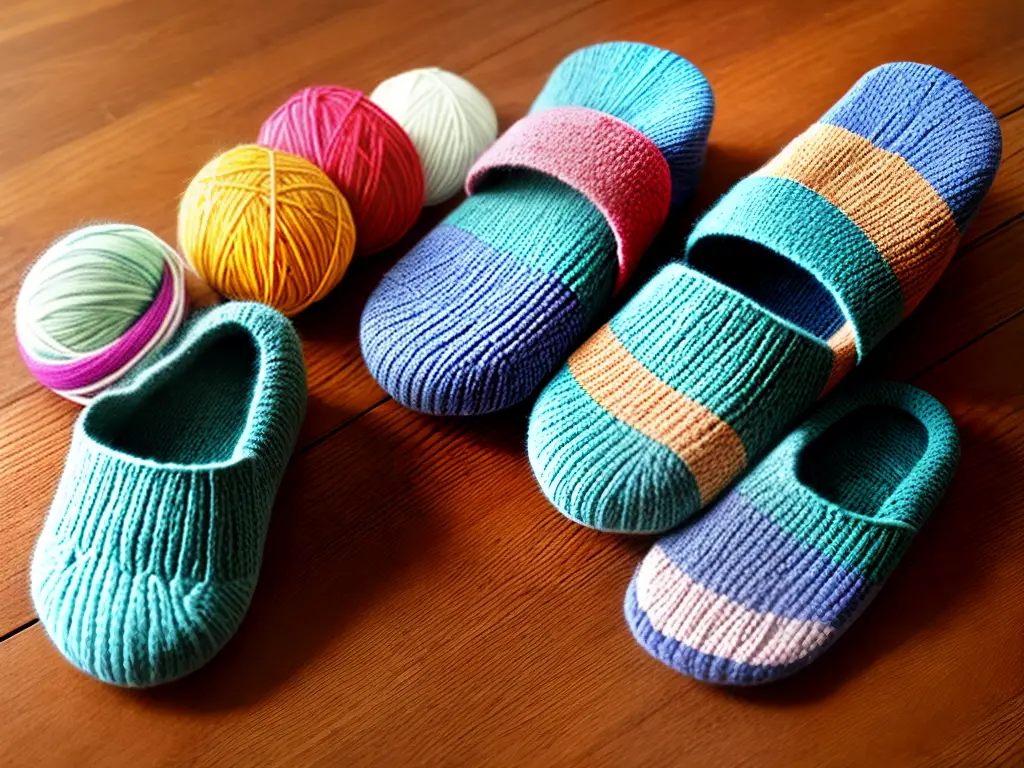
Knitting and crocheting are excellent methods for creating sturdy and warm slippers. In this guide, we will provide you with step-by-step instructions for knitting and crocheting your own slippers. By the end of this tutorial, you’ll have gained valuable skills that will help you create custom-designed, cozy slippers for yourself or as a thoughtful gift to others.
Knitted Slippers:
- Yarn of your choice (wool or acrylic work well)
- Knitting needles (size recommended for your chosen yarn)
- Darning needle or crochet hook for sewing seams
- Stitch markers
- Measuring tape
- Choose your slipper size: Measure your foot’s length, and choose the size accordingly (e.g., small, medium, or large).
- Cast on: Look up the suggested number of stitches for your slipper size and desired width. Cast on this number of stitches, leaving a long tail for sewing the toe seam later.
- Knit the toe: Knit the first row. In the second row, knit the first two stitches together, knit until the last two stitches, and then knit these two stitches together. This will decrease the number of stitches by 2.
- Knit the foot: Continue knitting in stockinette stitch (knit one row, purl one row) until your slipper’s foot length, minus the heel, is achieved.
- Shape the instep: Knit across the first half of the stitches, then turn and work back across these stitches only to create a flap for the instep.
- Knit the instep flap: Work in stockinette stitch for the desired length of the instep (usually 20-25 rows).
- Attach the instep flap: Pick up stitches along the edge of the instep flap and knit them together with the remaining stitches of the row.
- Knit the heel: Continue in stockinette stitch, decreasing the stitches on each side, until the desired heel size is achieved.
- Bind off: Bind off all stitches, leaving a long tail for sewing the heel seam.
- Sew the slipper: Using the darning needle or crochet hook, sew the heel and toe seams closed.
- Optional: Add a non-slip surface to the bottom by using fabric puffy paint or attaching non-slip fabric with a fabric adhesive.
Crocheted Slippers:
- Yarn of your choice (wool or acrylic work well)
- Crochet hook (size recommended for your chosen yarn)
- Darning needle or crochet hook for sewing seams
- Stitch markers
- Measuring tape
- Choose your slipper size: Measure your foot’s length, and choose the size accordingly (e.g., small, medium, or large).
- Create the toe: Start with a slipknot and chain the number of stitches needed for your slipper size. Join the chain with a slip stitch.
- Create the foot: Work in rounds, using single crochet stitches, until the slipper’s foot length, minus the heel, is achieved. Add stitch markers to mark the first stitch of each round.
- Create the heel opening: Skip the number of stitches needed for the heel opening, and then continue to crochet in a spiral to form the heel.
- Create the heel: Once your slipper reaches the back of your foot, start crocheting in rows instead of rounds to form the heel.
- Decrease for the heel shape: At the beginning and end of each row, decrease by one stitch until the desired heel shape is achieved.
- Sew the heel: Fold the heel in half and sew the edges together using a slip stitch and a darning needle or crochet hook.
- Create the cuff: Work in the round, using single crochet stitches to create a cuff around the slipper’s opening.
- Finish the slipper: Fasten off and weave in any remaining ends.
- Optional: Add a non-slip surface to the bottom by using fabric puffy paint or attaching non-slip fabric with a fabric adhesive.
Congratulations, you have now learned how to create your own knitted or crocheted slippers! Experiment with different yarn types, colors, and stitch patterns to create a personalized, cozy pair of slippers perfect for everyday use or as a thoughtful gift.
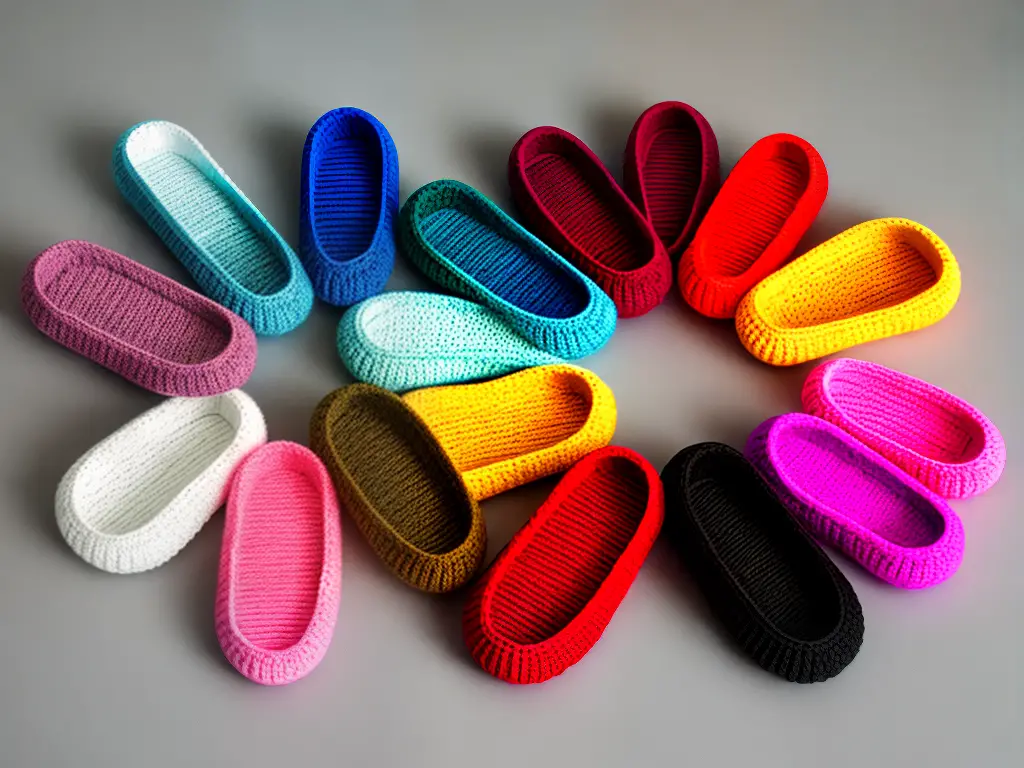
With your newfound knowledge and skills, you can confidently create your own cozy slippers tailored to your preferences and needs. Embrace the personal touch that comes with crafting your own footwear, and enjoy the comfort and warmth that only homemade slippers can provide. Who knows? You might even find yourself inspired to explore further DIY projects and up your slipper game with advanced techniques like knitting or crocheting.
Top 10 Gin Cocktails
Gin is an incredibly versatile spirit, perfect for crafting a variety of delicious and distinct cocktails. This list of top 10 gin cocktails showcases the best of the best, from iconic classics to contemporary favorites, there’s something for every palate. Whether you’re a long-time gin lover or just beginning to explore the world of juniper-infused goodness, these cocktails are sure to delight and impress.
- 2.5 oz Gin
- 0.5 oz Dry Vermouth
- Olive or Lemon Twist, for garnish
- 1 oz. gin
- 1 oz. Campari
- 1 oz. sweet vermouth
- A strip of orange peel
- Ice
- A rocks glass
- A mixing glass
- A bar spoon
- A jigger
- Start by chilling your rocks glass with ice.
- In the mixing glass, combine equal parts (1 oz.) of gin, Campari, and sweet vermouth, using the jigger to measure.
- Add ice to the mixing glass and stir the cocktail using the bar spoon. You want to stir it for about 20 seconds or until well chilled and slightly diluted.
- Discard the ice from your now-chilled rocks glass and strain the stirred cocktail into the glass.
- To create the burnt orange peel garnish, hold the strip of orange peel over the drink and use a lighter or match to carefully ignite the citrus oils as you squeeze the peel, releasing the smoky aroma into the drink.
- Gently rub the rim of the glass with the orange peel and then drop it into the drink as the final garnish.
- 2 oz gin
- 1 oz lemon juice
- 0.5 oz simple syrup
- Club soda (to top)
- Ice
- Lemon wedge and cherry (for garnish)
- Fill a Collins glass (or any tall glass) with ice.
- In a cocktail shaker, combine gin, lemon juice, and simple syrup with ice. Shake well.
- Strain the mixture over the ice in the Collins glass.
- Top the glass with club soda, giving it that much-loved fizz.
- Give the concoction a gentle stir to mix well.
- Finally, garnish with a lemon wedge and a cherry – and voilà, your Tom Collins is ready to impress!
- 2 oz gin
- 0.75 oz freshly squeezed lemon juice
- 0.75 oz honey syrup (mix equal parts honey and warm water)
- Combine the gin, lemon juice, and honey syrup in a cocktail shaker.
- Fill the shaker with ice and shake well until well-chilled.
- Strain the cocktail into a coupe or martini glass.
- Garnish with a lemon twist, expressing the citrus oils over the drink before placing it into the glass.
- Enjoy your sweet and sour journey into cocktail history!
- 1.5 oz gin
- 0.75 oz fresh lemon juice
- 0.5 oz simple syrup
- 2 oz champagne
- In a cocktail shaker filled with ice, combine the gin, lemon juice, and simple syrup. Shake vigorously for about 15 seconds until well chilled.
- Strain the cocktail into a champagne flute or coupe glass.
- Top the drink off with approximately 2 oz of champagne, allowing the bubbles to gently mix the drink.
- Garnish with a twist of lemon peel or a single maraschino cherry to add a touch of panache.
- 2 oz. gin
- 0.5 oz. lime cordial
- Lime wheel or twist for garnish (optional)
- Fill a mixing glass with ice.
- Add the gin and lime cordial, and stir until well chilled.
- Strain the mixture into a chilled coupe or martini glass.
- Garnish with a lime wheel or twist if desired.
- 1 ½ oz gin
- ½ oz cherry brandy
- ¼ oz Benedictine
- 2 oz pineapple juice
- ½ oz lime juice
- ¼ oz grenadine
- Club soda (optional)
- Ice
- Fill a cocktail shaker with ice.
- Add the gin, cherry brandy, Benedictine, pineapple juice, lime juice, and grenadine to the shaker.
- Shake well to combine and chill the ingredients.
- Strain the mixture into a highball or hurricane glass filled with ice.
- Top with a splash of club soda if desired, and stir gently to combine.
- Garnish with a pineapple slice, maraschino cherry, or a luxardo cherry, and enjoy!
- 0.75 oz. gin
- 0.75 oz. Green Chartreuse
- 0.75 oz. maraschino liqueur
- 0.75 oz. freshly squeezed lime juice
- 2 oz gin (a high-quality, botanical-forward gin is recommended to enhance the flavor)
- 1 oz fresh lemon juice
- 1/2 oz simple syrup
- Several fresh mint leaves
- Ice
- In a cocktail shaker, lightly muddle the mint leaves to release their fragrant oils.
- Add the gin, lemon juice, and simple syrup to the shaker.
- Fill with ice, seal the shaker, and then give it a good shake for about 15 seconds or until well combined and chilled.
- Strain the mixture into a chilled glass filled with ice.
- Garnish with a sprig of fresh mint and serve immediately.
Gin & Tonic: The Timeless Classic That Never Fails to Impress
Gin & Tonic (G&T) has been a staple cocktail for ages, its elegant simplicity befitting any occasion. It’s a classic, unpretentious, and utterly refreshing choice that can be easily whipped up in no time. This perfect pairing of clear, juniper-infused spirit with the bitter fizz of tonic water has certainly stood the test of time among its more sophisticated counterparts. So, let’s dive into the fascinating world of Gin & Tonic and see what keeps this dignified libation a consistent top choice in the gin cocktail brigade.
The History of Gin & Tonic:
The Gin & Tonic as we know it today has an interesting history. First developed in the 18th century, gin originally gained popularity in Britain, while tonic water was invented in the 1820s in Peru by British army officers as a medicine to fight malaria. They used to mix the bitter quinine-infused tonic water with gin to make it more palatable. Eventually, this was garnished with a citrus wedge to enhance the flavor, and with that, the Gin & Tonic cocktail was born.
The Perfect Ratio:
The success of a Gin & Tonic lies in its simplicity, with various opinions on the perfect ratio. Some argue that a 1:1 ratio of gin to tonic water is the best way to appreciate both the complex botanicals of gin and the bitterness of tonic water. Others prefer a more mellow blend featuring a 1:2 ratio or even 1:3 for a more delicate profile. The ultimate Gin & Tonic relies on one’s personal taste and how they want to strike that delicate balance between the two flavors.
The Importance of Garnish:
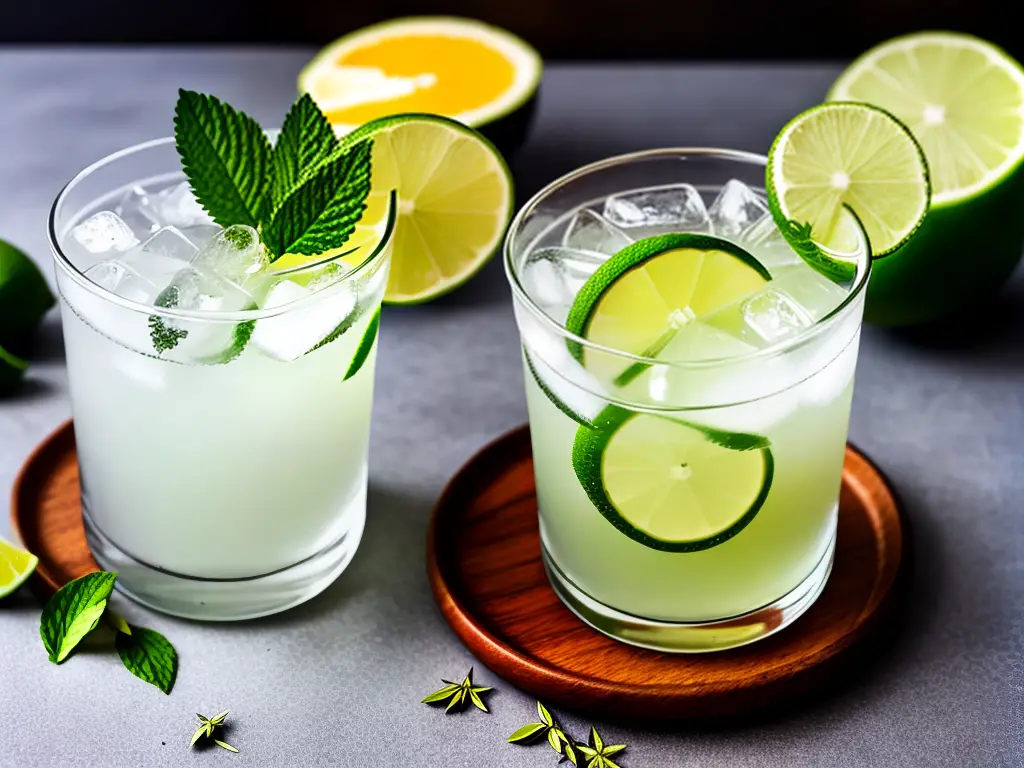
Though Gin & Tonic is a straightforward cocktail, the garnish plays a surprisingly crucial role in accentuating the flavor profile. A classic Gin & Tonic uses a lime wedge to provide a citrusy compliment to the bitterness of the tonic water. However, the versatility of this cocktail allows you to experiment with other garnishes, including lemon, orange, grapefruit, or even cucumber, depending on the specific botanicals in the gin you choose.
The Vessel: The Highball Glass
Gin & Tonic is best served in a highball glass. There’s a reason for its continued popularity among seasoned bartenders and casual drinkers: the tall, narrow shape of the highball glass maintains the fizziness of the tonic water for an extended period, helping you savor the G&T experience. To enjoy your Gin & Tonic at its finest, fill the highball glass with quality ice – the bigger, the better, as it melts slower and doesn’t dilute the cocktail as quickly.
Conclusion:
A classic Gin & Tonic is an elegant and refreshing cocktail that stands on its simplicity and perfectly balanced flavors. It’s a go-to drink for many, and no wonder it takes up a prime spot in our top 10 gin cocktails listicle. It’s a drink that allows you to play around, mix it up, and make it your own – and that is undoubtedly a testament to the enduring charm of this iconic cocktail. So, cheers to the Gin & Tonic – a true classic that will never go out of style!
Martini: The Timeless Elegance of Gin
There’s a reason James Bond and gin enthusiasts around the world favor the Martini – this elegantly sophisticated cocktail is sheer perfection when it comes to flavor, balance, and style. Join us as we explore this world-famous gin concoction, learn of its history, and, most importantly, tips to create your very own perfect Martini in the comfort of your home.
All true Martini aficionados revel in the simplicity and precision of its ingredients. At its most basic, a Martini comprises premium gin, dry vermouth, and the choice of an olive or a lemon twist garnish.
Simply stir the gin and vermouth in a mixing glass with ice, strain into a chilled cocktail glass, and garnish with your chosen olive or lemon twist.
The Martini’s origins are steeped in mystery and debate. The most popular theory traces its roots to the Californian Gold Rush era, where it evolved from the Martinez, another gin-based cocktail. However, some claim that the drink takes its name from the Italian vermouth brand Martini & Rossi, as early adopters initially made the drink with these spirits.
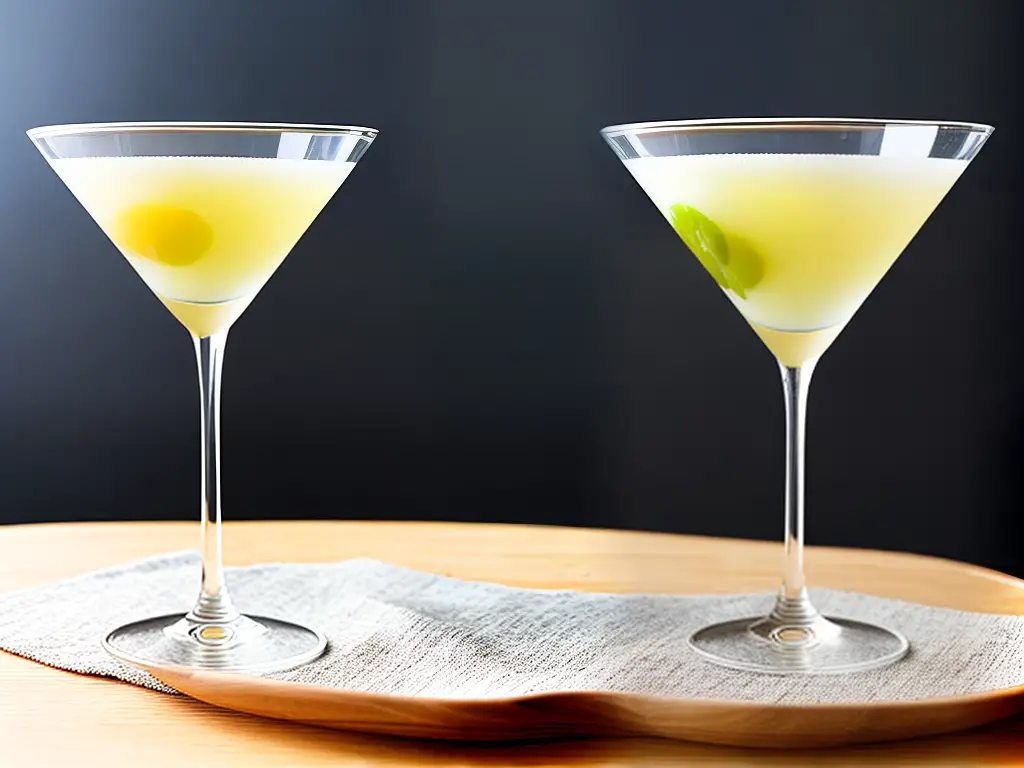
In addition to its glorious taste, the Martini is synonymous with style and sophistication. Its aesthetic appeals to both purists and modern mixologists alike. The classic V-shaped cocktail glass that houses the drink has become an integral part of pop culture, thanks to its frequent appearances in movies and television shows.
Thanks to Ian Fleming’s famous spy, James Bond, the classic conundrum of whether a Martini should be “shaken, not stirred” is frequently debated. Purists argue that stirring the ingredients gently ensures the drink remains clear, velvety, and undisturbed. The shaken approach, on the other hand, churns up the drink’s ingredients, resulting in a frothy, slightly diluted, and cloudy mixture.
The Martini is far more than just a drink – it’s a statement of class, taste, and refinement. A must-try for all gin enthusiasts, this magical blend of flavors and effortless sophistication has earned its place as one of the top gin cocktails of all time. So channel your inner James Bond and raise a glass to the timelessness of the Martini. Cheers!
The Negroni: A Perfectly Balanced Bitter-Sweet Symphony
When it comes to gin cocktails, one legendary concoction stands tall amongst its peers, boasting a remarkable balance of flavors – the Negroni. This iconic Italian apéritif has a tantalizingly bitter taste backed by a subtle hint of sweetness that tickles the taste buds. Ranked at number 3 in our top 10 gin cocktails list, let’s explore the complex taste profile of this classic drink and how to prepare it to perfection.
Created in the early 20th century, the Negroni owes its origin to a certain Count Camillo Negroni in Florence, Italy. Legend has it that the Count, seeking to add a bit more kick to his favorite Americano cocktail (made with Campari, sweet vermouth, and club soda), requested the bartender to replace the soda with gin. This bold substitution resulted in the birth of the Negroni.
The Negroni truly shines in its ability to maintain a harmonious balance between bitter and sweet. The bitterness of the Campari is beautifully balanced by the sweetness of the vermouth, while the gin adds a potent backbone to the mix.
The burnt orange peel garnish is the final touch that elevates this cocktail to greatness. The aromatic oils from the peel bring a hint of smokiness that adds depth and complexity to the overall taste, making it a truly irresistible concoction.
To craft the perfect Negroni, you’ll need the following ingredients and equipment:
The Negroni is a true testament to the power of balance in a cocktail. Its enchanting mix of bitter, sweet, and smoky notes will surely captivate your senses and keep you coming back for more. So, gather your friends and unleash your inner mixologist to create this timeless gin cocktail that never goes out of style. Cheers!
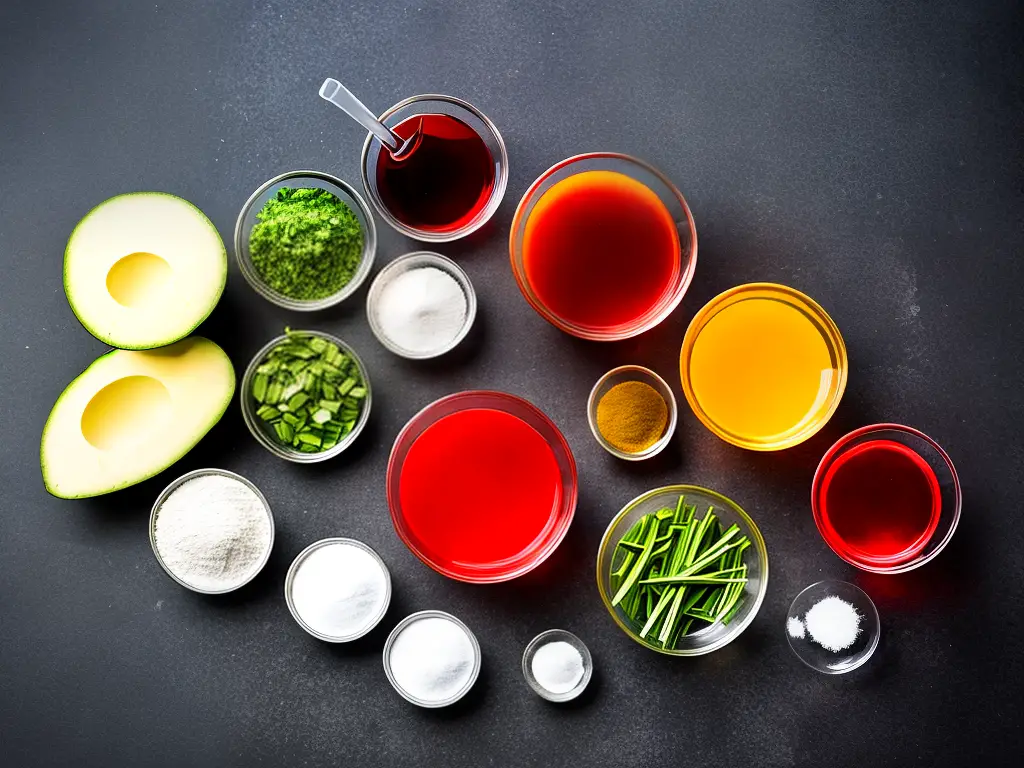
The Timeless Tom Collins: A Refreshing Classic Gin Cocktail
Gin lovers, brace yourselves for a fizzy adventure with the ultimate summer refresher – the Tom Collins. Whether lounging by the pool or hosting a swanky soirée, the Tom Collins has rightly earned its place among the top 10 gin cocktails. This delightful drink is revered for its simplicity, balance, and timeless charm. It’s said that you can’t go wrong with a classic, so let’s dive in and explore the refreshing world of the Tom Collins cocktail.
The Origins of the Tom Collins Cocktail
Believe it or not, the Tom Collins has a fascinating origin story that dates back to the 19th century. First appearing in print in the 1876 edition of Jerry Thomas’ ‘The Bartender’s Guide,’ this gin cocktail was named after a notorious practical joke of the time, the ‘Great Tom Collins Hoax of 1874.’ The prank involved convincing people that an individual, named Tom Collins, was talking about them at a nearby bar, only for them to discover it was all a ruse. Fast forward to today, and the only gossip we’re spreading is about this fantastic gin cocktail.
The Recipe for a Classic Tom Collins Cocktail
The Tom Collins is a tall, cool, fizzy drink made by combining a few essential ingredients – gin, lemon juice, simple syrup, and club soda. The harmony of flavors, balancing tartness and sweetness, makes it an irresistible and crowd-friendly delight.
Ingredients:
Instructions:
Adjust the Cocktail to Your Taste
One of the best things about the Tom Collins is its adaptability. If you prefer a sweeter or tangier taste, simply adjust the ratios of lemon juice and simple syrup. Hendrick’s or Plymouth gins are known to work particularly well in this cocktail but feel free to experiment with your favorite gin, adding a personal touch to this timeless treat.
In Conclusion: The Timeless Charm of the Tom Collins
With its elegant simplicity, well-rounded flavor profile, and endless adaptability, it’s no wonder the Tom Collins comfortably sits among the top 10 gin cocktails. The next time you’re in the mood for an effervescent and utterly enjoyable libation, look no further than this sparkling classic. Cheers to the time-honored Tom Collins – a refreshing gin cocktail that will undoubtedly stand the test of time.
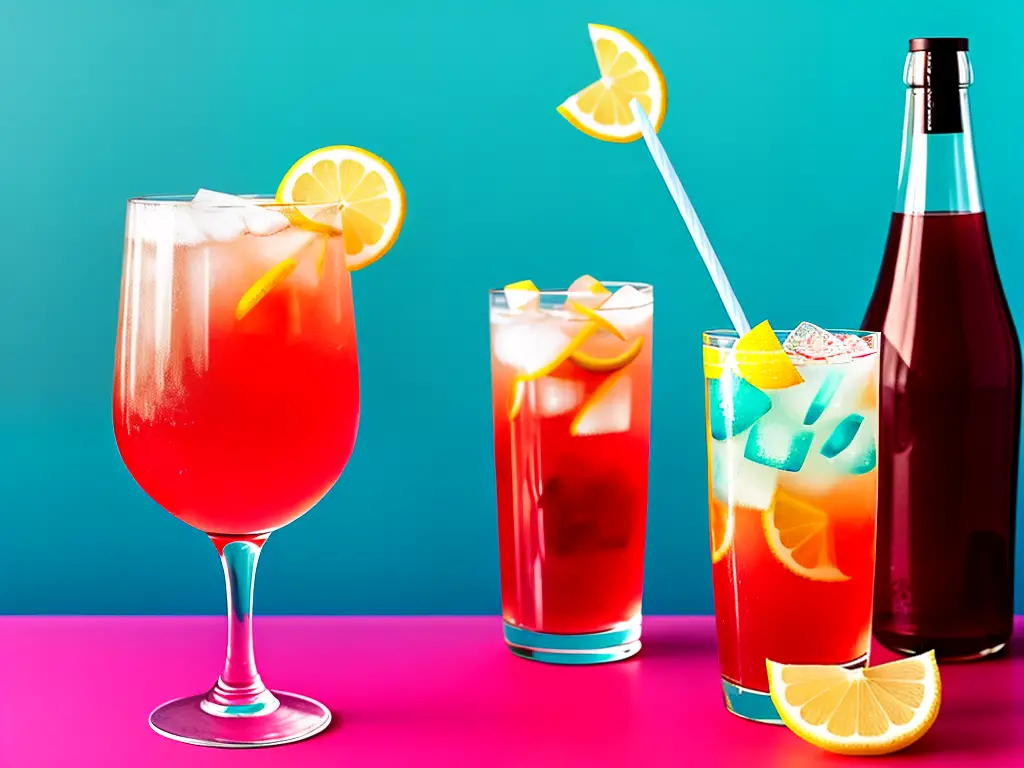
Bee’s Knees: A Sweet and Sour Sip into Cocktail History
As we dive deeper into the vast world of gin cocktails, let’s take a moment to appreciate a true gem from the Prohibition-era – Bee’s Knees. Known for its delightful balance of sweet and sour flavors, Bee’s Knees has stood the test of time and continues to be a favorite cocktail for gin enthusiasts.
The History of Bee’s Knees:
The Bee’s Knees is believed to have originated during the Prohibition-era when bartenders cleverly used honey and citrus to mask the harsh taste of homemade gins, often referred to as “bathtub gin.” The name Bee’s Knees derives from a popular slang in the 1920s, meaning “the best,” and this delightful cocktail certainly lives up to its name even a century later.
The Sweetness of Honey:
One of the key elements that sets Bee’s Knees apart from other gin cocktails is the use of honey syrup. Traditionally, a mixture of honey and water is used to create a smooth, sweet, and syrupy consistency. This honey syrup adds a depth and warmth to the cocktail, balancing out the zesty and acidic notes of the lemon juice.
The Burst of Citrus:
The refreshing sour punch in Bee’s Knees comes from the inclusion of lemon juice. This acidic component complements the sweetness of the honey syrup, creating a harmonious balance of flavors. Freshly squeezed lemon juice is highly recommended to ensure the best taste and quality.
The Choice of Gin:
Just like in any cocktail, the quality of gin you choose has a tremendous impact on the overall taste of Bee’s Knees. A London dry gin is commonly recommended for its balanced flavor profile of juniper, citrus, and floral notes. However, you can also experiment with other styles of gin to find the one that suits your taste buds the best.
The Recipe:
Making a Bee’s Knees cocktail is fairly simple and requires only three primary ingredients. Here’s the classic recipe to recreate this timeless cocktail at home:
Instructions:
In conclusion, the Bee’s Knees cocktail offers a delightful and well-rounded flavor profile that has pleased cocktail enthusiasts for generations. Its simplicity and balanced combination of sweet and sour make it an ideal gin cocktail to be enjoyed on various occasions. Let this Prohibition-era classic remind you that sometimes, the best things in life are indeed the Bee’s Knees!
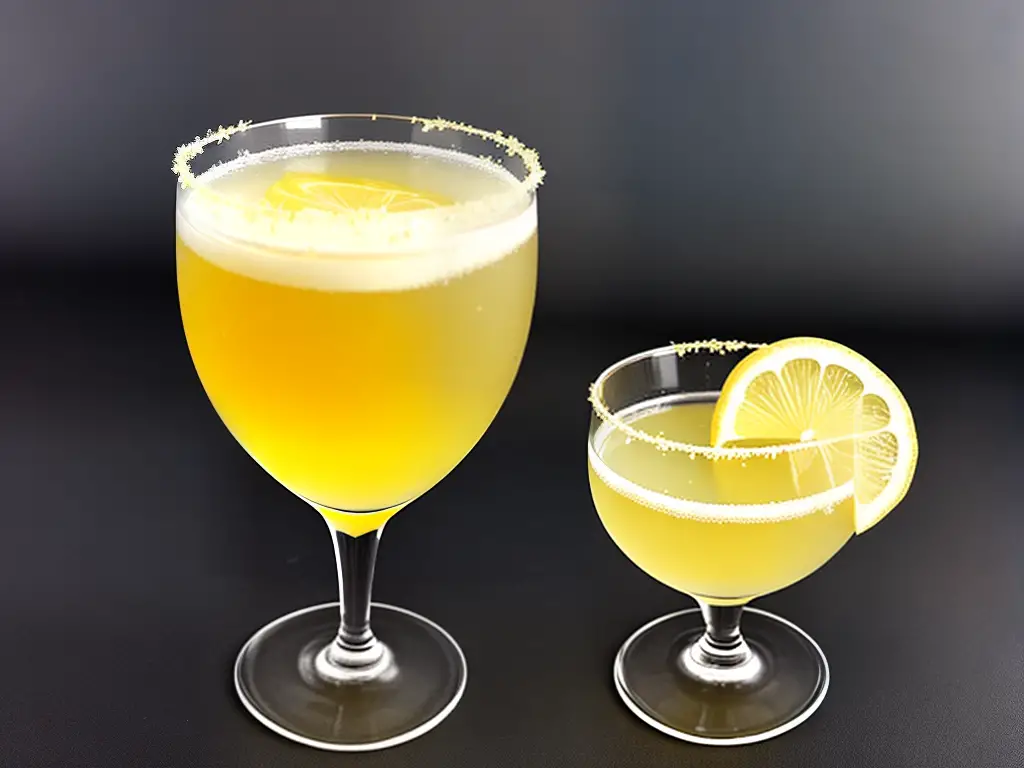
French 75: A Sparkling Delight That Packs a Punch
There are few things as elegant as a perfectly mixed cocktail, and there’s something especially refined about sipping on a seamless blend of gin, champagne, lemon, and sugar. Enter the French 75 – a classic, bubbly concoction that has been gracing high society gatherings and exclusive soirees for nearly a century. This time-honored libation will transport you to a world of glamour and sophistication, while also managing to pack a powerful punch to delight your taste buds. Get ready to celebrate life’s finest moments with this exquisite champagne cocktail – the French 75!
History and Origin:
Named after a 75mm French artillery gun, the French 75 is a testament to the idea that good things come in small packages. It is said that this potent cocktail was invented during World War I by legendary bartender Harry MacElhone in his famous Harry’s New York Bar in Paris. The original recipe called for gin, lemon juice, simple syrup, and champagne. The combination of flavors and effervescence proved to be a hit, earning the French 75 its reputation as a sparkling delight that delivers a refined kick.
Profile and Flavors:
The French 75 is vibrant, sophisticated, and definitely packs a punch. The base spirit, gin, lends a fragrant backbone to this sparkling cocktail, while the fresh lemon juice adds a zesty, citrus tang that contrasts beautifully with the natural sweetness of simple syrup. When all of these ingredients are combined and topped off with luxurious bubbles from a quality champagne, the result is nothing short of divine. The French 75 is light, effervescent, and perfect for celebrating special occasions or simply toasting to the good life.
Mixing the Perfect French 75:
To recreate this sparkling delight at home, you’ll only need a few key ingredients and a little bit of finesse. Start by gathering good-quality gin, fresh lemon juice (always use freshly squeezed for the best results), simple syrup, and your choice of champagne or any fine sparkling wine.
Ingredients:
Instructions:
Conclusion:
Undeniably elegant and delectably smooth, the French 75 is a baroque masterpiece of a cocktail that deserves to be savored and celebrated. This dazzling blend of gin, lemon juice, simple syrup, and champagne may seem demure, but be warned – just like the 75mm artillery gun it’s named after, it packs quite a punch. The next time you’re in the mood for a little indulgence, raise a glass and toast to the finer things in life with the illustrious French 75!
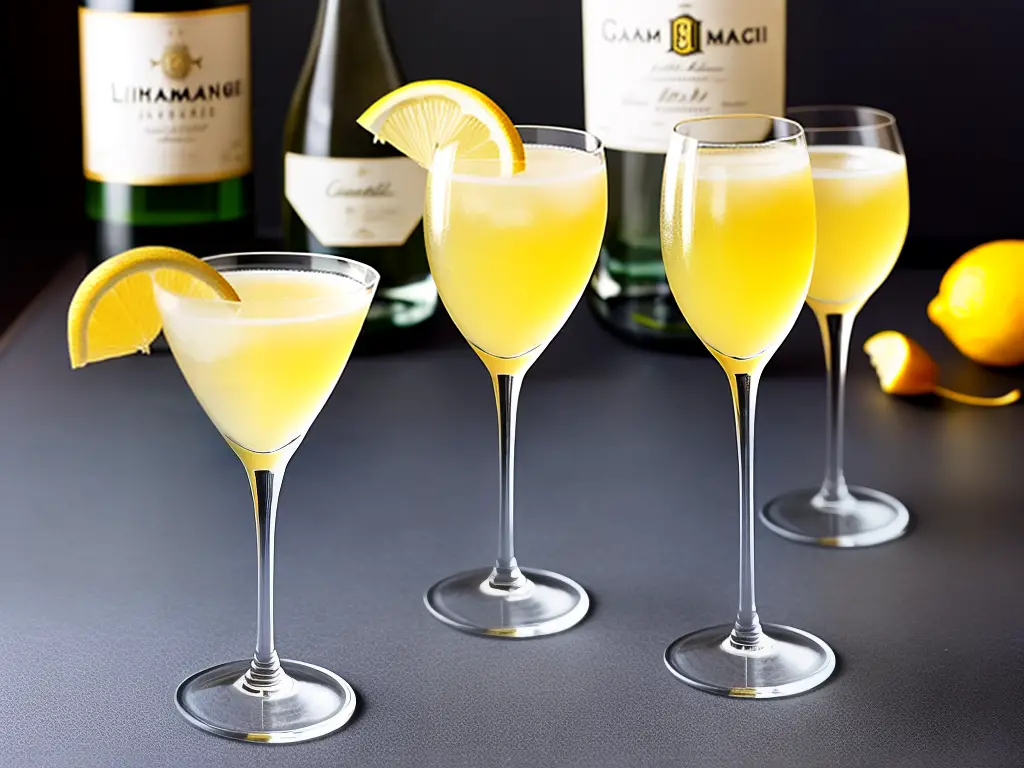
The Gimlet: A Classic Gin Cocktail Perfect for Any Gin Enthusiast
The world of gin cocktails is vast and varied, but sometimes the best drinks come from the simplest recipes. Enter the Gimlet, an elegant and refreshing gin concoction that packs a punch with its tart and zesty flavors. As one of the top 10 gin cocktails to try, the Gimlet’s simplicity allows the quality of the gin to shine through, making it a must-try for any gin enthusiast. In this short article, we’ll delve into the origin, ingredients, and variations of this timeless gin classic.
While the true origins of the Gimlet remain a mystery, it’s widely believed that the cocktail was invented by British Navy sailors as a way to prevent scurvy during long sea voyages. The mixture of gin and lime cordial not only helped to mask the taste of poor-quality water but also provided sailors with an essential dose of vitamin C. Over time, the Gimlet evolved from a maritime panacea to a popular and sophisticated cocktail with a devoted following in the world of mixology.
The beauty of the Gimlet lies in its simplicity. Traditionally, it’s made with just two ingredients — gin and lime cordial. However, the quality and balance of these ingredients are crucial to creating a Gimlet that packs a punch. Opt for a good-quality gin that complements the tartness of the lime cordial. In the hands of a skilled bartender or gin enthusiast, these two ingredients combine to create a beautifully balanced and tart cocktail.
The Classic Gimlet
Instructions:
While the classic Gimlet is enjoyable in its own right, modern mixologists have come up with their own spins on this traditional recipe. One popular variation is to use fresh lime juice and simple syrup instead of lime cordial, creating a fresher and more vibrant version of the original. Adding a few sprigs of fresh basil or mint can also add an extra layer of depth and complexity to this revitalizing cocktail.
Whether you’re a gin aficionado or just dipping your toes into the world of cocktails, give the Gimlet a try. Its simplicity allows the quality of the gin to truly shine, while its tart kick makes it an enjoyable and versatile drink for any occasion. As just one of the top 10 gin cocktails to sample, the Gimlet is sure to become a favorite in your cocktail repertoire. Cheers!
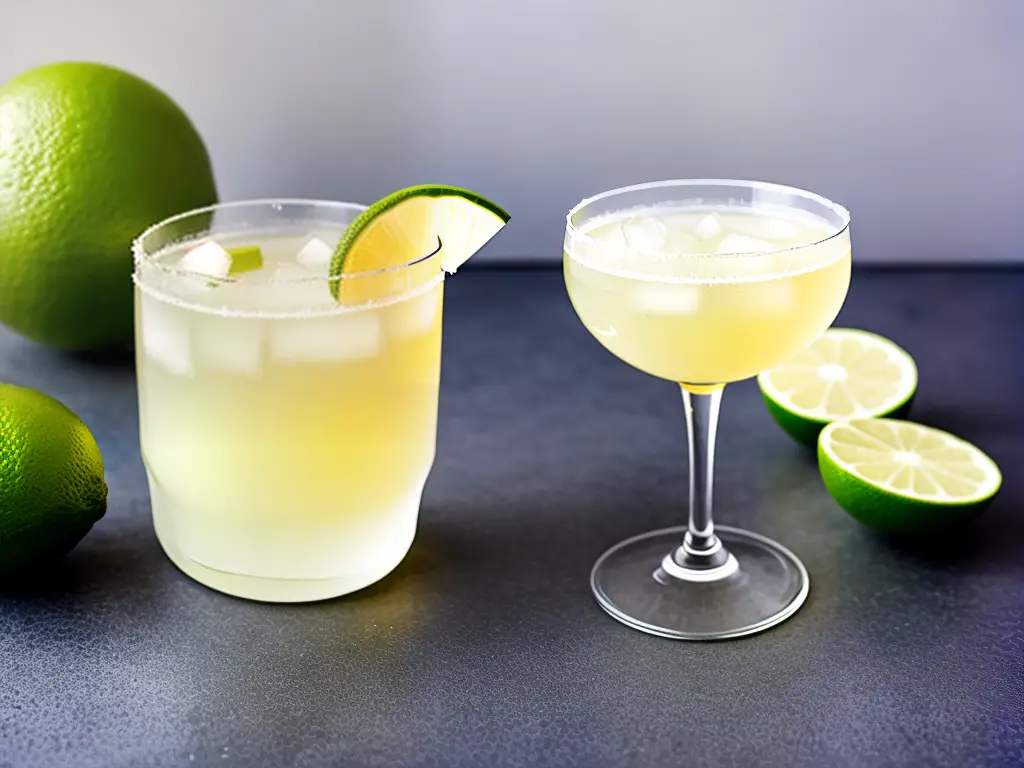
Singapore Sling: An Exotic Taste of the Tropics in a Glass
Imagine yourself at a breezy beach bar, the sun setting beneath the horizon, the sound of waves crashing the shore, and a refreshing, vibrant, and fruity cocktail in your hand. That cocktail is none other than the Singapore Sling, a classic gin-based cocktail that perfectly captures the essence of a tropical paradise. In this article, we’ll explore the intriguing history, unique flavors, and easy-to-follow recipe that make the Singapore Sling a must-try for any gin cocktail enthusiast.
History:
The Singapore Sling is an iconic gin cocktail that hails from the colonial-era Raffles Hotel in Singapore, dating back to 1915. Bartender Ngiam Tong Boon is credited with its creation, showcasing his inventive spirit to create a tantalizing taste that quickly became popular among socialites and travelers alike. Over a century later, the Singapore Sling remains a beloved classic that transports drinkers to the exotic, sun-soaked splendor of Singapore’s picturesque past.
Flavors:
The Singapore Sling is an exuberant blend of strikingly diverse flavors that truly set it apart from your average cocktail. At its heart, the irresistible combination of gin and cherry brandy add depth and sophistication to the mix. Benedictine, a herbaceous liqueur, brings a touch of subtle complexity, marrying effortlessly with the tartness of lime juice. The true exotic twist, however, comes from the inclusion of pineapple juice – a staple of countless tropical cocktails – giving the Singapore Sling its distinctively fruity and refreshing flavor. Topped with a splash of grenadine, this vivid concoction is transformed into a stunning sunset-hued masterpiece that begs to be sipped and savored.
Recipe:
To create your own taste of the tropics at home, follow this simple Singapore Sling recipe:
Instructions:
Conclusion:
With its vibrant flavor, rich history, and unparalleled versatility, the Singapore Sling is a timeless gin-based cocktail that continues to captivate drinkers around the world. Whether you’re looking to add a splash of tropical flair to your next gathering, or simply searching for a new tantalizing tipple to try, the Singapore Sling is the perfect choice. So go ahead — mix up a batch and enjoy a refreshing taste of the tropics in a glass. Cheers!
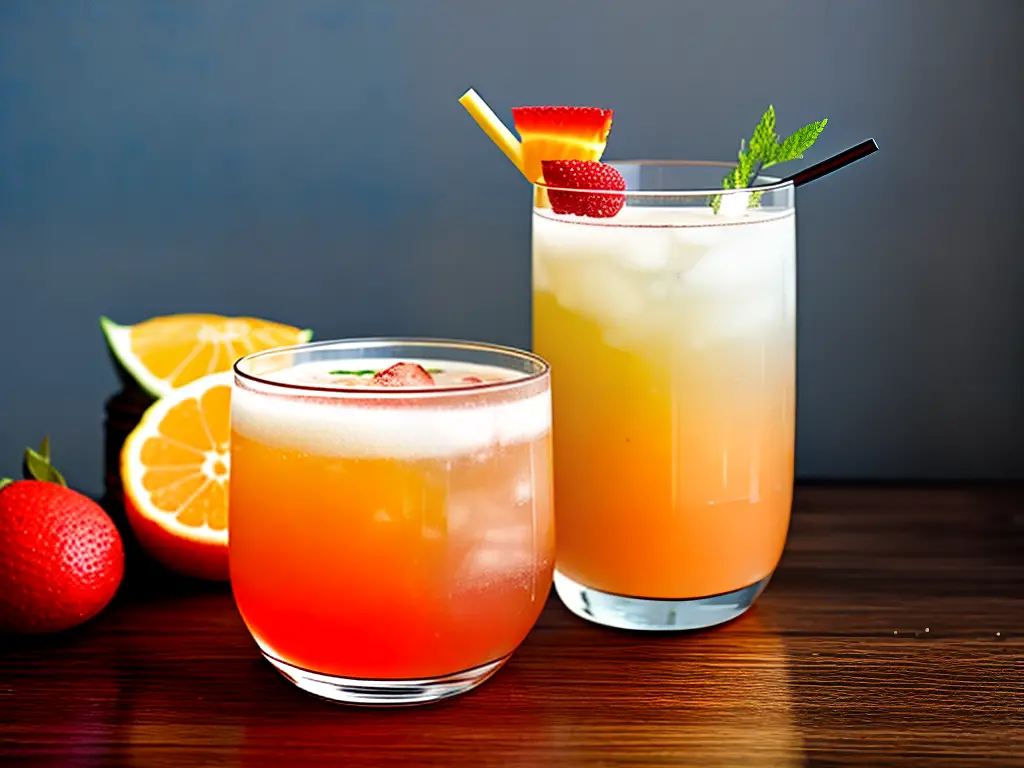
The Last Word: A Timeless Gin Cocktail with A Hint of Mystery
As you sip your way through the world of gin cocktails, it’s time for a dramatic twist. Introducing Last Word, a concoction that will leave you spellbound with its unique blend of flavors – a herbaceous delight that has stood the test of time. Plunge into the intriguing world of this classic cocktail, as we unravel its history, flavors, and the reason behind its lasting charm.
Stepping back in time to the early 20th century, the Last Word was conceived at the Detroit Athletic Club, where it quickly gained recognition as one of the most popular drinks. Its exact origins are shrouded in mystery, but it is believed to have been created by a local bartender named Frank Fogarty, who was also an accomplished vaudeville performer. The Last Word’s complex and captivating blend of flavors made it an instant hit with the audience and kept the guests coming back for more.
The infamous Prohibition Era saw the Last Word become a rare indulgence. However, in the early 2000s, the Last Word experienced a sudden resurgence when it was discovered by Murray Stenson, a revered bartender at the Zig Zag Café in Seattle. The drink soon regained its lost popularity and started appearing on cocktail menus across the States, enchanting a whole new generation of cocktail enthusiasts.
The Last Word is an equal-parts cocktail, crafted using gin as its base with the vibrant addition of Green Chartreuse, maraschino liqueur, and lime juice. The result is a mesmerizing melange of flavors that leave a lasting impression on your palate. The gin provides a robust foundation, while the Green Chartreuse adds a touch of herbaceous magic. The maraschino liqueur lends a delicate sweetness, and the lime juice cuts through the richness, bringing a much-needed balance.
To enjoy the full experience of the Last Word, it is essential that it’s made with precision and care. Here’s how to create this spellbinding concoction:
1. Fill a cocktail shaker with ice.
2. Combine all the ingredients in the shaker.
3. Shake vigorously until well-chilled.
4. Strain into a chilled coupe glass.
5. Garnish with a lime twist or a cherry, as desired.
The Last Word holds a special place in the realm of gin cocktails, and for a good reason. With its distinctive flavors and enchanting history, it has transcended trends and managed to captivate the hearts of many throughout the years. Next time you’re in the mood for a sophisticated yet daring gin cocktail, remember that the Last Word has been waiting to make a dramatic entrance in your life. Cheers!
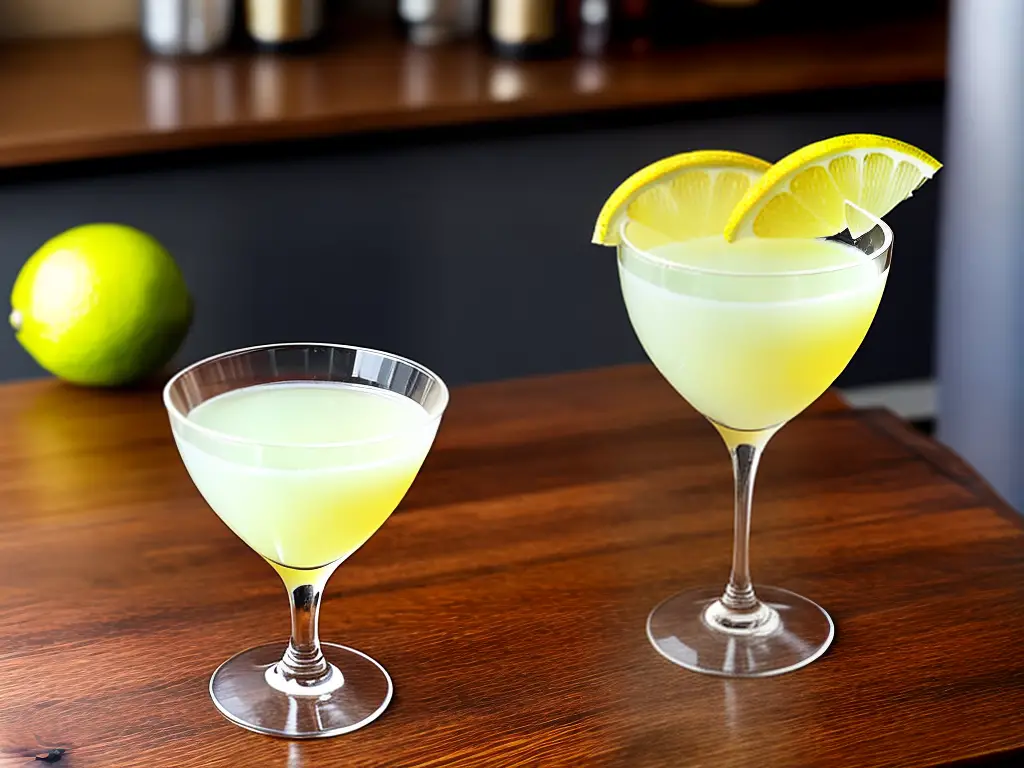
#10. Southside: A Minty Fresh Twist on a Classic Mojito
As the summer months approach, our cravings for refreshing and revitalizing drinks tend to increase. So, what better way to indulge in the sun’s glowing embrace than with a delicious, ice-cold gin cocktail? Sway away from the classic mojito and let us introduce you to its sophisticated and energizing gin counterpart – the Southside.
The Southside cocktail, often regarded as “the gin mojito”, effortlessly encapsulates the perfect balance of sweet and tart flavors, making it a favorite for plenty of gin enthusiasts.
This delightful concoction is an alluring blend of botanical gin, freshly squeezed lemon juice, a touch of simple syrup for sweetness, and a generous helping of vibrant, aromatic mint leaves. Refreshingly light and incredibly easy to make, the Southside is perfect for those warm-weather afternoons spent lounging on the porch or hosting an elegant garden party.
Ingredients:
Instructions:
The versatility and vast array of flavors gin exhibits make it the ideal choice for crafting innovative and exciting cocktails. And when it comes to refreshing, delicious drinks to beat the heat, there’s hardly any contender that can outshine the vibrant and minty magic of the Southside cocktail.
So, embrace the warm weather and quench your thirst with this bright and flavorful gin-based mojito alternative. Settle down in a sunny spot, take a leisurely sip, and allow the cooling, citrusy goodness of the Southside to transport you to a world of mint-infused delight. Cheers!
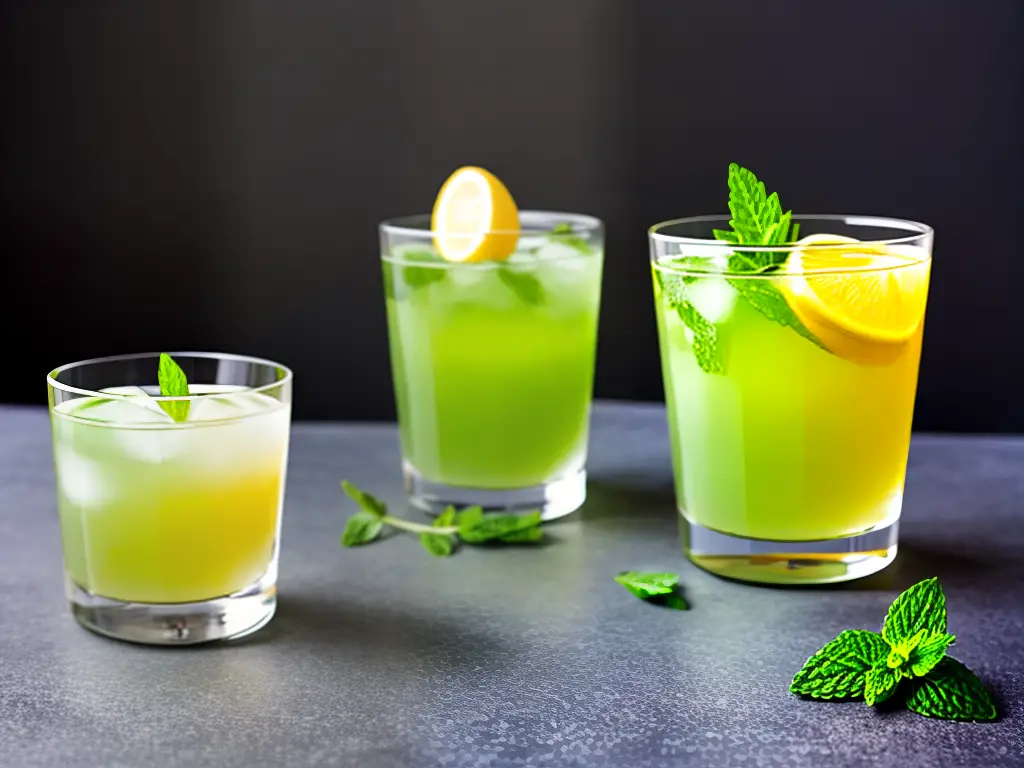
There you have it – the top 10 gin cocktails that exemplify the magic of this beloved spirit. Each of these concoctions showcases the brilliance of gin in its own unique way, from time-honored classics to modern masterpieces. So, the next time you’re looking for the perfect gin tipple, look no further than this fantastic list. Cheers to your next gin-venture!
Top 10 Gin Cocktails
Gin, an incredibly versatile spirit, has experienced a resurgence in popularity in recent years. Its diverse flavor profiles, ranging from floral to fruity to spicy, have inspired countless creative concoctions. In this listicle, we will take you on a journey through the top 10 gin cocktails that you must absolutely try. These cocktails are rooted in history, burst with flavor, and showcase the best qualities that gin has to offer. So, grab your mixing glasses and let’s get started.
Classic Gin and Tonic: A Timeless Favorite for Every Gin Lover
The world of cocktails has evolved tremendously over the years with fancy concoctions and creative mixes gracing the menus of the finest bars and restaurants. However, there’s one drink that has stood the test of time and remains a universal favorite among cocktail enthusiasts worldwide – the Classic Gin and Tonic. Simple yet sophisticated, this iconic drink serves as the ultimate benchmark to showcase the quality of any top-shelf gin.
The Gin and Tonic actually has its roots in the British Colonial era. British soldiers used to drink quinine tonics to ward off malaria during their time in India. But, as quinine was extremely bitter, they would mix it with gin to create a more palatable drink, and thus, the Gin and Tonic was born. Nowadays, tonic water still contains quinine, although in much smaller quantities, and is combined with gin and a fresh lime wedge for a refreshing and light cocktail.
It’s said that simplicity is the ultimate sophistication, and the Classic Gin and Tonic proves this adage true. The elegance of this cocktail lies in the perfect balance of its three key ingredients – gin, tonic water, and lime. The botanical flavors of the gin beautifully complement the bitter-sweet notes of the tonic water, while the lime wedge adds a zesty twist to elevate the taste.
- – 2 ounces of your favorite gin
- – 4 ounces of tonic water
- – Ice cubes
- – 1 lime wedge
- – Highball glass (or any glass of your preference)
- Fill your glass with ice cubes to the rim. The ice should be fresh, as stale ice may lend an off-flavor to the drink.
- Add the gin to the glass. The choice of gin plays a crucial role in the taste of your Gin and Tonic. Opt for a high-quality gin with botanical flavors that you enjoy.
- Gently pour the tonic water over the ice to prevent the bubbles from dissipating too quickly.
- Stir slowly and carefully to blend the gin and tonic water without compromising the bubbly fizz.
- Squeeze the fresh lime wedge over your concoction and drop it into the glass. Tossing in the lime adds a zesty hint, while also giving your cocktail a pop of citrus color.
Versatile and effervescent, the Classic Gin and Tonic is an ideal choice for any event or gathering. Whether you’re hosting a sophisticated soiree or simply enjoying a sunset on your deck, this time-honored cocktail will never disappoint. So, raise a toast to good times and great company with the evergreen Classic Gin and Tonic, a cocktail that has, and will continue to, stand the test of time.
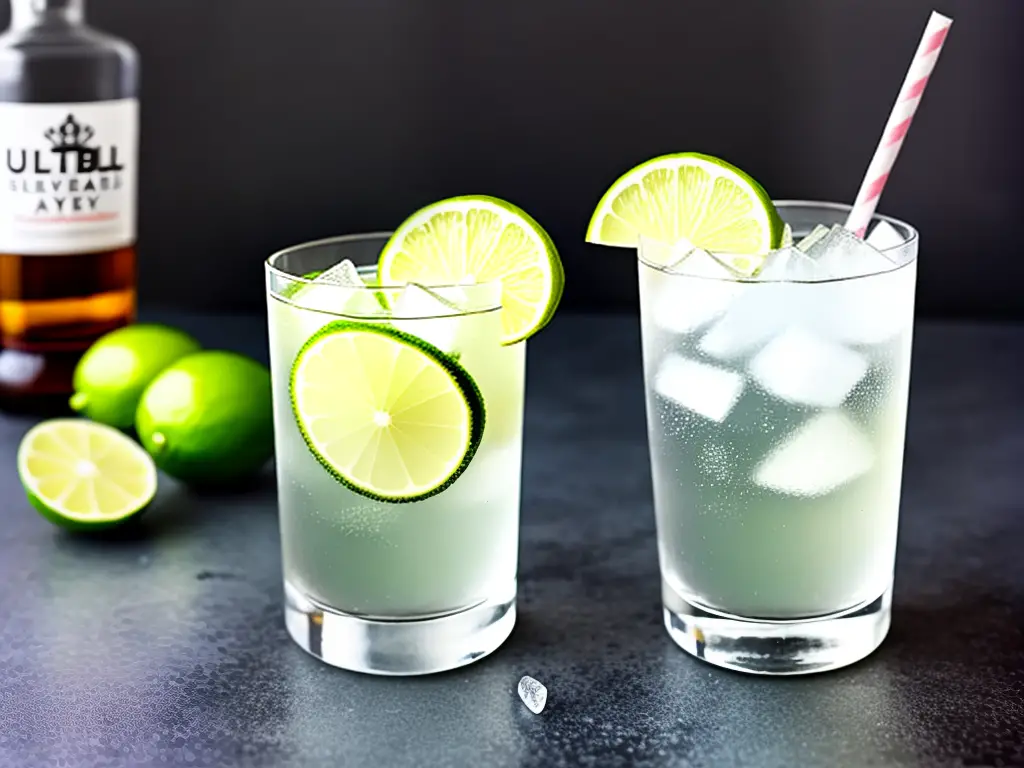
Negroni: A Classic Italian Gin Cocktail
Are you looking for a sophisticated gin cocktail with a unique and bold flavor profile? Look no further, the Negroni is here to elevate your happy hour experience. This classic Italian cocktail boasts a delightful combination of bitter Campari, sweet vermouth, and robust gin. Best served on the rocks with a twist of orange peel, the Negroni is the perfect libation to entertain your taste buds and impress your friends.
Characterized by its brilliant red hue, the Negroni has a fascinating history dating back to the early 20th century. Legend has it that the drink was born in Florence, Italy, when a patron named Count Camillo Negroni asked his bartender friend to strengthen his favorite cocktail, the Americano, by replacing the soda water with gin. And thus, the Negroni was born.
The simplicity of this three-ingredient cocktail should not be mistaken for a lack of complexity in its flavor. The bitterness of Campari leads the charge, soon followed by the sweetness of the vermouth, creating a marvelous balancing act that is rounded out by the juniper-forward flavor of gin. This captivating interplay of bitter, sweet, and herbal notes is what sets the Negroni apart from other gin-based cocktails.
When it comes to crafting the perfect Negroni, the devil is in the details. The ideal proportions are equal parts gin, Campari, and sweet vermouth – typically one ounce of each. This allows each element to shine equally, showcasing the harmony between the ingredients. To prepare, simply combine the ingredients in a mixing glass with ice, stir until well chilled, and strain into a rocks glass filled with fresh ice. Garnish with an orange peel twist to unlock another layer of refreshing citrus aroma.
Don’t be surprised if you find yourself falling in love with this charming Italian aperitif – the Negroni is truly unlike any other cocktail. It’s the perfect choice for pre-dinner drinks or a chic gathering with friends. So why wait any longer? Raise your glass, toast to la dolce vita, and discover the captivating allure of a Negroni tonight. Cheers!
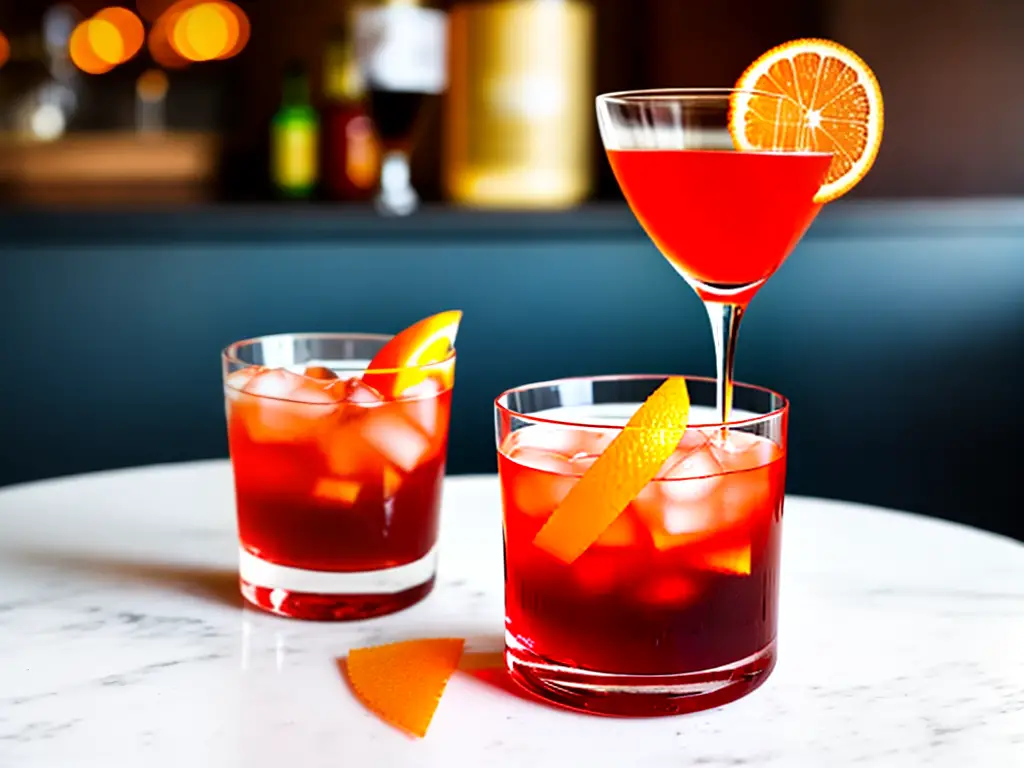
Tom Collins: The Classic Fizzy Gin Cocktail You Need to Try
Gin lovers, rejoice! We’re exploring the top 10 gin cocktails you need to try, and the Tom Collins is one refreshing drink that truly deserves its spotlight on this list. The perfect blend of sweet and tart, this classic cocktail is a tall drink that not only intrigues your taste buds but also turns heads with its effervescent beauty. Let’s dive into the enchanting world of Tom Collins and learn more about its origins, unique taste, and how you can make it at home.
The Origins of Tom Collins:
The history of the Tom Collins can be traced back to the 19th century when it was first created in England. Originally conceived as the John Collins by a bartender working at Limmer’s Old House in London, the drink’s name changed to Tom Collins after the gin base was swapped from Old Tom gin to London dry gin.
The Tom Collins gained popularity in the U.S. during the late 1800s when it was recognized in Jerry Thomas’ Bartenders Guide as a “gin and sparkling lemonade” drink. The cocktail has since then been a go-to choice at bars and parties alike!
The Refreshing Taste of Tom Collins:
The Tom Collins is a delightful balance of sweet, tart, and fizzy! The recipe calls for gin, lemon juice, sugar syrup, and soda water. The gin adds a botanical and juniper-forward base while the lemon juice provides a zesty citrus flavor. Sugar syrup sweetens the mix, and soda water contributes the carbonation that makes this drink irresistibly refreshing!
It is typically served in a Collins glass, a tall, narrow tumbler that accommodates the towering nature of this fizzy concoction. A garnish of a lemon slice and a maraschino cherry adds a pop of color and a touch of elegance.
How to Make Your Own Tom Collins:
Ready to make this fantastic cocktail at home? Here’s a quick and easy recipe for you:
- 2 oz gin (preferably London dry gin)
- 1 oz fresh lemon juice
- 0.5 oz simple syrup
- Soda water
- Lemon wheel and maraschino cherry, for garnish
Instructions:
- Fill a Collins glass with ice.
- In a cocktail shaker filled with ice, combine gin, lemon juice, and simple syrup. Shake well.
- Strain the mixture into the ice-filled Collins glass.
- Top off with soda water.
- Gently stir to combine and garnish with a lemon wheel and maraschino cherry.
Now you’re ready to enjoy a Tom Collins! Elegant, fizzy, and full of character, Tom Collins is a gin cocktail you simply can’t afford to miss. Cheers to this fabulous classic!

The Tangy Twisted Classic Gimlet Gin Cocktail
When it comes to gin cocktails, there is an almost endless array of options to suit every taste. As we explore the best of the best, it’s impossible to overlook the minimalist but impactful Gimlet. Clocking in at a solid #4 on our top 10 gin cocktails, this tangy beverage is easy to make, yet its flavors are so well-balanced and satisfying that it’s often considered a hallmark of a skilled bartender or mixologist.
Believed to have been named after the British naval surgeon Sir Thomas Gimlette, who introduced it to the Royal Navy as a medicine, the Gimlet has a storied past. Sir Thomas used to mix equal parts gin and lime cordial to create a concoction that helped prevent scurvy amongst sailors. Today, this classic gin cocktail is appreciated around the world, proving that sometimes simplicity is key.
The true beauty of the Gimlet lies in its simplicity. With a combination of gin, lime cordial, and sometimes a splash of soda water, the cocktail boasts a perfect balance of tartness, sweetness, and bitterness. This harmonious blend is what captivates drinkers, offering a welcome refreshment without any extra fuss. The recipe is easily customizable to suit individual preferences, with many variations featuring additions such as elderflower, cucumber, or even the use of other spirits.
How to Make a Classic Gimlet:
- 2 oz gin
- 1/2 oz lime cordial
- Lime wheel, for garnish
- Combine the gin and lime cordial in a cocktail shaker filled with ice.
- Shake for about 15 seconds, ensuring the ingredients are well-mixed and chilled.
- Strain the mixture into a chilled coupe glass or an Old-Fashioned glass filled with fresh ice.
- Garnish with a lime wheel and serve immediately.
The secret to mastering the classic Gimlet is to source the best gin and lime cordial you can find. High-quality ingredients will make a massive difference in flavor, so don’t skimp on them. Opt for aromatic, well-balanced gins and tart, sweet lime cordials – you’ll thank yourself as you’re sipping on this delightful, tangy concoction.
The Gimlet is a testament to how simplicity can be an asset in the world of cocktails. Its easy-to-make nature only adds to its appeal, especially for gatherings, special occasions, or just a quiet evening at home. So, next time you’re feeling a little scurvy, make yourself a Gimlet and enjoy its history, crisp flavors, and smoothly satisfying taste. Cheers!
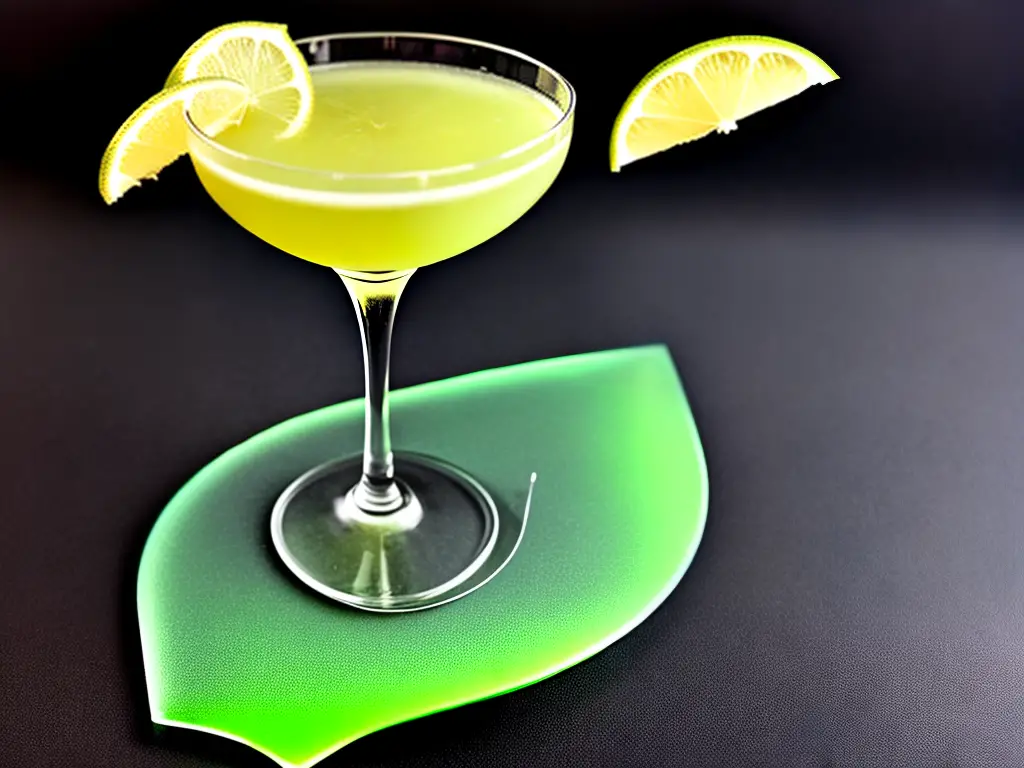
Discover the Classic Elegance of an Aviation Gin Cocktail
In the world of cocktail enthusiasts, gin holds a special place for its complex yet versatile flavor combinations. With many possible twists and concoctions, gin cocktails have always remained a classic favorite among drinkers. While a gin and tonic might be your go-to, our top 10 list of gin cocktails will share a variety of options to entice your senses. Let’s dive into one of our favorites: the Aviation cocktail.
The Sky’s the Limit: A History of the Aviation
The Aviation cocktail is a timeless classic dating back to the early 20th century. Created by bartender Hugo Ensslin in 1911 and featured in his self-published recipe book, “Recipes for Mixed Drinks,” Aviation was a shining example of how the world had taken to the skies with the introduction of airplanes in those days. It’s no surprise that the name was inspired by the aeronautical feats of this era.
Taking Flight: Ingredients and Steps
The Aviation recipe may have evolved over the years, but the original version remains a top choice for gin enthusiasts. For a delightful taste of classic elegance, gather the following ingredients:
- 2 oz. gin
- 1/2 oz. lemon juice (freshly squeezed for best results)
- 1/3 oz. maraschino liqueur
- 1/4 oz. crème de violette (optional, but highly recommended for both color and taste)
To create your signature Aviation cocktail, follow these steps:
- Fill a cocktail shaker with ice.
- Add the gin, lemon juice, maraschino liqueur, and crème de violette to the shaker.
- Shake well to combine and chill the ingredients, typically for about 15 to 20 seconds.
- Strain the cocktail into a chilled coupe or cocktail glass.
- Optional: garnish with a lemon twist, cherry, or both to add a touch of flair.
Landing: The Tasting Experience
The Aviation’s unique blend of flavors sets it apart from other gin cocktails. The citrusy fresh tang of lemon juice enhances the botanical notes of gin, while maraschino liqueur adds a subtle sweetness. The pièce de résistance, crème de violette, contributes both a velvety floral flavor and a beautiful pastel purple hue, reminiscent of fluffy clouds and endless skies. The combination of flavors is delicate and sophisticated, making it an exquisite choice for any palette.
Conclusion: Classic Elegance, Modern Appeal
The Aviation is an elegant classic that could inspire anyone to expand their gin cocktail arsenal. Despite its historical origins, the cocktail remains relevant and admired in modern times for its exceptional flavor profile and undeniable visual charm. Whether it’s for a special occasion, a cocktail party, or just a night in, give the Aviation a try and let your taste buds soar to new heights. Cheers!
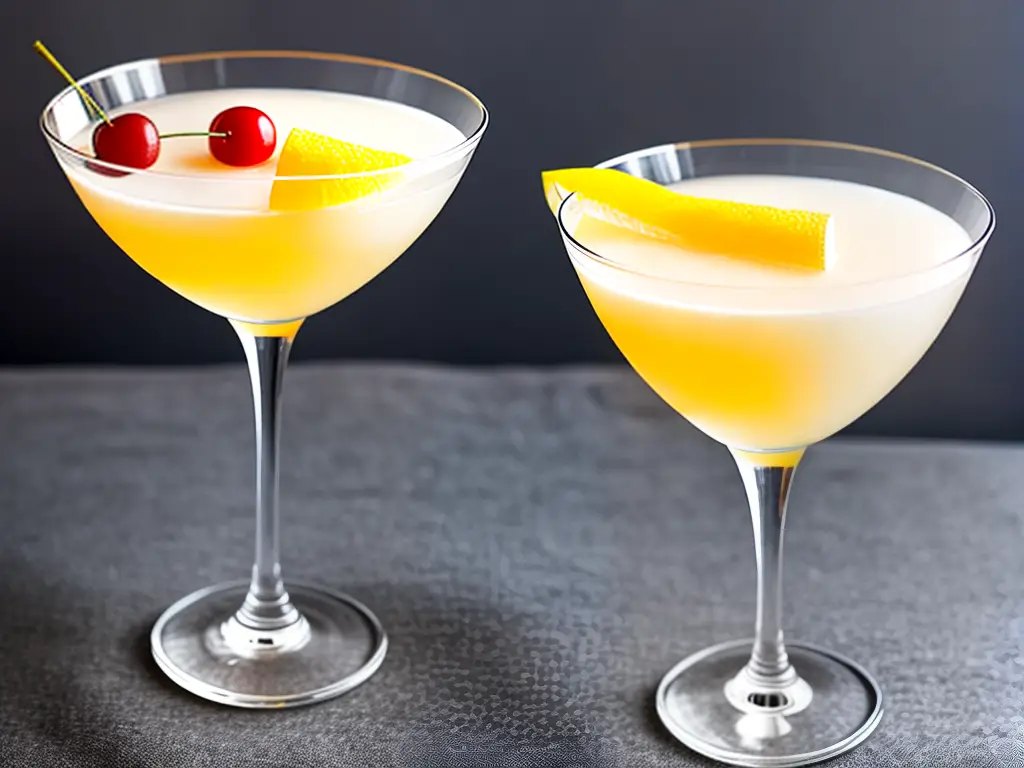
Bee’s Knees: The Perfect Gin Cocktail to Buzz About
A true classic never fades, and the Bee’s Knees cocktail is no exception. Born during the Prohibition era, this delightful concoction has maintained its popularity for almost a century, thanks to its perfect blend of distinct flavors that only continue to enchant gin enthusiasts across generations. If you’re looking to explore a timeless gin cocktail, you’ve found the answer. Sit back, relax, and let’s delve into the world of the Bee’s Knees.
The Origins of the Bee’s Knees
The Prohibition era in the United States (1920-1933) was a time when alcohol production, sale, and transportation were illegal, leading to a rise in underground bars known as speakeasies. To mask the poor quality of homemade gin, bartenders mixed alcohol with fruit juices and other flavorful ingredients, leading to the creation of several renowned cocktails—including the Bee’s Knees.
What’s in a Bee’s Knees?
The Bee’s Knees is simplicity in a glass—made with just three core ingredients, each playing a crucial role in creating its sublime flavor. Here’s the classic recipe:
- 2 oz. gin
- ¾ oz. fresh lemon juice
- ¾ oz. honey syrup (a 1:1 mixture of honey and water, heated until the honey dissolves)
These simple ingredients meld together to create a satisfyingly refreshing cocktail—a perfect choice on a hot day or to serve at any gathering.
How to Make a Bee’s Knees
Preparing a Bee’s Knees cocktail is fuss-free and takes no time at all:
- Fill a cocktail shaker with ice.
- Pour in the gin, lemon juice, and honey syrup.
- Shake well to chill and combine the ingredients.
- Strain the mixture into a coupe glass, or any other elegant glass of your choice.
- Optionally, garnish with a lemon twist.
Within minutes, you’ll have an exquisite cocktail that’s both visually appealing and tantalizing to the taste buds.
Why You Should Try the Bee’s Knees
The Bee’s Knees is a cocktail that showcases a perfect balance of flavors—sharp, fresh lemon juice cuts through the sweetness of the honey syrup, while the botanical elements in gin add depth and complexity to the overall taste. This delightful blend is not too sweet, nor too sour—it’s just right.
Besides its exceptional taste, the Bee’s Knees has a touch of history and intrigue to it. With each sip, you’ll be transported back to the clandestine world of speakeasies and the spirit of the Roaring Twenties. This is a cocktail that’s sure to foster interesting conversations and admiration from fellow gin lovers.
Conclusion
Among the vast ocean of gin cocktails, the Bee’s Knees stands out as a true classic that effortlessly captures the essence of a bygone era, while maintaining its relevance in today’s world of libations. This simple, yet elegant cocktail is refined, tasteful, and absolutely worth a try—whether you’re a seasoned gin enthusiast or just beginning your journey. Cheers to the Bee’s Knees—the perfect gin cocktail to buzz about!
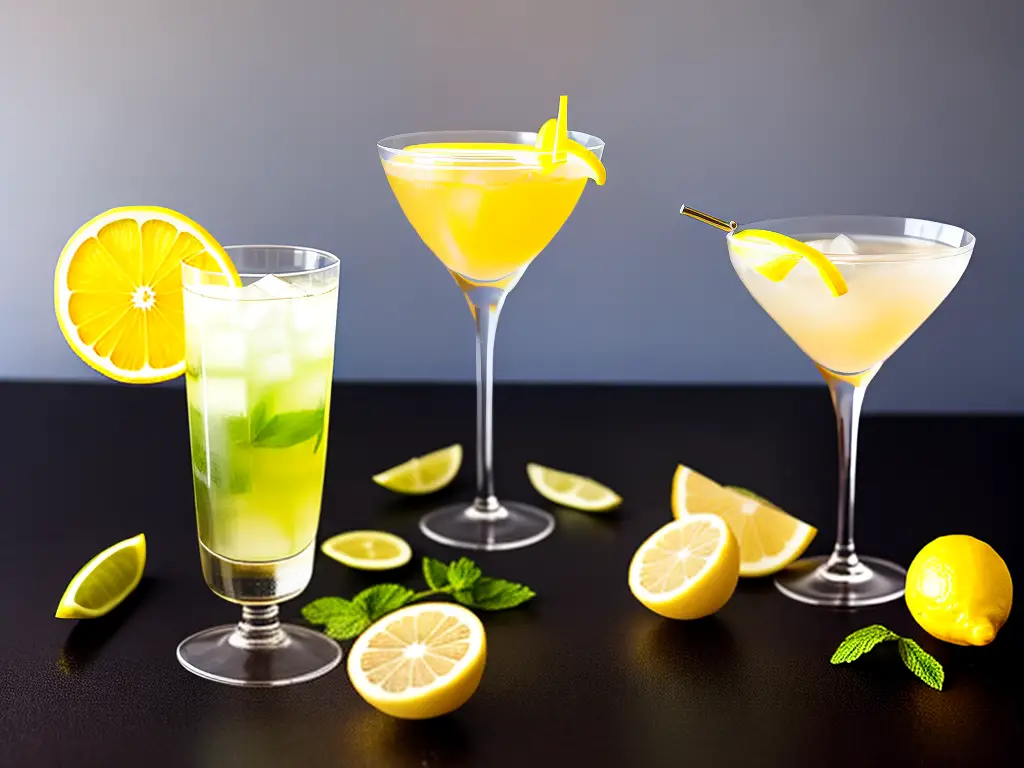
Singapore Sling: A Tantalizing Taste of the Tropics
Imagine sipping a delightful cocktail that transports your taste buds straight into the heart of a tropical paradise. A cocktail that perfectly blends the crispness of gin, the sweetness of cherry brandy, the zest of orange liqueur, and the inviting freshness of pineapple juice, all topped with a dash of grenadine. Well, that heavenly concoction exists, and it’s called the Singapore Sling.
The Singapore Sling is a vibrant gin-based cocktail that has been delighting enthusiasts worldwide since its creation over a century ago. Believed to have originated at the Long Bar in Singapore’s famed Raffles Hotel, this alluring cocktail has become an icon in the world of mixology.
As you lift the glass, the luscious aroma of pineapple and orange entices your senses while the brilliant pink hue, courtesy of the grenadine, promises a visual treat. Your first sip reveals a splendid mix of flavors, as the potency of the gin finds a perfect match in the sweet and tangy fruit juices. The cherry brandy and orange liqueur add depth, creating a well-rounded concoction that leaves you craving more.
What sets the Singapore Sling apart from other gin cocktails is its captivating presentation. Each glassful is overflowing with the excitement of the tropics, typically garnished with a slice of juicy pineapple, a twist of citrus peel, and a cherry to complete the picture. As you savor each sip, you can’t help but feel transported to a sun-kissed beach, with palm trees swaying in the breeze and a soothing ocean soundtrack playing in the background.
In an era of increasingly complex and experimental cocktails, the Singapore Sling stands the test of time as a classic, accessible, and refreshing drink. It’s a must-try for gin lovers and tropical-drink-enthusiasts alike, so why not whip up one next time you’re in the mood for a taste of the exotic?
Recipe for Singapore Sling
- 1 1/2 oz Gin
- 1/2 oz Cherry Brandy
- 1/2 oz Orange Liqueur (e.g. Cointreau or Triple Sec)
- 3 oz Pineapple Juice
- 1/2 oz Fresh Lime Juice
- 1/4 oz Grenadine
- Club soda (optional)
- Ice
- Garnish: Pineapple slice, orange or lemon twist, and cherry
Instructions:
- Combine gin, cherry brandy, orange liqueur, pineapple juice, lime juice, and grenadine in a cocktail shaker filled with ice.
- Shake well and strain into an ice-filled highball or Collins glass.
- Top with a splash of club soda if desired, and gently stir.
- Garnish with pineapple slice, citrus twist, and cherry. Enjoy responsibly.
Get ready to dive into the world of tropical cocktails with the ever-popular Singapore Sling, a gin-based treasure that never ceases to delight and impress!

Bramble: The Berrylicious Gin Cocktail You Need to Try
Are you tired of the same old gin cocktails and looking for something new to try? Say hello to the Bramble, a delightful, fruity concoction that bursts with flavor and charm. Ranked at number 8 in our top 10 gin cocktails list, the Bramble is sure to become a new favorite for gin enthusiasts and fruit lovers alike.
The Bramble – A Brief History:
With its origins dating back to the 1980s, the Bramble was created by legendary British bartender, Dick Bradsell. Inspired by the classic Gin Fix, Bradsell gave it a modern twist with the addition of crème de mûre, a delicious blackberry liqueur. The name “Bramble” comes from the blackberry bush (commonly known as the bramble bush) and perfectly captures the irresistible fruity essence of this delightful cocktail.
The Perfect Mix of Flavors:
The beauty of the Bramble lies in its harmonious blend of flavors. Combining gin’s signature botanical notes with the tartness of lemon juice, the sweetness of sugar syrup, and the rich, berry flavor of crème de mûre, this cocktail is like a symphony for your taste buds.
Every sip of a perfectly made Bramble transports you to a lush garden filled with juicy blackberries, where the sun-kissed citrus fruits create a vibrant dance of citrusy notes. The gin provides a firm backbone for these flavors, grounding this fruity cocktail with its distinctive character.
Garnishing the Bramble:
To truly elevate the Bramble, it’s essential to pay attention to the garnishes. Fresh blackberries are a must, adding a juicy burst of flavor and ensuring that there’s no mistaking the star ingredient of this cocktail. A slice of lemon provides a bright contrast to the deep purple hue of the crème de mûre and adds a zesty flourish to the Bramble’s flavor profile.
The visual appeal of the Bramble is undeniable – the cascading layers of gin, lemon juice, sugar syrup, and crème de mûre create a mesmerizing canvas. When garnished with blackberries and lemon, the aesthetic allure is simply unmatched, making it a fantastic option for entertaining guests or simply elevating your cocktail game at home.
In Conclusion:
The Bramble is undoubtedly a hidden gem in the world of gin cocktails. Its fruity charm and captivating visual appeal make it a must-try for anyone looking to expand their gin horizons. So, the next time you’re in the mood for a gin cocktail with a touch of whimsy, give the Bramble a try – you’re in for a berrylicious treat!
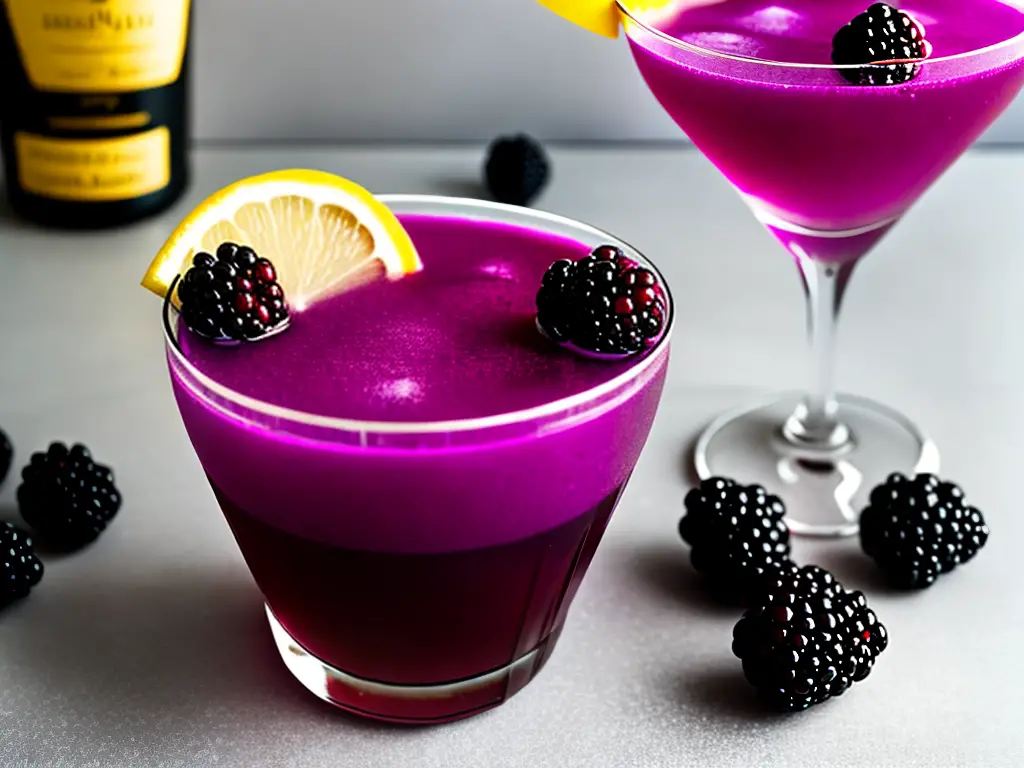
The Timeless Charm of French 75: A Perfect Gin Cocktail for Every Occasion
Get ready to toast to good times as we explore one of the most elegant and classic gin cocktails loved by millions – the French 75. The luxurious blend of gin, lemon juice, sugar syrup, and Champagne in this delightful cocktail has captivated taste buds for decades. Join us as we dive into the history, the recipe, and some interesting variations of the French 75.
A Taste of History:
Originating in the early 20th century, the French 75 owes its name to the powerful 75-mm gun used in World War I. The cocktail’s combination of tartness, sweetness, and a kick of gin mimics the gun’s rapid fire, leaving an indelible impression on those who indulge. Paris is said to be the birthplace of the French 75, with bartender Harry MacElhone of Harry’s New York Bar often credited with its creation.
The Classic Recipe:
To craft the perfect French 75, follow this simple recipe:
- 1.5 oz gin
- 0.75 oz fresh lemon juice
- 0.5 oz sugar syrup
- 3 oz Champagne
- Lemon twist for garnish
Instructions:
- In a cocktail shaker filled with ice, combine the gin, lemon juice, and sugar syrup.
- Shake well until chilled, and strain into a flute glass.
- Top with Champagne and gently stir to combine.
- Garnish with a lemon twist and enjoy!
Variations to Glam-up Your French 75:
The French 75 is a versatile cocktail that allows you to play with different flavors and garnishes. Here are a few twists on the classic version:
- Replace the sugar syrup with a lavender syrup or elderflower liqueur to add more depth and floral notes.
- Experiment with different types of gin, like Old Tom or a more citrus-forward gin, to highlight specific flavors.
- Consider swapping Champagne for Prosecco or another sparkling wine to suit your preference or budget.
- Use a grapefruit twist garnish for a dash of bitterness and contrast to the cocktail’s sweetness.
The French 75 remains a symbol of sophistication, and its charm will never fade. This timeless cocktail is perfect for special occasions or simply elevating a regular evening. Celebrate life in the most stylish way possible, and raise a toast to the world with the unforgettable French 75. Cheers!”

Top 10 Gin Cocktails: #10 Clover Club
The gin cocktail scene has always been an integral part of the world of mixology. With its sophisticated taste and versatile flavor profile, gin complements various ingredients producing mind-blowing concoctions. In this series of top 10 gin cocktails, we take you through some of the most exquisite gin-based drinks you ought to try. At number 10, we have the elegant Clover Club cocktail.
Originating from the exclusive Philadelphia men’s club of the same name in the late 1800s, the Clover Club has stood the test of time as a pre-Prohibition classic cocktail. Known for its delicate flavors, frothy texture, and pale pink hue, the Clover Club exudes an air of refinement and sophistication, making it a perfect choice for those special evenings or a fancy night out.
The star ingredient in this delightful cocktail is, of course, gin. Complementing this liquor are a zesty lemon juice, sweet raspberry syrup, and the most peculiar addition of an egg white. Although not everyone may be a fan of raw egg whites in their cocktails, it’s essential to create the frothy and creamy consistency that sets the Clover Club apart from its gin-based siblings.
To make the Clover Club, you’ll need:
- 2 oz gin
- 1 oz fresh lemon juice
- 1 oz raspberry syrup
- 1 egg white
- Fresh raspberries, for garnish
In a cocktail shaker filled with ice, pour in the gin, lemon juice, raspberry syrup, and egg white. Shake well to combine and emulsify the egg white. Strain the mixture into a chilled coupe or martini glass. Garnish with fresh raspberries for that picture-perfect touch.
The Clover Club is a testament to the grace and charm of classic cocktails, with its flawless blend of botanical flavors of gin, tangy lemon, and fruity sweetness of raspberry syrup. And while the addition of egg white may not be everyone’s cup of tea, it adds an exquisite touch that elevates the drinking experience to new heights.
So, whether you’re a gin connoisseur or simply looking for an elegant cocktail to impress your guests, the Clover Club is a must-try. As we continue this journey through the top 10 gin cocktails, we promise to bring you an eclectic mix of flavors that truly showcase the magnificence of gin. Stay tuned for our next gem in this remarkable list of gin cocktails. Cheers!
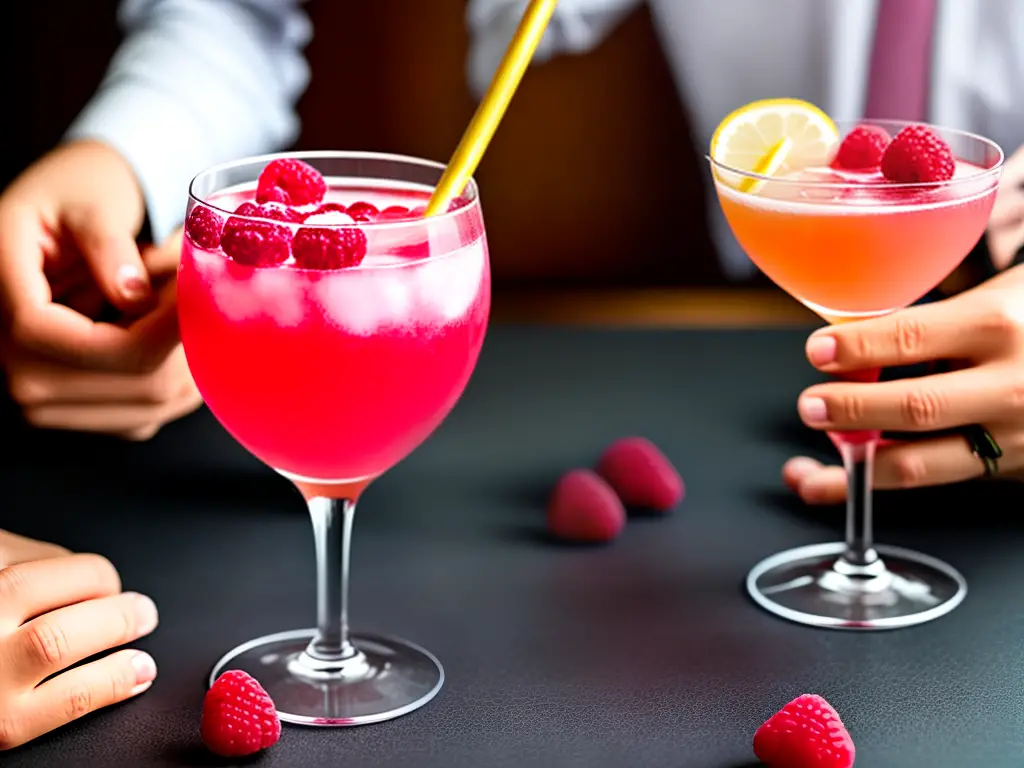
These top 10 gin cocktails provide a fantastic introduction to the world of gin-based drinks. Each one of these cocktails varies in flavor, complexity, and appearance, ensuring there’s something for everyone to enjoy. As you explore these delightful mixtures, you may find some new favorites to add to your list of go-to drinks. So next time you’re craving a refreshing libation, grab your trusty bottle of gin and mix up one (or more) of these exquisite cocktails. Cheers!
How to Clean Sneakers
Keeping your sneakers clean and looking their best is an essential aspect of maintaining their longevity and preserving their appearance. In this comprehensive guide, you will uncover the knowledge and techniques required to effectively clean various sneaker materials, choose the right cleaning supplies, and address common stains and issues. By the end of this article, you’ll have the confidence and know-how to tackle any sneaker cleaning challenge with ease.
Understanding Sneaker Materials and Cleaning Methods
Before you start cleaning your sneakers, it’s essential to understand the different materials used in their construction. This knowledge will help you choose the appropriate cleaning methods and products for each kind of material. The most common materials found in sneakers are fabric, leather, suede, and rubber.
- Fabric: A variety of fabrics can be used in sneakers, including canvas, mesh, and knit materials. Fabric sneakers are generally lightweight and breathable, making them ideal for casual wear and sports activities. They may be the easiest to clean, as most fabric materials can be washed with standard cleaning products or even machine washed, depending on the manufacturer’s instructions.
- Leather: Leather sneakers are typically made from animal hide and can be more durable and water-resistant than fabric materials. Genuine leather sneakers can be more expensive than other materials, but they also can provide more comfort and support. Leather sneakers should be cleaned with specialized leather cleaners to prevent damage to the material and maintain their appearance.
- Suede: Suede is a type of leather that has a soft, fuzzy surface. It’s a delicate material that can be easily scratched or damaged if not treated properly. Suede sneakers should be cleaned with specialized suede cleaners and brushes, as they can’t be cleaned with water or standard cleaning products.
- Rubber: Rubber is commonly used for the sole of sneakers and can also be found in some upper sections for added protection and durability. It’s a water-resistant material that provides excellent traction and support. Rubber can be easily cleaned with a mixture of water and mild soap or specialized rubber cleaners.
Once you understand the different materials used in your sneakers, you’ll be able to choose the most effective cleaning techniques for each material. Here are some general guidelines for cleaning different sneaker materials:
- Fabric: Fabric sneakers can usually be cleaned with a soft brush, mild detergent, and water. Some fabric sneakers can also be machine washed, but always follow the manufacturer’s instructions. Allow fabric sneakers to air dry to avoid damaging the material, and avoid exposing them to direct heat.
- Leather: To clean leather sneakers, use a soft, damp cloth or a specialized leather cleaner. Apply the cleaner to the surface of the leather and gently buff away dirt and stains. Do not use water or soap, as they can damage the leather. Condition leather sneakers regularly to maintain their appearance and prevent drying and cracking.
- Suede: Suede sneakers require special care to maintain their delicate surface. Use a specialized suede cleaner and brush to gently clean the material, and avoid using water or soap. To prevent the suede from getting stained or discolored, you can also apply a suede protector spray after cleaning.
- Rubber: To clean rubber soles and details, mix water with a small amount of mild soap, and use a soft-bristle brush to scrub away dirt and stains. Wipe the rubber with a damp cloth to rinse off any soap residue, and pat dry with a clean cloth or towel.
Remember to always follow the manufacturer’s care instructions for your specific sneakers and materials, as improper care can cause damage or void warranties. Regularly cleaning and maintaining your sneakers will help prolong their life and keep them looking fresh and stylish.

How to Choose the Right Cleaning Supplies for Your Sneakers
Cleaning sneakers can significantly improve their appearance and longevity. However, it’s essential to choose the right cleaning supplies to protect your sneakers’ material and avoid causing damage. Here is a simple guide to help you select the appropriate cleaning products for your sneakers.
Step 1: Identify your sneakers’ material
First and foremost, you need to determine the specific materials of your sneakers. The most common sneaker materials include canvas, leather, suede, mesh, and synthetic materials like rubber and plastic. Knowing the exact material will help you select the appropriate cleaning products without causing damage to your sneakers.
Step 2: Research materials-specific cleaning products
Check the manufacturer’s guidelines and any online reviews or articles related to cleaning supplies specifically recommended for your sneakers’ material. Avoid using harsh chemicals or abrasive tools that can damage the material or discolor your sneakers.
Step 3: Consider a sneaker cleaning kit
A sneaker cleaning kit often includes all the essential cleaning supplies like a soft brush, microfiber cloth, mild detergent, and instructions. If you’re not sure where to start, consider investing in a sneaker cleaning kit that caters to a wide range of materials. This can save you time and ensure you use the right products to clean your sneakers effectively.
Step 4: Gather individual cleaning supplies
If you prefer to gather individual cleaning supplies or already have some of them at home, make sure you have:
- A soft brush: Ensure the brush has soft bristles made of natural fibers or high-quality synthetic ones. Using a soft brush will prevent scratches and damages to your sneakers’ material. If your sneakers are made of delicate materials like suede, consider a specific suede brush.
- Microfiber cloth: A microfiber cloth is perfect for wiping away dirt without causing scratches. It’s suitable for cleaning various materials such as leather, mesh, and synthetic materials.
- Mild detergent: Opt for a gentle, mild detergent, or even a specialized sneaker cleaning solution for cleaning your sneakers. Harsh soaps and chemicals can be damaging and cause discoloration.
- (Optional) Protective spray: For materials like suede or nubuck, a protective spray can help keep your sneakers looking fresh and prevent future stains.
Step 5: Assemble the supplies
After selecting the appropriate cleaning products for your sneakers, assemble all your supplies and place them in a convenient location so that they are readily accessible when you’re ready to clean your sneakers.
Choosing the right cleaning supplies is crucial to ensure your sneakers are cleaned effectively without causing any damage. By following these simple steps to determine the ideal cleaning products for your sneakers’ specific material, you’ll keep your sneakers looking fresh and extend their lifespan.
Pre-Cleaning Preparation for Sneaker Cleaning
Cleaning your sneakers properly can help extend their lifespan and keep them looking fresh. To ensure a thorough clean, it’s important to prepare your sneakers before you start cleaning. Here are the steps to follow for pre-cleaning preparation:
-
Gather your materials: Before you begin, ensure you have the necessary tools and cleaning products to clean your sneakers. You will need:
-
A soft brush or toothbrush
-
A mild soap or sneaker cleaner
-
A bowl or container for mixing water and soap
-
A clean cloth or sponge
-
A towel
-
Optional: Sneaker protectant spray
-
-
Remove any loose dirt: Begin by knocking your shoes together outside to remove any loose dirt, dust, or debris. If there’s still dirt remaining on the surface of your sneakers, use a soft brush to gently brush away the dirt. Be careful not to damage the shoe’s fabric or materials in the process.
-
Remove the laces: If your sneakers have laces, take the time to remove them before cleaning. This will enable you to clean the surface of your sneakers and laces separately, ensuring they’re both cleaned properly. When removing the laces, take note of their original position so you can easily lace them back up later.
-
Remove the insoles: If your sneakers have removable insoles, take them out before cleaning. This will allow you to clean them separately and ensure they dry completely before reinserting them into your sneakers. If your insoles are not removable, use caution when cleaning around them so as to not saturate them with water.
-
Inspect for any damage or special cleaning needs: While preparing your sneakers, take a moment to inspect them for any damage or specific areas that may need extra attention during the cleaning process. This may include scuff marks, stains, or delicate fabric areas.
-
Prepare your cleaning solution: Mix a small amount of mild soap or sneaker cleaner with water in a bowl or container. You’ll want the solution to be bubbly but not overly soapy.
Now that you’ve completed the pre-cleaning preparation, you’re ready to start cleaning your sneakers. Remember to take care when cleaning delicate fabrics or materials, and always allow your shoes to dry completely before wearing them again. To further protect your sneakers after cleaning, consider applying a sneaker protectant spray to help reduce future staining and dirt accumulation.
Hand Cleaning Techniques for Sneakers
Cleaning your sneakers by hand is an effective way to maintain and prolong their life. It’s important to master the proper techniques for scrubbing, rinsing, and drying to avoid damaging your sneakers. Here’s a step-by-step guide on hand cleaning your sneakers using a soft brush, cloth, and mild detergent.
Materials needed:
- Soft-bristle brush or toothbrush
- Cloth or sponge
- Mild detergent or sneaker cleaner
- Bowl or container
- Warm water
- Paper towels or soft cloth
Instructions:
- Preparation: First, remove the laces from your sneakers and set them aside. If they’re also dirty, you can clean them by hand with soapy water or put them in a mesh bag and throw them in the washing machine.
- Dry brushing: Start by using a soft-bristle brush or toothbrush to brush off any loose dirt or debris from your sneakers. Pay particular attention to the soles and any visible crevices.
- Mixing the cleaning solution: In a bowl or container, mix warm water with a few drops of mild detergent or sneaker cleaner. It’s crucial to use a gentle detergent to prevent any damage to your sneakers’ material.
- Starting the cleaning process: Dampen your cloth or sponge in the cleaning solution and wring out any excess water. Gently wipe the entire surface of your sneakers using the damp cloth or sponge. Be careful not to apply too much pressure, as this can damage the material.
- Scrubbing the sneakers: Dip your soft-bristle brush or toothbrush into the cleaning solution and gently scrub your sneakers in a circular motion. Focus on areas with stubborn stains and dirt, such as the soles and any crevices. Be mindful not to scrub too hard on delicate materials like suede or mesh.
- Rinsing: Once you’ve scrubbed your sneakers, use a clean, damp cloth or sponge to wipe off the cleaning solution. Make sure to rinse the cloth or sponge with fresh water often to avoid spreading dirt and soap residue across the sneakers.
- Drying the sneakers: After rinsing and making sure there’s no soap residue remaining, gently pat your sneakers dry using paper towels or a soft cloth. Do not use direct heat from hair dryers or heaters, as this can cause damage to your sneakers.
- Stuffing the sneakers: To help your sneakers maintain their shape and speed up the drying process, stuff them with crumpled paper towels or a soft cloth. Make sure not to overstuff them, as this can lead to stretching the material.
- Air-drying: Allow your sneakers to air-dry in a well-ventilated area, away from direct sunlight or heat sources. This can take anywhere from a few hours to a full day or more, depending on the material of your sneakers.
- Re-lacing and storage: Once your sneakers are completely dry, re-lace them and store them in a cool, dry place until your next use.

Machine Washing Your Sneakers: Benefits, Risks, and Instructions
Cleaning your sneakers is essential for both hygiene and maintaining their appearance. Machine washing sneakers is a convenient and effective method to accomplish this. However, it’s critical to follow the correct procedure to protect your sneakers during the washing cycle. Let’s explore the benefits, risks, and instructions for machine washing sneakers.
Benefits of Machine Washing Sneakers:
- Easy and efficient: Machine washing sneakers saves time and effort compared to hand washing.
- Deeper clean: A washing machine can provide a more thorough cleaning, especially for hard-to-reach areas.
- Odor removal: Machine washing can help to eliminate unpleasant odors from your sneakers.
Risks of Machine Washing Sneakers:
- Damage to the sneakers: Improper washing settings or overloading the machine may cause damage to the sneakers’ materials, including the fabric, glue, or rubber sole.
- Wear and tear: Over time, excessive machine washing can contribute to the deterioration of your sneakers.
- Fading colors: Some sneakers may fade in color or lose their vibrancy during the washing process.
Instructions for Machine Washing Sneakers:
- Consult the manufacturer’s instructions and tags: Before proceeding, review the manufacturer’s guidelines to ensure that your sneakers are machine washable. Some materials may not be suitable for machine washing.
- Remove any loose dirt and debris: Begin by brushing off any visible dirt from the surface of your sneakers. This will prevent clogging the washing machine and ensure better cleaning results.
- Remove laces and insoles: Take out the laces and insoles, as these should be washed separately to avoid tangling and damage to your sneakers.
- Pre-treat any stains: To improve the chances of removing any tough stains or scuffs on your sneakers, use a pre-treatment solution or a mixture of water and laundry detergent to apply directly to the affected area. Gently scrub the area with a soft brush, then let the solution sit for 15-20 minutes before washing.
- Place your sneakers in a laundry bag: To minimize potential damage, use a mesh laundry bag or a pillowcase to hold your sneakers during the washing cycle.
- Load the washing machine: Add a few towels or clothes to the load to balance the machine and provide extra cushioning for your sneakers. Do not overload the washing machine, as this may cause damage to the sneakers and the machine itself.
- Choose the correct settings: Select a gentle or delicate cycle and use cold water to protect your sneakers from damage. It’s also recommended to use a mild detergent suitable for delicate fabrics.
- Start the washing cycle: Once you’ve selected the appropriate settings, start the washing cycle and allow your sneakers to be cleaned.
- Air dry your sneakers: To maintain the shape and prevent damage to your sneakers, allow them to air dry in a well-ventilated area, away from direct sunlight or heat sources. Avoid using a tumble dryer, as this can cause shrinking or damage to the materials.
- Re-lace and re-insert insoles: After your sneakers are fully dry, you can re-insert the insoles and re-lace your shoes. Your sneakers are now clean and ready to wear.
How to Dry Sneakers the Right Way: Best Methods and Techniques
Drying your sneakers properly is essential to maintaining their shape, appearance, and overall longevity. Many of the traditional methods to dry shoes, such as using a radiator or a direct heat source, can actually cause more harm than good. So, it’s crucial to understand the best ways to dry your sneakers without causing any damage. This guide will teach you air drying and shoe dryer techniques that safely and effectively dry your sneakers.
Air Drying
Air drying is the simplest and most cost-effective method to dry your sneakers. It allows the shoes to dry gradually and naturally, preventing damage to the sneaker’s materials. Here is how to air dry your sneakers correctly:
- Remove the insoles and laces: Start by taking out the insoles and laces. This allows better air circulation, speeding up the drying process, and ensuring every part of the shoe dries completely.
- Clean your sneakers: Before drying, make sure your sneakers are clean to prevent any dirt, grime, or moisture from being trapped inside.
- Stuff with newspaper, paper towels, or a dry cloth: To help absorb moisture and maintain the shape of the sneakers, stuff them with newspaper, paper towels, or a dry cloth. Make sure not to overstuff them, as this might cause the sneakers to lose their shape.
- Place the sneakers in a well-ventilated area: Find a spot with good air circulation, such as outdoors or near an open window, and place the sneakers on a flat surface. Make sure they are not exposed to direct sunlight, as this might cause the colors to fade.
- Rotate the sneakers: Every 30 minutes to an hour, turn the sneakers to ensure that they dry evenly. Replace the newspaper, paper towels, or dry cloth as needed.
- Allow the sneakers to dry completely: Depending on the level of moisture, air drying may take several hours to a full day.
Using a Shoe Dryer
Shoe dryers are devices specifically designed to dry shoes safely and efficiently. They use warm, gentle air circulation to dry your sneakers without causing damage. Here’s how to use a shoe dryer:
- Choose the right shoe dryer: There are various types of shoe dryers available in the market, such as electric or portable ones. Choose a shoe dryer that best fits your needs and is compatible with your sneakers’ material.
- Set up the shoe dryer: Place the shoe dryer on a flat, stable surface and follow the manufacturer’s instructions to properly set it up.
- Place the sneakers onto the shoe dryer: Make sure the sneakers are securely placed on the dryer, ensuring proper air circulation.
- Use the appropriate settings: Most shoe dryers have adjustable settings to accommodate different shoe materials and drying times. Choose the appropriate setting for your sneakers.
- Monitor the drying process: Keep an eye on your sneakers while they are on the shoe dryer. Check them periodically to ensure they are drying evenly and not overheating.
- Remove the sneakers once they are dry: Once your sneakers are completely dry, remove them from the shoe dryer and allow them to cool down before wearing them.
Both air drying and using a shoe dryer are effective and safe methods to dry your sneakers without causing damage. Make sure to follow the instructions and avoid drying techniques involving direct heat sources like radiators. Properly drying your sneakers will keep them looking and feeling great for an extended period.
How to Clean White Sneakers: Tips and Techniques for Keeping Your Shoes Bright
White sneakers are a staple in many wardrobes, but keeping them clean can be a challenge. Luckily, there are several tips and techniques to maintain the bright white appearance of your white sneakers without causing yellowing or discoloration. Follow these steps on how to clean your white sneakers for a fresh and clean look every time.
Materials needed:
- Mild liquid soap or sneaker cleaning solution
- Soft-bristle toothbrush or a sneaker cleaning brush
- Clean cloth or sponge
- Warm water
- White vinegar or baking soda (optional for tough stains)
- Microfiber cloth (optional)
- Magic eraser (optional)
Step-by-step instructions:
- Remove the laces: Take off the laces from your sneakers to make sure all parts of the shoe can be easily cleaned. Laces can be cleaned separately by soaking them in a mixture of warm water and soap. Rinse well and let them air dry.
- Brush off excess dirt: Before applying any cleaning solution, brush off any excess dirt from the sneakers using a soft-bristle toothbrush or sneaker cleaning brush. This will prevent the dirt from spreading while cleaning.
- Prepare a cleaning solution: Mix a small amount of mild liquid soap or a sneaker cleaning solution with warm water. You can also use a 1:1 solution of white vinegar and water for tough stains or a paste made from baking soda and water for ground-in dirt.
- Apply the cleaning solution: Dip a clean cloth or sponge into the cleaning solution and gently rub it onto the sneakers, focusing on the stained areas. For tougher stains or hard-to-reach areas, use a toothbrush or sneaker cleaning brush to gently scrub the stains away.
- Rinse your sneakers: After cleaning your sneakers, use a clean cloth or sponge dipped in fresh warm water to wipe away the soap residue. Make sure to rinse thoroughly, as any leftover soap can leave a residue on your shoes.
- Dry your sneakers: Use a clean, dry cloth or microfiber cloth to gently pat the sneakers dry. Avoid using direct heat sources, such as hair dryers or radiators, as they can damage the sneakers’ material and cause yellowing.
- Tackle scuff marks (optional): If you have scuff marks on the soles of your white sneakers, gently rub a magic eraser over the areas to remove the marks.
- Let your sneakers air dry: After cleaning and drying your sneakers, allow them to air dry completely before wearing or storing them. Avoid direct sunlight as it may cause yellowing or discoloration.
- Maintain your white sneakers: To keep your white sneakers looking clean and bright, try to clean them regularly and avoid wearing them in muddy or dirty environments. If you notice any stains, address them as soon as possible for easier cleaning.
With a bit of effort and care, you can keep your white sneakers looking clean and bright. Remember to clean them regularly and use the right techniques and products to avoid damaging or discoloring your shoes. In no time, you’ll have fresh, white sneakers that make a statement wherever you go.
How to Clean Leather and Suede Sneakers
Cleaning Leather Sneakers:
- Gather necessary supplies: You will need a clean cloth or sponge, mild soap (such as hand or dish soap), water, leather cleaner, and leather conditioner.
- Remove the laces: Before you start cleaning, remove the laces from your sneakers. You can wash them separately, either by hand or by placing them in a laundry bag and washing in a washing machine.
- Prep the leather: Begin by wiping the surface of your leather sneakers with a clean, damp cloth or sponge to remove any loose dirt and debris.
- Create a cleaning solution: Mix a few drops of mild soap with lukewarm water, and then dip the clean cloth or sponge in the solution.
- Clean the leather: Gently scrub the leather with the soapy cloth, working in sections and focusing on any particularly dirty or stained areas. Be careful not to use too much water or soap, as this can damage the leather.
- Rinse and dry: Use a clean, damp cloth or sponge to wipe away any soap residue from the sneakers. Then use a soft, dry cloth to gently dry the leather.
- Apply leather cleaner: Follow the manufacturer’s instructions for the leather cleaner, applying it to the surface of your sneakers with a clean, dry cloth.
- Condition the leather: After the sneakers are completely dry, apply leather conditioner to help protect and maintain the leather. Again, follow the manufacturer’s instructions for proper application.
- Let the sneakers dry: Allow your sneakers to air-dry completely, away from direct sunlight or heat sources. Do not use a hairdryer or other heat source to speed up the drying process, as this can damage the leather.
- Re-lace the sneakers: Once your sneakers are completely dry, replace the clean and dry laces.
Cleaning Suede Sneakers:
- Gather necessary supplies: You will need a suede brush, suede eraser, clean cloth, and suede cleaner or white vinegar.
- Remove the laces: As with leather sneakers, remove the laces from your suede sneakers before cleaning. Wash them separately as instructed above.
- Brush off loose dirt: Using the suede brush, gently brush the surface of your sneakers to remove any loose dirt and debris.
- Remove stains and scuffs: For scuff marks or stains, use the suede eraser to gently rub the affected areas. Be careful not to apply too much pressure, which can damage the suede.
- Clean the suede: For dirt that cannot be removed with the eraser, you can use a suede cleaner or a mixture of equal parts water and white vinegar. Moisten a clean cloth with the cleaner or vinegar solution, and gently dab it on the stained area. Do not rub or apply too much liquid, as this can damage the suede.
- Dry the sneakers: Allow the sneakers to air-dry completely, away from direct sunlight or heat sources.
- Restore the nap: Once the sneakers are completely dry, use the suede brush to gently brush the surface and restore the nap. Brush in a single direction to avoid damaging the suede.
- Protect your shoes: You may also consider using a suede protective spray to help prevent future stains and dirt buildup. Follow the manufacturer’s instructions for proper application.
- Re-lace the sneakers: Replace the clean and dry laces once your sneakers are completely dry.

Maintaining Sneaker Cleanliness
Keeping your sneakers clean and fresh is essential for maintaining their appearance and durability. By following some simple steps, you can easily keep your sneakers looking brand new for a long time. Here’s how to maintain sneaker cleanliness:
- Regular cleaning: Develop a habit of cleaning your sneakers regularly, preferably after every few wears. This will prevent the buildup of dirt and stains and keep them looking fresh.
- Remove dirt: Use a soft brush or an old toothbrush to remove dirt and debris from the surface of your sneakers. You may also use a damp cloth or sponge to gently wipe and clean the surface of your sneakers.
- Wash your sneakers: For canvas or fabric sneakers, you may use a mild detergent to clean your sneakers. Mix the detergent with warm water and gently scrub the surface of your sneakers using a soft brush. Rinse thoroughly and air dry. Leather or suede sneakers should be cleaned with products specifically designed for those materials.
- Clean the soles: Use a brush to clean the outsoles of your sneakers, removing any dirt or debris.
- Wash the laces: Detach the laces and wash them separately using a mild detergent. Allow them to air dry before relacing your sneakers.
- Use protective products: Apply sneaker protectant sprays or creams to create a barrier on the surface of your sneakers. These products help in repelling dirt, stains, and water, making it easier for you to clean and maintain them. Make sure to follow the manufacturer’s instructions for proper application.
- Proper storage: Store your sneakers in a cool, dry place away from direct sunlight. Sunlight can cause yellowing or discoloration of your sneakers. If possible, use a shoe rack or shoe organizer to keep your sneakers organized and prevent them from being crushed or deformed.
- Use shoe trees: Insert shoe trees or newspaper into your sneakers after each wear to help maintain their shape, absorb moisture, and reduce odors. Shoe trees made of cedar wood are especially beneficial, as they not only help maintain the shape but also have a pleasant scent that helps to deodorize your shoes.
- Rotate your sneakers: Avoid wearing the same pair of sneakers every day. Rotating your sneakers will allow them to air out and reduce the wear and tear on a single pair.
- Spot cleaning: Address stains or spills as soon as possible. Use a gentle cleaner and a soft brush to remove the stain. For suede or leather sneakers, use a specialized cleaner and follow the manufacturer’s instructions for best results.
By following these steps and incorporating regular cleaning, using protective products, and practicing proper storage techniques, you can maintain the cleanliness and appearance of your sneakers, ensuring that they remain fresh and stylish.
How to Clean Sneakers: Addressing Common Stains and Issues
Cleaning your sneakers can seem like a daunting task, particularly when faced with various stains and issues. Fear not! In this guide, we’ll cover methods and products that will help you tackle common sneaker stains like scuffs, grass stains, or oil marks. With a little patience and the right techniques, your sneakers will look as good as new!
1. Gather your materials:
- A soft bristle brush (an old toothbrush will do)
- A clean cloth or towel
- Mild laundry detergent or dish soap
- Warm water
- Stain-specific cleaning products (we’ll go over these in the sections below)
- A bowl or container for mixing cleaning solutions
- Optional: Magic eraser or melamine foam for scuffs
2. Preliminary cleaning:
- Remove any dirt, mud, or debris by brushing it off with a soft bristle brush.
- If needed, use a slightly damp cloth to remove any remaining dirt.
- Let the sneakers air dry completely before proceeding.
3. Scuffs:
- Dampen a clean cloth or sponge with warm water and apply a small amount of mild laundry detergent or dish soap.
- Gently scrub the scuffed area in a circular motion.
- If the scuffs are still visible, consider using a magic eraser or melamine foam. Lightly dampen the magic eraser and gently scrub the scuffed area.
- Wipe away any excess soap with a clean, damp cloth.
- Allow the sneakers to air dry.
4. Grass stains:
- Mix a solution of 1 part warm water, 1 part white vinegar, and 1 part dish soap.
- Soak the soft bristle brush in the solution and gently scrub the grass-stained area in a circular motion.
- Rinse the area with clean water and use a clean cloth to gently blot the area dry.
- Let the sneakers air dry. If the stain persists, repeat the steps above.
5. Oil marks:
- Apply a small amount of dish soap directly onto the oil stain.
- Using a soft bristle brush, gently scrub the oil-stained area in a circular motion.
- Rinse the area under warm water and gently pat dry with a clean cloth.
- Allow the sneakers to air dry.
6. Mud stains:
- Let the mud dry completely, then brush off as much as possible with the soft bristle brush.
- Mix a small amount of laundry detergent and warm water to create a soapy solution. Dip the brush in the solution and scrub the mud-stained area in a circular motion.
- Rinse the area with clean water and use a clean cloth to gently blot the area dry.
- Allow the sneakers to air dry.
7. Post-cleaning care:
- After your sneakers have dried, check for any remaining stains or issues. If necessary, repeat the appropriate stain-specific cleaning methods above.
- To prevent future stains, consider using a sneaker protector spray according to the manufacturer’s instructions.
- Store your shoes in a cool, dry place away from direct sunlight to help maintain their appearance and lifespan.
Now that you have gained valuable insights into cleaning sneakers, you can put your newfound knowledge into practice and ensure your shoes remain fresh and stylish for years to come. Remember to always carefully consider the materials of your sneakers, use the appropriate cleaning supplies, and follow the recommended techniques for each specific type of stain. With a little effort and attention to detail, your sneakers will maintain their pristine appearance and serve you well for many miles ahead.
Retro Sneakers
Retro sneakers have undoubtedly left an indelible mark on the world of sports, fashion, and pop culture. As we journey through the evolution of these iconic shoes, we will discover their humble beginnings, their rise to prominence, and their immense influence on both sneakerheads and casual wearers alike. By examining the history, popular brands, iconic models, collaborations, and roles in sports, fashion, and pop culture, we can better appreciate the artistry and impact of retro sneakers in shaping our modern world.
A Brief History of Retro Sneakers
The history of retro sneakers dates back to the early 20th century when athletic shoes were introduced for various sports, such as basketball and running. One of the first iconic brands to emerge was Converse, which released its All-Star model in 1917, initially designed for basketball players. The Converse All-Stars, also known as “Chuck Taylors,” became a cultural symbol and are still popular today, transcending from sportswear to casual fashion.
During the late 1960s and early 1970s, sneakers became more prominent in popular culture, with brands such as Adidas and Puma on the rise. The Puma Clyde, named after basketball player Walt “Clyde” Frazier, and the Adidas Superstar, known for its distinctive shell-toe, entered the sneaker market during this time. Both became staples for sports enthusiasts and sneaker collectors alike. These designs marked a turning point in sneaker history as they transitioned towards more innovative and stylish options for consumers, no longer strictly serving athletic purposes.
The 1980s saw the advent of the “sneakerhead” culture, with the release of several influential retro sneakers, such as the iconic Air Jordan 1 by Nike. The collaboration between basketball legend Michael Jordan and Nike designer Tinker Hatfield propelled the sneaker industry to new heights, as the Air Jordan 1 marked the beginning of an extensive series that continues to captivate sneaker enthusiasts to this day. Additionally, during this era, the Reebok Classic and Adidas Stan Smith gained popularity, solidifying their place in retro sneaker history.
In the 1990s, sneakerheads were captivated by chunkier designs and collaborations with renowned designers. One of the most notable releases of this decade was the Nike Air Max line, which introduced visible air cushioning to athletic footwear. This unique design element has since become a trademark of the Nike brand. Also during this era, FILA released the Disruptor silhouette – a best-selling retro sneaker that has seen a resurgence in recent years.
Retro sneakers continue to dominate the market today, with numerous brands and designers finding inspiration in both the functional and artistic elements of previous eras. Collaborations between luxury fashion houses and sportswear brands blur the lines between sneaker culture and high fashion, leading to a growing appreciation for retro designs among new generations of sneaker enthusiasts. As a result, many iconic models from the past are regularly reissued or reimagined, ensuring that the rich history of retro sneakers continues to endure and evolve. One such brand that has played a significant role in popularizing retro sneakers is Nike.

Top Retro Sneaker Brands
Over the years, Nike has popularized numerous iconic styles that continue to be widely sought after today. One of the earliest Nike classics is the Cortez, which first debuted in 1972 as a running shoe. However, it may be the Air Force 1, released in 1982, that cemented Nike’s position in both sneaker culture and popular culture. The Air Jordan line, featuring NBA legend Michael Jordan, became an instant phenomenon since the release of the first Air Jordan 1 in 1984. Today, retro Jordans are among the most desirable and collectible sneakers in the market, demonstrating the immense and enduring appeal of retro sneaker designs.
Adidas, another giant in the retro sneaker market, has managed to maintain its iconic status through the release of classic silhouettes that date back to the 1960s. The German brand’s most notable contribution to the sneaker culture is perhaps the Adidas Superstar, which was first released in 1969 as a basketball shoe.
Since then, the Superstar has maintained its popularity, becoming a staple in hip-hop fashion and culture. Other iconic Adidas retro sneakers include the Stan Smith, Gazelle, and Samba, all of which continue to make fashion statements today.
Converse, known for their classic canvas high-top Chuck Taylor All Star sneaker, has been a major player in the retro sneaker game since the early 20th century. First introduced in 1917, the Chuck Taylor All Star quickly became the go-to basketball shoe of the era. Nearly a century later, this style remains continually popular – transcending sports and becoming a cornerstone of streetwear and youth culture.
Converse has sustained its relevance over the years by collaborating with other brands and artists, continuously reinterpreting their iconic sneakers for new generations.
Puma, another key player in the retro sneaker market, has its roots in the 1948 split of the Dassler brothers, who founded Adidas. Establishing Puma as its own brand, the company has since released a range of iconic styles that have played a role in shaping sneaker culture. The Puma Suede, first released in 1968, quickly became a popular choice for both athletes and sneaker enthusiasts.
To this day, Puma retains its classic aesthetic while collaborating with high-profile brands and celebrities such as Rihanna, Selena Gomez, and The Weeknd, keeping the brand fresh and innovative.
Reebok, a brand that originated in the UK, has played a significant role in the retro sneaker scene. The launch of their Classic Leather in 1983 catapulted the brand to success, as the shoe became a sensation in both the athletic and casual footwear markets. Reebok’s impact on sneaker culture was further solidified with the introduction of the Reebok Pump in 1989, which featured a custom fit with its unique ‘pump’ technology. This innovative design quickly gained traction and popularity, particularly in basketball circles.
Iconic Sneakers That Changed the Game
In recent years, Reebok has made a concerted effort to reissue these iconic styles, effectively maintaining their popularity among new generations of sneakerheads. Similarly, the Air Jordan 1, first released in 1985 as a collaboration between NBA legend Michael Jordan and the footwear giant Nike, has also become an iconic retro sneaker. This revolutionary high-top sneaker combined style, performance, and an unbeatable marketing strategy to create a cultural phenomenon that changed the landscape of athletic footwear forever. The Air Jordan 1 not only holds an important place in the history of sports marketing but also played a significant role in shaping sneakerhead culture as a whole. The shoe’s initial release has spawned countless colorways, collaborations, and iterations, becoming a staple in the collections of sneaker enthusiasts across the globe.
Another classic sneaker model that has stood the test of time is the Converse Chuck Taylor All Star, first introduced in 1917. Named after American basketball player Chuck Taylor, who endorsed the shoe and helped promote its popularity, the Chuck Taylor All Star became synonymous with basketball and street culture. Featuring a simple canvas upper, rubber sole, and distinctive metal eyelets, the shoe’s minimal design has made it appealing to a wide range of consumers, including musicians, skateboarders, and hip-hop artists. This versatility has kept the Converse Chuck Taylor All Star at the forefront of sneaker culture for over a century.
The Adidas Stan Smith is yet another retro sneaker that has remained influential throughout the years. First released in the 1960s as a tennis shoe, this classic low-top silhouette features a clean and minimalist design, adorned with the iconic Adidas three stripes in perforated form. In the 1970s, the shoe was named after tennis legend Stan Smith, who became the face of the silhouette, further propelling the sneaker to mainstream popularity. Over the years, the Stan Smith has been embraced by fashion designers, celebrities, and sneakerheads alike, and its simple yet iconic aesthetic ensures continued relevance in the world of sneakers.
Released in 1982, the Nike Air Force 1 was a groundbreaking sneaker on various fronts. It was the first basketball shoe to incorporate Nike’s innovative "Air" cushioning technology, providing unparalleled comfort and support to players on the court. The shoe’s bulky design and distinctive swoosh also made it a hit amongst sneakerheads, transforming it into a cultural phenomenon. Named after the US presidential airplane, the Air Force 1 further solidified its presence in popular culture through association with hip-hop fashion and music scenes, becoming a symbol of streetwear and retro sneaker culture.
Another iconic sneaker that deserves a mention is the Puma Clyde, inspired by and named after basketball legend Walt "Clyde" Frazier. Initially released in 1973, the shoe’s enduring popularity can be attributed to its sleek design and lightweight construction, qualities that were considered rare in basketball sneakers during that era. The Puma Clyde was at the forefront of the intersection between sports and fashion, making it a favorite among sneaker enthusiasts and paving the way for more minimalist, versatile athletic footwear in the market. Today, the Puma Clyde continues to be well-regarded in the sneaker culture, and retro versions continue to be cherished and sought after by collectors and casual wearers alike.
Sneaker Collaborations and Retro Sneakers
Along with the enduring popularity of retro sneakers, collaborations between brands and designers have become increasingly popular in recent years, creating unique and exclusive products that generate hype among sneaker enthusiasts. One of the most recognizable sneaker collaborations in the world of retro sneakers is the ongoing partnership between Virgil Abloh’s Off-White label and Nike. This collaboration has led to the creation of many iconic designs, such as the reinterpreted versions of the classic Air Jordan 1, Air Force 1, and Air Max 90. The combination of Off-White’s deconstructed aesthetic with the timeless design of these retro sneakers creates a unique blend of old and new, which has resonated with sneakerheads across the globe.
Another significant sneaker collaboration that has impacted the retro sneaker market is the partnership between Adidas and rapper Kanye West, who together have created the wildly popular Yeezy brand. While many of their designs are more futuristic and unlike traditional retro sneakers, certain models like the Yeezy Powerphase Calabasas take inspiration from Adidas’ classic 80’s tennis shoes. The combination of Kanye’s influence, limited availability, and the retro aesthetic has made this collaboration a must-have for many collectors.
Some sneaker collaborations go beyond the world of fashion and streetwear, delving into popular culture to create unique limited-edition releases. For example, the collaboration between Nike and the popular Netflix series Stranger Things resulted in a collection of retro-inspired sneakers, featuring designs from the 1980s in which the series is set. The collection includes notable models like the Nike Cortez, Blazer Mid, and Air Tailwind 79, with each shoe showcasing elements from the show, such as the Hawkins High School colors and logo.
Limited-edition releases play a significant role in the retro sneaker market, as they often celebrate important milestones, collaborations, or events. For instance, the Air Jordan 11 ‘Concord’ first debuted in 1995 and has seen multiple re-releases over the years, including a highly anticipated limited release in 2018. This particular sneaker is held in high regard among collectors, as it was worn by Michael Jordan during the Chicago Bulls’ historic 72-10 season.
Another limited-edition retro sneaker that has captured the attention of enthusiasts is the Nike Air Max 1 ‘Parra,’ designed in collaboration with Dutch artist Piet Parra. The sneaker’s vibrant colorway, unique pattern, and limited availability have made it a sought-after collector’s item. Collaborations between brands like Adidas and boutique retailers, such as the Alife x Starcow x Adidas Consortium Sneaker Exchange, have also produced limited-edition retro-inspired sneakers that generate excitement among aficionados. The combination of exclusivity, innovative designs, and nostalgia continues to fuel the excitement and demand for retro sneaker collaborations and limited-edition releases.

The Influence of Retro Sneakers on Sports and Culture
In turn, retro sneakers have played a significant role in the world of sports, particularly in basketball, tennis, and skateboarding, as their influence has only grown over time. The nostalgic appeal of these classic designs, fused with modern technology, has drawn athletes and fans alike to don these culturally significant shoes. Many of these sneakers bear the names of iconic athletes, such as Michael Jordan, or carry designs inspired by particular career moments or achievements, which helps cement the legacies of these sports stars. The combination of sports history, appealing designs, and star power has contributed to the continued popularity of retro sneakers, making them both a fashion statement and a celebration of athletic achievements.
Basketball is, perhaps, the most well-known area in which retro sneakers have made their mark on the court. Models such as the Air Jordan 1 and the Nike Air Force 1 have become iconic symbols of the sport, and the personalities behind the shoes have played an undeniable role in their popularity. Michael Jordan’s eponymous sneaker line has crossed over into the mainstream, transcending sports to become a significant aspect of popular culture, with each subsequent release rekindling interest in the athlete’s illustrious career. As a result, the legacy of Michael Jordan and other basketball greats has become intertwined with the success of the sneakers that have been designed in their honor.
Tennis also boasts its fair share of retro sneakers that have influenced the sport and its fanbase. The Adidas Stan Smith is perhaps the most recognizable of these, named after the renowned tennis player in the 1970s. These sneakers have since become a staple in casual and stylish athleisure wear due to their versatility and timeless design. Additionally, Andre Agassi’s vibrant Nike Air Tech Challenge shoes challenged the clean-cut image often associated with tennis, mirroring the player’s rebellious spirit both on and off the court. These retro sneakers, with their distinctive designs and endorsements from star athletes, have helped shape the way fans perceive tennis as a sport.
In the world of skateboarding, retro sneakers have also solidified their place as an integral aspect of its culture. Sneakers like the Vans Old Skool and the Nike SB Dunk Low have long been popular among skateboarders, lauded for their durability, supportive design, and grip. Additionally, the release of special edition sneakers in collaboration with popular skateboarding brands, such as Supreme or Palace, has intensified hype around retro sneaker releases and further ingrained them into the fabric of skate culture.
As fans continue to be captivated by retro sneakers, companies are releasing new colorways and collaborations to satisfy the demand for customization and personal style. This phenomenon ties athletes’ personal branding to their sneakers, creating a stronger connection between the shoes, the sport, and the athletes themselves. Subsequently, new generations of sports enthusiasts are introduced to past legends by wearing their sneakers and uncovering the stories behind these iconic designs, fueling a continued interest in retro sneakers and the history they represent.
The Enduring Impact of Retro Sneakers on Fashion and Pop Culture
Since the 1980s, retro sneakers have held a strong influence in fashion and pop culture, and their impact continues to be felt today. These sneakers have become an integral part of popular culture, making their presence known in various facets such as movies, music, and streetwear. Iconic designs like the Nike Air Jordan 1, Adidas Superstar, and Converse Chuck Taylor All-Stars have left an undeniable mark on our society. Over time, they’ve transcended their initial purpose as athletic attire to become a wardrobe staple for tastemakers and trendsetters alike, further expanding the cultural reach of retro sneakers.
The music industry, and more specifically, hip-hop, have long been intertwined with the world of sneakers. Artists such as Run DMC, who famously rapped about their Adidas sneakers in “My Adidas,” and Kanye West with his Yeezy brand, have helped to solidify the status of retro sneakers as symbols of style and cultural expression. These collaborations and endorsements create a symbiotic relationship between the music industry and the sneaker world, with both parties benefiting from the association. This further cements the sneakers’ impact on pop culture and elevates their status in the realm of fashion.
The rise of streetwear culture also played a massive role in the popularity of retro sneakers. As streetwear evolved and became more mainstream, the demand for iconic sneaker silhouettes increased. Brands like Supreme, Off-White, and Stüssy have all incorporated classic sneaker styles into their fashion lines, creating collaborations and limited-edition releases that are highly coveted by fans and collectors. This further emphasizes the importance of retro sneakers within the fashion world, as they serve not only as a functional piece of footwear but also as a critical component of streetwear style.
Moreover, retro sneakers have become emblematic of nostalgia for past decades and are sought after by collectors who appreciate the history and cultural significance behind these iconic designs. The resurgence of popular styles from the ’80s and ’90s, such as the chunky dad sneakers and the classic high-top silhouettes, demonstrates the power of nostalgia in fashion, as these designs evoke memories and emotions that contribute to their appeal. This nostalgic aspect also connects retro sneakers to broader pop culture trends, as they are often featured in films, television shows, and music videos that pay homage to the past.
The impact of retro sneakers on fashion trends, streetwear, and pop culture is immense and multifaceted. Playing a significant role in shaping modern style, the enduring symbiotic relationship between retro sneakers, the music industry, and sneakerhead culture continues to drive their enduring appeal. With each new collaboration and revival, retro sneakers solidify their place as a cornerstone of pop culture and the fashion world.
Sneakerhead Culture and the Rise of Sneaker Collecting
Sneakerhead culture represents the love, passion, and dedication for collecting sneakers globally, reflecting the historical connections between sports, music, and fashion. Sneaker enthusiasts, commonly referred to as ‘sneakerheads,’ collect and obsess over unique, retro, and limited-edition sneakers as a form of self-expression or to showcase their personal style. These sneaker enthusiasts take immense pride in their knowledge and understanding of sneaker history, resale value, and cultural impact, further strengthening the relationship between retro sneakers and their modern-day appeal.
The rise of sneaker collecting as a mainstream hobby can be traced back to the 1980s when legendary basketball player Michael Jordan inked a partnership with Nike, leading to the creation of the iconic Air Jordan series. This partnership ignited a revolution in the sneaker industry, as other major sports stars like LeBron James, Kanye West, and Pharrell Williams later followed suit, collaborating with renowned brands like Nike and Adidas to create unique and highly sought-after sneaker lines. These collaborations bridge the gap between sports, entertainment, and fashion, contributing to the growing popularity of retro sneakers amongst sneakerheads and the general public.
Retro sneakers are highly coveted by sneakerheads due to their nostalgic appeal, historical significance, and limited availability. Collectors often engage in extensive research, networking within the sneaker community, and attending release events to secure rare and exclusive pairs. Over the years, the resale market for these sneakers has flourished into a multi-billion dollar industry driven by the high demand, limited supply, and the rise of e-commerce platforms, making it easier than ever for collectors to find these highly coveted pairs.
However, there is a competitive aspect to sneakerhead culture, with collectors often vying against each other for the latest releases or rare finds. Events such as trade shows, sneaker conventions, and online groups provide a platform for sneaker enthusiasts to engage with each other, trade knowledge, and showcase their collections. Limited releases and collaborations can even create a frenzy among fans, leading to long queue lines outside sneaker stores and websites getting overwhelmed with traffic on release day.
The market for limited-edition and sought-after retro sneakers is heavily influenced by digital platforms and social media, where sneaker influencers often build their following by posting news, discussions, and reviews of the latest releases. This continuous stream of information helps to build hype around certain sneakers, further driving demand and higher resale prices. It is evident that the convergence of sports, music, and fashion, combined with the rise of social media and e-commerce, has played a crucial role in shaping sneakerhead culture and the modern landscape of sneaker collecting.
As we reflect on the multifaceted aspects of retro sneakers, it becomes evident that these seemingly simple footwear items have transcended their original purpose and emerged as significant cultural symbols. From their influence on sports legends to their role in driving fashion trends and fostering a thriving collector community, retro sneakers continue to inspire generations of enthusiasts. By preserving their historic charm and adapting to contemporary influences, retro sneakers persist in capturing the hearts and minds of people from all walks of life.
The Most Colorful Turtles
Turtles are truly fascinating creatures that have graced our planet for millions of years. As we delve into the world of the most colorful turtles, we will discover the distinctive characteristics and fascinating beauty of species like the Painted Turtles, Red-Eared Sliders, Eastern Box Turtles, and Diamondback Terrapins. From their vibrant shells and skin patterns to their unique behaviors and ecological roles, these turtles captivate the hearts and minds of people across the globe.
Colorful Turtle Species
Painted Turtles are some of the most colorful turtles that can be found in North America. They have a dark shell with red and yellow markings on the bottom, and their head, neck, and legs also have yellow and red stripes. These colorful turtles are usually found in slow-moving freshwater habitats, such as ponds, marshes, and lakes. They enjoy basking in the sun on logs or rocks, and they are good swimmers. Painted Turtles can be found in most of the United States, as well as parts of Canada and Mexico.
Another colorful turtle species is the Red-Eared Slider. These turtles get their name from the red markings on each side of their head, which look like little red ears. They also have a green shell with yellow and black markings, and their skin is covered in intricate yellow patterns. Red-Eared Sliders are native to the southeastern United States, but they have been introduced to other parts of the world as pets and can now be found in various habitats, including ponds, streams, and lakes in Europe, Asia, and Australia.
Eastern Box Turtles are small, colorful turtles known for their high-domed shells and bright yellow, orange, or red patterns on a brown or black background. These terrestrial turtles can be found in forests, fields, and wetlands throughout the eastern United States. A unique feature of the Eastern Box Turtle is its hinged plastron, which allows it to close its shell tightly when it feels threatened. These turtles are omnivores, feeding on a variety of insects, plants, and even carrion.
Diamondback Terrapins are beautifully patterned turtles with grey, brown, or black skin and unique diamond-shaped patterns on their shells. Their skin also features white, yellow, or green spots and flecks. These turtles are unique because they live in brackish water habitats, such as estuaries and salt marshes, which are a mix of salt and freshwater. Native to the eastern and southern United States, Diamondback Terrapins are well-adapted to their environment, with webbed feet for swimming and strong jaws for crushing the shells of their favorite prey, such as snails, crabs, and mollusks.
Among the many fascinating turtle species, some of the most colorful ones have a unique anatomy and physiology that allows them to demonstrate stunning shell patterns, vibrant skin colors, and various functions in nature. These vibrant colors on a turtle’s shell, known as scutes, are formed by layers of keratin, which is the same protein found in our hair and nails. The bright colors and patterns are not only pleasing to the eye but serve specific purposes in a turtle’s life, such as communication, camouflage, and protection from predators.

The Vibrant Colors and Patterns of Turtle Species
One more fascinating turtle species known for its vibrant colors is the Yellow-Bellied Slider. Similar in appearance to the Red-Eared Slider, these turtles have a bright yellow plastron and yellow stripes on their head, neck, and legs. They also have a dark green or black shell with irregular yellow markings. Yellow-Bellied Sliders can be found in the southeastern United States and prefer slow-moving freshwater habitats, including swamps, ponds, and marshes. As they bask in the sun or glide through the water, their vivid coloration adds a splash of beauty to their environment, drawing attention to the impressive ways in which color plays a role in their survival and adaptation to the natural world.
One example of a visually striking turtle species is the painted turtle, which has a smooth and flat shell adorned with intricate patterns and a kaleidoscope of colors, including red, yellow, and orange. Their skin is also decorated with colorful markings that extend from their head down to their legs. These patterns serve as a form of camouflage, enabling them to blend in with their surroundings in the water, which makes it difficult for predators to spot them.
In addition to camouflage, the bright colors on some turtle species also serve as a means of communication. For instance, the male red-eared slider turtle is known for its bright red patch of skin around its ears. This coloration not only makes the turtle visually attractive but also plays an essential role in communication during mating rituals. Males use their vibrant, colorful markings to attract and court females or to warn off other males.
The vibrant colors of the Eastern box turtle serve a slightly different purpose in nature. The shell of the Eastern box turtle, which features a mix of yellow, orange, and brown, closely resembles the appearance of fallen leaves when viewed from above. This can help camouflage the turtle from aerial predators, such as birds of prey. When threatened, the Eastern box turtle is also able to protect itself by retracting its limbs, tail, and head into its shell, creating a tight seal.
Turtles are fascinating creatures that come in various vibrant colors, with some species having the ability to change the color of their skin or shell over time. This process, known as color morphism, can be an adaptation to their environment or a result of aging. For example, the Green Sea Turtle can exhibit different shades of green, grey, or brown on its shell, depending on its location and diet. When they hatch from their eggs, Green Sea Turtles have dark-colored shells for camouflage in the sand. However, as they grow older and spend more time in the ocean, their shells may lighten or darken due to exposure to sunlight or as a result of the types of algae they consume. Thus, the colorful shells, skin patterns, and vibrant colors displayed by different types of turtles not only make them visually appealing but also offer them survival benefits ranging from protection to communication in the natural world.

The Colorful Diet of Turtles
These mesmerizingly colorful turtles can be found in various habitats around the world, and their diet can differ depending on their surroundings. Some turtles, like the Painted Turtle and the Red-eared Slider, are omnivores, meaning they consume both plants and animals. They primarily feed on aquatic vegetation, insects, and small fish in their freshwater environments. Conversely, some marine species like the Hawksbill Sea Turtle mainly feed on animals such as sponges, jellyfish, and other invertebrates. Regardless of their colorful appearance, these turtles play a crucial role in maintaining the health and balance of their respective ecosystems.
The diet of a colorful turtle can also change as they grow older. Young turtles, also known as hatchlings, usually have a higher protein requirement for their rapid growth and development. This is why most hatchlings prefer eating more insects, worms, and small fish. As they grow older, their diet becomes more balanced, with adult turtles consuming more plants than younger ones.
The food sources available in a turtle’s environment can greatly influence their coloration. For instance, the striking colors of a Painted Turtle or a Red-eared Slider are thought to be linked to the pigments present in the plants and algae they consume. These pigments, known as carotenoids, are responsible for giving plants their bright colors and also contribute to the coloration of the turtles that eat them.
A turtle’s ability to maintain its striking colors can also be affected by the quality of the food it eats. In the wild, turtles have access to a wide variety of food sources that help provide the necessary nutrients to maintain their vibrant colors. However, in captivity, where turtles rely on the food provided by their caretakers, their diet may lack essential nutrients, which can cause their colors to fade over time. Therefore, it is crucial to ensure that a pet turtle’s diet closely mimics the variety of foods it would naturally consume in the wild.
Colorful turtles are fascinating creatures that capture our attention with their vivid hues and captivating patterns. A key factor in maintaining their bright colors is their diet and nutrition, which is important to understand for their overall health and survival. By providing turtles in captivity with an adequate and varied diet, we can help them maintain their stunning appearance that contributes to our fascination with them. Furthermore, studying their food sources could enhance our understanding of their biology and aid in conservation efforts.

The Fascinating Behavior of Colorful Turtles
Aside from their vibrant appearance, colorful turtles have unique and intriguing mating, nesting, and social interactions. Their shell and skin colors serve both as a visual display and a vital role in their communication and understanding of their surroundings. One of the most strikingly colored species is the Painted Turtle, known for its red, yellow, and orange markings on its shell and body. Other colorful turtles, such as the Red-Eared Slider and the Eastern Box Turtle, also captivate us with their vibrant hues and interesting behavioral patterns.
During the mating season, which usually occurs in spring and autumn, male colorful turtles display striking behavior to attract females. They court the females by extending their necks, displaying their vibrant skin colors, and swimming around the females while fluttering their front claws near the female’s face. This elaborate courtship behavior helps males not only to grab the attention of female turtles but also to communicate their fitness and potential as a partner. Female turtles are believed to select a mate based on the males’ visual appearance to ensure strong and healthy offspring.
Nesting is another essential aspect of colorful turtles’ behavior. Female turtles typically search for suitable nesting sites on land close to their aquatic habitats. They prefer areas with sandy or loamy soil that offers the right balance of moisture and warmth necessary for successful incubation of their eggs. Female turtles are known to be very particular about the location of their nests, using their keen perception of color and light to navigate to the perfect nesting spot. Once a suitable location is found, female turtles dig a hole using their rear legs and lay their eggs in the nest, which they cover with soil for protection.
Colorful turtles, being ectothermic like all reptiles, rely on the heat from the environment for regulating their body temperature. These turtles bask in the sunlight to absorb heat and synthesize Vitamin D. They also use their vibrant colors to help regulate their body temperature. The dark patches on their shells help them absorb sunlight and warm up, while lighter markings may serve to reflect excess heat and prevent the turtle from overheating.
Social interactions among colorful turtles vary depending on the species. Some turtles, like painted turtles and red-eared sliders, are known to form groups called bale when basking in the sun or foraging for food. Studies have shown that these turtles recognize each other based on their colors and markings, and they tend to prefer the company of those with similar appearances. On the other hand, Eastern box turtles are more solitary and are rarely seen interacting with other turtles except during mating. These turtles rely on their color patterns for camouflage in their terrestrial habitats to avoid predators, using their well-adapted shells for protection when needed.
Colorful turtles such as the painted turtle, red-eared slider, and hawksbill sea turtle showcase fascinating behavior and communication, with color playing a significant role in their mating, nesting, and social interactions. Their vibrant appearance not only serves as a visual cue for other turtles, but it also helps them effectively navigate their environments and maintain their overall health. Studying these intriguing behaviors further helps us to better understand these vibrant creatures and the intricate ways they communicate and interact with their surroundings.

Challenges and Conservation of Colorful Turtles
Unfortunately, these colorful turtles face numerous challenges in their natural habitats due to human activities. Habitat loss is a predominant threat for these vibrant creatures, as their ecosystems are often destroyed or altered by human development, agricultural expansion, and deforestation. As their habitats shrink, turtles struggle to find food, shelter, and appropriate nesting sites, leading to a decline in their populations. It is crucial that we continue to learn about and protect these beautiful and unique animals, in order to help ensure their survival and the preservation of their crucial roles in their ecosystems.
Pollution is another significant challenge for colorful turtles. Plastic waste, chemical contaminants, and oil spills in aquatic environments can have a devastating impact on these animals. Ingesting plastic debris can lead to digestive blockages or malnutrition, while exposure to pollutants may impede reproduction or cause diseases. As a result, turtle populations suffer, and some species may even become endangered or extinct.
Climate change is also affecting the survival of colorful turtles. Rising temperatures and ocean acidification disrupt their ecosystems and can have direct consequences on turtles’ reproduction, growth, and immune systems. For instance, higher sand temperatures in nesting areas can skew sex ratios, leading to more females than males, while increased coastal erosion affects nesting sites. Moreover, extreme weather events, such as storms and hurricanes, can further endanger turtles’ habitats and disrupt their life cycles.
Various conservation efforts have been implemented to protect these enchanting creatures and their habitats. International organizations, local groups, and governments are working together to preserve turtle populations by promoting sustainable development and habitat restoration. Specific actions include creating protected areas and sanctuaries, implementing sustainable tourism practices, and reducing pollution by promoting recycling and waste management measures.
Several organizations also focus on engaging local communities in turtle conservation initiatives. Local residents can participate in programs such as beach cleanups, reforestation initiatives, and awareness campaigns to protect and conserve turtle populations. In addition, research and monitoring activities help scientists better understand turtle populations and their needs to develop more effective conservation strategies. By fostering collaboration among various stakeholders, these ongoing conservation efforts aim to ensure the survival of our planet’s most colorful and captivating turtles.

As we embrace the wonders of the most colorful turtles, it is crucial to recognize the threats they face, such as habitat loss, pollution, and climate change. By raising awareness of these extraordinary species and supporting conservation efforts, we can help ensure their survival and continued presence in our world. Let us celebrate and cherish the beauty of these colorful turtles, as they offer us invaluable insights into the mysteries of nature and inspire us to protect our planet’s biodiversity for generations to come.
Fruit Loops, a beloved and iconic breakfast cereal, has captured the hearts and taste buds of both kids and adults alike for generations. With its vibrant colors, fruity flavors, and crunchy texture, Fruit Loops can be much more than just a breakfast staple. This unique cereal can be utilized as a key ingredient in various sweet and savory dishes, adding a whimsical touch to your culinary creations. Get ready to embark on a delicious adventure by learning how to use Fruit Loops in innovative ways, all while exploring the nutritional aspects and artful presentation of your dishes.
The Versatility and History of Fruit Loops Cereal
Fruit Loops, a popular breakfast cereal that has delighted taste buds for generations, has an interesting history. First introduced in 1962 by Kellogg’s, Fruit Loops was created by product developer Eugene McKay, who sought to make a cereal that was both nutritious and visually enticing.
The cereal initially featured three colorful, fruit-flavored loops – red (cherry), orange (orange), and yellow (lemon) – with more loop colors and flavors added over the years. These fun, vibrant colors not only brought something unique to breakfast tables, but also boasted a fruity aroma that many people found irresistible.
The iconic taste and texture of Fruit Loops is largely due to their unique blend of fruit flavors and lightly sweetened coating. The distinct flavor profile is achieved through a combination of natural and artificial fruit flavors, along with a hint of citrus. Fruit Loops also have a light, crispy texture that is perfect for munching on straight out of the box or soaking up milk at breakfast. They are made from a cornmeal-based dough, which is shaped into the familiar loop shapes and then baked into the cereal we all know and love.
In addition to their traditional role as a breakfast staple, Fruit Loops can also be incorporated into a wide range of sweet and savory recipes.
- Their bright colors and fruity flavors make them an ideal ingredient for creating eye-catching desserts, such as Fruit Loops krispie treats or a cake adorned with these colorful loops.
- The cereal can be crushed and used as a topping for ice cream or mixed into cookie dough for a unique spin on classic cookies.
- These vibrant cereal pieces can be used to provide a splash of color in a variety of savory recipes. Try sprinkling them over a simple salad for a playful pop of color and slight sweetness, or use them as a surprising, fruity crumb coating for fried chicken. Fruit Loops can be a fun and unexpected addition to crunchy snack mixes or even sprinkled over macaroni and cheese for a burst of fruity flavor combined with a creamy, savory dish.
Incorporating Fruit Loops into both sweet and savory recipes is not only a fun way to get creative with your dishes, but also adds a touch of whimsy and nostalgia that can delight your family or guests. Experimenting with this iconic cereal can evoke childhood memories for some, and spark playful conversation for others. So why not indulge in a little culinary adventure by including Fruit Loops in your recipes? You may discover some extraordinary flavor combinations and create unforgettable dishes in the process.
Fun and Colorful Dessert Ideas Using Fruit Loops
A popular sweet recipe that highlights the colorful and fruity flavors of Fruit Loops is the No-Bake Froot Loops Marshmallow Treat. This dessert is a unique twist on the classic marshmallow treat, which typically uses Rice Krispies. To make this vibrant and scrumptious dessert, simply melt marshmallows and butter together, then stir in the cereal until evenly coated. Press the sticky mixture into a greased pan and let it set for at least an hour. The marshmallow blend holds the cereal together, resulting in a soft, gooey, and visually appealing dessert bar that boasts a delightful fruity taste, sure to spark joy and nostalgia.
Another delectable option for using Fruit Loops in your desserts is to create Fruit Loop pastries. A quick and easy method is using pre-made crescent roll dough, which can be filled with a mixture of cream cheese, powdered sugar, and crushed Fruit Loops. After sealing and baking, these little pastries burst with sweet and tart flavors from the cereal-infused filling. Their eye-catching appearance from the colorful cereal makes them fun and unique for every dessert lover.
Cereal-infused cakes are becoming popular in the food scene, and Fruit Loops can easily be integrated into this trendy dessert option. A fun idea is to make a Fruit Loop-infused cake batter by adding crushed cereal to your preferred vanilla or white cake mix. This will not only add a pop of color to your cake, but also some fruity flavors that are synonymous with the iconic cereal. Just like a funfetti cake, this will surely impress guests, and they will be surprised to know that the specks of color inside are actually Fruit Loops. For an extra cereal touch, use crushed Fruit Loops to garnish your cake or sprinkle them onto your icing for a decorative finish.
Froot Loops also make an exciting addition to traditional cookie recipes. By combining crushed Fruit Loops with your favorite sugar cookie or shortbread dough, you can create a playful and delicious treat. Simply roll out the dough, cut it into desired shapes, and bake as usual. The Fruit Loops not only bring a pop of color to the cookies but also add that signature fruity flavor to each bite. You can even add a fruity icing made from powdered sugar, milk, and a touch of your favorite fruit-flavored extracts to enhance the flavors further.
One delicious way to incorporate Fruit Loops into sweet and savory recipes is by using them as a topping or mix-in for homemade ice cream or frozen yogurt. By combining the cereal bits with a vanilla or fruit-flavored ice cream base, you create a unique and enjoyable spin on frozen treats. The vibrant colors will entice both children and adults alike, while the fruity and creamy combination will leave them craving more. Fruit Loops can also be added to a favorite store-bought ice cream, making for a simple but delightful dessert upgrade that is sure to please all sweet cravings.
Exploring the Versatility of Fruit Loops in Parfaits and Yogurt Bowls
Moving on from frozen treats, Fruit Loops can also serve as a versatile topping for parfaits and yogurt bowls. The colorful loops can be used to create visually appealing dishes for both adults and children. A simple yet tasty recipe involves layering vanilla or Greek yogurt with fresh fruit, such as strawberries or blueberries, and topping it off with Fruit Loops. The combination of creamy yogurt, sweet berries, and crunchy cereal provides a balanced blend of flavors and textures that can brighten up your morning routine or serve as a delectable dessert. These creative uses of Fruit Loops demonstrate their potential as an exciting and flavorful addition to various sweet and savory recipes.
To elevate your parfait game, consider using Fruit Loops as an ingredient in homemade granola. Mix the cereal with oats, nuts, and a sweetener like honey or maple syrup before baking until golden brown. Then, you can layer this scrumptious, crunchy concoction with yogurt and fruit to create a satisfying and wholesome yogurt bowl. Sprinkle some chia seeds or coconut flakes on top for extra texture and taste, or even add a drizzle of caramel or chocolate sauce to satisfy a sweet tooth.
Fruit Loops can also be incorporated into more creative recipes, such as a tropical-inspired parfait. Layer pineapple or mango-flavored yogurt with chunks of fresh pineapple, kiwi, or mango, then sprinkle a generous portion of Fruit Loops over the top. The addition of shredded coconut and a few sprigs of fresh mint will transport your taste buds to an island getaway. This tropical twist on a classic parfait is perfect for summer mornings or festive brunches.
If you’re looking for a more indulgent yet visually stunning option, try creating a Fruit Loop explosion parfait. Use a cylindrical glass or jar for optimal presentation, start by adding a layer of vibrant raspberry or strawberry yogurt, followed by a layer of crushed Fruit Loops, and then a layer of sliced fruit. Repeat the layers, using a different yogurt flavor, such as blueberry or peach. When you reach the top, add a heaping spoonful of whipped cream, garnish with whole Fruit Loops, and drizzle a fruit sauce or syrup for a dazzling finish.
Fruit Loops are a colorful and fruity cereal that can be easily incorporated into both sweet and savory dishes, providing a unique twist to traditional recipes. For a sweet treat, consider creating parfaits and yogurt bowls using Fruit Loops, paired with vibrant fruits and spices like cinnamon or cardamom for an exotic twist. You can even experiment with savory elements such as a few pinches of sea salt or a crumble of goat cheese, which can perfectly contrast the sweetness of the Fruit Loops and add complexity to the dish.
Fun and Fruity Savory Recipes Using Fruit Loops
Taking the versatility of Fruit Loops even further, they can be used as a crunchy coating for proteins in savory recipes. The fruity flavors, along with the cereal’s crisp texture, provide an unexpected contrast to dishes such as chicken, fish, or even tofu. By using Fruit Loops in both sweet and savory recipes, you can bring a pop of color and crunch to your breakfast, dessert, or main course dishes, switching up your routine with a creative and delicious twist on traditional recipes.
To make a Fruit Loop-crusted protein, simply crush the cereal into fine crumbs and use them as you would any other breading. You can do this by dipping your protein of choice into a beaten egg, then coating it in the crushed Fruit Loops. Bake or fry the coated protein until it reaches the desired level of crispiness, and you’ll have a savory dish with a fruity twist. Adjust the cereal-to-breading ratio, or mix it with traditional breadcrumbs or Panko, to suit your taste preferences and find the perfect balance of savory and sweet.
Another interesting way to incorporate Fruit Loops into a savory dish is by adding them to a trail mix for a fun and fruity snack. Combine your favorite nuts, seeds, and dried fruits along with some colorful Fruit Loops to add a pop of color and a touch of sweetness. This unique trail mix is perfect for packing in lunches, taking on hikes, or munching on as an afternoon snack.
For more playful savory recipes, consider making unique snack mixes using Fruit Loops. Combine the cereal with salty snacks like pretzels, popcorn, or cheese crackers to make a party mix that is perfect for entertaining guests, watching a sports game, or simply enjoying on a movie night. You can also add spices or additional flavorings to level up your snack mix for a truly enjoyable and customizable treat.
Combining sweet and savory flavors can elevate ordinary dishes to exceptional culinary creations, making Fruit Loops an intriguing ingredient to experiment with. These colorful, fruity cereals can easily transform into a crunchy topping for salads, tacos, or even garnishes for soups, adding a playful and delightful twist to your meals.

Fun Ways to Incorporate Fruit Loops into Beverages
Not only limited to food pairings, Fruit Loops also add a whimsical pop of color to beverages, while bringing a nostalgic flavor to your drinks. A popular choice is the Fruit Loops milkshake, blending cereal with ice cream and milk for a truly unique treat. To make this mouth-watering beverage, add two cups of vanilla ice cream, one cup of Fruit Loops cereal, and half a cup of milk into a blender. Blend to perfection, and garnish with whipped cream and more Fruit Loops for a visually appealing and scrumptious drink.
For a lower calorie alternative, consider making a Fruit Loops smoothie using yogurt and fresh fruit. Combine one cup of vanilla yogurt, half a cup of Fruit Loops, half a cup of fresh fruit such as strawberries, bananas, or blueberries, and one cup of ice in a blender. Blend until smooth and serve immediately. This option still provides a fun twist on a traditional smoothie, but also incorporates additional nutritional value with the fruit and yogurt components.
If you prefer to use Fruit Loops as a garnish, consider rimming the glass of your beverage in crushed Fruit Loops to create a colorful and unique presentation. To do this, first spread a thin layer of frosting or honey on the rim of the glass to create a sticky surface. Then, place some crushed Fruit Loops on a plate and carefully press the rim of the glass into the crushed cereal, ensuring that the cereal pieces adhere to the frosting or honey. This technique works particularly well on milkshakes, smoothies, or even cocktails like a fruity margarita.
Another option is to create Fruit Loops-infused ice cubes for a surprisingly fun addition to your beverage. Fill an ice cube tray with Fruit Loops and then pour water, milk or fruit juice over the cereal pieces. Allow the ice cubes to freeze completely before adding them to a clear soda, lemonade, or sparkling water. As the ice cubes melt, they will release the fruity flavors and vibrant colors of the Fruit Loops into the drink.
Fruit Loops is a popular breakfast cereal known for its fruity taste, vibrant colors, and crunchy texture. Not only does it make for an interesting ingredient in various sweet and savory dishes, but it can also be incorporated into eye-catching beverages. These creations showcase the versatility and fun of the beloved cereal while putting a creative twist on classic drinks, perfect for entertaining or just enjoying yourself.
Nutritional Information and Recommendations for Fruit Loops
There are numerous innovative recipes that use Fruit Loops as a key component, offering delightful surprises with each bite or sip. While enjoying these unique and playful dishes and beverages, it is essential to understand the nutritional value of the cereal before integrating it into your meals. Next time you’re craving something distinctive and whimsical, give one of these Fruit Loops-inspired recipes a try.
One serving of Fruit Loops, which is about 29 grams or 1 cup, provides 110 calories, 1 gram of fat, 140 milligrams of sodium, 25 grams of carbohydrates, and 3 grams of protein. Notably, this cereal also contains a high amount of added sugar, approximately 10 grams per serving, which can contribute to health concerns if consumed in excess.
Besides being high in sugar, Fruit Loops also contain artificial colors, flavors, and preservatives, which might not be suitable for everyone. In addition, this cereal is not gluten-free as it is derived from a mix of corn, wheat, and oat flours. People with celiac disease or gluten sensitivity should avoid consuming Fruit Loops. Furthermore, some ingredients in Fruit Loops can cause allergic reactions, particularly in those with sensitivities to corn, wheat, or oats. To accommodate these dietary restrictions, consider substituting Fruit Loops with gluten-free or allergen-free cereal alternatives.
Substituting Fruit Loops with healthier alternatives can also reduce the sugar content of your recipes. There are natural, low-sugar cereal options on the market that can provide a similar crunch without the added sugars. Using these options can help balance the sweetness in your dish and contribute to better overall nutrition. Another option is to incorporate fruits or nuts to add texture, natural sweetness, and additional nutrients to your recipe.
When using Fruit Loops in savory dishes, it is important to consider the sweet and fruity flavors that the cereal will bring. To balance these flavors, you may want to incorporate some salty, spicy, or tangy elements into your recipe. The high sodium content of Fruit Loops should also be taken into account when planning your dish to avoid over-consumption of sodium. Opting for low-sodium alternatives or reducing the salt content in other parts of your dish will help maintain a more balanced flavor and healthier overall meal.
For those seeking to incorporate the fun and unique element of Fruit Loops into sweet and savory recipes, it is essential to keep in mind the nutritional value and potential allergens present in the cereal. By experimenting with healthy substitutions, reducing sugar content, and balancing flavors, you can create a variety of delicious and nutritious dishes that cater to an array of dietary preferences and restrictions. As you try new and exciting recipes that feature this colorful and crunchy cereal, remember to prioritize the health and well-being of those who will be enjoying your culinary creations.
Creating Visually Appealing Fruit Loop Dishes
In addition to taste, the presentation is a key factor in making your Fruit Loops creations stand out. By focusing on the aesthetic arrangement of your dishes, you can make them visually appealing and encourage people to give them a try. With mindful preparation and artful presentation, your sweet and savory recipes featuring Fruit Loops are sure to become crowd favorites while maintaining a focus on health-conscious choices.
One fundamental technique in food presentation is to use contrasting colors and textures to create visually interesting dishes. For instance, placing vibrant Fruit Loops atop a smooth and creamy yogurt, or using them as a fun and colorful garnish for a more subdued dish like oatmeal or a smoothie bowl can instantly elevate the visual appeal.
In addition to color and texture, consider the overall composition of your dishes. When arranging your Fruit Loops creations, keep in mind the rule of thirds, which emphasizes placing key elements of your dish along imaginary lines that divide the plate into thirds, both horizontally and vertically. This way, you create a sense of balance and harmony in your presentation. For example, if you’re making a Fruit Loops parfait, alternate layers of colorful cereal with layers of yogurt or fruit to create a visually striking and well-balanced dish.
Lighting is crucial in food photography, and utilizing natural light is often the best option for showcasing your Fruit Loops dishes. Set up your photography station near a window that allows plenty of soft, natural light to filter in, and avoid using harsh artificial light sources that may create unflattering shadows or change the appearance of colors. A reflector or a simple white foam board can be used to bounce light back onto the dish, filling in any unwanted shadows.
When photographing your Fruit Loops creations, don’t be afraid to experiment with different angles and perspectives. Some dishes may look best when photographed straight-on or from a 45-degree angle, while others may be more visually interesting from an overhead view. Experiment with various heights and distances to find the perfect shot that highlights all the details of your culinary masterpiece.
Aside from perfecting your lighting and angles, adding props and accessories can enhance your Fruit Loops photography. Choose items that complement and reinforce the theme or style of your dish. For instance, a colorful napkin or a patterned plate can add visual interest to your composition without detracting from the star of the show – the Fruit Loops! Additionally, feel free to play with the arrangement of the cereal pieces themselves, creating fun patterns, shapes, or even spelling out words to showcase your creativity and integrate a little whimsy into your food art.
Embrace your inner food artist and take your creativity to new heights by incorporating Fruit Loops into a diverse array of sweet and savory dishes. From delightful desserts to mouthwatering savory surprises, these colorful cereal rings offer a unique twist to traditional recipes. Equipped with nutritional information, allergen considerations, and food photography tips, you’re now ready to embark on a journey of culinary discovery to create and share memorable Fruit Loop-infused recipes that are bound to impress and satisfy taste buds of all ages.