Categories
Sneakers

How to Tie Shoelaces: Quick & Simple Guide

Tying shoelaces may seem like a simple task, but with various knot techniques and types of shoelaces available, it can be more complex than you think. In this guide, you will learn about different types of shoelaces, how to prepare your shoes for tying, and practice several knot-tying methods. Additionally, you will explore knot variations, troubleshoot common mistakes, and improve your shoelace tying skills through practice. Grab your favorite pair of shoes and let’s dive in!

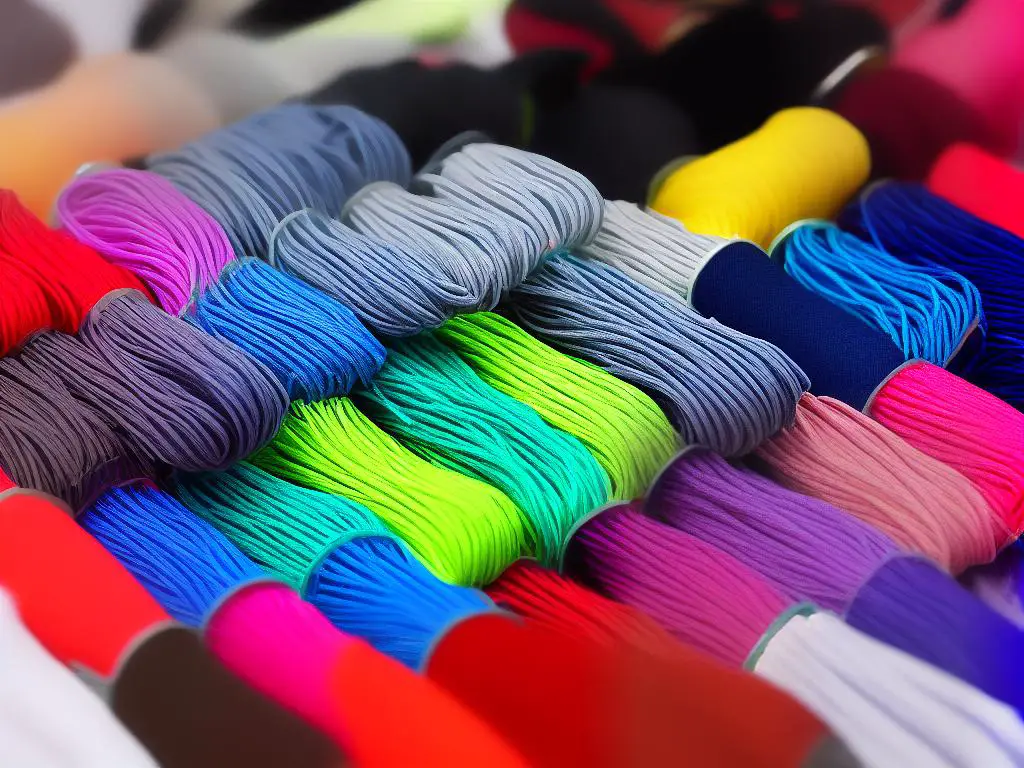
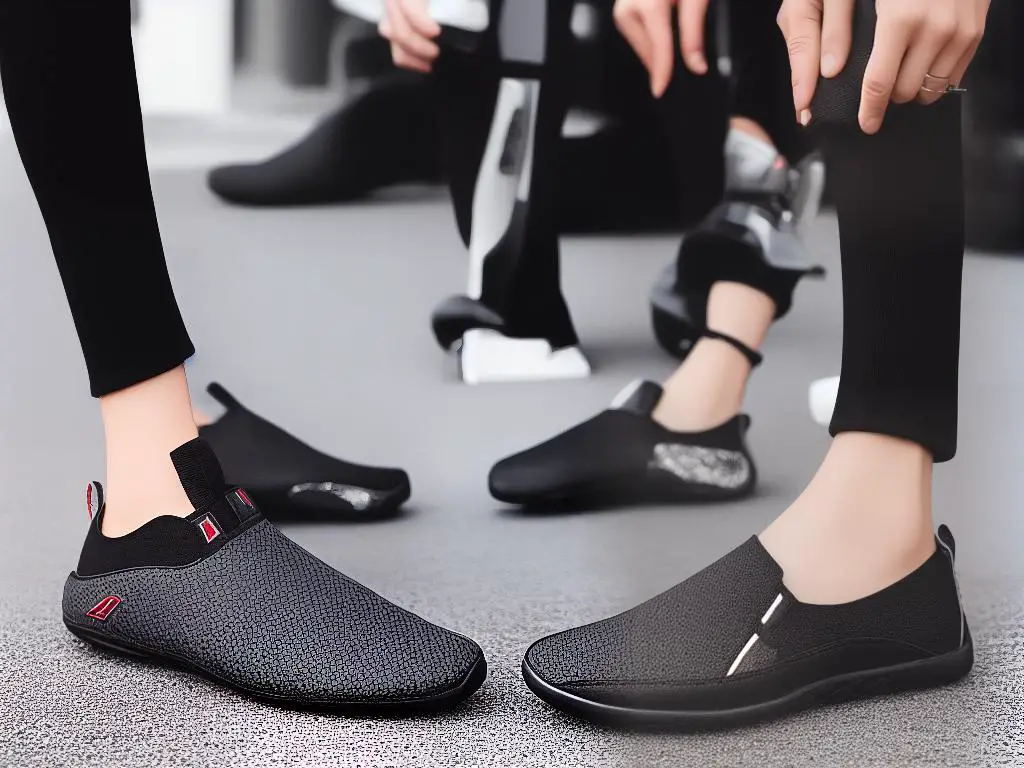
Understanding Shoelace Types

Introduction:

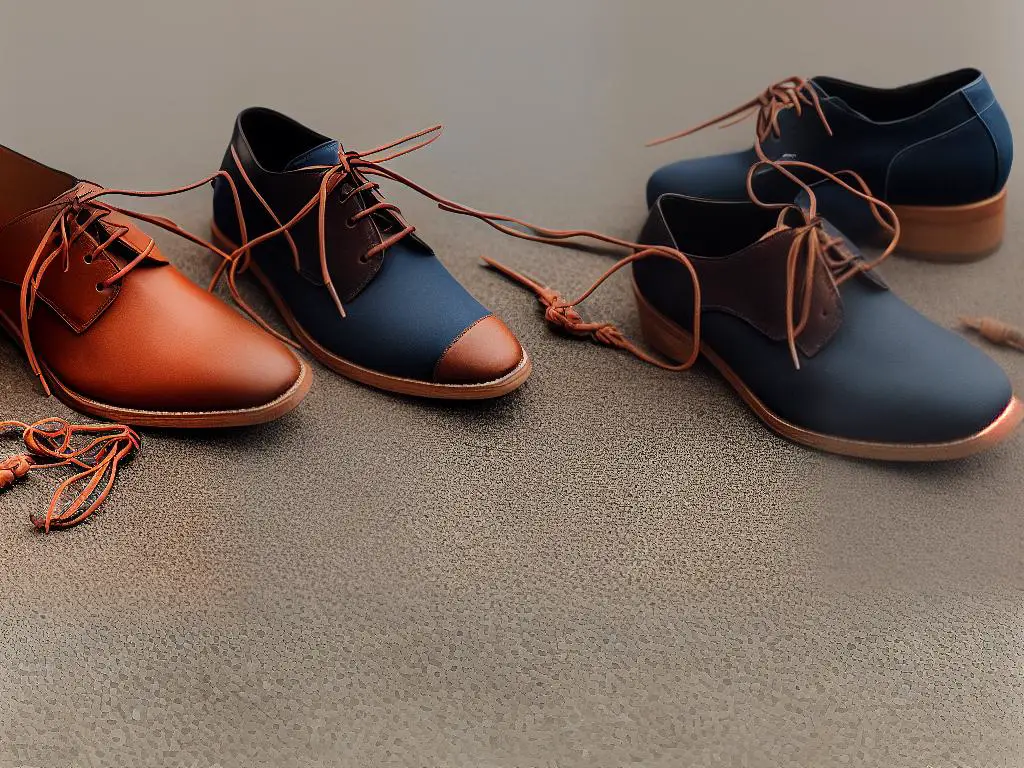
Before learning how to tie your shoelaces, it’s essential to understand the different types of shoelaces and how to choose the right ones for your shoes. With various materials, lengths, and designs available, you want to make sure you select the best option for your specific needs. In this guide, we’ll discuss several kinds of shoelaces and provide tips on choosing the right size and type for your shoes.

Flat Shoelaces:

Flat shoelaces are the most common type of laces that you’ll find in sneakers and casual shoes. They are wide, thin, and usually have a polyester or cotton construction. Flat laces lay comfortably on the shoe and provide a clean appearance.

Round Shoelaces:

Round shoelaces are generally found in dress shoes, boots, and some athletic shoes. These laces have a tubular shape, which gives them a more formal look and offer more durability. Round laces can be made of various materials like cotton, nylon, or waxed cotton.

Waxed Shoelaces:

Waxed shoelaces add an extra layer of protection for the laces, making them more resistant to water, fraying, and breaking. They are ideal for dress shoes or outdoor footwear, as the wax helps maintain their shape and structure. The waxed finish provides a slightly shiny appearance and also offers more grip when tying.

No-tie Shoelaces:

No-tie shoelaces are an innovative solution for those who may have difficulty tying shoelaces or are looking for a more streamlined and hassle-free option. They utilize an elastic lace material that securely attaches to the eyelets with plastic or metal anchors. You can slip your shoes on and off effortlessly without having to tie and untie laces.

Coiled Elastic Shoelaces:

Coiled elastic shoelaces are designed to stretch and contract, allowing users to slip their shoes on and off without needing to tie them. These laces are typically used in athletic shoes and are popular among runners who don’t want to worry about their laces coming undone during their workout.

Tips on Choosing the Right Shoelace Size and Type:

  • Length: Measure the total number of eyelets on your shoes, and then check the shoelace packaging or manufacturer’s website for a sizing guide. Most shoelace brands offer a range of lengths to accommodate various shoe sizes and eyelet numbers.
  • Material: Consider the specific needs of your shoes and your typical activities when selecting a shoelace material. Cotton laces are breathable and soft, ideal for casual shoes. Polyester or nylon laces are more durable and weather-resistant, making them suitable for athletic or outdoor footwear.
  • Color and Design: Select a shoelace color and design that matches your personal style and the color of your shoes. You can choose from solid colors, patterns, or even reflective shoelaces for added visibility during nighttime activities.
  • Ease of Use: If you have trouble tying shoelaces, consider opting for no-tie or coiled elastic shoelaces to simplify the process.

Conclusion:

Understanding the different shoelace types will help you choose the best option for your shoes and ensure a comfortable, secure fit. Pay attention to length, material, color, design, and ease of use when selecting the right shoelaces for your needs. Now that you know which laces are best suited for your shoes, you can learn to tie them confidently and securely.

An image of different types of shoelaces lined up next to each other to illustrate the different options available.

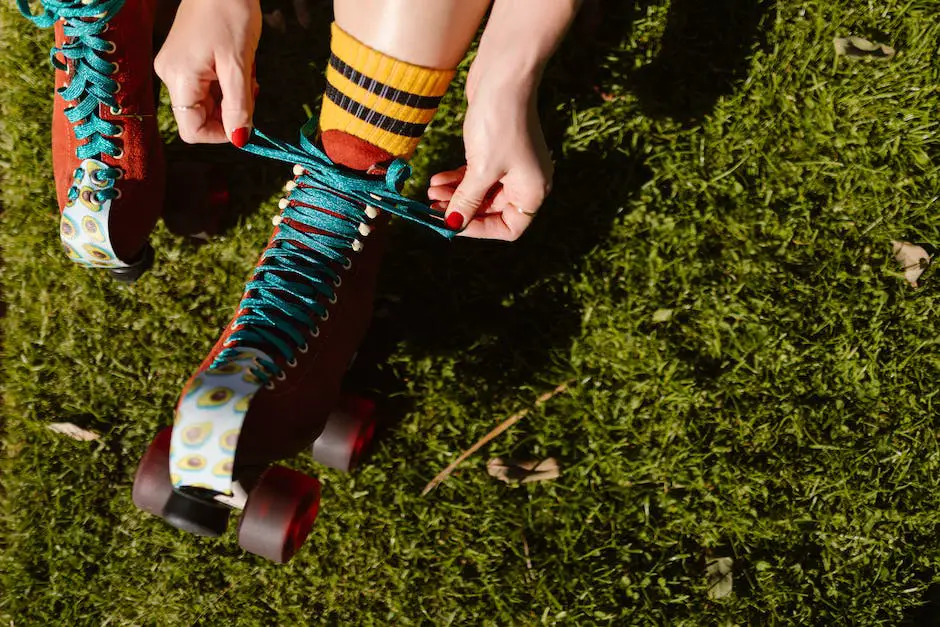
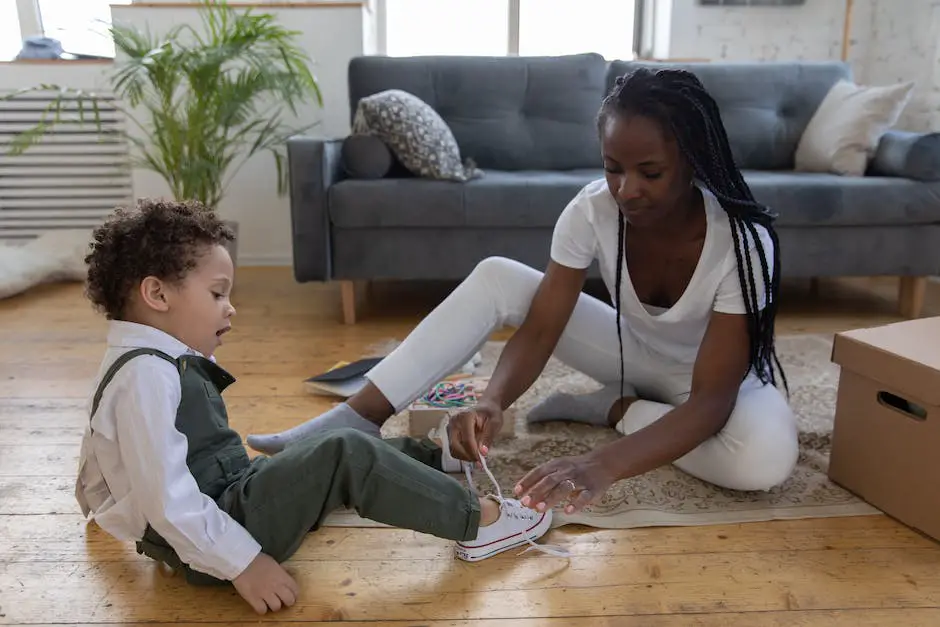
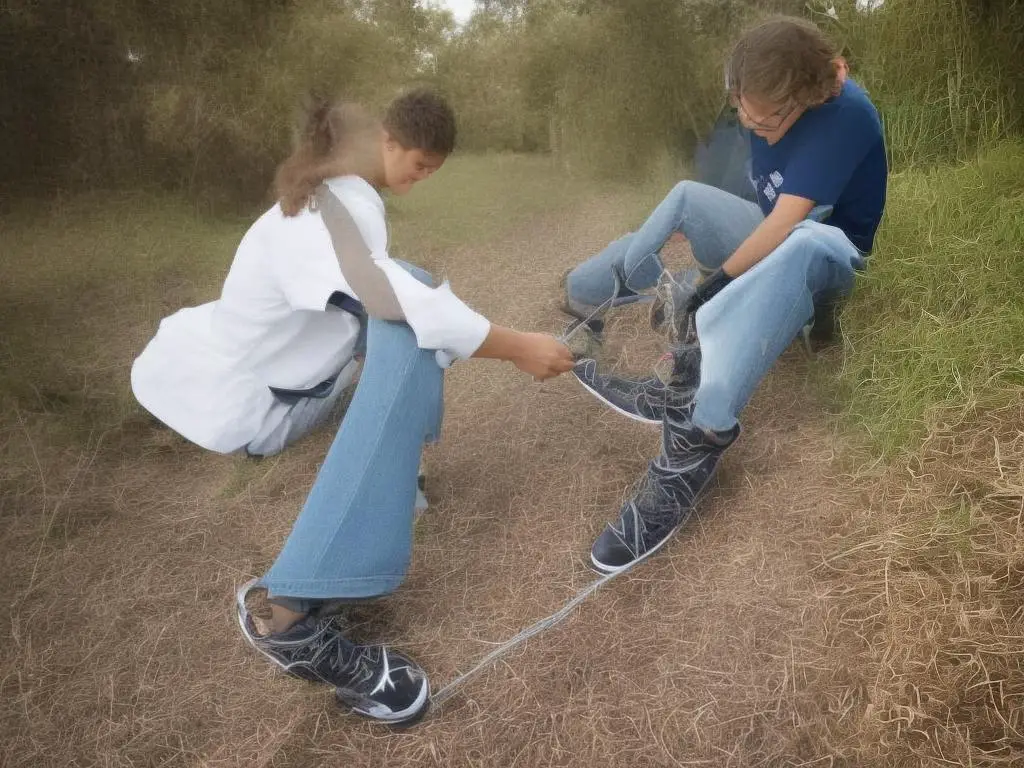
Preparation for Tying

Step 1: Gather your materials

To begin, you’ll need a pair of shoes with eyelets along the sides, and a pair of shoelaces that are of appropriate length for your shoes.

Step 2: Insert the shoelaces

Take one end of the shoelace and insert it through the bottom eyelet (the one closest to your toes) on one side of the shoe, from the outside in. Then, take the other end of the shoelace and insert it through the bottom eyelet on the other side of the shoe, also from the outside in. Make sure that the laces are of equal length on both sides.

Step 3: Cross the laces

Next, take the left lace and cross it over the right lace, creating an “X” shape. Thread the left lace through the next available eyelet on the right side, going from the outside in. Do the same for the right lace, threading it through the next available eyelet on the left side.

Step 4: Continue lacing

Repeat step 3 for the remaining eyelets, making sure to cross the laces over each other and threading them through the eyelets from the outside in. Be consistent with your pattern, either crossing the left lace over the right lace or vice versa, for a neat appearance.

Step 5: Check your progress

As you lace your shoes, make sure the laces lay flat and don’t twist. This will ensure a comfortable and secure fit when tying.

Step 6: Finishing up

Once you’ve threaded the laces through all the eyelets, give them a gentle tug to ensure that they’re securely in place and evenly tightened. You should now have two laces of equal length emerging from the top of your shoe, and you’re ready to begin tying your shoes.

Now that you know how to properly thread your shoelaces through the eyelets of your shoes, you can practice tying different knots like the standard bow knot, double knot, or even more advanced techniques. Keep practicing, and this skill will soon become second nature.
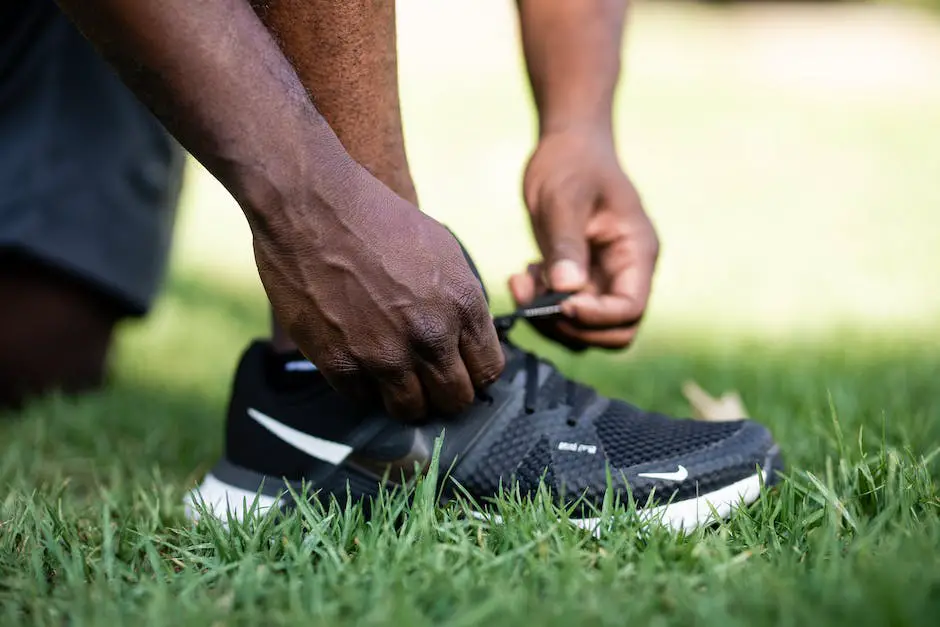
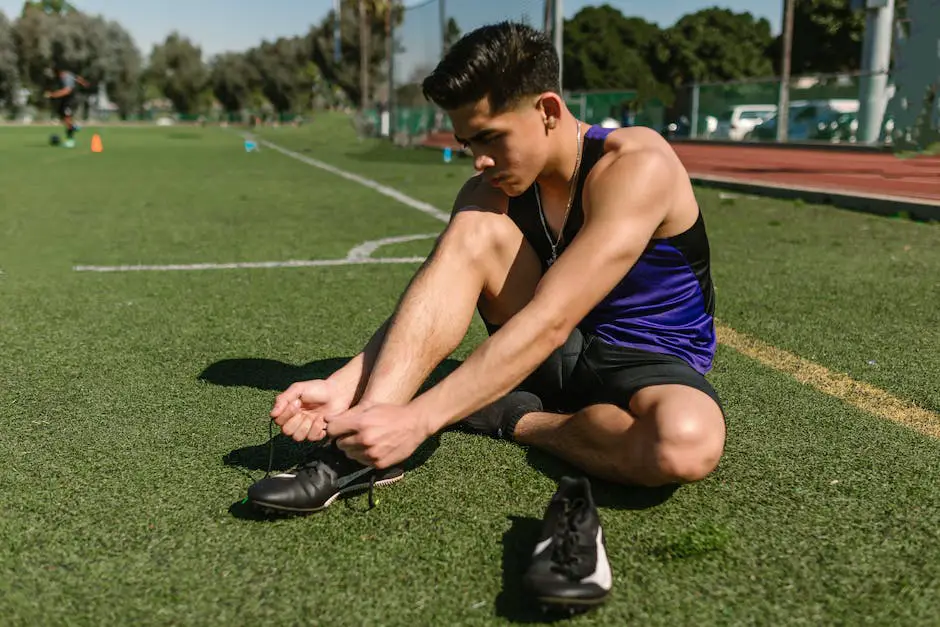
An image of a shoe with laces.

The Basic Bow Knot

Step 1: Prepare your shoes
Place your shoes on a flat surface with the shoelaces fully untied and making sure the ends are of equal length.Step 2: The Starting Knot
Grab both ends of the shoelaces, one end in each hand. Cross the right end over the left, creating an “X” shape, and then pull the right end through the bottom of the “X” and pull tight. This will create a basic starting knot that will help keep your laces together as you continue with the bow knot.Step 3: Form the First Loop
Hold the right shoelace with your right hand, between your thumb and index finger, and use your other fingers to cradle the lace while folding it back on itself to form a loop. This loop is often referred to as the “bunny ear.”Step 4: Wrap the Second Lace
With the left shoelace in your left hand, wrap it around the “bunny ear” loop you created with the right lace. As you wrap, make sure to keep it tight and close to the base of the loop.Step 5: Form the Second Loop
While still holding the left lace, pinch it with your right thumb and index finger, and make sure to keep it snug against the base of the right loop. Now, use your left hand to fold the remaining part of the left lace back onto itself to create a second “bunny ear” loop.Step 6: Thread and Tighten
With both “bunny ear” loops in hand, use your left thumb and index finger to push the left loop through the small opening created when you wrapped the left lace around the right loop. Gently pull both loops away from each other to tighten the bow knot. Be sure to adjust and tighten the loops to your desired size and tightness.Step 7: Check Your Work
Check to ensure the bow knot is secure and even. If needed, tighten or adjust the loops and the starting knot to achieve a secure and comfortable fit.

Now you have successfully tied your shoelaces using the basic bow knot method! Repeat these steps on your other shoe, and you’re ready to go.
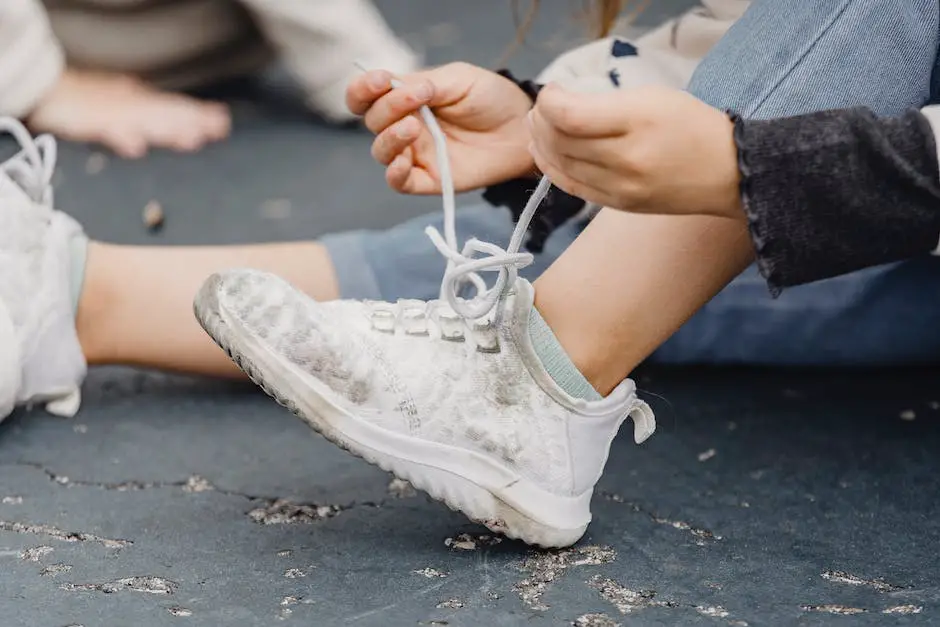
An illustration of someone tying their shoelaces step-by-step.

The Two Loop Knot

Start by preparing your shoes: Make sure your shoes are on your feet, and the shoelaces are untied, straightened, and threaded through all the necessary holes or eyelets.

  1. Hold both ends of the shoelaces: With one end of the shoelace in each hand, make sure the laces are approximately even in length. You may need to adjust the laces slightly to ensure they are even.
  2. Make the starting knot: Cross one lace over the other, then tuck the lace on top through the hole created at the bottom, pulling both ends tight. This will create a simple starting knot.
  3. Create the first loop (bunny ear): Hold one end of the shoelace between the thumb and pointer finger of one hand, pinching it in the middle to create a small loop. This loop should resemble a bunny ear, with the end of the loop hanging down.
  4. Create the second loop (bunny ear): With your other hand, do the same pinch on the other shoelace to create a second loop. Both hands should now be holding a bunny ear.
  5. Cross the two loops: Bring the loops close to each other and cross one loop over the other, just like you did with the laces in step 3.
  6. Tuck a loop through the hole: This is where the loops become the knot. Carefully tuck one of the loops through the hole created between the two crossed loops.
  7. Tighten the knot: Gently pull on both loops and ends of the laces to tighten the knot. Make sure to keep holding onto the loops as you do this to ensure a secure knot.
  8. Adjust the knot as needed: Once the knot is tight, you can adjust the size of the loops and ends to your liking. Ensure that the knot is secure and will not easily come undone.

Congratulations! You have now learned how to tie shoelaces using the Two Loop Knot or Bunny Ears technique. Practice this method a few more times to perfect your skills, and you’ll be able to tie your shoelaces with ease.

Illustration of hands tying shoelaces using the Two Loop Knot or Bunny Ears technique.

The Ian Knot

To begin, place your shoes on a flat surface and make sure the laces are fully untied and even on both sides of each shoe.Hold one end of the shoelace in each hand. Grip the lace with your thumb and index finger while making sure your palms are facing each other. You should be holding the shoelaces similar to how you would hold a piece of paper with both hands facing each other.Begin by making a loop with both ends of the shoelace, leaving about 2-3 inches of the lace as the loop’s tail. The right loop should be over the left loop. This will form the basic shape of the Ian Knot.Next, cross the loops over one another by bringing the right loop across the left loop with your right hand, and vice versa with your left hand. The tails of the laces should switch hands in the process.As you cross the loops, adjust your fingers so they can grab the tail of the other lace. Your index fingers should be pointing at the tail of the other lace, while your thumb should be behind it.Now, pinch the tail of the other loop with your thumb and index finger while keeping the loops crossed. This will create a small opening in the center of the knot as you pinch the tails.Once you’ve pinched the tails of each loop, gently pull your hands apart to tighten the knot. As you do this, the knot will become more secure and visually resemble a traditional shoelace knot.Adjust the knot to your desired tightness by pulling on the loops or tails as needed. You may need to practice the Ian Knot a few times to get comfortable with the technique, but once you’ve mastered it, you’ll be able to tie your shoes more efficiently.Congratulations, you’ve now learned the Ian Knot! Practice this technique on both shoes, and you’ll be speeding through your shoelace tying in no time.Remember, practice makes perfect. The more you practice the Ian knot, the quicker and more proficient you’ll become at tying your shoelaces.

A picture of a person tying their shoelaces using the Ian Knot technique.

Understanding Knot Variations

Knots have played an important role since ancient times, and they continue to be a crucial part of everyday life, especially when it comes to tying shoelaces. There are various knot variations that can make your shoelace tying experience more efficient, secure, and even fun. In this guide, we will explore different knot variations for tying shoelaces.

Standard Bow Knot:

This is the most common and widely used method for tying shoelaces.

  • Start by crossing the two ends of the laces (A and B) and pull them tight to form a simple half-knot.
  • Create a loop with one end (A) by folding it back on itself.
  • Wrap the other end (B) around the loop, forming a second loop behind the first loop.
  • Pull both loops tight to form a completed bow knot.

Double Slip Knot:

This variation provides extra security by adding a second loop to the standard bow knot.

  • Start with a standard bow knot but instead of forming just one loop with each end, create two loops by folding each end back on itself twice.
  • Wrap one looped end around the other looped end, then pull both loops tight to form a completed double slip knot.

Ian Knot:

This variation is known as the world’s fastest shoelace knot; it saves time and provides a secure hold.

  • Start by holding one end of the lace (A) in your left hand, and the other end (B) in your right hand.
  • Create a loop with both ends (A and B) by folding each end back on itself.
  • Cross the loops over each other as if tying a regular bow knot.
  • Reach through each loop with your opposite hand and grab the standing part of the opposite lace.
  • Pull both ends tight to form a completed Ian knot.

Surgeon’s Knot:

This variation is particularly helpful for slippery shoelaces since it adds extra friction to keep the knot secure.

  • Start with a standard half-knot, but add an extra twist by wrapping one end of the lace (A) around the other (B) one more time.
  • Create a loop with each end, as if tying a regular bow knot.
  • Wrap one loop around the other and pull both loops tight to form a completed Surgeon’s knot.

Loop Knots:

This is a decorative shoelace knot wherein both ends are tucked away, giving the knot a clean look.

  • Start with a standard half-knot.
  • With one end (A), create a loop by folding it back on itself.
  • Wrap the other end (B) around the loop (A), then pass the end (B) through the loop it formed by wrapping around the loop (A).
  • Pull both loops tight to form a completed loop knot. Tuck the untied ends underneath the knot for a cleaner look.

Keep practicing these different knot variations until you find the one that provides the ideal combination of efficiency, security, and aesthetics for your specific needs. With time and patience, you will undoubtedly master these variations and enhance your shoelace tying experience!

An image of various shoelace knots, including the standard bow knot, double slip knot, Ian knot, surgeon's knot, and loop knots.

Troubleshooting Common Mistakes

When learning to tie shoelaces, it’s common to encounter a few hurdles along the way. Below are some common mistakes and solutions to ensure a secure and tight knot every time.

Mistake 1: Twisted laces

If your laces are twisted when you try to tie them, the knot won’t hold as secure and might come undone over time.

Solution: Before you start tying, take a moment to straighten your laces by running your fingers along their length. This will ensure they lie flat and smooth when you tie the knot.

Mistake 2: Too tight or too loose loops

If your shoelace loops are either too tight or too loose, your knot might not hold well, and the shoes won’t feel comfortable on your feet.

Solution: When you make the loops (“bunny ears”) for your knot, pay attention to their size. Remember that the loops should not be bigger than your thumb or smaller than your pinky finger. Make sure the tension is consistent throughout your knot.

Mistake 3: Uneven laces

When you finish tying your shoelaces, you might notice that one side of the knot has a long lace end while the other has a short one.

Solution: To fix this, begin by undoing the knot. Then, adjust the starting point of the knot by pulling more or less of the lace through the top eyelets of your shoe. Aim for equal lace lengths on both sides before tying the knot.

Mistake 4: Knot comes undone easily

If you find that your shoelaces are coming untied during the day, you might be tying a “slippery” knot.

Solution: Make sure you’re tying a standard or “secure” shoelace knot, also known as the square knot or double knot. Begin by tying the “bunny ears” once, then wrapping one loop around the other to complete a second knot. This should give you a more secure knot that stays tied throughout the day.

Mistake 5: Difficulty with “bunny ears” method

Some people struggle with the “bunny ears” method to tie their shoelaces, causing frustration and knots that come undone easily.

Solution: If the “bunny ears” method isn’t working for you, try learning the “loop, swoop, and pull” method. This method involves creating one loop (or “bunny ear”) and then wrapping the other lace around it before pulling it through to create the second loop. This alternative method might feel more natural for some people to perform.

In conclusion, tying your shoelaces correctly can help ensure a comfortable fit and prevent your shoes from coming untied during the day. By addressing these common mistakes and following the solutions provided, you should be able to achieve a secure and tight knot every time.

A pair of children's shoes with untied shoelaces laying on the ground next to a colorful shoelace tying chart.

Practicing Shoelace Tying

Gather your materials: To practice tying shoelaces, you will need a pair of shoes with laces that are long enough to practice with, or a piece of rope or string to simulate a shoelace.Find a comfortable space: Choose a well-lit and quiet area where you can sit and comfortably work with your hands.Review the basic steps: Familiarize yourself with the basic process of tying shoelaces by breaking it down into steps. The standard method includes:
– Crossing the laces to create an ‘X’
– Looping one lace under the other and pulling it tight to create a starting knot
– Creating two “rabbit ears” or loops with both laces
– Crossing the loops and tucking one under the other to create the bow
– Pulling both loops tight to secure the knotPractice with your dominant hand: Start practicing your shoelace-tying skills using your dominant hand to hold one lace and guide the other. Repeat the entire process several times to get the hang of it.Switch hands: Practice tying your shoelaces using your non-dominant hand to hold one lace and guide the other. This might feel awkward at first, but with practice, you will become more comfortable using both hands.Speed up: Once you feel confident with the basic steps, try increasing your speed. Challenge yourself to tie both shoelaces faster and more efficiently.One-handed tying: For an extra challenge, try tying your shoelaces using only one hand. This can be a helpful skill to learn for those with limited mobility in one hand or arm.Repeat the process: Continue practicing your shoelace tying skills daily or as often as necessary. The more you practice, the more precise and efficient you will become.Alternate methods: Try learning different methods of tying shoelaces, such as the “two-loop” method or the “Ian Knot.” By learning various techniques, you can find the most comfortable and efficient method for you.Stay patient: Learning and mastering any skill takes time, and shoelace tying is no exception. Be patient with yourself, and don’t get discouraged if you don’t see immediate improvement. Keep practicing, and you’ll get better over time.

An illustration of the basic steps for tying shoelaces in order: crossing the laces, creating a knot, making 'rabbit ears', crossing the loops, and pulling tight to secure.

By taking the time to explore various shoelace types and knot techniques, you are now equipped with the knowledge to efficiently and securely tie your shoelaces. Use these new skills to your advantage, whether it’s for daily life or to add a touch of personal style to your footwear. Remember that, like any skill, practice makes perfect, so don’t hesitate to experiment with different techniques and continue improving your shoelace tying abilities.

Categories
Sneakers

Master the Art of Tying Shoelaces: Step-by-Step Guide

Tying shoelaces is a universal skill that most individuals learn during their childhood. The seemingly simple task not only ensures that your shoes stay firmly on your feet but also adds a touch of personal style to your footwear. This article will guide you through the world of shoelace tying, helping you understand different materials, choose the right length, learn basic and alternative tying methods, discover life hacks and solutions to common shoelace problems, and hone your shoelace tying prowess.

Understand different shoelace materials

Before learning how to tie shoelaces, it’s essential to know about different types of shoelace materials. The material used to make shoelaces can impact the tying process and how well your shoelaces will stay tied throughout the day. Here is an overview of some common shoelace materials and their properties:

Cotton shoelaces:

  • Cotton shoelaces are soft and flexible, making them easy to tie and adjust
  • However, they tend to become dirty, wear out, and fray relatively quickly.
  • Cotton laces are often used for casual shoes or sneakers and may lose tension as you go about your day, requiring retying.

Polyester shoelaces:

  • Polyester laces are durable, lightweight, and resistant to moisture and wear.
  • They offer a good balance between flexibility and strength, making them a popular choice for various types of shoes.
  • This type of shoelace is easy to tie and holds knots well, so you don’t need to worry about frequently retying your shoes.

Nylon shoelaces:

  • Nylon shoelaces are strong, durable, and have a smooth texture.
  • Due to their slick surface, nylon laces may be more challenging to tie, and the knots may slip or come undone more easily than other materials.
  • However, once properly tied, they hold tension well.
  • They are often used for athletic shoes or heavy-duty footwear (such as work boots or hiking boots) because of their strength and resistance to wear.

Now that you know the different types of shoelace materials, here’s a step-by-step guide on how to tie your shoelaces:

  1. Begin by threading the shoelaces through the bottom eyelets of your shoes, with the ends pointing outwards. Make sure that the lace lengths are even on both sides.
  2. Cross the left lace (let’s say it’s Lace A) over the right lace (Lace B), creating an ‘X’ shape. Then, thread Lace A under Lace B and pull both laces tight to form a snug knot at the base of the shoe.
  3. Pinch the middle of Lace A between your thumb and index finger, creating a small loop (also known as a ‘bunny ear’).
  4. Hold the loop in place securely using your left hand. With your right hand, take Lace B and wrap it around the ‘bunny ear’ loop (counterclockwise) that you’ve created with Lace A.
  5. As you wrap Lace B around Lace A’s loop, push a portion of Lace B through the gap between the two laces (where you crossed Lace B over Lace A) to create a second loop.
  6. Hold the new loop you created with Lace B, and pull both the original loop (Lace A) and the new loop (Lace B) tight. This should form a secure bow.
  7. Adjust your bow to the desired size, ensuring the knot is tight enough to hold its position throughout the day.

Now that you know how to tie shoelaces and understand how different shoelace materials may affect the tying process, you can confidently tackle any shoe with ease. Practice tying and untying your shoelaces with various materials to get a feel for the differences in grip and tension.

A picture of different shoelace materials, including cotton, polyester, and nylon shoelaces.

Choose the right shoelace length

To choose the right shoelace length for your shoes, follow these instructions:

  1. Determine your shoe type: Different types of shoes, such as running shoes, casual shoes, or boots, may require different lengths of shoelaces. This is because they have a varying number of eyelets or may need extra length for additional support.
  2. Count the number of eyelets on your shoe: Count the number of eyelets on one side of your shoe, then multiply by 2 to get the total number of eyelets. For example, if your shoe has 4 eyelets on one side, the total number of eyelets would be 8.
  3. Measure your current shoelaces (optional): If you have a pair of shoes with the correct length of shoelaces, simply measure the length of one of the laces and use it as a reference for purchasing new ones.
  4. Consult a shoelace length chart: There are various shoelace length charts available online that provide suggested shoelace lengths based on the number of eyelets and type of shoe. These charts can help you determine the right length of shoelaces for your shoes.
  5. Here’s a general guideline based on the total number of eyelets for your shoes:
    • 4-5 eyelets: 27-36 inches (68-91 cm)
    • 6-7 eyelets: 36-45 inches (91-114 cm)
    • 8-9 eyelets: 45-54 inches (114-137 cm)
    • 10-12 eyelets: 54-63 inches (137-160 cm)
    • 12-14 eyelets: 63-72 inches (160-183 cm)

    Please note that these are approximate lengths and can vary slightly depending on your preference for how long you want the ends of the shoelaces to be after tying.

  6. Consider the width of your shoelaces: Generally, athletic shoes require wider shoelaces, while dress shoes and casual shoes use thinner laces. Make sure to choose the right width of shoelaces for your specific shoes.

After choosing the right shoelace length, you are now ready to tie them. With practice, you’ll be able to master the art of tying shoelaces and feel confident in your footwear.

A person's hands are seen touching shoelaces, preparing to tie them up.

Basic shoelace tying method

Begin with your shoe on your foot, ensuring that your shoelaces are threaded properly through all the eyelets and that they are even on both sides.Grab both ends of the shoelaces, one in each hand, with your thumbs facing down and your index fingers pointing towards your toes.Cross the right shoelace over the left shoelace, forming an “X” shape. Tuck the right shoelace under the left shoelace, pulling it through the hole formed where the two laces overlap.Pull both shoelaces tightly to create a simple knot at the base of your shoe.Hold the right shoelace up with your thumbs facing up and your index fingers facing away from you. Pinch the lace between your thumbs and index fingers, creating a loop about the size of the final bow you desire. This will be referred to as the “right loop.”Repeat step 5 with the left shoelace, forming the “left loop.” Make sure both loops are of similar size.Cross the right loop over the left loop, forming another “X” shape, just as you did in step 3.Tuck the right loop under the left loop, pulling it through the hole formed where the two loops overlap. Maintain a firm grip on the loops as you tighten the knot to form a secure bow.Adjust the size of the loops and the length of the loose shoelace ends by gently pulling on them until the desired size and look is achieved.Congratulations! You have successfully tied your shoelaces using the standard method. Now, go out and enjoy your securely fastened shoes.

An image of someone tying shoelaces step-by-step with illustrations of the X and bow shapes.

Alternative shoelace tying methods

Alternative Shoelace Tying Methods

Bunny Ear Method:

Step 1: Starting with the shoelaces already threaded through the holes in the shoes, and flat against the surface of the shoes, pull both ends of the shoelaces outwards to tighten them.

Step 2: Cross the two ends of the shoelaces over one another, forming an X shape. Thread one end of the shoelace through the gap created by the X, then pull them tight.

Step 3: Create two loops (the ‘bunny ears’) on each of the shoelace ends by simply folding the laces back onto themselves without twisting them.

Step 4: Cross the ‘bunny ears’ over each other, again forming an X shape.

Step 5: Thread one of the ‘bunny ears’ through the gap in the X, just as in step 2, and pull both loops tightly. You now have a securely tied bow on your shoes.

Reef Knot Method:

Step 1: Begin by making sure your shoelaces are already threaded through the holes in the shoes, and lying flat against the surface of the shoes.

Step 2: Pull both ends of the shoelaces outwards to tighten them.

Step 3: Cross one end of the shoelaces over the other, forming an X shape. Thread the end of the lace on top through the gap created by the X, and pull both ends tight.

Step 4: Cross the same end that was on top in step 3, over the other end, forming another X shape. Thread the now bottom lace through the gap created by the X and pull tight.

Step 5: You have now tied a secure reef knot, which is known for its symmetrical appearance and ease of untying when needed. To avoid slips, make sure the ends of the shoelaces are long enough to ensure the knot stays in place.

Quick-Release Method:

Step 1: As with the other methods, start by making sure your shoelaces are threaded through the holes in the shoes and lying flat against the surface.

Step 2: Pull both ends of the shoelaces outward to tighten.

Step 3: Bend one end of the shoelace back towards the shoe, leaving a small loop at its tip. Hold this loop in place with your thumb and index finger.

Step 4: Take the other end of the shoelace and wrap it around the loop you created in step 3. Pull it tight, so the loop of the lace stays in place.

Step 5: Create another loop with the now free end of the shoelace by folding the lace back on itself. Hold this loop with your thumb and index finger.

Step 6: Hold the shoelace in place and gently pull both loops outward.

Step 7: The quick-release knot can now be easily undone by simply pulling both ends of the shoelaces. This method is particularly useful for those who need to remove their shoes quickly, such as athletes or medical personnel.

A child tying shoelaces using the bunny ear shoelace tying method.

Shoelace tying life hacks

Tying shoelaces is a basic yet essential life skill that everyone should learn. Many people learn to tie their shoes as kids, but not everyone knows the various tricks and techniques for tying shoelaces quickly, securing loose ends, and preventing knots or tangles. In this guide, we will explore different shoelace tying life hacks to help you lace up like a pro.

The Bunny Ear Method:

Perhaps the simplest shoelace tying technique, the Bunny Ear method is easy to learn and quick to execute.

  1. Start with your laces properly threaded through the eyelets of your shoes.
  2. Pull both ends of the lace and cross one end over the other, pulling it through the loop.
  3. Make two loops (bunny ears) with both ends of the lace.
  4. Cross the bunny ears over each other and pull the one farthest from you through the loop created by the other.
  5. Pull both bunny ears to tighten the knot securely.

The Ian Knot:

Touted as the world’s fastest shoelace knot, the Ian Knot can save you time and effort when tying your shoes.

  1. Start with your laces properly threaded through the eyelets of your shoes.
  2. Hold both ends of the laces between your thumbs and index fingers.
  3. Cross your hands to create an “X” shape with your laces.
  4. Using your free fingers, pull a loop of each lace through the center of the “X.”
  5. Carefully pull the loops outward to tighten the knot.

Tuck in loose ends:

Loose ends can cause tripping and look untidy. To secure loose ends, you can tuck them into the sides of your shoes or underneath your laces.

  1. Adjust your laces to ensure they are equal in length on both sides.
  2. Tie your chosen shoelace knot securely.
  3. Tuck the loose ends of the laces into the sides of your shoes, or thread them under the horizontal sections of your laces and pull snugly.

Use a “lace lock” to prevent knot slippage:

A lace lock is an easy way to secure your shoelaces and prevent them from coming undone during the day.

  1. Before tying your shoelace knot, create a loop with each lace and hold them in each hand.
  2. Cross the loops and pull one loop through the hole created by the other loop.
  3. Pull the loops tight to create a lock.
  4. Tie your preferred knot on top of the lace lock to ensure that it stays secure.

Double knots for extra security:

If you have particularly slippery laces or are worried about your shoelace knots coming undone, try using a double knot for extra security.

  1. Tie your preferred shoelace knot as usual.
  2. Create a simple overhand knot by crossing the two loose ends again and snuggly pulling one end through the loop created by the other end.
  3. Pull tight to secure the double knot.

Tying shoelaces doesn’t have to be a chore or a source of frustration. With these shoelace tying life hacks, you can secure your shoes quickly and easily, ensuring that you stay comfortable and safe throughout your day. From the Bunny Ear method to the Ian Knot, experiment with these techniques to find your favorite way to lace up your shoes like a pro.

A person tying their shoelaces using the Bunny Ear Method

Common shoelace problems and solutions

Uneven Shoelace Lengths – If you find that one end of your shoelace is significantly longer than the other, this could lead to difficulty in tying a balanced and secure knot. To fix this problem, first untie your shoelaces completely. Next, pull both ends of the shoelace to ensure that they are even at the center of the shoe, where the laces cross. Adjust the laces accordingly, ensuring that the shoe remains snug and comfortable on your foot. Lastly, tie your shoelace like you normally would, and you should have evenly balanced lace lengths.Broken or Frayed Shoelace Tips – Broken or frayed shoelace tips can make it difficult to lace or unlace your shoes, as well as create an untidy appearance. To repair a broken aglet, you can use one of the following methods: Apply clear nail polish or glue to the frayed ends of the shoelace and twist it tightly to form a new, sealed aglet. Allow it to dry completely before using the shoelace. Use heat shrink tubing. Cut a small piece of heat shrink tubing, that is just slightly longer than the damaged aglet. Place the tubing over the frayed lace end, and then carefully apply heat (using a lighter or a hairdryer) to the tubing until it shrinks tightly around the lace.Shoelaces Keep Coming Untied – If your shoelaces continually come undone, it’s likely that you’re not tying them securely enough, or you’re using a method that loosens easily. Try using the ‘double-loop’ or ‘bunny ears’ method to create a more secure knot. Begin by tying a regular starting knot, looping one lace end over the other and pulling tight. Create a loop with each end by simply folding the lace back onto itself. Cross the two loops over each other, just as you would in a regular knot. Tuck one loop under the other and pull tight. This should result in a secure, double-looped knot that should stay in place throughout the day.Difficulty Lacing Shoes When the Laces Are Too Short – When shoe laces are too short, it can be difficult to lace your shoes and tie them properly, resulting in discomfort or ill-fitting shoes. The simplest solution is to purchase longer shoelaces that better suit the size of your shoe and the lacing style you prefer. Alternatively, you can try adjusting your lacing method. For example, you can skip an eyelet or use a smaller crisscross pattern to save lace length. Also consider trying ‘straight bar lacing’ for a more minimalist look while using less lace.Shoelaces Are Too Long – Long shoelaces can create a messy appearance and can be a tripping hazard if they drag on the ground. If your shoelaces are too long, you can either trim them to a shorter length and secure the cut ends with clear nail polish or glue to prevent fraying, or purchase shorter shoelaces designed for your specific type of shoe. Another option is to tie an additional knot or two after tying your regular bow, which will use up some of the excess length and keep the ends off the ground.

A picture of a pair of shoes, with one shoe having a seemingly tangled knot and the other shoe with a neatly tied bow.

Practicing and perfecting shoelace tying

Gather your materials: To start practicing, you’ll need a pair of shoes with laces or a shoelace board. Make sure the laces are long enough to tie easily without being too long. You can use shoes that you wear daily or an old pair that you no longer wear.Find a comfortable spot: Have a comfortable chair to sit on while practicing shoelace tying. Good posture and proper height will make it easier for you to see and reach your shoelaces.Start with the basic knot: Hold one lace in each hand. Cross the right lace over the left lace, then pull the right lace under the left lace, making a simple twist. Tighten the laces by pulling both ends away from each other.Create the loops: Make a loop with the right lace by folding it back on itself. Hold the loop between your right thumb and index finger. Using your left hand, grab the left lace and wrap it around the right loop, moving from right to left.Complete the bow: While holding the left lace wrapped around the right loop, use your left index finger and thumb to push a small section of the left lace through the opening between the two loops. Pull both loops tight to finish the bow.Repeat the process: The key to perfecting your shoelace tying skills is repetition. Practice tying your shoelaces multiple times to develop muscle memory and to become more comfortable with the process.Try different tying methods: There are several ways to tie shoelaces, such as the ‘bunny ears’ method or the ‘Ian Knot.’ Experiment with these different techniques to find the one that works best for you.Test your skills on different types of shoes: Practice tying shoelaces on various shoes, including athletic shoes, dress shoes, and boots. Each type of shoe may have slightly different lace lengths, eyelet spacing, or stiffness, which can affect the feel of tying your shoelaces.Increase your speed: As you become more comfortable with shoelace tying, challenge yourself to tie your shoelaces more quickly and efficiently. Set a timer and practice tying your shoes as quickly as possible while maintaining a secure knot.Teach others: One of the best ways to solidify your understanding is by teaching someone else how to tie their shoelaces. This will help you reinforce your knowledge and identify any areas of the process you might still need to work on.Remember, practice makes perfect. Continue practicing these steps regularly, and you’ll become an expert at tying shoelaces in no time.

A picture of someone's hands tying their shoelaces step by step.

Armed with the knowledge and skills presented in this guide, you are now prepared to confidently tie your shoelaces in various ways and address any shoelace-related challenges that may arise. Remember that practice makes perfect, so don’t be afraid to experiment and try new techniques. Soon enough, you’ll be an expert at keeping your kicks secured and cruising through life with style and ease.

Categories
Food

Tofu: The Ultimate Guide

Tofu, a versatile and nutritious food, has been a staple in Asian cuisines for centuries. In this article, we’ll explore the fascinating history and origin of tofu, as well as its numerous health benefits and various types. From there, we’ll dive into different cooking methods and provide you with an array of delectable tofu recipes for you to try out.

History and Origin of Tofu

Tofu, also known as bean curd, is a popular plant-based protein that originated in China over 2,000 years ago. Although the exact origins of tofu are still debated, it is widely accepted that it was first discovered during the Han dynasty (206 BC–220 AD) in China.It is believed that tofu was accidentally invented when a Chinese cook mixed fresh soy milk with nigari, a form of natural magnesium chloride found in sea water, causing the soy milk to curdle and form soft, white curds.Over time, tofu became a staple ingredient in various Asian cuisines, including Chinese, Japanese, Korean, Vietnamese, and Thai. Tofu was introduced to Japan during the Nara period (710–784) by Buddhist monks and quickly gained popularity as a nutritious and versatile protein source among vegetarians and those following a Buddhist diet, which typically avoids animal products. Meanwhile, in Korea, tofu was first recorded in the Goryeo Dynasty (918–1392) and is now widely used in traditional dishes like sundubu-jjigae and dubu-kimchi.As the popularity of tofu spread across Asia, it eventually made its way to other regions around the world, gaining traction in Western countries during the 20th century. In the United States, the rise of the health food movement and an increasing awareness of plant-based diets have helped tofu become a mainstream ingredient in grocery stores and restaurants.Tofu, enjoyed by millions of people worldwide, is appreciated for its versatility in cooking and its potential health benefits as a high-quality source of plant-based protein.

An illustration of tofu being served in different forms in China, Japan, and Korea reflects tofu's origins and widespread popularity in Asia.

Health Benefits of Tofu

Also known as bean curd, tofu is a versatile and nutritious food derived from soybeans. Its status as an excellent source of plant-based protein makes it an ideal option for those following vegetarian or vegan diets. Besides protein, tofu is packed with essential nutrients like iron, calcium, and magnesium, which contribute to bone health, muscle function, and overall well-being. Moreover, tofu contains unsaturated fats known to help lower cholesterol levels and reduce the risk of heart diseases.

Another health benefit of tofu is its potential to improve digestion and gut health. Tofu contains isoflavones, which are compounds found in soybeans that have been shown to have positive effects on gut bacteria, thereby promoting a healthy digestive system. Furthermore, tofu is low in calories yet high in filling nutrients, making it beneficial for weight management and overall health. The isoflavones in tofu have also been linked to a reduced risk of developing certain types of cancers, including breast and prostate cancer.

Tofu, also known as bean curd, is a versatile, protein-rich food made from the curdled milk of soybeans. Its versatility contributes to its health benefits, as it can be easily incorporated into a wide variety of dishes, making it convenient for those looking to adopt a plant-based or vegetarian lifestyle. Tofu can be pan-fried or grilled, added to soups or smoothies, and even used as a base for desserts. Its mild flavor and various textures enable individuals to adapt it to suit their specific tastes and dietary preferences, providing not only an array of health benefits but also an enjoyable and conscientious eating experience.

A picture of tofu being served on a plate with various vegetables and rice. It is a healthy and versatile food that can be eaten in many different ways.

Types of Tofu

There are several types of tofu available in the market, differing in texture and firmness. Soft tofu, or silken tofu, is made by coagulating soy milk without curdling it, resulting in a smooth, custard-like texture. Silken tofu is softer compared to other types of tofu and is often used in soups, smoothies, and desserts, as it easily blends with other ingredients. By incorporating various types of tofu into one’s diet, people can enjoy diverse and nutritious meal options.

Firm tofu and extra-firm tofu have a denser texture and are made by pressing soybean curds to remove the excess liquid.

Due to their more solid structure, they hold their shape better when cooked and can be sliced, cubed, or crumbled for use in various dishes.

Firm tofu is ideal for stir-fries, grilling, and baking, while extra-firm tofu can be used in recipes that require a substantial texture, such as in hearty stews and meat substitutes.

Both firm and extra-firm tofu can be marinated to enhance their flavors, and they easily absorb the taste of the other ingredients they are cooked with.

Another variety of tofu that has gained popularity in recent years is sprouted tofu.

It is made from sprouted soybeans, which are said to be easier to digest and boast higher levels of nutrients compared to non-sprouted soybeans.

Sprouted tofu is available in different levels of firmness, resembling traditional tofu, and can be used interchangeably in recipes.

No matter the type or texture, tofu is known for its ability to absorb flavors and adapt to a wide range of cuisines, making it a versatile and nutritious addition to various dishes.

There are different types of tofu such as soft tofu, firm tofu and extra-firm tofu with varying textures and firmness.

Cooking Methods for Tofu

One popular cooking method for tofu is frying, which can be done in different ways to achieve varying textures and flavors. Shallow frying or pan-searing tofu involves cooking it in a small amount of oil in a hot pan until it’s golden brown and crispy on all sides. This technique is perfect for incorporating tofu into stir-fries, salads, and wraps. Deep frying, on the other hand, completely submerges the tofu in hot oil, resulting in a crispy outer layer, while maintaining a tender inside. Deep-fried tofu can be enjoyed as a snack, or used in dishes like curry or noodle bowls.

Baking tofu is another excellent method that offers versatility for creating different textures and flavors. To bake tofu, drain and press it to remove excess moisture, then cut it into desired shapes or sizes. To enhance its taste, marinate the tofu in your choice of sauces or spices before baking. Spread the tofu pieces evenly on a lined baking sheet and bake them at 350°F for 25-35 minutes, flipping halfway through, until the desired crispness is attained. Baking tofu provides a healthier alternative to frying, as it requires less oil while still achieving a crispy exterior.Grilling is a fantastic way to prepare tofu, particularly during the warmer seasons when you can enjoy its smoky, charred flavor. Before grilling, make sure to drain, press, and slice the tofu into thick slabs or skewer-friendly cubes. Marinating the tofu adds extra flavor and helps prevent it from sticking to the grill. Preheat the grill and lightly oil the grates to prevent the tofu from sticking. Cook each side for a few minutes until grill marks appear, and the tofu becomes firm and slightly charred on the outside. Grilled tofu is a delicious addition to salads, sandwiches, or as a main course protein served with your favorite side dishes.

Three different images showing tofu being fried, baked, and grilled on a grill pan.

Tofu Recipes

Tofu, or bean curd, is a versatile, nutritious, and protein-rich food made from soy milk. It is a popular ingredient in various cuisines around the world, particularly in Asian dishes. With its subtle taste, tofu serves as the perfect canvas to absorb flavors from other ingredients in a recipe. It comes in different forms, such as silken, soft, firm, and extra-firm, with each type suitable for specific recipes. Beyond grilling, tofu can be pan-fried, stir-fried, baked, and even used in smoothies and desserts, showcasing its incredible versatility.

When it comes to tofu dishes, the options are plenty and cater to various taste preferences. For savory dishes, tofu can be marinated and pan-fried, then incorporated into salads, sandwiches, or grain bowls. As a plant-based protein option, it works well in popular dishes like tofu scramble (a vegan alternative to scrambled eggs), tacos, or pasta dishes. In Asian cuisines, tofu is often used in dishes such as mapo tofu (a spicy Sichuan dish with tofu and ground meat in a chili sauce), agedashi tofu (a Japanese appetizer with crispy fried tofu served in a soy-based sauce), and miso soup (with tofu cubes and seaweed). Tofu can also be used as a meat substitute in curries, stir-fries, and noodle dishes, making it ideal for vegetarian and vegan diets.

Moreover, tofu can also be used in a variety of dessert recipes, proving its exceptional adaptability as an ingredient. Silken tofu, known for its smooth, creamy texture, works exceptionally well in non-dairy and vegan desserts like tofu cheesecake, chocolate mousse, and fruit-based smoothies. By blending silken tofu with ingredients like cocoa powder, sugar, and vanilla extract, it transforms into a creamy, indulgent treat that is perfect for satisfying your sweet tooth without any guilt. In Asian confections, tofu is also used to make dishes like douhua (a soft Chinese tofu pudding served with sweet syrup) and taho (a Philippine dessert made of silken tofu, sugar syrup, and tapioca pearls). Whether you choose to explore savory or sweet tofu recipes, one thing is for sure: the possibilities are virtually endless when it comes to creating diverse dishes with this humble ingredient.

A picture of a chef preparing tofu in a wok.

Now that you have a better understanding of tofu’s rich history, its myriad health benefits, and the various types available, you’re well-equipped to incorporate this wonderful ingredient into your cooking repertoire. With a plethora of cooking techniques and delicious recipes at your disposal, there’s no limit to what you can create using tofu. So, go ahead and unleash your inner chef, experimenting with this versatile and nutritious ingredient in your favorite dishes or discovering new ones.

Categories
Sneakers

Slip-On vs Lace-Up Shoes: Ultimate Comparison

Deciding between slip-on shoes and lace-up shoes can be a challenging task, as both styles offer unique advantages and disadvantages. This article aims to inform you about the history, design, and construction of both types of shoes, as well as their benefits and drawbacks, so you can choose the right footwear for your needs and preferences.

History and Evolution

The history and evolution of slip-on shoes can be traced back thousands of years. The earliest known slip-on shoes were sandals worn by ancient Egyptians and Romans, who appreciated their ease of use and breathability. Throughout the centuries, slip-on shoes continued to evolve and diversify to meet the needs of different cultures and climates. For example, the traditional Japanese “geta” sandal was created as a convenient slip-on footwear solution for walking on wet or uneven surfaces. In more recent times, slip-on styles such as loafers, ballet flats, and espadrilles have gained popularity around the world for their versatile mix of comfort, style, and functionality.

Lace-up shoes, in contrast, have roots that can be traced back to the 16th century. Balmoral (Oxford) shoes and Blücher (Derby) shoes, two predominant styles of lace-up shoes, both originated in Europe as military footwear. The use of lace-up closures allowed soldiers to adjust the tightness of their shoes for a secure and comfortable fit on long marches. Over time, lace-up shoes crossed over from military use to everyday wear and became a fashionable choice for both men and women. In the Victorian era, lace-up boots became a popular option for women seeking both style and support. Today, lace-up shoes have expanded to encompass a wide variety of footwear styles, including sneakers, dress shoes, and hiking boots.

Throughout various cultures, the decision to wear slip-on shoes versus lace-up shoes has grown to represent more than just an individual’s personal taste. In certain situations, the differences between these two footwear styles can symbolize social class or occupation. For instance, during the 19th century in England, lace-up shoes were commonly associated with the upper classes, whereas slip-on shoes were considered fitting for working-class laborers. Currently, we see similar distinctions in professional attire, with lace-up shoes being regarded as more formal and slip-on shoes appearing as more casual and laid-back. In the end, the development of both slip-on and lace-up shoes has presented us with a diverse and abundant selection of footwear, enabling everyone to find the ideal pair based on their specific needs and preferences.

A man wearing slip-on shoes looking at a timeline of footwear with ancient Egyptian and Roman-inspired sandals on one end and modern slip-on shoes on the other end.

Design and Construction

Slip-on Shoes

Designed for convenience and easy wear, slip-on shoes require no laces to be tied. Crafted from various materials, such as canvas, leather, or synthetic fabrics, they come in numerous styles that include loafers, moccasins, boat shoes, and sneakers. To provide a better fit, comfort features like elastic inserts, padded collars, and cushioned insoles are often incorporated in slip-on shoes. These design elements cater to the wearer’s unique footwear needs and allow for a seamless transition when considering both slip-on and lace-up options.

Lace-up Shoes

Lace-up shoes, on the other hand, require laces to fasten the shoe securely onto the foot, offering a more adjustable and supportive fit for various foot sizes and shapes. Lace-up shoes come in many styles such as dress shoes, casual wear, and athletic footwear. The lace-up system provides more support and stability, particularly for athletic pursuits or jobs that require a lot of walking or standing. Lace-up shoes may feature decorative or functional details such as broguing, wingtips, or toe caps to provide a unique design.

Construction Methods

Slip-on shoes and lace-up shoes have distinct construction methods that impact their appearance and functionality. Slip-on shoes typically use glue or stitching to attach the upper to the sole, resulting in fewer seams or a more minimalistic look. On the other hand, lace-up shoes require additional reinforcements due to the strain caused by the tension of the laces. As a result, the uppers of lace-up shoes often have more intricate designs, featuring eyelets and other decorative or functional elements.

A picture of a person's foot inserting easily into a slip-on shoe without any requirement to tie laces.

Advantages of Slip-On Shoes

When comparing slip-on shoes with lace-up shoes, the convenience and ease of wear stand out as a key advantage for slip-on shoes. With no laces to tie or untangle, slip-ons are perfect for fast-paced individuals or those who struggle with tying laces. Additionally, slip-on shoes can be swiftly removed, making them practical for situations where shoes need to be frequently taken on and off, such as going through airport security or entering specific cultural or religious spaces. In contrast, lace-up shoes may require more time and effort to put on or remove, making them less suitable for such circumstances.

Another advantage of slip-on shoes is their flexibility in sizes. Given that they often have an elastic upper or a stretchable material, they may accommodate a wider range of foot sizes and shapes, providing a comfortable fit for people with slightly wider or narrower foot dimensions than standard sizes. This flexibility can also give more room for feet to swell or contract throughout the day, ensuring consistent comfort.

Slip-on shoes provide an easy and casual option for various occasions due to their relaxed and laid-back vibe. Their versatility, combined with a wide range of designs such as sneakers, loafers, and sandals, make them an adaptable and fashionable accessory in one’s wardrobe for different settings and outfits.

A picture of someone wearing slip-on shoes, which can be quickly and easily removed.

Advantages of Lace-Up Shoes

On the other hand, lace-up shoes offer a significant advantage in terms of fit and support compared to slip-on shoes. The adjustable laces cater to the unique contours of an individual’s feet, resulting in a more secure, snug fit. This prevents the shoes from slipping off, a common issue with slip-on shoes. The additional support provided by lace-up shoes makes them suitable for a broader range of activities including sports, hiking, and long walks, as they help minimize the risk of injury.

Another notable benefit of lace-up shoes is their customizability, as laces can be easily swapped out for different styles, colors, and lengths to suit the wearer’s preferences. This flexibility allows individuals to personalize their footwear, adding an element of distinctiveness to their overall ensemble. Additionally, lace-up shoes are available in various styles, making them highly versatile for dressing up or down. Their suitability for both casual and formal occasions sets them apart from slip-on shoes, which tend to lean more towards informal settings.

Lace-up shoes offer style versatility, catering to a wide range of wardrobe options, from timeless classics to trendy contemporary pieces. This adaptability makes lace-up shoes a popular choice for men and women when selecting footwear for work, social engagements, and special occasions. For instance, a pair of oxfords, brogues, or pumps can be dressed up or down for business or black-tie events, while casual sneakers and boots can easily complement jeans and skirts for everyday wear. In contrast, slip-on shoes may not be as appropriate for specific formal events or intricate dress codes.

A picture of a person wearing a pair of lace-up shoes.

Disadvantages of Slip-On Shoes

Aside from style considerations, lace-up shoes also provide an advantage in terms of foot health. While slip-on shoes can be comfortable and convenient, they often lack adequate support and cushioning for the foot’s arch, leading to discomfort and even long-term damage. Additionally, slip-ons tend to have a looser fit than lace-up shoes, increasing the chances of developing blisters or corns from friction. Conversely, lace-up shoes offer a more customizable and secure fit, which can help to minimize irritation and promote proper foot alignment, ensuring long-lasting comfort and well-being.

Another disadvantage of slip-on shoes is their limited stability, particularly when engaging in any physical activities or walking on uneven surfaces. The looser fit of slip-ons makes it more likely for the shoe to slip off or twist on the foot, increasing the risk of injuries such as sprained ankles or unexpected falls. Lace-up shoes, however, provide a more secure and stable fit. This is particularly important for those who are active, have balance issues, or need additional foot support due to medical conditions.

Slip-on shoes are generally perceived as less formal compared to lace-up shoes, which can be limiting in professional or dressy settings where a refined and polished appearance is crucial. The more casual aesthetic of slip-on shoes makes them less suitable for events requiring formal attire or in workplaces with a strict dress code. In contrast, lace-up shoes are often associated with a higher level of formality and sophistication, making them a more versatile and appropriate choice for various occasions.

Imagine walking on sand with footprints that show the arch of the foot. Slip-on shoes lack the support that helps keep the arch in place, which can cause discomfort and long-term damage to the feet.

Disadvantages of Lace-Up Shoes

However, one notable disadvantage of lace-up shoes in comparison to slip-on shoes is the time-consuming process of tying and untying laces. This can be particularly inconvenient for individuals in a rush, those with limited mobility or dexterity, or young children who have not yet mastered the skill of tying shoelaces. In contrast, slip-on shoes offer a quick and hassle-free option, as they can be simply stepped into without any additional fastening required. This allows for a more efficient getting dressed routine and less time spent on adjusting footwear throughout the day.

Lace-up shoes also present the potential issue of lace damage, which can be both frustrating and costly in the long run. Laces can fray, break, or become tangled over time, requiring replacement or repair. Additionally, the repeated process of tying and untying can contribute to the overall wear and tear of the footwear, which may lead to a shortened lifespan for the shoes themselves. Slip-on shoes, on the other hand, do not have laces to worry about, making them a more durable and low-maintenance choice.

One major advantage of slip-on shoes over lace-up shoes is their convenience in certain situations, such as passing through security checkpoints at airports. Lace-up shoes require untying and retying, which can be time-consuming and frustrating. Moreover, lace-up shoes may not provide the same level of comfort as slip-on shoes, as laces can sometimes be tied too tightly, causing irritation or discomfort. Therefore, slip-on shoes offer a more efficient and comfortable alternative to their lace-up counterparts.

Illustration showing the differences between putting on lace-up shoes and slip-on shoes, with slip-on shoes being the easier and quicker option.

Popular Brands and Styles

There are several popular brands offering a variety of slip-on shoes to choose from, such as Vans, Skechers, and TOMS. Vans has been a leading brand since the 1970s with their iconic Classic Slip-On, featuring a wide selection of materials, patterns, and colors. Skechers caters to those who prioritize comfort and cushioning, offering athletic and comfort-oriented slip-ons with their line of GoWalk and Equalizer shoes. TOMS, known for their social mission, provides lightweight canvas slip-on shoes in various colors and patterns. These slip-on shoes are typically priced between $40 and $80, offering an affordable and functional alternative to lace-up shoes.

Lace-up shoes come in a variety of styles and price points, which can cater to a wide range of consumers. Popular brands in this category include Nike, Adidas, and Converse. Nike and Adidas offer a multitude of athletic and casual sneakers, both high-end and affordable, that are perfect for daily wear as well as fitness activities. These brands have made significant strides in integrating performance technology and design, with popular styles such as the Nike Air Force 1, Adidas Ultra Boost, and Adidas Originals Superstar. Converse, a classic and casual brand, is best known for their Chuck Taylor All-Star shoe. This simple, canvas sneaker has been a wardrobe staple for decades and remains a timeless option for many. Lace-up shoes from these brands can range anywhere from $40 to well over $200 for limited edition and high-end releases.

When it comes to style and versatility, Sperry and Cole Haan are two brands that offer a well-rounded selection of both slip-on and lace-up shoes. Sperry, known for their Original Boat Shoe, provides a variety of lace-up and slip-on boat shoes in various materials and colors, catering to those in search of a preppy, coastal, or casual style. Cole Haan, on the other hand, boasts a diverse collection of casual and dress options, including the ØriginalGrand Ultra Wingtip Oxford and the Nantucket Loafer. With a price range spanning from $50 to over $200, these brands offer something for every budget.

A chart showing the various shoe brands for slip-on and lace-up shoes and their respective prices.

Choosing the Right Shoe

When selecting the perfect shoe, several factors come into play, such as the occasion, comfort, personal style, and foot health. Both slip-on and lace-up shoes have their distinct benefits and drawbacks, depending on these considerations. Slip-on shoes are ideal for casual situations, offering the convenience of being easily put on and removed. They make the perfect choice for quick errands or relaxed gatherings. Conversely, lace-up shoes cater to more formal occasions, sports, and activities requiring a secure fit. Providing superior foot support, lace-up shoes are seen as a more suitable option for professional environments.

Comfort and foot health are important elements to think about when choosing between slip-on and lace-up shoes. While slip-on shoes provide quick comfort, they might not offer adequate support for individuals with specific foot or arch issues. Properly fitted lace-up shoes can give better control over the snugness of the fit, which can be beneficial for those with foot ailments, as well as for athletes who require stability during their sports activities. Moreover, lace-up shoes also enable the use of specific lacing techniques catered to a person’s foot shape and needs, providing a more customized fit.

Personal style plays a significant role in choosing between slip-on and lace-up shoes. Fashion preferences differ from one individual to another, and there is a wide range of both slip-on and lace-up shoe styles available on the market, from classic to trendy. In general, slip-on shoes tend to have a more casual and laid-back appearance, while lace-up shoes are often associated with a polished and professional look. However, some shoe designs combine elements from both types, offering stylish options for those who want the best of both worlds. It is crucial to pick a shoe that complements one’s wardrobe and provides the desired aesthetic without compromising comfort and foot health.

A young boy is trying on two pairs of shoes, one pair of slip-on shoes and the other a pair of lace-up shoes, to decide which one he should wear.

Ultimately, the decision between slip-on shoes and lace-up shoes depends on your personal preferences, comfort, and the specific occasion. By understanding the history, design, and advantages and disadvantages of both types of shoes, you can make an informed decision and find the perfect shoe that best suits your individual style and needs. Remember, never compromise on comfort and foot health when selecting a shoe that’s right for you.

Categories
Uncategorized

Apple Recipes

Welcome to the wonderful world of apples! Apples are incredibly versatile ingredients and can be used in a wide range of delicious recipes. In this article, we’ll explore the different types of apples, learn various apple preparation techniques, and discover classic, unique, and international apple recipes. We will also discuss canning and preserving options as well as healthy recipe ideas for those seeking nutritious apple dishes. Let’s dive into our apple adventure!

Types of Apples

Apples are one of the most versatile and widely-consumed fruits around the world. With over 7,500 varieties of apples, there are several types, each with its unique flavor, texture, and color. In this guide, we will explore some popular types of apples, their taste profiles, and the best recipes to make with each variety.

1. Granny Smith Apples

  • Taste Profile: Tart and tangy with a firm texture
  • Best-suited Recipes: Pies, tarts, apple crisps, and as a contrast in salads
  • Description: Granny Smith apples maintain their shape well, making them ideal for baking purposes. Their tartness balances out the sweetness in desserts and also complements other flavors in salads, such as mixed greens, walnuts, and goat cheese.

2. Red Delicious Apples

  • Taste Profile: Sweet, mild flavor, and tender texture
  • Best-suited Recipes: Fresh eating, fruit salads, apple sauce, and smoothies
  • Description: These iconic red apples have a beautiful appearance, but their tender texture might get mushy when baked. They are best enjoyed raw, such as in fruit salads or as a snack.

3. Golden Delicious Apples

  • Taste Profile: Sweet, mild flavor, with a tender-crisp texture
  • Best-suited Recipes: Baking, apple sauce, and apple butter
  • Description: Golden Delicious apples are versatile as they hold up well to baking and can be used for apple sauce and apple butter. They are also suitable as a standalone snack.

4. Fuji Apples

  • Taste Profile: Sweet, juicy, and crunchy
  • Best-suited Recipes: Fresh eating, salads, and baking
  • Description: Fujis are a popular snack due to their sweet taste and crisp texture. They can also be used in salads, where their sweetness complements greens and vinaigrettes. Additionally, Fuji apples hold up well in baking, making them a suitable choice for pies and tarts.

5. Honeycrisp Apples

  • Taste Profile: Sweet with a hint of tartness and a crisp, juicy texture
  • Best-suited Recipes: Fresh eating, salads, and baking
  • Description: Honeycrisps are known for their satisfying crunch and sweet flavor, making them a popular choice for snacking. They are also wonderful in salads and can be used in baking recipes, such as pies or apple crisps.

6. Gala Apples

  • Taste Profile: Sweet and mildly tart with a firm texture
  • Best-suited Recipes: Fresh eating, salads, and baking
  • Description: Gala apples are multipurpose and can be used in several recipes due to their balanced taste profile and firm texture. They make for a suitable option for pies, tarts, salads, or simply by themselves as a snack.

7. McIntosh Apples

  • Taste Profile: Mildly tart and tender
  • Best-suited Recipes: Fresh eating, apple sauce, and apple butter
  • Description: McIntosh apples are excellent for apple sauces and apple butter due to their tender texture. Their tartness adds a pleasant tangy flavor, making them a delightful addition to these recipes.

Understanding the different types of apples, their flavor profiles, and best-suited recipes can enhance your culinary skills and knowledge. From pies and tarts to salads and sauces, this guide provides valuable information for incorporating apples into various dishes. Feel free to mix and match different varieties to create unique flavor combinations that cater to your taste buds. Happy cooking!

An image showing different types of apples such as Granny Smith, Red Delicious, Golden Delicious, Fuji, Honeycrisp, Gala, and McIntosh. The apples are arranged in a circular pattern, with each type labeled with its name. The image is in PNG format.

Apple Preparation Techniques

Apples are a versatile fruit used in various delicious recipes such as pies, salads, and sauces. Proper apple preparation is essential for consistency in taste and appearance. In this guide, we will discuss different apple preparation techniques including peeling, coring, slicing, and storage tips to preserve their freshness.

1. Peeling

Required Tools:

  • A sharp paring knife or a vegetable peeler

Instructions:

  1. Wash the apple thoroughly under running water to remove dirt and residues.
  2. Hold the apple in one hand and the peeler or the knife in the other.
  3. Start at the top near the stem, and firmly push the peeler or knife away from your body to remove the skin.
  4. Continue peeling the apple around its circumference, ensuring that you remove as little flesh as possible.
  5. After you have peeled the entire apple, give it a quick rinse to remove any remaining peel.

2. Coring

Required Tools:

  • A sharp knife or an apple corer

Instructions:

  1. Place the apple on a cutting board with the stem facing up.
  2. If using a knife, cut the apple in half vertically through the stem and the bottom. Then make four angled cuts around the core, avoiding the seeds, to remove it.
  3. If using an apple corer, position the corer at the center of the apple and push it through until it reaches the bottom. Pull the corer back out to remove the core.
  4. Check for any remaining seeds or parts of the core and remove them.

3. Slicing

Required Tools:

  • A sharp knife

Instructions:

  1. Place the cored apple halves on the cutting board with the flat sides facing down.
  2. Hold the apple firmly and slice it into even wedges, about ¼ inch thick. The thickness may vary depending on your preference and the specific recipe.
  3. Cut away any remaining peel or core if necessary.

4. Storage and Freshness Preservation

  • To store apples for short periods, place them in a plastic bag in the refrigerator. They should last for up to a week.
  • For long-term storage, store apples in a cool, dark, and well-ventilated place, such as a cellar or a fruit storage rack. Place them in a single layer, not touching each other, and check them frequently for signs of spoilage.
  • Use a mixture of one part lemon juice and three parts water to prevent the apple slices from turning brown due to oxidation. Dip the apple slices in this solution before using them in salads or other recipes that require raw apples.
  • For cooked apple dishes, like pies and crisps, peeling, coring, and slicing the apples right before cooking will help prevent browning and reduce the risk of spoilage during storage.

Now that you have learned different apple preparation techniques, you can apply them to your favorite apple recipes for excellent results. Enjoy exploring various apple dishes, and always remember to practice proper handling and storage techniques to enjoy fresh and delicious apples all year round!

An image of a hand holding a partially peeled apple next to a bowl of sliced apples with a knife and a cutting board on the side.

Classic Apple Recipes

Apples are incredibly versatile when it comes to cooking and baking. Classic apple recipes like apple pies, apple crisps, and apple sauces are not only delicious but also easy to prepare. In this guide, you will learn the necessary steps, ingredient choices, and baking techniques for creating these three classic apple recipes.

1. Apple Pie

  • 6 cups thinly sliced, peeled apples (Granny Smith or Honeycrisp work well)
  • 1 cup granulated sugar
  • 2 tbsp all-purpose flour
  • 1/2 tsp ground cinnamon
  • 1/4 tsp ground nutmeg
  • 1/4 tsp salt
  • 1 tbsp lemon juice
  • 2 premade pie crusts (or homemade)
  • 1 tbsp butter

Instructions:

  1. Preheat the oven to 425°F (220°C).
  2. In a large bowl, mix together the sugar, flour, cinnamon, nutmeg, and salt.
  3. Add the apple slices and lemon juice to the bowl, coating the apples evenly in the dry mixture.
  4. Place the bottom pie crust in a 9-inch pie dish, gently pressing the crust down into the dish.
  5. Fill the crust with the apple mixture, piling the fruit higher in the center of the pie.
  6. Cut the butter into small pieces and dot the top of the apple mixture with the pieces.
  7. Place the top pie crust over the apple filling, crimping the edges of the two crusts together to seal the pie.
  8. Cut a few small slits in the top crust to allow steam to escape.
  9. Bake the pie for 45-50 minutes, or until the crust is golden brown and the filling is bubbly.
  10. Allow the pie to cool before serving.

2. Apple Crisp

  • 6 cups thinly sliced, peeled apples (Granny Smith or Honeycrisp work well)
  • 1 cup quick-cooking oats
  • 1 cup all-purpose flour
  • 1 cup packed brown sugar
  • 1/4 tsp baking powder
  • 1/4 tsp baking soda
  • 1/2 cup butter, softened

Instructions:

  1. Preheat the oven to 350°F (175°C).
  2. Grease a 9×13-inch baking dish and layer the apple slices in the dish.
  3. In a large bowl, mix together the oats, flour, brown sugar, baking powder, and baking soda.
  4. Cut in the softened butter using a pastry cutter or two knives until the mixture resembles coarse crumbs.
  5. Sprinkle the crumb mixture evenly over the apple slices in the baking dish.
  6. Bake for 45 minutes, or until the apples are tender and the topping is golden brown.
  7. Serve warm, optionally with a scoop of vanilla ice cream.

3. Apple Sauce

  • 4 apples, peeled, cored, and chopped (choose a soft variety such as McIntosh or Golden Delicious)
  • 3/4 cup water
  • 1/4 cup granulated sugar
  • 1/2 tsp ground cinnamon

Instructions:

  1. In a medium saucepan, combine the chopped apples, water, sugar, and cinnamon.
  2. Bring the mixture to a boil, then reduce the heat, and let it simmer for 15-20 minutes, stirring occasionally.
  3. Once the apples are soft, remove the saucepan from the heat.
  4. For chunky applesauce, mash the apples with a potato masher until the desired consistency is reached. For a smoother applesauce, use an immersion blender or a food processor.
  5. Allow the apple sauce to cool before serving.

These classic apple recipes are sure to impress and delight your family and friends. With easy-to-follow instructions and simple ingredients, anyone can make these homemade apple pies, apple crisps, and apple sauces. Enjoy these fall favorites and remember to always use fresh, high-quality apples for the best results.

A dish filled with homemade apple pies, apple crisps, and apple sauce

Unique Apple Recipes

Apples are a versatile fruit that can be used in a variety of dishes, both sweet and savory. In this guide, we will explore some unique apple recipes, including apple-stuffed chicken, apple salad, and apple chutneys. These dishes will demonstrate how apples can be incorporated in unconventional ways to create exciting new flavors and textures in your meals.

1. Apple-Stuffed Chicken

Ingredients:

  • 4 boneless, skinless chicken breasts
  • 2 medium apples, peeled, cored, and finely chopped
  • 1/2 cup shredded cheddar cheese
  • 1/4 cup bread crumbs
  • 1/4 cup chopped walnuts
  • 1/4 cup finely chopped fresh basil
  • Salt and pepper, to taste
  • 1 tablespoon olive oil
  • Toothpicks or cooking twine (to secure chicken)

Instructions:

  1. Preheat your oven to 375°F (190°C).
  2. In a bowl, combine chopped apples, cheddar cheese, bread crumbs, walnuts, and basil. Mix well and season with salt and pepper.
  3. Cut a pocket into one side of each chicken breast, being careful not to cut all the way through. Stuff each pocket with an equal amount of the apple mixture and secure with toothpicks or cooking twine.
  4. Season the outside of the chicken breasts with salt and pepper.
  5. Heat olive oil in an oven-safe skillet over medium-high heat. Sear the chicken breasts for 3-4 minutes on each side, until they are golden brown.
  6. Place the skillet in the oven and bake for 20-25 minutes, or until the chicken reaches an internal temperature of 165°F(74°C).
  7. Remove the chicken from the oven and let it rest for 5 minutes before serving.

2. Apple Salad

Ingredients:

  • 2 medium apples, thinly sliced
  • 2 cups arugula or mixed greens
  • 1/2 cup thinly sliced red onion
  • 1/2 cup crumbled blue cheese
  • 1/4 cup dried cranberries
  • 1/4 cup chopped pecans
  • Balsamic vinaigrette

Instructions:

  1. In a large salad bowl, combine apples, arugula, red onion, blue cheese, dried cranberries, and pecans.
  2. Drizzle with balsamic vinaigrette and toss gently to combine.
  3. Serve the salad as a side dish or add grilled chicken or fish for a complete meal.

3. Apple Chutney

Ingredients:

  • 4 medium apples, peeled, cored, and chopped
  • 1/2 cup chopped red onion
  • 1/4 cup apple cider vinegar
  • 1/4 cup brown sugar
  • 1/4 cup raisins
  • 1 tablespoon finely grated fresh ginger
  • 1/2 teaspoon ground cinnamon
  • 1/4 teaspoon ground cloves
  • Salt and pepper, to taste

Instructions:

  1. In a medium saucepan, combine all the ingredients, and bring to a boil over medium heat.
  2. Reduce heat to low and simmer for 25-30 minutes, stirring occasionally, until the apples are soft and the chutney has thickened.
  3. Let the chutney cool before transferring it to an airtight container. Store it in the refrigerator for up to one week.
  4. Serve the apple chutney alongside roasted meats, grilled fish, or as a topping for sandwiches.

With these unique apple recipes, you’ll have an assortment of dishes to impress your friends and family. Incorporating apples in unconventional ways can bring a fresh and delightful twist to your meals. Enjoy experimenting with apples and discovering new flavors and textures in your dishes.

A picture of a plate of food with apple-stuffed chicken, apple salad, and apple chutney.

International Apple Recipes

Apples are a versatile fruit loved by many cultures worldwide and have inspired countless delicious recipes. In this guide, we will explore apple recipes from various countries, including French Tarte Tatin, German Apfelstrudel, and British apple crumbles. By learning and making these apple dishes, you can enjoy your apples in a whole new way while experiencing international flavors.

Recipe 1: French Tarte Tatin

  • Ingredients:
    • 5 medium-sized apples, peeled, cored, and cut into quarters
    • 1 cup granulated sugar
    • 6 tablespoons unsalted butter, diced
    • 1/4 teaspoon salt
    • 1 sheet puff pastry
  • Instructions:
    • Preheat the oven to 425°F (220°C).
    • In a 10-inch oven-safe pan (preferably cast-iron), combine the sugar and 1/4 cup water. Cook over medium heat until the mixture turns into a deep amber caramel, about 10 minutes. Remove from heat and whisk in the butter and salt until melted and combined.
    • Arrange the apples snugly in the caramel, cut side up, with the round sides against the edge of the pan.
    • Roll out the puff pastry to a thickness of about 1/8 inch, then lay it over the apples, tucking the edges down into the pan.
    • Place the pan in the preheated oven and bake for 25-30 minutes, or until the puff pastry is golden brown and crispy.
    • Carefully remove the tarte from the oven and let cool for 10 minutes. To serve, place a plate (larger than the pan) over the tarte and carefully invert the tarte onto the plate. Serve warm with whipped cream or ice cream, if desired.

Recipe 2: German Apfelstrudel

  • Ingredients:
    • 4 medium-sized apples, peeled, cored, and sliced
    • 1 cup granulated sugar
    • 1 teaspoon cinnamon
    • 1/2 cup raisins (optional)
    • 1/2 cup finely chopped walnuts or almonds
    • 4 tablespoons melted butter
    • 1 package frozen phyllo dough, thawed
  • Instructions:
    • Preheat oven to 375°F (190°C). Prepare a baking sheet lined with parchment paper.
    • In a large bowl, combine sliced apples, sugar, cinnamon, raisins (if using) and chopped nuts. Set aside.
    • Lay one sheet of phyllo dough on a clean work surface and brush with melted butter. Repeat this process, layering 4-5 sheets of phyllo dough on top of one another.
    • Spread the apple mixture along the longer side of the phyllo dough, leaving about 2 inches of space at the edges.
    • Carefully roll up the dough and apple filling like a jelly roll, tucking the edges in as you roll.
    • Place the strudel seam-side down on the prepared baking sheet. Brush with more melted butter, if desired.
    • Bake for 30-35 minutes, or until the strudel is golden brown and crispy.
    • Allow the strudel to cool slightly before cutting into thick slices. Serve warm with whipped cream or vanilla ice cream.

Recipe 3: British Apple Crumble

  • Ingredients:
    • 4 medium-sized apples, peeled, cored, and chopped
    • 1/3 cup granulated sugar
    • 1 teaspoon cinnamon
    • 1 cup all-purpose flour
    • 1/2 cup rolled oats
    • 1/2 cup brown sugar
    • 1/2 cup cold unsalted butter, cut into small pieces
    • Pinch of salt
  • Instructions:
    • Preheat the oven to 375°F (190°C). Grease an 8×8-inch baking dish.
    • In a large bowl, combine the chopped apples, granulated sugar, and cinnamon. Pour this mixture into the prepared baking dish.
    • In another bowl, mix together the flour, rolled oats, brown sugar, and salt. Add in the cold butter and use your fingers or a pastry cutter to blend the butter into the dry ingredients until it resembles coarse crumbs.
    • Spread the crumble topping over the apples in the baking dish, making sure to completely cover the apples.
    • Bake in the preheated oven for 35-40 minutes, or until the topping is golden and crunchy and the apples are tender.
    • Allow the apple crumble to cool slightly before serving with whipped cream or custard.

As you make these international apple recipes, you will not only satisfy your apple cravings but also expand your culinary skills to include these tasty cross-cultural delights. Enjoy!

A mouth-watering display of apples in a variety of colors and shapes, along with other fresh fruits and baking ingredients, arranged in a rustic wooden basket. This image is ideal for showcasing the versatility and international appeal of apples in culinary applications. The filename for the image is 'apple-recipe-image-RND.png', where RND are three random letters as a PNG format.

Canning and Preserving Apples

Preserving and canning apples is a fantastic way to enjoy the flavors of fall all year round. In this guide, we will look at the process of canning and preserving apples. You will learn how to make apple butter, jams, and jellies that will last for months on the shelf.

Materials and Equipment:

  • Fresh apples
  • Sugar
  • Pectin (for jams and jellies)
  • Lemon juice
  • Spices (optional: cinnamon, nutmeg, cloves)
  • Large pot or saucepan
  • Immersion blender or food processor (for apple butter)
  • Mason jars with lids and screw bands
  • Canning funnel
  • Jar lifter
  • Water bath canner or large stockpot with a lid
  • Clean towels

Instructions:

  1. Prepare the apples. Wash and dry the apples thoroughly. Remove the stems, peel, core, and dice the apples into small pieces.
  2. Make apple butter, jam, or jelly base.
    • For apple butter: Cook the diced apples with sugar, and spices (such as cinnamon, nutmeg, and cloves) in a large pot over low heat, stirring frequently. Cook until the apples are soft and can be easily mashed. Use an immersion blender or food processor to make a smooth puree.
    • For apple jam:
      In a large saucepan, combine the diced apples, sugar, and lemon juice. Cook over medium heat, stirring frequently until the sugar has dissolved and the apples soften slightly.
    • For apple jelly: In a large saucepan, combine the diced apples, sugar, pectin, and lemon juice. Cook over medium heat, stirring constantly, until the sugar dissolves and the mixture comes to a boil.
  3. Prepare jars for canning. Wash the jars, lids, and screw bands in hot, soapy water. Rinse thoroughly. Place the jars in the water bath canner (or large stockpot) filled with water. Bring the water to a boil, then reduce the heat to keep the jars hot until ready to fill. Place the lids and screw bands aside, as they should not be boiled.
  4. Fill jars with apple butter, jam, or jelly. Using a canning funnel, ladle the hot apple butter, jam, or jelly into the hot jars, leaving 1/4-inch headspace. Headspace is the empty space between the top of the preserves and the top of the jar. Wipe the rims of the jars with a clean, damp cloth to remove any spills.
  5. Attach lids and screw bands. Place a clean, hot lid on each jar, then screw the band down just until fingertip tight. Do not overtighten the bands.
  6. Process jars in a water bath canner. Place the filled jars in the water bath canner (or large stockpot) fitted with a rack. Ensure that the jars are covered with water by at least 1 inch. Bring the water to a boil, then cover the pot and process the jars for the recommended time based on your altitude and specific recipe (usually 10-20 minutes for apple butter, jams, and jellies).
  7. Cool and store jars. Use a jar lifter to remove the processed jars from the boiling water and place them on a clean towel to cool. The jars will make a “ping” sound as they seal. Once cooled, check the lids for a proper seal by pressing the center of the lid; it should not flex up or down. Wipe the jars clean, label them with the contents and the date, and store in a cool, dark place for up to one year.

A PNG image showing canned apples with jars, bowls, and utensils on a wooden table for illustration.

Healthy Apple Recipes

Apples are a versatile and nutritious fruit that can be enjoyed in many forms. Explore these healthy apple recipe options, including apple smoothies, baked apples, and sugar-free apple-based snacks to satisfy your cravings while keeping your health in check.

1. Apple Smoothie

Ingredients:

  • 1 large apple, cored and chopped
  • 1 cup unsweetened almond milk (or any milk of your choice)
  • 1 cup baby spinach
  • 1/2 cup Greek yogurt
  • 1/2 banana
  • 1 tablespoon honey or maple syrup (optional)
  • 1/2 teaspoon cinnamon
  • 1 cup ice

Instructions:
1. Place all ingredients in a blender and blend until smooth. Adjust sweetness with honey or maple syrup if desired. Enjoy your refreshing apple smoothie!

2. Baked Apples

Ingredients:

  • 4 large apples
  • 1/4 cup chopped walnuts
  • 1/4 cup chopped dates (or raisins)
  • 1 teaspoon cinnamon
  • 1/8 teaspoon nutmeg
  • 1/2 cup unsweetened apple juice or water

Instructions:
1. Preheat oven to 375°F (190°C).
2. Core each apple, leaving the bottom intact. Create a small well in the top of each apple using a spoon.
3. In a small bowl, combine the walnuts, dates, cinnamon, and nutmeg. Fill each apple with the mixture.
4. Place the apples in a baking dish and pour the apple juice or water into the bottom of the dish.
5. Bake for 35-40 minutes, or until apples are tender. Remove and allow to cool slightly before serving.

3. Sugar-Free Apple Chips

Ingredients:

  • 2 large apples (any variety)
  • 1 tablespoon lemon juice
  • Cinnamon, to taste

Instructions:
1. Preheat oven to 225°F (105°C).
2. Line two baking sheets with parchment paper.
3. Thinly slice the apples, about 1/8-inch thick. Remove any seeds.
4. Toss the apple slices with lemon juice to prevent browning.
5. Arrange the apple slices in a single layer on the prepared baking sheets. Sprinkle with cinnamon to taste.
6. Bake for 1.5 to 2 hours, turning the apple slices halfway through cooking, until the apple slices are dry and crisp. Allow the apple chips to cool completely before transferring to an airtight container.

4. Apple Cinnamon Oatmeal

Ingredients:

  • 1 cup old-fashioned rolled oats
  • 2 cups unsweetened almond milk
  • 1 large apple, cored and chopped
  • 1/2 teaspoon cinnamon
  • 1/4 teaspoon salt
  • 1 teaspoon vanilla extract
  • 1 tablespoon maple syrup (optional)

Instructions:
1. In a saucepan, combine oats, almond milk, chopped apple, cinnamon, and salt. Bring to a boil over medium heat, stirring frequently.
2. Lower the heat to a simmer, cover, and let cook for 7-8 minutes or until oats are tender and creamy.
3. Remove from heat and stir in vanilla extract. Adjust sweetness with maple syrup if desired.
4. Let oatmeal sit for 1-2 minutes to thicken. Serve warm, topped with additional chopped apples, nuts, or a sprinkle of cinnamon if desired.

Enjoy experimenting with these healthy apple recipes, packed with nutrients and flavors that will make you excited to incorporate apples into your daily meals!

An image with apples, cinnamon sticks, and walnuts arranged in a wooden board with a fork and a knife beside it.

Now that you’ve learned more about the various types of apples, apple preparation techniques, and some incredible apple recipes from across the globe, it’s time to make the most of this wonderful fruit! Whether you’re preparing classic desserts, unique savory dishes, or preserves, you’re now equipped with the knowledge needed to create delightful apple-focused dishes for any occasion. So, grab some apples and let your culinary creativity shine!

Categories
Uncategorized

Cupcakes: A Scrumptious Slideshow

Delicious, delightful, and delectable – cupcakes have been a favorite treat for people of all ages for centuries. These miniature cakes have captured the hearts of many, not just for their irresistible taste but also for their visually charming presentation. This journey through the fascinating world of cupcakes will explore their history, famous bakeries, types, decorating techniques, scrumptious recipes, creative party ideas, latest trends and innovations, exciting competitions, and undeniable benefits.

Cupcake History

Cupcakes have been a beloved treat for generations, gracing the tables at birthday parties, weddings, and numerous other events. These delightful, miniature versions of a full-sized cake have continued to evolve over time and have captured the hearts (and stomachs) of millions. But have you ever wondered how these delectable desserts came to be? Follow us as we explore the sweet history of cupcakes and see how they transformed from simple, quick-to-bake cakes to tantalizing treats and culinary masterpieces.

The Early Origins of Cupcakes

The history of cupcakes can be traced back to the late 18th century when bakers were experimenting with cakes that were smaller in size and quicker to bake than traditional desserts. The first recorded mention of the word “cupcake” is found in a 1796 cookbook penned by Amelia Simmons, titled “American Cookery.” While the mini cakes in Simmons’ recipe were not what we’d consider a modern cupcake – they were made with ingredients such as flour, sugar, milk, and spices – they marked the birth of something great.

The Queen’s Influence

It was in the 19th century that cupcakes underwent a significant transformation, and much of this can be attributed to Queen Victoria of England. Known for her love of sweets, Queen Victoria adopted the concept of individual serving-sized cakes, thus inspiring bakers of the time. This led to the birth of the “Queen’s Cake” – a small cake made with rich ingredients such as butter, sugar, and eggs, and often decorated with a layer of icing. Queen Victoria’s love of these mini treats helped catapult the popularity of cupcakes and effectively changed the way people enjoyed cake.

Convenience and Creativity: 20th Century Cupcakes

The 20th century saw a surge in the popularity of cupcakes, especially due to the release of pre-packaged cake mixes and innovative inventions such as cupcakes’ signature liners. The convenience of these pre-packaged mixes allowed home bakers to whip up a batch of cupcakes with ease, making the sweet treat even more popular. Cupcakes also offered a platform for creativity; bakers experimented with various flavors, decorations, and themes. There were even cookbooks dedicated solely to these dainty delights, inspiring people across the globe to invent their own delicious variations.

The Cupcake Boom of the 21st Century

Cupcakes reached new heights of fame in the early 21st century due to appearances on popular TV shows such as “Sex and the City,” sparking what some refer to as the “cupcake craze.” This gave birth to boutique cupcake shops catering to a newfound appreciation for the versatile dessert. Today, you can find countless gourmet cupcake establishments offering all kinds of flavors and designs, including savory ones like bacon and cheese. The introduction of digital platforms like social media and YouTube have further popularized easy-to-make-at-home cupcake recipes, allowing these delightful desserts to flourish among the masses.

Conclusion

From their humble beginnings, cupcakes have undeniably evolved into an iconic symbol of celebration and indulgence. As they continue to gain popularity, we can only expect even more innovative and creative permutations of this classic treat. And as long as we continue to ooze creativity and maintain our sweet tooth, cupcakes will undoubtedly remain a favorite dessert for people of all ages. So, the next time you take a bite out of a scrumptious cupcake, take a moment to appreciate the rich historical journey behind every crumb.

A timeline of cupcake history, showing the evolution of the cupcake from its humble beginnings in the late 18th century to its current status as a beloved treat for people of all ages.

Famous Cupcake Bakeries

Cupcakes are miniature pieces of artwork that not only look beautiful but also taste heavenly. In the world of cupcakes, some bakeries stand out and make a name for themselves with their creative and delicious treats. In this article, we will take you on a delectable journey to some of the most renowned cupcake bakeries across the globe and explore the secrets behind their scrumptious creations.

Magnolia Bakery (New York City, USA)

Established in 1996, Magnolia Bakery in New York City gained fame after being featured on the popular TV show ‘Sex and the City.’ Since then, this quaint bakery has become well-known for its creamy and velvety cupcakes, especially their signature Red Velvet Cupcake with whipped vanilla icing. Another must-try is their Hummingbird Cupcake, a delectable mix of pineapple, banana, and pecan topped with cream cheese icing. Magnolia Bakery has expanded internationally to locations such as Dubai, Tokyo, and Seoul.

The Hummingbird Bakery (London, United Kingdom)

The Hummingbird Bakery has been a London classic since its launch in 2004. This bakery is known for creating American-style cupcakes that are rich, moist, and irresistible. With flavors ranging from classic vanilla and chocolate to vibrant chocolate mint and zingy lemon meringue, the Hummingbird Bakery has found a loyal following who can’t get enough of their picture-perfect cupcakes.

Cupcakes by Sonja (Manila, Philippines)

Sonja Ocampo got her start by training with Magnolia Bakery in Manhattan before opening up her own bakery in 2006 in Manila. Cupcakes by Sonja has captured the hearts of Filipino dessert lovers through delicacies such as Valrhona Chocolate Cupcake with fluffy marshmallow icing and Salted Caramel Choco Cupcake with its tongue-tingling combination of sweet and salty flavors. Inspired by cupcakes from her childhood in New York, Sonja’s unique flavors create lasting impressions on taste buds.

Little Cupcakes (Melbourne, Australia)

Little Cupcakes is an Australian gem famous for its adorably decorated cupcakes made from locally sourced ingredients. With a commitment to quality, Little Cupcakes creates daily specials alongside their much-loved regulars like the Berry White Cupcake, a white chocolate cupcake topped with mixed berry frosting, and the Milo Mudslide, an ode to the popular Australian malted chocolate, topped with chocolate ganache and dusted with Milo powder. Vegans and those with gluten sensitivities can also indulge in Little Cupcakes’ delicious and thoughtful selections.

Le Cupcake (São Paulo, Brazil)

Located in Latin America’s most populous city, Le Cupcake is an enchanting bakery specializing in gourmet cupcakes made from high-quality Belgian chocolate, hand-pressed almond paste, and fresh fruits. Delighting the sweet-toothed population of São Paulo, Le Cupcake is best known for its brigadeiro cupcake, which features Brazil’s most loved sweet, a mouth-watering mix of chocolate and condensed milk.

These renowned cupcake bakeries have gained fame not only for their scrumptious creations but also for their ability to transport us to a world of sugar, spice, and everything nice. Each bakery has its unique charm and distinctive cupcakes, providing a delightful experience to all who indulge in their treats. So, the next time you’re traveling across the globe, don’t forget to make a sweet stop at these famous cupcake bakeries and satisfy your cravings in a memorable way.

A collage of cupcakes from various bakeries mentioned in the article.

Types of Cupcakes

Cupcakes, the miniature form of heavenly cakes, have an incredible fan base all around the globe. Loved by everyone, these tiny treats are perfect for small gatherings, office parties, children’s birthdays, or even a snack craving. If you think you know cupcakes just because you’ve tried the classic chocolate or vanilla ones, you’re in for a delicious surprise. There are countless cupcake flavors, taking inspiration from fruits, drinks, desserts, and much more! In this listicle, we will explore some of the most delightful types of cupcakes, including the classics, health-conscious alternatives, and exotic combinations.

1. Classic Vanilla

You can’t go wrong with a light, fluffy vanilla cupcake topped with a rich and creamy buttercream frosting. The simple yet delicious taste of a vanilla cupcake is a favorite for many occasions.

2. Decadent Chocolate

A rich, moist chocolate cake topped with chocolate frosting is the ultimate comfort food for every chocoholic. The depth of cocoa flavor in these little treats makes them irresistible.

3. Red Velvet

A perfect balance of sweet and tangy, red velvet cupcakes are a luxurious treat. These deep red cakes are moist in texture and pair well with tangy cream cheese frosting.

4. Lemon

Add a dose of zest to your cupcake indulgence with a delicious lemon cupcake. These cheerful little treats can be topped with lemon or vanilla frosting for a delightful citrus twist.

5. Gluten-Free

For those who prefer or need gluten-free alternatives, these cupcakes promise the same heavenly taste and texture without compromising on flavor. With the use of gluten-free flour or almond meal, even those with celiac disease or gluten intolerance can enjoy delightful cupcakes.

6. Dairy-Free

Dairy-free cupcakes are perfect for lactose intolerant or vegan dessert enthusiasts. Made with almond milk, coconut milk, or soy milk, these cupcakes are as satisfying to the taste buds as their dairy counterparts.

7. Exotic Flavors

Why not get adventurous and try some exotic cupcake flavors? Thai tea, lavender, Earl Grey, matcha green tea, and guava are just a few of the countless tempting options available. These flavors will transport your taste buds to a whole new world of gustatory experiences.

8. Boozy Cupcakes

Add a dash of your favorite liquor to your cupcakes to elevate the flavor profile. Options like Baileys Irish Cream, Kahlúa, or champagne can transform your simple cupcake into an adult indulgence.

9. Fruit-Based Cupcakes

Nature offers a plethora of fruits that can turn an ordinary cupcake into a delightful fruity goodness. Blueberry, strawberry, pineapple, and banana are just a few examples of fruits that blend exceptionally well with the fluffy cake base.

Cupcakes are an indispensable part of any celebration, regardless of the occasion or your personal preferences. With countless delicious and creative variations available, there is a cupcake flavor to suit everyone’s palate. From classic flavors to exotic concoctions, the world of cupcakes offers a delectable treat for those with a sweet tooth. So why wait? Get in the kitchen and start baking these heavenly delights or visit your nearest bakery to sink your teeth into the scrumptious world of cupcakes!

An image of a tray of cupcakes with different flavors and toppings, including chocolate, vanilla, strawberry, and cream cheese frosting, topped with colorful sprinkles and fresh berries. The cupcakes are arranged in a circular pattern on a white plate.

Cupcake Decorating Techniques

Decorating cupcakes can be a truly enjoyable and creative process. They serve as a perfect canvas to unleash your creativity and display your artistic flair. Whether you’re an amateur baker or a seasoned expert, knowing how to decorate cupcakes effectively can be a game-changer. In this article, we will explore various cupcake decorating techniques, tips, and tricks to help you create stunning, Instagram-worthy cupcakes.

1. Frosting Basics:

Frosting is an essential element in cupcake decoration, adding color, flavor, and texture to your baked creations. You can choose different types of frosting, such as buttercream, cream cheese, or even whipped cream. Make sure your cupcakes are entirely cool before you start frosting to prevent melting and maintain a smooth appearance. For precise and clean frosting application, use an offset spatula or a flat-bladed knife.

2. Piping:

Piping bags and tips are a baker’s best ally in achieving beautifully decorated cupcakes. For beginners, it can be helpful to start with a few basic piping tips such as round, star, and petal. Practicing various piping techniques on a plate or parchment paper before applying them to your cupcakes can help improve your skills. A simple swirl (using a round or star tip) can give your cupcakes a classic, elegant look, while more intricate designs can add a touch of sophistication and glamour.

3. Adding Sprinkles and Edible Glitter:

Sprinkles, sanding sugar, and edible glitter can add an element of fun and excitement to your cupcake decorations. Apply these embellishments immediately after piping your frosting to make sure they stick effectively. For a more precise application, you can use tweezers to place individual sprinkles or edible decorations on the frosting. Color-coordinated sprinkle mixes or themed decorations can tie your cupcakes to a specific occasion or event.

4. Fondant Accents:

Fondant is a versatile and pliable sugar paste that can be rolled out and sculpted into various shapes and designs. You can buy pre-colored fondant or create custom colors by kneading gel food coloring into white fondant. Use cookie cutters, fondant tools, or even a sharp knife to create shapes and decorative elements to place on top of your frosted cupcakes. To stick the fondant decorations to your cupcakes, use a dab of frosting or a small amount of water.

5. Marbled Effect:

For a unique and eye-catching design, you can create a marbled effect on your cupcakes using two or more colors of frosting. Fill a piping bag with one color of frosting, then add the second color along one side. Gently mix the colors together by squeezing the piping bag, then pipe the frosting onto your cupcakes in a swirling motion. This will create a stunning marbled effect that is sure to impress.

With a bit of practice and patience, anyone can learn how to decorate cupcakes like a pro. Don’t be afraid to experiment with different tools, techniques, and embellishments – the options are only limited by your imagination. So go ahead, put on your apron, unleash your creativity, and get ready to take your cupcakes to the next level! Happy baking!

A set of cupcakes in different colors and decorated with frosting and sprinkles.

Cupcake Recipes

Cupcakes have become a popular treat for people of all ages, thanks to their delightful flavors, pleasing presentation, and individually sized portions. If you’re a cupcake lover or simply someone looking to try out some amazing recipes, look no further! We’ve gathered a list of some of the most scrumptious cupcake recipes out there, covering a wide variety of flavors and textures for everyone to enjoy. Get ready to impress your friends and family with these mouth-watering cupcake creations.

1. Classic Vanilla Cupcakes

There’s nothing quite like a classic vanilla cupcake. They’re perfect for any occasion and can be dressed up or down with different frostings and toppings. This light, fluffy, and moist vanilla cupcake recipe will surely become a staple in your baking repertoire.

2. Decadent Chocolate Cupcakes

For the chocolate lovers out there, this rich, moist, and irresistible chocolate cupcake is a must-try. Combining cocoa powder and melted chocolate, these cupcakes are packed with bold and sumptuous chocolatey goodness.

3. Strawberry Lemonade Cupcakes

When it comes to summer desserts, nothing beats the refreshing combination of strawberries and lemonade. These strawberry lemonade cupcakes are bright, citrusy, and bursting with fresh strawberry flavor. The tangy lemon cream cheese frosting adds the perfect finishing touch.

4. Red Velvet Cupcakes

These luxurious red velvet cupcakes are a classic favorite, featuring a rich, moist, and slightly chocolatey cake topped with smooth and tangy cream cheese frosting. The vibrant red color adds a touch of elegance to any celebration.

5. Salted Caramel Cupcakes

Indulge in the heavenly combination of sweet and salty with these delectable salted caramel cupcakes. Featuring a moist and tender caramel-infused cupcake, salted caramel filling, and caramel buttercream frosting, these treats are perfect for those looking to satisfy their cravings.

6. Funfetti Cupcakes

Add a little fun to your dessert table with these colorful funfetti cupcakes. These fluffy and moist vanilla cupcakes are packed with colorful sprinkles, giving them a whimsical and festive appearance. They’re perfect for birthdays or other celebrations where a little extra joy is desired.

7. Chai Latte Cupcakes

Embrace the warm and cozy flavors of fall with these chai latte cupcakes. These tender cupcakes are infused with a blend of chai spices, giving them a rich, aromatic flavor. Top them with a silky cinnamon cream cheese frosting for a comforting and indulgent treat.

Whether you’re an expert baker or just starting in the world of cupcakes, these amazing cupcake recipes are sure to please every palate. From classic flavors to exciting new combinations, there’s a recipe for every occasion and taste preference. So, what are you waiting for? Get baking and enjoy the delightful world of cupcakes!

A colorful image of cupcakes with different toppings and decorations, including sprinkles, fruits, frosting, cream, chocolate, and nuts.

Cupcake-themed Party Ideas

Cupcakes are not only delicious, but they can also serve as an inspiration for an amazing and memorable party. If you’re looking to host a celebration that incorporates sweet treats in every aspect, look no further than these creative and delightful cupcake-themed party ideas. From decorations and games to activities and favors, these ideas will tantalize the taste buds and engage guests of all ages.

Creative Decorations:

  1. Cupcake Stand Centerpiece: Create an eye-catching focal point for your party by using a tiered cupcake stand as the centerpiece on your main table. Fill it with cupcakes in various flavors and designs that match your party’s color scheme.
  2. Cupcake Liner Garland: String together colorful cupcake liners with twine or thread, and hang them from the ceiling or wall to create a whimsical garland that adds a touch of sweetness to the party atmosphere.
  3. Cupcake Topper Decorations: Customize store-bought or homemade cupcakes with themed toppers, such as mini flags, balloons, or festive messages. These can double as party favors for guests to take home.

Fun and Tasty Games:

  1. Cupcake Decorating Contest: Set up a station with a variety of frostings, sprinkles, and other toppings for guests to create their own unique cupcake designs. Kids and adults alike will love showcasing their creative skills with this fun and edible activity.
  2. Cupcake Blind Taste Test: Prepare a selection of cupcakes with different flavors and have guests put their taste buds to the test by guessing the flavors while blindfolded. Award a prize to the one who gets the most correct answers.
  3. Cupcake Relay Race: This game is perfect for outdoor parties. Divide guests into two teams and have them race to transport cupcakes from one table to another using a spoon or spatula, without dropping or squishing the cupcakes. The first team to successfully transfer all their cupcakes wins!

Engaging Activities:

  1. DIY Cupcake Bar: Allow guests to create their own delectable treats by providing plain cupcakes, various frostings, and a wide assortment of toppings. Be sure to provide boxes or bags for guests to take home their creations as a tasty memento of the party.
  2. Cupcake-themed Craft Corner: Set up an area where guests can unleash their creativity with cupcake-themed crafts. Some ideas include decorating aprons with fabric markers or paint, creating paper cupcake collages, or designing their own cardboard cupcake stands.
  3. Cupcake Story Time: Gather your little guests for a story time session featuring picture books about cupcakes. Make it interactive by asking them questions about the stories and encourage them to share their own cupcake-related tales.

A cupcake-themed party is a unique and delightful way to celebrate any occasion. With these creative ideas, you’ll be able to throw a party that captivates guests and leaves them craving more. Don’t forget to provide plenty of napkins – things might get a little messy with all the sweet fun! So, go ahead and indulge in the sugary sweetness of a cupcake party that will be remembered for years to come.

Illustration of a cupcake-themed party with colourful decorations, cupcakes and games

Cupcake Trends and Innovations

Cupcakes have always been a crowd-pleaser, gracing tables at parties, weddings, and in everyday indulgences. This classic treat has witnessed a surge in popularity in recent years, with numerous bakeries, television shows, and social media accounts devoted entirely to these delightful bite-sized desserts. From unique flavor combinations to eye-catching presentation styles, cupcakes have transformed into an art form as intricate as any decorative cake. Here, we explore the most recent trends and innovations in the world of cupcakes.

1. Unique Flavor Combinations:

Gone are the days when vanilla and chocolate were the only options for cupcake connoisseurs. Today, bakers are combining sweet, savory, tangy, and spicy elements to create an array of distinctive flavor profiles. Some popular favorites include lemon lavender, salted caramel, and chili chocolate, to the more adventurous passion fruit with basil, balsamic strawberry, and sweet corn with blueberry. These innovative combinations are reinventing the cupcake game, offering delightful surprises for the most discerning palates.

2. Alcohol-infused cupcakes:

Cupcakes are expanding into the realm of adult indulgence, thanks to the introduction of alcohol-infused flavors. Many bakeries now offer tipsy treats, laced with popular liqueurs like rum, Baileys, and Kahlua, or feature beer and wine flavors, such as Irish stout and champagne. These enticingly ‘boozy’ cupcakes present a fascinating twist to the conventional dessert, perfect for grown-up celebrations.

3. Gluten-free and vegan options:

The rise in gluten-free and vegan diets has opened an avenue for bakers to create delicious cupcakes that cater to those with dietary restrictions. These alternative creations utilize a variety of non-traditional ingredients, such as almond flour, agave syrup, and flaxseed eggs. The result? Cupcakes that are just as satisfying and delectable as their classic counterparts – with an inclusive touch!

4. Cupcake bouquet arrangements:

When it comes to presentation, cupcakes have advanced beyond the traditional tiered stand. One of the most beautiful and eye-catching trends in cupcake presentation is creating a bouquet – an arrangement of cupcakes, artfully dressed and displayed in the form of a blooming flower arrangement. This striking presentation style is increasingly becoming the centerpiece of choice for special events such as weddings, bridal showers, and birthdays.

5. Edible garnishes and decorations:

The art of cake decorating has transitioned smoothly into the realm of cupcakes, with an emphasis on edible garnishes and decorations. From delicate, hand-crafted sugar flowers to intricately piped lace patterns, each cupcake is crafted like a miniature work of art. Edible gold leaf, shimmering glitter, and custom fondant designs elevate the humble cupcake to a lavish, personalized delight.

With the latest trends and innovations showcasing the endless potential for imagination and creativity, the world of cupcakes continues to evolve and enchant dessert lovers everywhere. So, whether you’re an amateur home baker or a seasoned professional looking for inspiration – or simply someone who adores these tiny confections – the artful world of cupcakes awaits!

A variety of colorful and beautifully frosted cupcakes arranged in a bouquet style floral arrangement, with green leaves and stems for decoration.

Cupcake Competitions

The humble cupcake has risen to stardom in the culinary world over the past few years, and it’s no longer just a tasty treat – it’s a competitive sport. Cupcake competitions have exploded in popularity, with both amateur and professional bakers battling it out for the ultimate bragging rights. In this article, we’ll dive into the exciting world of cupcake competitions, and discover how these delightful desserts have made their way to the battlefield.

The Rise of the Cupcake Competitions

Cupcake competitions have grown in popularity alongside the cupcake trend itself. With the rise of television shows like Cupcake Wars and pastry chefs becoming household names, it’s no surprise that people have started to see cupcakes as a canvas for creativity and skill. At their core, these competitions showcase the perfect marriage between taste and aesthetic.

The Competitive Cupcake Landscape

Cupcake competitions can be found at various levels, from local bake-offs to national championships, like the prestigious National Cupcake Competition in the UK or the World Food Championships in the United States. Some contests focus on specific themes and ingredients, while others encourage contestants to let their imaginations run wild in the presentation, flavors, and techniques.

Hone Your Skills with Cupcake Classes

Whether you’re an amateur or a seasoned pro, there’s always more to learn in the world of cupcake baking and decorating. Taking a cupcake class is not only an excellent way to refine your skills and experiment with new techniques, but it can also be a fun and interactive way to build your competitive edge.

The Rules of the Game

Each competition will have its own set of rules and guidelines, but there are some common themes throughout. Generally, competitors are required to create a certain number of cupcakes, often varying in flavors and designs. Judging criteria often include taste, presentation, creativity, and adherence to the theme.

The Prizes

Aside from the notoriety that comes from being crowned the cupcake champion, winners often receive prizes ranging from cash and gift certificates to kitchen gadgets and baking supplies. Not to mention, a win or strong performance can significantly boost your reputation in the baking community and open up opportunities for media interviews, demonstrations, and collaborations.

Friendly Rivalry and Community Spirit

Aside from the thrill of victory, cupcake competitions serve as a platform for bakers to showcase their unique talents and foster a sense of community. There’s nothing like cheering on your fellow bakers or swapping tips and techniques to keep your creative juices flowing.

If you’re a cupcake enthusiast, why not take your baking skills to the next level and test them in the world of competitive cupcaking? It’s a chance to challenge your creativity, learn new skills, and discover the wealth of talent in the baking community. So go ahead and get ready to take your cupcake game to the next level – and perhaps even bring home a shiny trophy!

A group of contestants gathered around a table, each holding up a cupcake creation with a competitive look on their face.

Benefits of Cupcakes

Cupcakes have long been a beloved treat, especially for celebrations, parties, and gatherings. However, these tiny delights have more than just their tempting flavors to offer. Not only are cupcakes great for portion control and accommodating varying dietary preferences, but they also have a way of bringing people together. Let’s dive into the wonderful benefits of cupcakes, and celebrate their role as a social connector.

1. Portion Control

Cupcakes offer the perfect small portion of dessert, without the temptation of overindulging. Guests know exactly how much they are consuming, helping them practice portion control and manage their calorie intake. Plus, cupcakes eliminate the need for cutting and serving, reducing the chance of cross-contamination and ensuring a more hygienic and efficient dessert option.

2. Adaptable for Different Diets and Preferences

Having a variety of cupcakes at gatherings makes it easier to cater to different dietary preferences, such as vegan, gluten-free, or nut-free options. These days, it is easier to find or bake cupcakes with alternative ingredients and substitutes. So, whether your guests have specific dietary needs or are just health-conscious, there’s a perfect cupcake for everyone!

3. Customizable and Creative

The versatility of cupcakes knows no bounds. They can be decorated in a multitude of ways, using various colors, frostings, and toppings to suit any theme or occasion. By personalizing cupcakes with edible decorations, messages, monograms, or more, the possibilities for creating unique and memorable treats are endless.

4. A Crowd Pleaser

Cupcakes are universally cherished, making them the ultimate crowd-pleaser. Serving a selection of flavors and decorations ensures there is a cupcake for everyone’s taste, appealing to both kids and adults alike. Additionally, cute and colorful cupcakes often become a conversation starter, leading to new connections and interactions among the guests.

5. Budget-Friendly

Compared to traditional cakes, cupcakes can be a more cost-effective dessert option, especially when baking them at home. They are easy to make, require less time and effort, and can be served in simple and eco-friendly ways, like using recycled paper liners. And, if you’re feeling extra creative, the internet offers countless ideas for turning simple cupcakes into gourmet creations without breaking the bank.

Cupcakes might be small, but their benefits are far-reaching. From portion control and adaptability to different diets, to their creative possibilities and social appeal—it’s time to give these scrumptious little wonders the recognition they deserve. So, go ahead and indulge in a cupcake, knowing that you’re enjoying not only a delightful treat but also a sweet connection to others.

A group of people gathered around a table filled with various cupcakes, laughing, and enjoying each other's company.

So, let’s raise a toast to the delightful world of cupcakes, as they continue to bring joy and smiles to faces across the globe. They’re more than just a tasty treat; cupcakes offer rich history, foster creativity, and serve as the centerpiece of memorable celebrations. As we’ve discovered, these tiny confections extend beyond a mere dessert choice; they stand as a symbol of happiness, connection, and indulgence, igniting inspiration for both experienced home bakers and passionate professionals alike.

Categories
Uncategorized

Toothpaste Dispensers and Toothpaste Squeezer

Oral hygiene is an essential aspect of one’s overall health, and the tools we use to maintain it play a crucial role. Toothpaste dispensers and squeezers have emerged as innovative solutions to minimize wasted toothpaste and enhance the overall experience of brushing our teeth. In this comprehensive guide, we delve into the world of toothpaste dispensers and squeezers, discussing their types, benefits, and how to select the perfect one to suit your needs.

Introduction to toothpaste dispensers and squeezers

Toothpaste dispensers and squeezers are innovative devices designed to help individuals improve their oral hygiene routine and reduce toothpaste wastage. The primary purpose of a toothpaste dispenser is to easily and hygienically dispense the toothpaste without the need for manual squeezing or rolling the toothpaste tube. On the other hand, a toothpaste squeezer is primarily used to ensure that all of the toothpaste in a tube is utilized, minimizing waste and cost. Both devices contribute to convenience and efficiency in oral care.

There are numerous benefits to using toothpaste dispensers and squeezers, such as improved cleanliness, organization, and money savings. A toothpaste dispenser can help reduce mess by preventing toothpaste from spreading across the countertop or dripping down the sides of the tube. This leads to a more hygienic environment as bacteria and germs are less likely to grow and spread. Additionally, these devices can contribute to a more organized bathroom routine, as they eliminate the need for using multiple tubes of toothpaste and can store toothbrushes in one place.

Incorporating toothpaste dispensers and squeezers in daily dental care routines can also help in maintaining oral hygiene by promoting correct toothpaste amount usage. Often, people use more toothpaste than necessary, leading to overconsumption and unnecessary cost. Dispensers can assist individuals in using the perfect amount of toothpaste needed, ensuring thorough teeth cleaning and overall oral health improvement.

Different types of toothpaste dispensers and squeezers are available to suit various needs and preferences. Manual toothpaste dispensers require users to push or press a button to release toothpaste, while automatic dispensers use a motion sensor or touchless mechanism to dispense toothpaste. Toothpaste squeezers can be found in various designs, including plastic clips, rollers, or sliding mechanisms to push the toothpaste towards the opening. Depending on the type of toothpaste tube and individual preferences, users can opt for the design of squeezer that best addresses their needs.

Toothpaste dispensers and squeezers offer a practical solution to common oral care challenges such as maintaining hygiene, organizing bathroom space, and reducing toothpaste waste. Traditional methods of dispensing toothpaste can be messy and wasteful, but toothpaste dispensers and squeezers provide a more hygienic and convenient alternative with various types available to cater to individual preferences and needs.

An image of a white toothpaste dispenser standing on a bathroom countertop next to two toothbrushes.

Types of toothpaste dispensers and squeezers

By incorporating these devices into daily routines, individuals can improve their oral health practices and contribute to a more environmentally and budget-conscious lifestyle. Considering the diverse designs, technologies, and options available for toothpaste dispensers and squeezers, it is worthwhile to explore these devices to identify the best fit for enhancing one’s oral hygiene regimen. In conclusion, toothpaste dispensers and squeezers are a valuable addition to any bathroom, positively impacting oral care and overall cleanliness.

Manual Toothpaste Dispensers and Squeezers

Manual toothpaste dispensers are simple, affordable, and easy to use. They come in the form of a small roller or clip attached to the end of the toothpaste tube to ensure even and controlled dispensing of the toothpaste. Manual dispensers are portable and require no power source, making them an excellent option for those who prefer simplicity.

Automatic Toothpaste Dispensers

Automatic toothpaste dispensers utilize battery or electricity to dispense toothpaste with minimal effort. They often come with a docking station for the toothpaste tube and have a touchless feature making them more hygienic and perfect for those with mobility issues or minimalist bathroom style preference.

Wall-Mounted Toothpaste Dispensers

The design of wall-mounted toothpaste dispensers offers convenience and space-saving advantages. They are often manual or automatic and come with brackets or adhesives for secure attachment to the bathroom wall. Some wall-mounted dispensers include built-in toothbrush holders for sleek bathroom organization.

Countertop Toothpaste Dispensers

Countertop toothpaste dispensers sit on the bathroom counter, offering easy access without installation. They also come in manual or automatic models and may include features such as storage cups or toothbrush holders. They are an excellent choice for those who rent their homes or prefer a clutter-free environment.

When it comes to maintaining a proper oral health routine, toothpaste dispensers and squeezers offer a variety of benefits and convenience factors that cater to a wide range of individual needs and preferences. These devices can improve hygiene, minimize waste, and enhance the overall experience of taking care of your teeth and gums.

A toothpaste dispenser placed on a bathroom countertop with a toothbrush next to it.

How to choose the right toothpaste dispenser or squeezer

Choosing the right toothpaste dispenser or squeezer is crucial for maximizing the effectiveness of your daily dental care. A good toothpaste dispenser should help you save toothpaste, keep your bathroom counter clean, and make brushing your teeth more convenient. To make the right choice, consider factors such as ease of use, installation, compatibility with different toothpaste tubes, and cost. By paying attention to these details, you can find a toothpaste dispenser that truly improves your oral health routine.

The ease of use and convenience should be a top priority when looking for a toothpaste dispenser. You may want one that automatically dispenses toothpaste with a touch or press, or a simple squeezer that allows you to manually extract the toothpaste with minimal effort. The design should also cater to all family members, including children and seniors. It is important to choose a dispenser or squeezer with a non-slip grip and an ergonomic design to make it easy for everyone to use.

Installation is another important aspect to consider when choosing a toothpaste dispenser or squeezer. Some dispensers attach to your bathroom wall using suction cups, adhesive, or screws, while others sit on your countertop or mount inside your medicine cabinet. Determine the available space in your bathroom and select a dispenser that fits well and is easily accessible to all users. Easy installation and removal are also essential if you plan to move or travel with your toothpaste dispenser.

Compatibility with various toothpaste tubes is crucial when choosing the right dispenser or squeezer. Some toothpaste dispensers are designed for specific tube sizes and shapes, while others offer universal compatibility. Ensure that the toothpaste dispenser or squeezer you choose works well with your preferred brand of toothpaste and can accommodate different tube sizes if you switch brands or use multiple types of toothpaste within your household.

Cost is an essential factor to consider when selecting a toothpaste dispenser or squeezer. Prices can vary depending on the materials, design, and brand, so it’s essential to set your budget and determine what features are important to you. With some research, you can find affordable options that meet your needs without breaking the bank.

Toothpaste dispensers and squeezers are innovative solutions designed to help you get the most out of your toothpaste tube while ensuring that the process of dispensing toothpaste remains hygienic and convenient. There are various types of toothpaste dispensers and squeezers available in the market, each with its own unique design and installation method. To ensure that your toothpaste dispenser or squeezer works efficiently, it is essential to follow the manufacturer’s instructions while installing and using the product.

An image of a toothbrush and toothpaste next to a toothpaste dispenser with a non-slip grip and an ergonomic design, making it easy for everyone to use.

Installing and using toothpaste dispensers and squeezers

Considering factors like ease of use, installation, compatibility with different toothpaste tubes, and cost will help you in selecting the right toothpaste dispenser or squeezer for your household. Prioritizing these aspects will make your daily dental hygiene routine simpler and more efficient while ensuring you get the most out of your toothpaste. In conclusion, being informed and weighing your options will lead you to the best toothpaste dispenser or squeezer for your needs.

Wall-Mounted Automatic Dispensers

One type of toothpaste dispenser is the wall-mounted automatic dispenser. These dispensers are usually attached to the wall using adhesive strips or suction cups. Before installation, it is important to clean the surface where the dispenser will be mounted, ensuring that it is free from grime or dust. The adhesive strip should be pressed firmly against the wall to guarantee a secure hold. Some models may require the use of screws for installation, in which case it’s necessary to drill holes into the wall, insert wall plugs, and then screw the dispenser bracket into place. Once the dispenser is mounted, the toothpaste tube can be inserted into the designated slot, and the toothpaste will be automatically dispensed when you press your toothbrush against the nozzle.

Countertop Dispensers

Another type of toothpaste dispenser is the countertop variant, which comes with a base and requires no installation. These dispensers usually have a slot where the toothpaste tube is inserted, either horizontally or vertically, depending on the design. The toothpaste is then manually or automatically dispensed by pushing a lever or button. To use this type of dispenser effectively, ensure that the toothpaste tube is correctly inserted and that the cap is removed before attempting to dispense toothpaste.

Toothpaste Squeezers

Toothpaste squeezers, on the other hand, are simple devices designed to help you extract as much toothpaste as possible from the tube without any wastage. These devices often come in the form of plastic rollers or clips that slide onto the toothpaste tube. To use one, slide the squeezer onto the end of the toothpaste tube and then roll or slide the squeezer towards the nozzle, pushing the toothpaste towards the opening. This method ensures that no toothpaste is left unused within the tube.

Maintenance and Cleaning

When using toothpaste dispensers and squeezers, it is essential to clean them regularly to prevent any buildup of toothpaste residue or the growth of bacteria. Proper maintenance and cleaning practices significantly contribute to the smooth functioning of these devices, ensuring their durability and effectiveness. Most dispensers and squeezers can be easily disassembled, allowing you to clean each component separately with warm soapy water.

An image of a wall-mounted toothpaste dispenser, with a toothbrush inserted into the nozzle for dispension

Maintenance and cleaning of toothpaste dispensers and squeezers

Additionally, always consult the manufacturer’s guidelines for recommendations on maintenance and cleaning procedures. Staying well-informed will help you further improve the longevity and performance of your toothpaste dispenser or squeezer while reducing the risk of germs and bacteria buildup. Ultimately, taking proper care of these dental hygiene tools will result in an optimal oral care experience.

Begin by reading and following the manufacturer’s instructions regarding the care and cleaning of your toothpaste dispenser and squeezer model.

One of the best practices for maintaining a toothpaste dispenser is to clean its various components at regular intervals. Disassemble the different parts of the dispenser, such as the nozzle, dispensing button, and the toothpaste tube holder. Then, use a soft brush or sponge to clean these parts with warm soapy water. Rinse thoroughly with clean water, and let the components air-dry before reassembling.

To clean the toothpaste squeezer, start by removing any remaining toothpaste from the device. You can use a toothpick or a small brush to clear out any stubborn residues. For a thorough cleanse, prepare a mixture of warm water and mild detergent, and use a soft cloth or sponge to gently clean the squeezer. Rinse it thoroughly under running water, making sure all soap residues are removed. Allow the toothpaste squeezer to air-dry completely before storing it for future use.

Inspect your toothpaste dispenser and squeezer for any signs of wear and tear. Check for any cracks or damages that may affect the performance of the device. If you notice any issues, it’s best to replace the damaged part or the entire unit, depending on the extent of the damage. This will ensure that your dispenser and squeezer continue to function effectively and maintain good hygiene standards.

Another aspect to consider for maintaining the durability and hygiene of your toothpaste dispenser and squeezer is proper storage. To prevent the growth of mold and bacteria, always store these devices in a cool, dry, and well-ventilated area. Avoid leaving them in a damp or humid environment, as moisture can promote bacterial growth and damage the device in the long run.

A toothpaste dispenser and squeezer can be a great addition to your daily routine due to the convenience and waste reduction it offers. They come in various styles, materials, and designs, each promising a range of benefits, from ease of use to improved hygiene. If you are looking to invest in such a device, it’s important to research and analyze the reviews, ratings, and recommendations available from customers and experts to make the best decision when purchasing one.

An illustration of a toothpaste dispenser and squeezer being disassembled for cleaning purposes.

Reviews and recommendations

Once you have chosen the perfect toothpaste dispenser and squeezer, it’s essential to follow best practices for maintenance and cleaning. By doing so, you can enjoy the benefits of a toothpaste dispenser and squeezer that remain hygienic and functional for an extended period. Proper care and upkeep will ensure that you continue to enjoy the convenience and waste reduction that this innovative product offers.

Automatic Toothpaste Dispensers

One popular option in the market is the automatic toothpaste dispenser. These devices typically involve a wall-mounted unit that is activated when a toothbrush is pressed against the dispenser. This feature saves time and effort, making it particularly attractive for individuals with limited hand mobility or those who want a more streamlined morning routine. Reviews for such products tend to focus on the ease of installation and the consistency of the dispensing mechanism. A highly-rated example of an automatic toothpaste dispenser is the iHave Toothpaste Dispenser, which boasts a simple setup and smooth dispensing.

Manual Toothpaste Squeezers

Manual toothpaste squeezers, on the other hand, are more commonly used due to their simplicity, lower cost, and ease of use. These devices either clip or slide onto the tube and, when pushed or rolled, help distribute all the toothpaste from the tube. Customers appreciate this type of squeezer for their convenience and ability to minimize waste, ensuring that every bit of toothpaste is used. The LoveInUSA Toothpaste Tube Squeezer has received positive reviews for its durable design and budget-friendly price point.

UV Sanitizing Technology

Another trend that has emerged within the toothpaste dispenser market is the incorporation of UV sanitizing technology. These dispensers are marketed towards customers who want to prioritize oral hygiene by minimizing bacteria and germs, both on toothbrushes and around bathroom countertops. Reviews for these products typically emphasize their effectiveness in killing bacteria and whether the dispenser is easy to operate and maintain. An example of this kind of dispenser is the Puretta Toothbrush Sanitizer and Toothpaste dispenser, which has consistently high ratings and recommendations.

Versatile and Multipurpose Dispensers

Combine these technologies, and you will find dispensers that are versatile and multipurpose, catering to various needs and preferences. An example would be the Wekity Toothbrush and Toothpaste Squeezer Kit, which features an automatic toothpaste dispenser and manual squeezer in addition to toothbrush storage spaces. This all-in-one solution has received praise for its easy installation and functionality, making it a popular option for many families.

Researching and analyzing reviews and ratings are essential for finding the best toothpaste dispenser or squeezer to suit your preferences and needs, especially considering the growing concern about the environmental impact of our daily habits and the products we use. Focusing on the pros and cons provided by customers and experts will ensure you make an informed decision and avoid disappointment with your purchase.

A demonstration image of a toothpaste dispenser with a hand pressing a toothbrush against it

Environmental impact and sustainability

Toothpaste dispensers and squeezers have emerged as a popular eco-friendly alternative to traditional toothpaste tubes in recent years, mainly due to increasing awareness about single-use plastics and non-recyclable materials. By using these sustainable dental care products, not only are you making a more informed choice, but you are also reducing plastic waste and contributing to a greener future.

Toothpaste tubes, which are typically made from multiple layers of plastic, aluminum, and other materials, are difficult to recycle, and millions of them end up in landfills or polluting our oceans each year. In contrast, toothpaste dispensers and squeezers are designed to minimize waste from the outset, using less plastic in their construction and ensuring that every last bit of toothpaste is used. By opting for a toothpaste dispenser or squeezer, consumers can significantly reduce the number of plastic tubes that they discard over time, lowering their overall carbon footprint.

Additionally, toothpaste dispensers can be easily refilled with bulk toothpaste, which often comes in more environmentally friendly packaging, or with homemade toothpaste, which further minimizes the amount of plastic waste generated. This aligns with the global trend towards more conscious consumption, as consumers become increasingly aware of the environmental impact of their purchasing decisions and seek out eco-friendly alternatives.

Another advantage of toothpaste dispensers and squeezers is their durability and reusability. Many are made from high-quality materials, such as stainless steel or ceramic, which not only adds to their longevity but also makes them more sustainable than disposable toothpaste tubes. By investing in a reusable toothpaste dispenser, individuals can help reduce the demand for non-recyclable materials and contribute to a more circular economy.

In conclusion, toothpaste dispensers and squeezers provide an opportunity to mitigate the environmental impact of dental care by reducing plastic waste and promoting sustainability. Through innovative design and responsible consumption practices, these products contribute to a greener future, offering a more eco-friendly alternative for environmentally conscious consumers. By embracing toothpaste dispensers and squeezers, individuals can play their part in tackling the global issue of plastic pollution and supporting the transition to more sustainable lifestyles.

A white ceramic toothpaste dispenser with a black pump top and a toothbrush sitting next to it.

After exploring the various aspects of toothpaste dispensers and squeezers, it is evident that these devices can contribute significantly to the maintenance of oral hygiene, reduction of toothpaste wastage, and promotion of sustainability. By understanding the different types, features, installation processes, and maintenance practices, you can make the right choice when selecting a toothpaste dispenser or squeezer, ultimately leading to a more efficient and enjoyable brushing routine.

Categories
Uncategorized

Sensitive Teeth Toothpaste and Its Effects

Tooth sensitivity is a common dental issue that affects millions of people worldwide, often leading to significant discomfort and limitations in daily activities. As increased awareness about oral health is leading more people to seek knowledge and solutions for their dental problems, understanding sensitive teeth and their associated treatments is essential. This exploration into the world of sensitive teeth delves into various aspects of the issue and presents an array of effective ways to manage and alleviate sensitivity-related discomfort through the use of specialized toothpaste and other helpful oral hygiene practices.

Overview of Sensitive Teeth

Tooth sensitivity is an oral condition that affects millions of people worldwide, causing discomfort and pain when consuming hot, cold, sweet, or acidic foods and drinks. This sensitivity occurs when the protective layers of teeth, such as enamel and cementum, wear away, exposing the dentin layer underneath. The dentin contains tiny tubules that connect to the tooth’s nerve center, and when exposed to external stimuli, the nerves become irritated, leading to sensitivity and pain.

Various factors contribute to the development of tooth sensitivity, including aggressive tooth brushing, tooth grinding, and regular consumption of acidic foods and drinks.

One of the significant factors contributing to tooth sensitivity is worn tooth enamel. Enamel is the outermost protective layer of the tooth that shields the dentin from exposure. Over time, enamel can wear away due to poor oral hygiene, acidic diets, and overzealous brushing, among other factors. When the enamel thins, the dentin becomes exposed, leading to increased pain and sensitivity.

Another contributing factor to tooth sensitivity is tooth decay, commonly known as cavities. These occur when plaque, a sticky film of bacteria, builds upon tooth surfaces and produces acids that eat away at the tooth enamel. When tooth decay advances into the dentin layer, the nerves within the tooth become more vulnerable to external triggers like temperature and pressure, resulting in tooth sensitivity.

Gum disease, also known as periodontal disease, is another common cause of tooth sensitivity. Caused by harmful bacteria and plaque buildup along the gum line, gum disease can lead to inflammation, infection, and gum recession. As gums recede, the root surfaces of the teeth are exposed, and since these surfaces have less protective enamel than the tooth’s crown, sensitivity can increase. In some cases, gum disease can also cause bone loss around the tooth, further exacerbating tooth sensitivity issues.

Sensitive teeth toothpaste is formulated with active ingredients such as potassium nitrate or strontium chloride, which aim to decrease tooth sensitivity by blocking dentinal tubules and reducing nerve irritation. Moreover, these toothpaste formulations often include additional components to help strengthen tooth enamel, combat tooth decay, and prevent gum disease. Regular use of sensitive teeth toothpaste can provide relief for those experiencing tooth sensitivity, but it is crucial to consult with a dentist to ensure the underlying cause of sensitivity is properly identified and addressed.

A cartoon image of a toothbrush with several cartoon teeth around it, some with sad faces and others with happy faces.

Types of Sensitive Teeth Toothpaste

One of the key ingredients in sensitive teeth toothpaste is potassium nitrate, which effectively reduces tooth sensitivity by blocking pain signals transmitted by nerves in the teeth to the brain. This powerful chemical compound penetrates the enamel and dentin layers, reaching the nerve endings and alleviating the pain and discomfort associated with sensitive teeth. Toothpastes containing potassium nitrate typically have a concentration of about 5%, which is considered the optimal level for providing relief from tooth sensitivity.

Another active ingredient that is often used in sensitive teeth toothpaste is stannous fluoride. Stannous fluoride has been proven effective in reducing tooth sensitivity by forming a barrier along the openings of the tubules in the dentin, which are microscopic channels reaching the nerve endings. When these tubules are exposed to external stimuli such as hot or cold temperatures or acidic substances, we experience tooth sensitivity. In addition to blocking these tubules, stannous fluoride also helps in strengthening the enamel and fighting against decay by making it more resistant to acid attacks.

Different types of toothpaste formulated for sensitive teeth combine these active ingredients with others that help to maintain the health of your teeth and gums, such as antimicrobial agents that fight the bacteria responsible for gum disease and bad breath. These toothpastes also often include abrasive agents like hydrated silica, which help to gently remove stains and plaque from the surface of the teeth without causing further damage to the already sensitive enamel and dentin.

Apart from potassium nitrate and stannous fluoride, newer sensitive toothpaste formulations now utilize other desensitizing agents, such as calcium sodium phosphosilicate (NovaMin) and arginine. Calcium sodium phosphosilicate forms a hydroxyapatite-like substance upon contact with saliva, which physically seals off exposed dentin tubules to reduce sensitivity. Simultaneously, arginine, an essential amino acid, interacts with plaque biofilm to block receptors that cause pain, offering yet another desensitizing mechanism.

Finding the most suitable toothpaste for sensitive teeth can be based on personal preference and individual needs. It is recommended that you consult your dentist to help identify which toothpaste formulation will be most effective in addressing your specific sensitivity concerns. Your dentist may suggest alternating between different types of toothpastes to maximize the benefits of each active ingredient while minimizing any potential side effects.

Image of toothpaste with the words 'sensitivity relief' prominently displayed on the packaging

How Sensitive Teeth Toothpaste Works

It is important to consider that tooth sensitivity is a prevalent dental issue affecting a significant proportion of the adult population worldwide. Sensitive teeth typically occur when the enamel, which acts as the outer protective layer of the tooth, wears down and exposes the vulnerable dentin underneath. Therefore, selecting the right toothpaste is essential to help alleviate tooth sensitivity and maintain overall oral health.

Dentin is a porous material containing microscopic tubules that lead to the tooth’s nerve center. When these tubules are exposed to external stimuli such as hot or cold temperatures, sweet or acidic foods, and even aggressive tooth brushing, they can transmit signals to the nerve, leading to pain and discomfort.

Sensitive teeth toothpaste is specifically formulated to alleviate this discomfort by targeting the exposed tubules and forming a protective barrier on the surface of the teeth.

The active ingredient in most sensitive teeth toothpastes is either potassium nitrate or strontium chloride. These compounds work by either blocking the transmission of pain signals from the nerve or by occluding the dentin tubules, which helps prevent external triggers from reaching the tooth’s nerve center.

Potassium nitrate, for example, penetrates the dentin tubules and gradually numbs the nerve endings inside the tooth. This reduces or eliminates the nerve’s ability to send pain signals to the brain in response to external stimuli. Meanwhile, strontium chloride binds to the tooth’s surface and helps create a seal that covers and protects the exposed dentin tubules. This seal acts as a physical barrier, preventing external triggers from entering the tubules and accessing the nerve fibers.

In addition to these active ingredients, sensitive teeth toothpaste may also contain other beneficial additives. These can include fluoride, which strengthens the tooth enamel and helps prevent further erosion, and triclosan, an antibacterial agent that helps to minimize plaque formation and reduce gum inflammation. Some toothpastes also contain abrasive particles to help remove stains and surface debris without damaging the tooth enamel.

Regular use of sensitive teeth toothpaste can provide ongoing relief from discomfort associated with tooth sensitivity. This sensitivity originates from the exposure of the dentin layer, which lies beneath the enamel, due to factors like enamel erosion, receding gums, or even structural issues in the teeth. Sensitive teeth toothpaste is specially formulated with compounds like potassium nitrate or strontium chloride that work by temporarily blocking the tiny channels (called tubules) in the dentin layer, preventing nerve irritation and reducing sensitivity.

An image of a tube of sensitive teeth toothpaste with a toothbrush and a glass of cold water beside it

Effectiveness and Limitations of Sensitive Teeth Toothpaste

However, the effectiveness of the toothpaste varies among individuals and may be affected by factors such as the severity of the sensitivity, the cause of the enamel loss, and proper tooth brushing techniques. Therefore, it is essential to consult with a dental professional to address any underlying dental conditions and receive personalized recommendations for effective tooth sensitivity management. By doing so, individuals suffering from tooth sensitivity can optimize their oral care routine and experience improved comfort while maintaining proper dental hygiene.

The effectiveness of sensitive teeth toothpaste can vary depending on individual factors, such as the severity and cause of tooth sensitivity. Most people experience relief after a few weeks of consistent use, but some may require a longer duration before they notice significant improvement. It is crucial to remain patient and continue applying the toothpaste as directed, either twice daily or as recommended by a dentist.

Although sensitive teeth toothpaste can provide relief from sensitivity, it usually only offers temporary respite. This is because the active ingredients in the toothpaste are gradually washed away over time. For example, the potassium nitrate and strontium chloride in the toothpaste work by blocking the tubules in the dentin layer of the tooth, but their effect diminishes with each brush, necessitating continued use to maintain effectiveness. To achieve long-lasting relief, users need to consistently use the toothpaste every day. Missing out on applications could lead to diminishing results and returning sensitivity.

It is important to consider that sensitive teeth toothpaste has limitations. While it can help manage sensitivity caused by exposed dentin, it might not be as effective in addressing other causes of tooth pain. For instance, if the sensitivity is due to structural issues such as cracked teeth or an infection, the toothpaste may not provide significant relief. In such cases, it is vital to consult a dentist for a diagnosis and appropriate treatment.

Maintaining good oral hygiene habits and addressing any contributing factors that may exacerbate tooth sensitivity can go a long way in ensuring healthy teeth. For example, avoiding acidic foods and beverages that can erode the enamel, using a soft-bristled toothbrush, and not brushing too aggressively can prevent further damage to the teeth. Regular dental check-ups can also identify and treat any potential issues before they escalate, reducing the reliance on sensitive teeth toothpaste for relief. While sensitive teeth toothpaste can provide effective temporary relief, it is crucial to address the underlying cause and maintain excellent oral care habits for long-term improvement.

A toothpaste tube with gel squeezed out of the bottom with a toothbrush.

Oral Hygiene Practices for Sensitive Teeth

Tooth sensitivity can be an uncomfortable condition that affects many individuals, but implementing proper oral hygiene practices into one’s daily routine can help alleviate this issue. One surefire way to maintain good oral health is to use the right brushing technique. Dentists typically recommend placing the toothbrush at a 45-degree angle to the gum line, and gently using circular motions to clean all surfaces of the teeth. By following this technique, individuals can minimize the risk of enamel erosion or gum line recession, which often leads to increased tooth sensitivity, and thereby potentially decreasing the need for sensitive teeth toothpaste.

Using a soft-bristled toothbrush is another key factor in maintaining oral health for those with sensitive teeth. A toothbrush with hard or medium bristles can cause damage to the tooth enamel and irritate the gums, resulting in heightened sensitivity. Always choose a toothbrush marked as soft or extra-soft, and replace the brush every three to four months, as bristles can become frayed and less effective over time. For individuals with particularly sensitive teeth, an electric toothbrush with a pressure sensor can be a helpful tool, as it will ensure that the appropriate amount of pressure is used during brushing.

In addition to proper brushing techniques, using a toothpaste specifically designed for sensitive teeth can contribute to better overall oral hygiene. Such toothpastes typically contain ingredients like potassium nitrate or stannous fluoride, which work to block the microscopic tubules present in the dentin layer of the teeth, thereby reducing sensitivity. When using a sensitive teeth toothpaste, it is important to continuously use it as part of one’s daily routine, as the effects can wane if usage is stopped.

Regular dental check-ups and cleanings are also crucial in maintaining good oral health and managing tooth sensitivity. Dental professionals will be able to monitor and address any issues such as gum disease, tooth decay, or cracks in the teeth, which could all contribute to tooth sensitivity. Additionally, your dentist may recommend fluoride treatments or the application of sealants to further protect your teeth against sensitivity.

Tooth sensitivity is an issue faced by many individuals, which occurs when the tooth’s enamel is worn down or the gums have receded, exposing the tooth’s dentin. While sensitive teeth toothpaste aims to provide relief, there are other alternative remedies and treatments that can be explored, including professional treatments and home remedies.

Illustration of a toothbrush sideways on with bristle close up

Alternative Remedies and Treatments for Sensitive Teeth

Aside from using sensitive teeth toothpaste, implementing certain oral hygiene practices can help reduce tooth sensitivity and improve overall dental health. Measures such as limiting the consumption of acidic foods and beverages, using a mouthguard if teeth grinding is an issue, and practicing proper flossing techniques can have a significant impact. Embracing these habits will not only alleviate discomfort but also contribute to a brighter, healthier smile.

One professional treatment option includes the application of desensitizing agents, which can be administered by a dentist. These agents work by blocking the tubules in the dentin, thus reducing the tooth’s sensitivity to external stimuli, such as hot or cold beverages. Some common desensitizing agents include fluoride varnishes and gels, which can be applied directly to the affected teeth. While these treatments are effective for many individuals, it is important to consult with a dentist to determine the appropriate course of action based on individual needs.

Another professional treatment option for sensitive teeth is dental sealants. Dental sealants are a thin, protective coating applied to the tooth’s chewing surface, which helps prevent tooth decay and reduce sensitivity. Dental sealants are a long-lasting and relatively inexpensive option in comparison to other treatments. However, it is essential to note that dental sealants may not be suitable for everyone, depending on the individual’s dental health, and consultation with a dentist is necessary.

Bonding, also known as resin bonding or composite fillings, is yet another professional treatment for sensitive teeth. In this treatment, a tooth-colored resin material is applied to the tooth’s surface, which is then hardened with a curing light, effectively sealing the exposed dentin. Bonding can diminish sensitivity, as well as improve the tooth’s appearance. However, bonding may need to be replaced over time, and a dentist can provide information on the appropriate materials and applications for each individual case.

For those who prefer home remedies, natural toothpastes can provide relief for sensitive teeth. Some natural toothpaste formulations contain ingredients such as potassium nitrate or strontium chloride, which are known to help reduce tooth sensitivity. Another popular home remedy is the use of clove oil, which has been used for centuries for its antiseptic, analgesic, and anti-inflammatory properties. Applying a small amount of clove oil to a cotton swab and dabbing it on the affected teeth can help alleviate sensitivity temporarily. However, it is important to consult with a dentist before beginning any home remedies, as individual circumstances may vary and some treatments may not be suitable for specific dental conditions.

Illustration of dental professional applying dental sealant on a tooth for tooth sensitivity relief.

Overall, managing sensitive teeth requires a comprehensive approach that encompasses appropriate toothpaste choices, proper oral hygiene practices, and awareness of alternative remedies and treatments. Individuals who are proactive in addressing tooth sensitivity can find relief and ultimately improve their oral health. By integrating the knowledge obtained about various types of sensitive teeth toothpaste, their mode of action, effectiveness, limitations, and additional strategies to reduce sensitivity, individuals can make informed decisions that best suit their dental needs and enhance their quality of life.

Categories
Uncategorized

Children’s Toothpaste and Dental Hygiene

As parents, one of our key responsibilities is to ensure the health and well-being of our children, and this includes their dental hygiene. Establishing good dental habits from a young age can have a significant impact on their long-term oral health, preventing dental issues and setting them up for success in maintaining a healthy smile. This comprehensive guide explores the importance of dental hygiene for kids, selecting the right toothpaste and toothbrush, teaching proper brushing techniques, understanding the role of fluoride, and the significance of regular dental visits, nutrition, and addressing common dental issues.

Importance of dental hygiene for kids

One key aspect of pediatric dental care is the consistent use of appropriate toothpaste for young children. Kids’ toothpastes are specifically formulated to cater to the unique dental needs of growing children, as their teeth continue to develop. These toothpastes contain a lower concentration of fluoride and are less abrasive when compared to adult toothpaste. Fluoride is essential in preventing tooth decay; however, excess amounts can lead to dental fluorosis, a condition that causes discoloration of the teeth. The carefully balanced ingredient composition of kids’ toothpaste helps to avoid such problems and ensures an effective cleaning routine for children.

Introducing the habit of regularly brushing their teeth with kids toothpaste from an early age is crucial in laying the foundation for lifelong dental hygiene. This practice helps children become familiar with and excited about the concept of dental care. Moreover, cultivating a fun and engaging tooth-brushing routine may significantly reduce the risk of dental issues, such as cavities, plaque, and gum disease in the future. The vibrant colors, flavors, and appealing packaging of children’s toothpaste often encourage children to maintain their enthusiasm for oral care as they grow older.

In addition to developing a regular brushing regime, parents should also ensure that their children are employing the correct toothpaste application techniques. This involves teaching them the appropriate amount of toothpaste to use and correct brushing motions. Dentists recommend that parents supervise their children’s tooth-brushing habits until at least the age of seven, to ensure accuracy and consistency. The use of timers, music, or storytelling during brushing can reinforce this learning process and make it an enjoyable experience for both the parent and child.

Aside from teaching proper brushing techniques, it is equally essential to educate children on the importance of flossing and rinsing with mouthwash. Encouraging these habits will help to further strengthen their oral health and protect them from potential dental issues. Providing kids with oral care products like flavored kids’ floss and alcohol-free kids’ mouthwash will not only help maintain their interest but will also ensure that they establish a comprehensive dental care routine.

Introducing children to good oral hygiene habits early in life is crucial for maintaining their dental health and preventing potential issues. Regular dental check-ups are an essential part of a child’s dental care routine, as dentists can monitor their oral health and alleviate any fears or apprehensions associated with dental visits. Alongside dental check-ups, using kids’ toothpaste and other tailored oral care products can significantly contribute to a strong and healthy foundation for a lifetime of optimal dental health.

Illustration of a smiling tooth with a toothbrush and a tube of kids' toothpaste, emphasizing the importance of dental hygiene for children.

Selecting the right toothpaste for children

Effective dental hygiene practices involve using the right toothpaste, which is specifically designed to cater to the unique needs of both adults and children. In the case of children, selecting an appropriate toothpaste should take into account factors such as their age, fluoride content, and flavor preferences. This can ensure that the toothpaste not only provides adequate dental protection but also encourages consistent and enthusiastic tooth brushing among kids, paving the way for lasting dental health.

The primary ingredient to consider while selecting a toothpaste for children is the presence of fluoride. Fluoride is a key element in fighting tooth decay, strengthening tooth enamel, and promoting healthier dental hygiene. The American Dental Association (ADA) recommends using toothpaste with fluoride for children, but in age-appropriate amounts. For infants below three years, a fluoride toothpaste with about 1,000 parts per million of fluoride (ppm) should be used in a rice-grain sized amount. For children aged 3 to 6, a pea-sized amount of fluoride toothpaste with approximately 1,350 to 1,500 ppm is recommended.

In addition to fluoride content, the flavor of toothpaste is an essential factor to consider for children. Many children do not like the strong taste of adult toothpaste, which can lead to a reluctance to brush their teeth properly. Children’s toothpaste generally comes in a variety of flavors such as fruit, bubblegum, or other mild flavors to make brushing more enjoyable for kids. However, it is important to ensure that the toothpaste is ADA-approved and meets all the required oral health requirements regardless of flavor.

One of the most significant differences between children’s toothpaste and adult toothpaste is the strength of the ingredients. Adult toothpaste typically contains stronger elements that may not be suitable for a child’s developing teeth. Some adult toothpaste may also have ingredients such as teeth whiteners or tartar control agents, which are not required for children and can be harmful or abrasive for their teeth. It is important to check the label and ensure that the toothpaste is suitable for the child’s age range.

Choosing the right toothpaste for your child is crucial for promoting good oral health throughout their lifetime. With numerous options available for children’s toothpaste, factors such as ADA approval, fluoride content, flavor, and age-appropriate labeling must be considered to ensure proper dental care habits are developed and maintained.

An image of a child brushing their teeth with a cartoon toothbrush and toothpaste to depict the importance of selecting the right toothpaste for children.

Teaching proper brushing techniques to kids

Teaching proper brushing techniques and instilling good dental hygiene habits from a young age are essential for children’s dental care routines. One of the core components is using a toothpaste specifically designed for kids, as these often have a milder taste and lower levels of fluoride, making them safer for children who may accidentally swallow it. The American Dental Association (ADA) further recommends opting for a fluoride toothpaste to help prevent tooth decay in children.

To start teaching children the correct way to brush their teeth, ensure they are using the appropriate amount of toothpaste. For children under three, use a smear of toothpaste about the size of a grain of rice. For children aged three to six, use a pea-sized amount. Explain to the child that they should be gentle when brushing, using circular motions to clean all surfaces of the teeth, and don’t forget to include the tongue as this will help to freshen breath and remove bacteria.

Making tooth-brushing an enjoyable and engaging activity can help motivate kids to maintain good dental hygiene. Consider introducing a fun toothbrush, perhaps one featuring their favorite cartoon character or one that lights up or plays music. A two-minute timer can be beneficial in encouraging children to brush for the recommended duration, ensuring they are thoroughly cleaning all their teeth. Allowing the child to choose their own toothbrush and toothpaste can give them a sense of ownership over their dental routine and increase their enthusiasm.

Another way to keep kids motivated to brush regularly is by making it a family activity, so they associate it with positive experiences. Brushing together not only strengthens the bond between child and parent but also allows the parent to ensure their child is using the correct technique in real-time. In addition to this, positive reinforcement and rewards, such as a sticker chart or small treats, can be used to celebrate consistent brushing and help establish long-lasting dental hygiene habits.

Teaching children about the importance of good dental health and the need for routine check-ups with a dentist is crucial for fostering proper oral care habits. Utilizing age-appropriate resources such as books, videos, and games can help explain why taking care of their teeth is essential, and maintaining open communication allows them to ask any questions they might have. Ensuring that children understand the benefits of proper brushing techniques and using suitable toothpaste will set them up for success in maintaining their dental health throughout their lives.

A cartoon image of a child brushing their teeth with a toothbrush in one hand and a toothpaste tube in the other, with bubbles forming around their mouth.

Fluoride in children’s toothpaste

Fluoride, a natural mineral that can be found in toothpaste, plays a pivotal role in strengthening tooth enamel and preventing tooth decay, especially in children with developing teeth. It is a common ingredient in various toothpaste options, including those designed specifically for children. Fluoride has been proven to help reduce cavities and actively promote overall oral health. By choosing the right toothpaste with fluoride and guiding them on proper brushing techniques, children’s dental health can be significantly enhanced.

Fluoride interacts with the tooth enamel, helping to repair damaged areas and making the enamel more resistant to acids produced by bacteria in the mouth. This helps prevent future tooth decay and cavities, which can become a significant issue for children who are still learning to maintain proper dental hygiene practices.

The benefits of fluoride in children’s toothpaste have been well-documented through numerous research studies. These studies have consistently shown that children who use fluoride toothpaste have significantly fewer cavities and better overall oral health than those who do not.

The American Dental Association (ADA), the American Academy of Pediatric Dentistry (AAPD), and the Centers for Disease Control and Prevention (CDC) all recommend the use of fluoride toothpaste for children to ensure their continued oral health.

The appropriate amount of fluoride in children’s toothpaste largely depends on the child’s age. According to the ADA, children under the age of three should use a smear of toothpaste, approximately the size of a grain of rice. Children three to six years old should use a pea-sized amount of toothpaste. Using the appropriate amount of toothpaste is essential, as swallowing too much fluoride can lead to dental fluorosis – a cosmetic condition that causes white spots or streaks on the teeth.

While fluoride is an essential component for maintaining children’s dental health, it is also crucial for parents to monitor their children’s brushing habits. Encouraging a consistent routine of brushing twice a day for two minutes each time, as well as flossing daily, will help ensure proper dental care. Additionally, introducing children to regular dental check-ups will further promote their oral health and help establish a healthy relationship with the dentist throughout their lives.

In conclusion, fluoride plays an essential role in children’s toothpaste, providing numerous benefits that contribute to better dental health. By following the recommended guidelines regarding the amount of fluoride based on the child’s age, parents can effectively protect their children’s teeth from decay and cavities. Maintaining proper dental hygiene, including using fluoride toothpaste, brushing twice daily, flossing, and receiving regular dental check-ups, is crucial for children to develop strong, healthy teeth and establish a strong foundation for lifelong oral health.

An image of a toothbrush with toothpaste on it, with the words 'with fluoride' on the packaging to depict the importance of fluoride in toothpaste.

Choosing the right toothbrush for your child

When selecting a toothbrush for your child, one of the most important factors to consider is their age. Different toothbrushes are designed for various age groups, and using an appropriate toothbrush will ensure a more effective and comfortable experience. For toddlers aged 1-2 years old, consider using a small toothbrush with soft bristles and a small head. As the child grows, you can transition to larger toothbrushes with slightly stiffer bristles. For example, children aged 5-8 years old might use a toothbrush with a larger head and a longer handle, while older kids may need an even bigger toothbrush to accommodate their larger teeth and mouth. Ultimately, the toothbrush choice and proper use of kids toothpaste with fluoride will help support your child’s dental health journey.

Bristle type is another crucial factor when selecting a child’s toothbrush. It is generally recommended to use toothbrushes with soft bristles, as they are more gentle on the gums and teeth enamel. Hard bristles can cause damage to the tooth enamel, and they might not effectively clean the teeth because they can’t bend and adapt to the shape of each tooth. Additionally, softer bristles are more comfortable and easier to maneuver, which may encourage a child to brush for the recommended two minutes without complaints.

The toothbrush size is another factor that must be carefully considered. The toothbrush head should fit comfortably in your child’s mouth and be able to reach all of their teeth, including the back molars. Small-headed toothbrushes are recommended for children, as they can easily maneuver around small mouths and tight spaces, ensuring a thorough cleaning. Similarly, the toothbrush handle should be proportionate to your child’s hand, allowing for a comfortable grip and better control while brushing.

A few additional features could help to make toothbrushing fun and more engaging for children, potentially leading to better oral hygiene habits. Many toothbrushes come in varying colors, designs, or even with popular characters on the handle, which can make choosing a toothbrush more enjoyable for your child. Furthermore, consider investing in a toothbrush with a built-in timer or one that plays music to ensure kids brush for the recommended two minutes.

One of the popular options for improving children’s dental care is the use of electric toothbrushes. These come in various sizes, bristle types, and often feature engaging designs and timers to make the process fun and effective. Some studies have shown that electric toothbrushes can be more efficient in removing plaque compared to manual ones. However, it’s essential to consult with your child’s dentist to determine if an electric toothbrush is appropriate and safe for their specific needs before making the switch.

An image showing a child brushing his teeth with a soft-bristled toothbrush while smiling.

Dental visits and professional cleanings for children

Along with the right brushing tools, regular dental check-ups and professional cleanings play an essential role in maintaining children’s oral health. These visits ensure early detection of potential issues, such as cavities, tooth decay, and gum disease, and help prevent them from escalating into serious dental problems. While assessing your child’s overall oral health, dental professionals can also provide valuable guidance on proper brushing techniques and recommend suitable toothpaste options for kids.

One of the key aspects of dental visits is to ensure that kids are using the right toothpaste. Fluoride-based toothpaste is widely recommended by dental professionals and the American Dental Association for promoting stronger, healthier teeth because fluoride actively helps to protect the teeth against decay. However, the appropriate amount of fluoride toothpaste used should depend on the child’s age, as swallowing too much fluoride can cause fluorosis, which leads to white spots on the teeth. Generally, children under the age of two should use a rice-sized amount of toothpaste, while those between the ages of two and six should use a pea-sized amount.

The frequency of dental visits for children depends on their age and specific oral health needs. The American Academy of Pediatric Dentistry recommends that children should visit the dentist by their first birthday or within six months of their first tooth erupting, whichever occurs first. After their initial visit, children should have regular dental check-ups and cleaning appointments every six months. However, children with an increased risk of oral health issues may be advised to have more frequent visits.

In addition to using kids toothpaste, practicing good oral hygiene as early as possible is vital for maintaining healthy teeth and gums. Parents should assist their children in forming consistent dental care routines, including brushing twice daily for two minutes, flossing once a day, and limiting sugary foods and drinks. Establishing these healthy habits early on will set the groundwork for a lifetime of good oral health.

In order to maintain a healthy mouth and a confident smile for your child, it is important to keep up with regular dental visits and choose the appropriate kids toothpaste. Dental professionals can monitor your child’s dental development and address any concerns or issues during these appointments. Moreover, familiarizing your child with the dental environment at a young age can help reduce fears and anxiety commonly associated with dental visits.

An illustration of a dentist examining a child's teeth with a happy child lying back in the dental chair.

Nutrition for healthy teeth and gums

Another crucial aspect of maintaining your child’s overall dental health is proper nutrition. A well-balanced diet contributes to the development of strong teeth and gums and helps prevent tooth decay and gum diseases. By ensuring your child receives the right nutrients and practicing good dental hygiene with the right toothpaste, you can set them on the path to a lifetime of healthy teeth and gums.

As children grow, it’s essential to choose toothpaste specifically tailored to their needs to ensure the best possible dental care and to promote healthy teeth and gums. Children’s toothpaste usually contains fluoride, which strengthens enamel and provides additional protection against cavities.

To ensure healthy teeth and gums, it is essential to incorporate a variety of nutrient-rich foods into a child’s diet. Dairy products, such as milk, cheese, and yogurt, are excellent sources of calcium and phosphorous, which play a crucial role in the remineralization process of teeth. Furthermore, these foods promote saliva production, which helps neutralize the acidity in the mouth caused by sugary or acidic foods. Crunchy fruits and vegetables, such as apples and carrots, also promote healthy teeth and gums by stimulating saliva production and acting as a natural toothbrush, removing plaque from the surfaces of teeth.

Conversely, certain foods and beverages have negative effects on children’s dental health. Sugary and sticky foods, like candies, cookies, and other sweets, are a leading cause of tooth decay. The sugars found in these foods interact with the bacteria present in the mouth, producing acids that break down tooth enamel. Additionally, sodas, fruit juices, and sports drinks are also harmful to teeth due to their high sugar content and acidic nature. Limiting the consumption of these foods and drinks and encouraging children to drink water throughout the day can help maintain a healthy oral environment.

Apart from maintaining a balanced diet, it’s essential to establish a proper oral hygiene routine for children. This includes brushing with kids’ toothpaste at least twice a day, flossing daily, and scheduling regular dental checkups. Choosing the right toothpaste for kids involves finding one with age-appropriate fluoride levels and a flavor that appeals to them, making the brushing experience more enjoyable and effective.

Children’s dental health is crucial for their overall well-being as it sets the foundation for a lifetime of strong teeth and gums. Preventing common dental issues like cavities and tooth decay, which are prevalent in children, should be a priority. Kids are more prone to sugary food consumption, which, in combination with poor oral habits, can lead to rapid plaque buildup and an increased risk of cavities. Encouraging regular brushing with fluoride toothpaste and flossing is essential to maintain oral hygiene.

A cartoon image of a child sitting in a dentist chair with a big smile on their face while a dentist examines their teeth with different dental instruments.

Addressing common dental issues in children

Alongside these preventative measures, it is crucial to educate children on the importance of dental health and the consequences of a poor diet. Involving them in the decision-making process when choosing nutritious foods and toothpaste can help instill a sense of responsibility regarding their dental hygiene. Additionally, keeping a check on unhealthy snacking habits significantly reduces the risk of cavities and strengthens enamel. Ultimately, developing healthy eating habits and a consistent oral care routine using kids’ toothpaste will ensure a lifetime of strong teeth and gums.

Another common dental issue in children is gum disease, which starts with inflammation and bleeding of gums and could result in severe gum diseases or tooth loss if left unchecked. Developing and reinforcing good oral hygiene habits from a young age can prevent this. Using age-appropriate toothpaste and gently massaging the gums during brushing can maintain healthy gums. Regular dental checkups and cleanings are crucial in preventing gum diseases.

Orthodontic issues like crooked teeth, overbites, underbites, and crowded teeth are also common in children, leading to dental issues and a significant impact on a child’s appearance and confidence. It’s crucial to identify and address orthodontic problems at an early stage with regular visits to the dentist. Orthodontic evaluation by the age of seven can help determine the potential treatment option like braces, expanders, or spacers.

Helping children develop positive dental habits, like making brushing a fun, engaging activity with flavored toothpaste and colorful toothbrushes, can encourage lifelong dedication to oral hygiene. Parents and caregivers must discourage oral habits like thumb sucking or prolonged use of a pacifier, leading to misaligned teeth or improper jaw development, and take steps to correct them.

Lastly, teaching children to wear mouthguards while playing sports, avoiding hard candies, and not using their teeth as tools can minimize injuries to the teeth and mouth. Regular dental checkups are vital to identify and address potential dental vulnerabilities early on.

An illustrated image with two children brushing their teeth with a parent supervising them.

By being proactive in our children’s dental care, we can set them on the path to a lifetime of healthy teeth and gums. Implementing the strategies and knowledge provided in this guide will not only teach children the importance of dental hygiene but also create a positive, lifelong habit. So let us empower our children with the right tools, techniques, and understanding, ensuring they have the brightest and healthiest smile possible.

Categories
Uncategorized

Best Toothpastes for a Healthy Smile

Maintaining good oral hygiene is crucial for a healthy and radiant smile, and choosing the right toothpaste is an important part of that process. With a plethora of options available in the market, it can be overwhelming to select the most suitable toothpaste for your needs. In this listicle, we bring to you the different types of toothpastes available, catering to diverse requirements. From fluoride and whitening toothpastes to sensitivity and natural ones, this guide will help you find the perfect toothpaste to keep your smile bright and your teeth in top shape.

1. Fluoride Toothpastes

Picking the right toothpaste can feel like a daunting task with countless options lining the shelves. But, worry no more! If you’re looking to strengthen and protect your teeth against tooth decay and cavities, fluoride toothpastes are your best bet. Let’s dive into the world of fluoride toothpastes and explore their amazing benefits for your oral health.

The Magic of Fluoride:

The star ingredient in these toothpastes is, of course, fluoride – a naturally occurring mineral that’s been long-accepted as a game-changer in oral care. Fluoride works wonders by remineralizing your tooth enamel and warding off cavities. It can either be in the form of sodium fluoride or stannous fluoride.

1. Colgate Total SF:

As one of the leading toothpaste brands in the market, Colgate Total SF offers comprehensive protection for your teeth. Its unique formula combines the power of stannous fluoride with other active ingredients to fight plaque, tartar buildup, and gum disease – achieving a truly all-in-one preventative solution.

2. Crest Pro-Health:

Well-renowned for its innovative oral care products, Crest Pro-Health boasts a stannous fluoride formula that combats tooth sensitivity and enamel erosion. Additionally, this toothpaste delivers impressive results in protection against gingivitis – ensuring healthy gums accompany your cavity-free teeth.

3. Sensodyne Pronamel:

Is tooth sensitivity getting in the way of you enjoying your favorite treats? Sensodyne Pronamel is here to save the day. Featuring sodium fluoride, this toothpaste specializes in shielding your sensitive teeth from extreme temperatures while also preventing cavities and strengthening weakened enamel.

4. Tom’s of Maine Natural Fluoride Toothpaste:

For those who embrace an eco-friendly and all-natural lifestyle, Tom’s of Maine Natural Fluoride Toothpaste should definitely be on your list. Made with naturally-sourced sodium fluoride, it also avoids artificial preservatives, sweeteners, and colors – promoting both your oral health and environmental well-being.

5. Parodontax Complete Protection:

Bleeding gums can often signal the start of periodontal diseases and issues with oral health. Parodontax Complete Protection addresses this concern, using its stannous fluoride formula to combat plaque buildup and consequently reduce gum bleeding. With better oral hygiene, you can flash those pearly whites with confidence.

A fluoride toothpaste, without a doubt, should find its way onto your shopping list. Choosing one that suits your individual needs will provide you with an effective and easy way to protect your teeth against the evils of tooth decay and cavities. So, brush your way to a healthier and brighter smile with one of these fantastic fluoride toothpaste options!

A picture of a toothbrush next to fluoride toothpaste on a white background.

2. Whitening Toothpastes

When it comes to dental health, the choice of toothpaste plays a crucial role in maintaining a bright and clean smile. Among the plethora of toothpaste options available, whitening toothpastes have gained immense popularity over the years. With their ability to gently remove surface stains and discoloration, using a whitening toothpaste can bring a significant difference in your oral hygiene and overall appearance. So, why not invest in the best whitening toothpaste to unleash a dazzling smile worth flaunting? Let’s dive deeper into the wonders of these tooth-whitening wonders and explore the top choices in the market.

Whitening Toothpaste: How It Works

Whitening toothpastes work their magic by incorporating mild abrasives and stain-removing agents, such as hydrogen peroxide or baking soda. These ingredients help to polish and brighten the teeth by gradually eliminating surface stains caused by various factors, like food, beverages, and smoking. Unlike regular toothpaste, whitening toothpastes have additional components that target stubborn stains and maintain the natural color of your teeth.

Top Whitening Toothpastes to Try

  1. Colgate Optic White Whitening Toothpaste
    Colgate Optic White is a potent whitening toothpaste that provides visible results in just three days. With the power of hydrogen peroxide as its primary ingredient, it effectively removes intrinsic and extrinsic stains for a brighter smile. It also includes fluoride to protect against cavities and fight plaque.
  2. Crest 3D White Luxe Glamorous White Toothpaste
    This fan-favorite toothpaste promises to remove up to 95% of surface stains within just three days of use. Crest 3D White Luxe has a unique Whitelock Technology which forms a protective layer to prevent future stains. It also contains fluoride to fortify the enamel and offer strong cavity protection.
  3. Arm & Hammer Advance White Extreme Whitening Toothpaste
    Arm & Hammer’s Advance White Extreme Whitening toothpaste focuses on the power of baking soda to remove plaque and surface stains while neutralizing the acids that lead to tooth decay. It also contains peroxide, which aids in whitening and provides an overall deep clean for healthier teeth and gums.
  4. Sensodyne Pronamel Gentle Whitening Toothpaste
    Sensitive teeth shouldn’t mean compromising on a whiter smile. Sensodyne Pronamel offers a gentle whitening formula developed specifically for sensitive teeth. Along with its teeth-whitening action, this toothpaste helps strengthen weakened tooth enamel and protect against acid erosion from daily food and drinks.

Choosing the Best Whitening Toothpaste for You

Every individual is unique, and so are their dental needs. When selecting the best whitening toothpaste, consider factors such as the level of sensitivity of your teeth, ingredients, and several reviews from other consumers. With a wide range of options available, you are sure to find the perfect match that will boost your confidence with a visibly brighter and healthier smile.

Conclusion

A radiant smile can work wonders in boosting your overall appearance and confidence. Whitening toothpastes, with their gentle yet effective stain removing powers, can help you achieve that dazzling smile without breaking the bank or opting for professional treatments. So, upgrade your oral care routine with a top whitening toothpaste and witness the commendable transformation in your smile.

A picture of different types of toothpastes with varying colors, textures, and packaging. The toothpastes are placed on a white background and include some whitening toothpaste options mentioned in the article, such as Crest and Sensodyne. The file is named 'toothpaste-options-image-ABC.png', with ABC being three random letters.

3. Sensitivity Toothpastes

Imagine savoring a spoonful of piping hot soup or an ice-cold beverage only to recoil in pain. Anyone with sensitive teeth knows that this sharp, sudden discomfort can turn a blissful foodie experience into a dreaded ordeal. Sensitivity toothpastes promise relief, but do they really work? Let’s delve into their soothing secrets and unveil the top three contenders in the sensitivity toothpaste game.

What Causes Tooth Sensitivity?

Before understanding how sensitivity toothpastes work, it’s essential to grasp the leading causes of tooth sensitivity. Enamel erosion and gum recession expose the underlying layer of teeth (called dentin) that houses nerve endings. When these nerves encounter hot, cold, or acidic elements, they may send an abrupt twinge of pain, which is tooth sensitivity.

Enter Sensitivity Toothpastes:

Thankfully, sensitivity toothpastes come to the rescue by targeting these exposed nerves. Potassium nitrate or strontium chloride, the active ingredients usually found in these toothpastes, desensitize teeth and provide pain relief.

Top 3 Sensitivity Toothpastes:

  1. Sensodyne Pronamel Gentle Whitening Toothpaste: Sensodyne’s Pronamel Gentle Whitening Toothpaste contains potassium nitrate, which prevents pain signals from traveling to the nerves while promoting remineralization to strengthen tooth enamel. Its gentle whitening properties break down surface stains to restore your teeth’s natural brilliance.
  2. Colgate Sensitive Pro-Relief Toothpaste: Colgate Sensitive Pro-Relief fights plaque, freshens breath, and uses Pro-Argin™ technology with arginine and calcium carbonate to form a protective barrier around exposed dentin. With regular use, this toothpaste ensures reduced sensitivity and fortified enamel.
  3. Tom’s of Maine Rapid Relief Sensitive Toothpaste: Tom’s of Maine Rapid Relief Sensitive Toothpaste uses a blend of arginine and calcium carbonate to provide quick relief from sensitivity. Free from fluoride, artificial preservatives, and harsh chemicals, this formula is natural, eco-friendly, and cruelty-free.

Conclusion:

Tooth sensitivity need not sabotage your culinary delights any longer. By incorporating sensitivity toothpastes into your oral care routine, you can enjoy that bowl of ice cream or a steaming mug of tea without any unpleasant surprises. It’s worth noting that severe, persistent tooth sensitivity might be an indicator of deeper dental issues that require a visit to your dentist. However, for mild to moderate sensitivity, these top three sensitivity toothpastes can be your ticket to a rejuvenating, pain-free smile!

Toothpaste tubes with Sensodyne, Colgate, and Tom's of Maine logos on a white background

4. Natural Toothpastes

Many of us are seeking ways to live a more sustainable and chemical-free lifestyle in our day-to-day routines. One such way is by switching to natural toothpaste that cleans and protects our teeth just as effectively as conventional alternatives. Natural toothpastes use gentle, eco-friendly ingredients sourced from plants and minerals to promote a healthy oral environment. If you’re considering making the switch, here is a list of four fantastic natural toothpastes you should try.

1. Tom’s of Maine Simply White Natural Toothpaste

Tom’s of Maine is one of the most recognized natural oral care brands, known for its eco-friendly practices and ingredient transparency. Their Simply White toothpaste is a brilliant choice for those looking to whiten their teeth naturally. It uses natural, plant-based silica to help remove surface stains without causing any damage to your teeth or gums. With the fresh taste of clean mint, this toothpaste is free from artificial flavors, colors, and preservatives, making it suitable for the entire family.

2. Hello Activated Charcoal Toothpaste

Activated charcoal has grown in popularity due to its natural teeth whitening properties and ability to absorb impurities. Hello’s Activated Charcoal Toothpaste combines this natural ingredient with coconut oil, a trusted and eco-friendly staple for oral care. This fluoride-free toothpaste is also packed with xylitol, a natural sweetener that helps prevent tooth decay. Plus, it has a deliciously refreshing peppermint flavor to give you fresh breath while you confidently show off your pearly whites.

3. David’s Premium Natural Toothpaste

David’s Premium Natural Toothpaste is a luxury, eco-friendly brand formulated to clean and protect teeth using only the highest quality natural ingredients. Their toothpaste features a blend of bicarbonate of soda and calcium carbonate to naturally remove plaque, while naturally derived mint oil refreshes your breath. David’s is also committed to sustainability, with a recyclable metal tube and a handy, reusable metal tube key for easy usage. Moreover, they are vegan, cruelty-free, and exclude artificial flavors, sweeteners, and colors.

4. Green People Peppermint & Aloe Vera Toothpaste

For those looking for a perfect blend of minty freshness and soothing, natural ingredients, Green People’s Peppermint & Aloe Vera toothpaste is a top pick. Unlike conventional toothpastes, this fluoride-free option uses a blend of organic peppermint oil and aloe vera for natural antiseptic and anti-inflammatory properties. It also features calcium carbonate and baking soda to gently clean teeth and maintain oral health. As a bonus, Green People’s toothpaste is free from harsh foaming agents like SLS, making it ideal for sensitive teeth and gums.

Switching to natural toothpaste is not only beneficial for your oral health but also supports a more sustainable and eco-friendly lifestyle. By choosing one of these fantastic natural toothpastes, you can rest assured that your smile will remain radiant without harming the environment. And remember, always consult with your dentist before making significant changes to your oral care routine to ensure you’re making the best choice for your unique dental needs. Happy brushing!

An image of natural ingredients commonly used in toothpaste like peppermint, aloe vera, calcium carbonate, bicarbonate of soda, coconut oil, and activated charcoal in test tubes and beakers on a lab table

5. Toothpastes for Kids

As parents, we know that getting our little ones to brush their teeth can be a challenge. However, choosing the right toothpaste can make brushing more enjoyable for them, while also ensuring strong, healthy teeth in the process. We’ve rounded up a list of the top 5 toothpastes for kids that provide gentle care for developing teeth and gums, fun flavors, and exciting packaging to keep your child engaged in their oral hygiene routine.

1. Tom’s of Maine Silly Strawberry Fluoride Toothpaste

Give your child a fruity and delicious brushing experience with this natural toothpaste from Tom’s of Maine. The real fruit flavor of Silly Strawberry adds a yummy taste, while the enamel-protecting fluoride fights cavities effectively. The toothpaste is SLS-free, making it gentle enough for little mouths and a great choice for eco-conscious families.

2. Colgate Kids Toothpaste with Anticavity Fluoride

Featuring popular characters such as Minions, Trolls, and Barbie, this toothpaste is sure to delight kids and get them excited about brushing their teeth. Its clinically-proven cavity and enamel protection formula helps ensure strong teeth in the long run. Moreover, it comes with a mild bubble fruit flavor that will leave your child’s mouth feeling fresh and clean.

3. Aquafresh Kids Pump Cavity Protection Bubble Mint Toothpaste

Designed with a convenient pump format, this toothpaste makes it easy for kids to dispense the right amount without making a mess. The cavity-fighting formula of Aquafresh Kids provides the required fluoride dose and the Sugar Acid Protection helps to strengthen teeth. Its mild bubble mint flavor is perfect for young palates and keeps breath fresh.

4. Hello Oral Care Kids Fluoride Free Toothpaste

If you’re looking for a fluoride-free option, Hello Oral Care offers a high-quality, natural toothpaste crafted with kids in mind. Made without artificial sweeteners, flavors or dyes, this toothpaste ensures a safe brushing experience for your child. Available in fun flavors like blue raspberry and watermelon, this toothpaste not only tastes great but also helps clean teeth effectively.

5. Crest Pro-Health Stages Kids Toothpaste

Featuring beloved Disney characters like Frozen’s Elsa and Anna, Star Wars’ BB-8, and Finding Dory’s Nemo, this toothpaste is a hit with young fans. The mild gel formula is gentle on delicate teeth and gums, but strong enough to fight cavities. The fruit burst flavor of Crest Pro-Health Stages Kids Toothpaste tastes great and encourages kids to keep brushing.

Help your child establish healthy oral hygiene habits by choosing a toothpaste that caters to their specific dental needs and offers a fun and enjoyable brushing experience. These 5 toothpastes for kids not only deliver on taste and packaging, but also provide age-appropriate care for developing teeth and gums. Happy brushing!

An image showing various toothpastes with colorful packaging targeting kids, such as Colgate with Minions, Aquafresh Kids, and Tom's of Maine Silly Strawberry.

6. Tartar-Control Toothpastes

Are you tired of constantly battling the buildup of tartar and plaque on your teeth? If you’re looking to maintain a healthy smile, tartar-control toothpaste could be the solution for you! By targeting the main culprits that cause dental issues, these specialist toothpastes promise to keep your pearly whites shining and your gums healthy. In this article, we’ll be exploring the wonders of tartar-control toothpastes and discuss how they can help you maintain your best smile yet!

1. What is Tartar, and Why is it a Problem?

First, let’s define tartar – it’s a hardened form of plaque that builds up on your teeth over time. It’s essential to know that the longer plaque and tartar remain on your teeth, the more likely you are to encounter oral health issues such as cavities, gum disease, and even tooth loss. That’s where tartar-control toothpastes come in!

2. How Do Tartar-Control Toothpastes Work?

These toothpastes contain specific ingredients designed to break down tartar deposits and stop them from forming on your teeth. Two primary ingredients used in tartar-control toothpastes are zinc citrate and sodium pyrophosphate. These components work together to inhibit tartar accumulation and keep plaque at bay, reducing the likelihood of developing dental issues.

3. The Benefits of Using Tartar-Control Toothpastes:

  • Reduced tartar buildup
  • Healthier gums due to prevention of plaque and tartar deposits
  • Decreased risk of tooth decay and cavities
  • Fresher breath and an overall cleaner mouth
  • Enhanced confidence knowing that your smile is at its best

4. How to Choose the Right Tartar-Control Toothpaste:

When choosing a toothpaste to combat tartar buildup, it’s essential to look for products that have the American Dental Association (ADA) Seal of Acceptance. This certification ensures the toothpaste has met stringent quality and efficacy criteria. Additionally, consider toothpastes with fluoride – an ingredient proven to strengthen teeth and prevent cavities.

5. Popular Tartar-Control Toothpaste Options:

  • Colgate Total Advanced Deep Clean
  • Crest Pro-Health Advanced Deep Clean Mint
  • Sensodyne Tartar Control Plus Whitening
  • Parodontax Toothpaste for Bleeding Gums
  • Arm & Hammer Complete Care Plus Whitening

6. Remember: Tartar-Control Toothpaste is just One Part of a Dental Hygiene Routine:

While implementing a tartar-control toothpaste into your dental care regimen is beneficial, don’t forget to maintain routine dental checkups and professional cleanings. These appointments are crucial for removing any leftover tartar deposits and ensuring your oral health is in the best shape possible.

Tartar-control toothpastes truly are a game-changer for anyone looking to enhance their oral hygiene and maintain a beaming, healthy smile. With their specially-formulated ingredients to combat plaque and tartar buildup, these toothpastes are a must-have for those keen on keeping their mouth feeling and looking its best. So, go ahead and make the switch – your teeth will thank you!

Illustration of two teeth side by side. The tooth on the left is healthy and white, while the tooth on the right is yellow and covered in tartar buildup. The illustration depicts how tartar-control toothpaste can prevent and reduce tartar buildup on teeth.

7. Anti-Gingivitis Toothpastes

A healthy smile involves more than just brushing your teeth—it’s also about taking care of your gums. Gingivitis, a common form of gum disease, can cause inflammation, bleeding, and even tooth loss if left untreated. Fortunately, there are a variety of anti-gingivitis toothpastes available that can help fight those pesky bacteria and keep your gums healthy and happy. Here are the top 7 anti-gingivitis toothpastes to consider adding to your oral care routine.

  1. Colgate Total Advanced Gum Protection – With its advanced formula containing stannous fluoride, Colgate Total Advanced Gum Protection toothpaste is designed specifically to target plaque and bacteria that lead to gum problems. It also promises 12-hour protection against bacteria that may cause gingivitis and bad breath.
  2. Crest Gum Detoxify Deep Clean – Crest’s Gum Detoxify Deep Clean toothpaste features a cooling activated foam that penetrates hard-to-reach areas to neutralize harmful bacteria below the gum line. This toothpaste also contains stannous fluoride to help strengthen enamel and protect against cavities.
  3. Parodontax Complete Protection – Designed to help prevent bleeding gums, Parodontax Complete Protection toothpaste contains stannous fluoride and a unique blend of natural ingredients to help target the root cause of gingivitis. It also works to strengthen teeth, freshen breath, and prevent cavities.
  4. Sensodyne Pronamel Gentle Whitening for Sensitive Teeth and Cavity Prevention – For those with sensitive teeth, Sensodyne Pronamel Gentle Whitening toothpaste offers the same anti-gingivitis benefits as other toothpastes, but with a gentler formula. It contains stannous fluoride to fight against cavities and gum disease, while also gently whitening teeth and protecting against acid erosion.
  5. Tom’s of Maine Whole Care Natural Toothpaste – Tom’s of Maine Whole Care toothpaste offers a natural and fluoride-free alternative for those looking to combat gingivitis. It uses zinc citrate, a naturally occurring mineral, to target plaque and bacteria, while also freshening breath and whitening teeth with natural silica.
  6. Biotene Fluoride Toothpaste – Biotene Fluoride Toothpaste is specially designed for those with dry mouth, a condition that can contribute to the development of gingivitis. Its mild formula moisturizes the mouth while also containing essential fluoride to protect against cavities and gum disease.
  7. Oral-B Pro-Expert Professional Protection – Oral-B’s Pro-Expert Professional Protection toothpaste combines stannous fluoride with a unique “cleaning foam” to help fight against plaque and bacteria that can cause gingivitis. This toothpaste also helps protect against cavities, enamel erosion, and sensitivity.

Taking good care of your gums is an essential part of maintaining overall oral health. By incorporating one of these 7 best anti-gingivitis toothpastes into your daily routine, you can combat gum disease and show off your healthy, beautiful smile with confidence. Always consult your dentist for personalized recommendations based on your specific oral health needs and concerns.

An image of a toothbrush with toothpaste being squeezed on it, representing oral care and use of toothpaste for healthy teeth and gums.

Now that you’re well-acquainted with the different types of toothpastes and their unique benefits, it’s time to make an informed decision. Whether you desire a sparkling white smile, need to tackle sensitivity issues, or prefer natural and eco-friendly ingredients, there’s a toothpaste tailored to address your specific requirements. Remember to also consider factors like your age, gum health, and preferences while making your choice. Embrace a suitable toothpaste, and step confidently towards a healthier, happier smile.