Categories
Cooking

Ultimate Guide to Utensils: The Unseen Workout Heroes

The life of an adult often revolves around finding healthier lifestyle options, and the kitchen plays a significant role in this journey. A seldom-discussed yet meaningful aspect in the pursuit of health and fitness is the utilisation of kitchen utensils. The role of kitchen tools extends beyond their basic functionality to impact our dietary habits and lifestyles. Whether it’s about controlling portion size, making healthy cooking easier, or encouraging mindful eating, the choice of utensils holds incredible significance. This discussion brings to light the underplayed kitchen-fitness relationship and how you can leverage it to reap maximum benefits.

Utensils and Your Diet: A match made in the kitchen

Shaping up Your Fitness Goals: Could Your Utensils be the Game Changer?

Hey, all you fitness enthusiasts out there! Ever thought those table companions like forks and spoons could make a significant difference in controlling your calorie intake? Utensils, yes, the ones you find in your silverware drawer, could be your new diet pals. They are sneaky, super-effective tools that could easily shape your diet and help smash those fitness goals!

The kind of utensils used while consuming meals greatly influence the amount and speed of food intake, hence affecting your diet and overall health. Here’s how, fine folks…

  1. Portion Sizes and Calorie Control

    Ever seen those colossal spoons and mega-sized forks at restaurants? Yes, they are not just there to ease your eating process but also cunningly influence you to eat more. Research suggest that using larger utensils often leads to eating larger portions, resulting in a higher calorie intake. However, using smaller utensils creates an optical illusion, making the meal appear more substantial, hence aiding portion control. The trick – opt for smaller utensils at home and request the same when dining out.

  2. The Magic of Chopsticks

    For those looking for a bit of exotica, chopsticks can be an excellent tool to control your eating speed. Unless you’re a chopstick savant, you’ll likely pick up much smaller bites and eat more slowly. This allows the stomach to send the ‘full’ signal to the brain in time, preventing overeating. Plus, chopsticks are great for strengthening hand muscles. How brilliant is that!

  3. Slow Down with Dessert Spoons

    Aerin’t desserts a weakness for most! While completely eviscerating desserts from your diet might seem impossible, using smaller spoons (think teaspoons or dessert spoons) can drastically reduce the quantity of intake. Smaller spoon = Smaller bites = Fewer calories consumed.

  4. Hydrate! But Mind the Glass

    Drinking water is essential for a fit lifestyle. But did you know the size and shape of the drinking vessel influence the amount of liquid intake? Taller, slimmer glasses give the illusion of more liquid. This can trick the mind into drinking more water, aiding hydration and health.

  5. Salad Forks and Soup Spoons

    Salad forks and soup spoons are again great tools for controlling portions. A salad fork allows you to take smaller bites, enabling slow eating and portion control. A soup spoon makes you sip slowly, aiding mindful eating habits.

So the next time you reach out for that knife and fork remember, these everyday tools can be your secret diet superheroes. Experiment with utensils, take control of portions, and notice the impact on those fitness goals!

Remember, diets don’t have to be boring, and fitness should not be daunting. Every little strategy brings you one step closer to your health goals. Now, who’s ready to go fork or chopstick shopping? Cheers to fit and fabulous days ahead!

Choosing the Right Utensils: Equipping your kitchen for success

Selecting The Right Utensils To Keep Your Kitchen Fitness-Focused

When it’s about maintaining a healthy lifestyle, the journey starts right from your kitchen. You train hard at the gym, but what steps are you taking towards a healthier cooking environment and eating habits?

Nutritious meals combined with the correct utensils can make all the difference. Here’s what to keep in mind whilst selecting tools for a fitness-focused kitchen, aside from those already mentioned.

  1. Instant Pot for Healthy Cooking
  2. An instant pot ticks all the boxes for quick, healthy, and fresh meals. It’s multifunctional capabilities, from acting as a pressure cooker to a rice cooker, a sauté pan to a yoghurt maker, render it an excellent option for those keen on maintaining nutrition levels in their meals.

  3. Non-Stick Pans for Low Fat Cooking
  4. Investing in a quality non-stick pan can be a game-changer in the pursuit of a fit lifestyle. They allow you to cut back on the amount of oil used whilst maintaining the deliciousness of the dish, thereby reducing unhealthy fat intake.

  5. A Trusty Food Scale for Accuracy
  6. This might seem a bit over the top, but a food scale can be instrumental in ensuring you’re consuming the right portion sizes. It helps keep track of your caloric intake, making sure you’re not unknowingly stacking up on unwanted calories.

  7. Portion Control Plates – A Visual Guide
  8. If you’re not keen on the objectivity provided by food scales, consider portion control plates. These plates have marked sections for various food groups, making it easier to get an idea of how much of what food type your body needs.

  9. Measure Liquid Calories The Wise Way
  10. In addition to mindful glass sipping, it’s crucial to keep an eye on the intake of liquid calories as well, and therefore a necessity to equip your kitchen with jugs having measurement markers.

  11. The Wonder of Spatulas and Tongs
  12. Believe it or not, using spatulas or tongs instead of serving spoons can aid in reducing your serving sizes. They naturally pick up less food, helping control that portion size.

  13. Swap Regular Straws for Silicone Straws
  14. Regular straws might tempt you to gulp down those smoothies a tad bit quicker. Switch to silicone straws as they not only help slow down consumption but also prove to be an eco-friendly option.

And there you have ’em. Consider these additions when gearing up your kitchen for the fitness lifestyle you’re striving to create. Remember, it’s the small changes that end up making the most significant difference. Keep sweating, keep smiling, and enjoy the journey towards a healthier you!

Maintaining your Utensils: A hygiene matter

How the Upkeep and Selection of Your Kitchen Tools Impact Your Fitness Journey

So you’re fully committed to your fitness journey, smashing your workouts and loving the endorphin rush. But did you know the battle for a fit body doesn’t solely happen in the gym? It also happens at the kitchen bench. It’s not just what you eat but how you prepare it that can impact your overall fitness goals.

Let’s dive into some fun facts that’ll pretty much make you see your kitchen utensils in a whole new light.

  • Ever contemplated about the virtue of a sharp knife? A properly sharpened knife isn’t just a pleasure to use—it can give you the satisfaction of creating pretty neat cuts of your fruits and veggies. The aesthetic pleasure derived from chopping can motivate you to include more of these nutritious delights in your meals. The less trouble it is to prepare, the more often you’ll find yourself reaching for the healthiest options available.
  • When it comes to bowls and plates, their colour might have more effect on your fitness journey than you realise. Studies have shown that eating off contrast-coloured plates—think brown rice on a white plate—can actually trick your brain into believing you’ve eaten more than you have. It’s all about creating a visual dichotomy; sometimes, the mind is easily fooled, to the benefit of your waistline!
  • On the note of food preparation, let’s talk blenders. Investing in a robust blender encourages you to whip up delicious, nutrient-dense smoothies that can act as perfect meal replacements. Plus, making homemade smoothies lets you control what goes in there, so you can sidestep those hidden sugars present in store-bought versions.
  • Last but not least, let’s chat about the unassuming ladle. Serving soups and stews with a ladle instead of pouring straight from the pot helps you keep track of quantity, reducing the chances of overeating. Plus, soups and stews are typically low in calorie and high on nutrition, making them perfect companions on your fitness journey.

In conclusion, it’s not just about hitting the gym rigorously but also about sustaining a healthy lifestyle that starts right from your kitchen! It’s high time to transform your kitchen into a fit-friendly zone by taking closer attention to your kitchen tools and their cleanliness. A fit body is truly made both at the gym and in the kitchen!

When fully realised and adequately acted upon, the relationship between kitchen utensils and health can open doors to remarkable improvements in one’s fitness journey. Selecting the right tools, ensuring their diligent cleanliness and maintenance, and understanding their role in portion control can drastically impact your diet. It encourages healthier cooking practices, promotes mindful eating, and aids in achieving your fitness goals. Indeed, the journey to a healthier you could be as simple as making the right choices in your kitchen tools – a small but potent stepping stone on the path to healthy living.

Categories
Cooking

Mastering the Art of Peanut Butter and Jelly Sandwich

The revered peanut butter and jelly sandwich, a staple of American diets, represents more than just a quick, easy lunch. It is a tapestry of flavors and textures that blends the rich, creamy smoothness of peanut butter with the sweet, fruity tang of jelly, all held together by the satisfying chewiness of bread. This iconic sandwich can be as simple or as complex as you’d like – choosing from a variety of breads, peanut butters, and jellies, finessing the perfect assembly technique to ensure even distribution, and adding your own creative twists to truly make it your own. This paper invites you on a flavorful journey to explore the depth of the peanut butter and jelly sandwich, taking it from a staple to an experience.

Knowing Your Ingredients

Crafting the Perfect PB&J Sandwich: A Guide for Parents

Unleashing smack-dab into the cherished sphere of childhood and family nostalgia, the classic Peanut Butter and Jelly (PB&J) sandwich has left its delicious imprint on every American heart. This iconic sandwich is more than just a quick lunch option; it’s a symbol of love, comfort and warmth you want to hand down to the little ones. Therefore, it’s essential we craft this memorable munch thoughtfully. Let’s explore the best combinations of bread, peanut butter, and jelly to create an unforgettable PB&J sandwich.

Bread: Start with the Foundation

The bread forms the quintessential foundation of our beloved PB&J sandwich. Freshness is pivotal here, with a preference for whole grain bread due to its high-fiber content, making it a healthier choice for the youngsters. Nonetheless, light and fluffy white bread cannot be undermined for its softness, especially for children who may not appreciate the denser texture of whole grains. Remember, the perfect bread for a PB&J needs to retain its integrity despite the heavy creaminess of peanut butter and the dripping sweetness of the jelly.

Peanut Butter: Go Nuts with the Spread

Moving onto the heart of the PB&J sandwich: the peanut butter. With numerous variations crowding the grocery shelves, from chunky to creamy, unsalted to salted, and natural to processed, choosing the perfect one may seem overwhelming. For a classic PB&J, creamy peanut butter usually wins the vote due to its smooth structure, making it easy for spreading and biting. However, a chunky version offers a delightful crunchiness that older kids might enjoy. If health is a priority, opt for unsalted, natural peanut butter, free of added sugars or oils.

Jelly: The Sweet Finale

Finally, let’s plunge into the jelly realm. Creamy peanut butter complements a variety of jellies and jams, but for a traditional PB&J sandwich, no spread steals the spotlight like grape jelly. Its iconic taste and texture form the perfect sweet balance to the creamy peanut butter. That being said, don’t be afraid to mix it up. Strawberry jam can lend a welcome tartness and chunkier texture, while raspberry jam could add a delightful zing.

Keep in mind while selecting jelly, that some brands may be laden with sweeteners and artificial flavors. It’s always a worthy investment to pick high-quality, organic jelly with minimal additives and high fruit content.

At the end of the day, creating the perfect PB&J sandwich extends beyond the ingredients you’ve stacked between two bread slices. It’s about the time shared huddled together in the kitchen, the rolling laughter as peanut butter smeared little cheeks, and the heart-filled stories experienced bite after scrumptious bite. While there’s no perfect recipe for a PB&J, with a dash of love and a pinch of creativity, you can craft a sandwich that is not just delicious, but also echoes with wholesome family bonds at every layer. Happy sandwich crafting, folks!

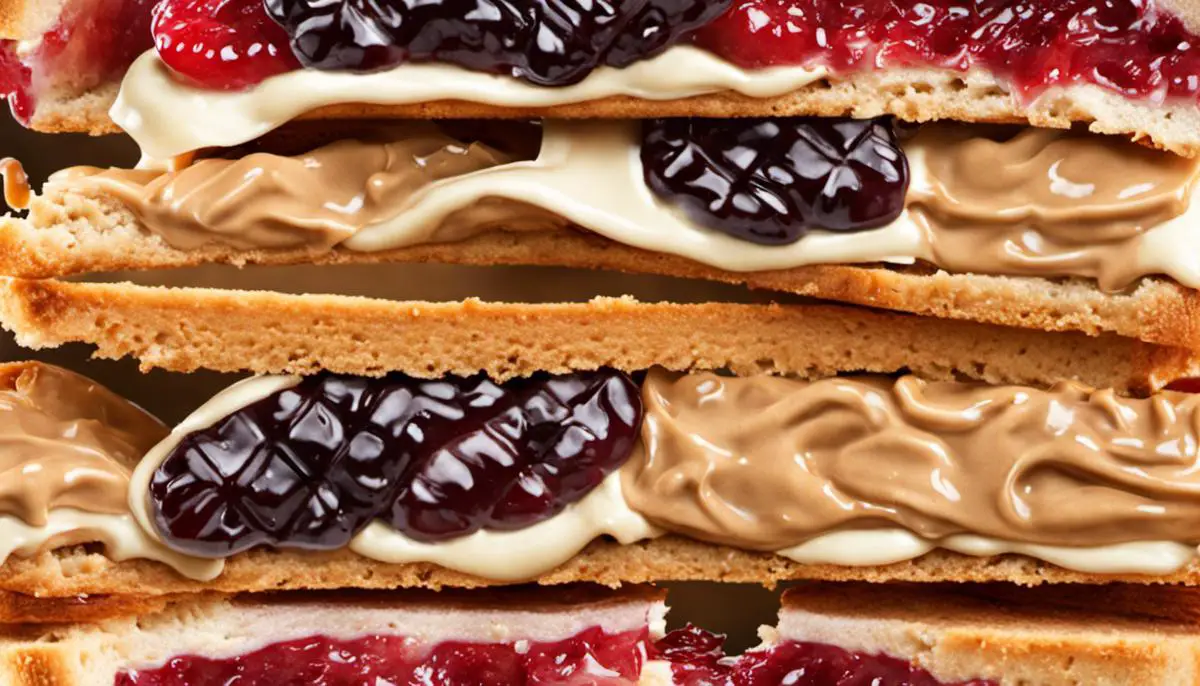
A close-up image of a PB&J sandwich with the bread, creamy peanut butter, and grape jelly perfectly layered.

The Perfect Assembly

Now that we’ve walked through some of the decisions that go into crafting the perfect peanut butter and jelly sandwich, let’s move on to the assembly process. It’s easy enough that even the youngest members of your family can help out, and nothing beats the smiles you’ll see when they take that first bite of their homemade sandwich!

First things first, gather your ingredients: your preferred bread, the choice of peanut butter which caters to your family’s taste buds, and that delightful jelly or jam. Making sure everything’s at hand will make the process smoother and more enjoyable, kind of like building a sandwich assembly line.

You’ll also want to make sure you have a clean workspace. A clean kitchen counter will do just fine, but for the little helpers in your life who can’t quite reach, a table will work just as well. And don’t forget the utensils – you’ll need a knife to spread your peanut butter and jelly.

Once everything’s ready, take two slices of your bread. On one slice, begin spreading a generous layer of peanut butter. This forms a barrier that helps prevents the bread from getting soggy once the jelly is added. Have you ever had a peanut butter and jelly sandwich only for the jelly to seep through the bread, creating a big mess? Using the peanut butter as a barrier should prevent that.

Next up, it’s jelly time! Spread your chosen jelly or jam on the other slice of bread. Here’s a simple yet crucial tip: spread the jelly right up to the edges. This ensures that every bite into your sandwich is a perfect harmony of bread, peanut butter, and jelly.

Once you’ve applied your spreads, press the two slices together, with the peanut butter and jelly sides facing each other. If you’d like, you can cut the sandwich into halves, either diagonally or vertically. This can make the sandwiches easier for little hands to handle.

Voila! You’ve just assembled the perfect PB&J sandwich! It really is as easy as one, two, three, and with a bit of practice, you and your family can have this process down to a fine art. Just remember, the most crucial ingredient in any PB&J sandwich is the love and care you put while making it.

Enjoy these precious moments spent with your family, giggling over the simplest things like spreading peanut butter or jelly. Trust me, these are the memories that stick and make for fun stories that get passed down from generation to generation. Happy sandwich making!

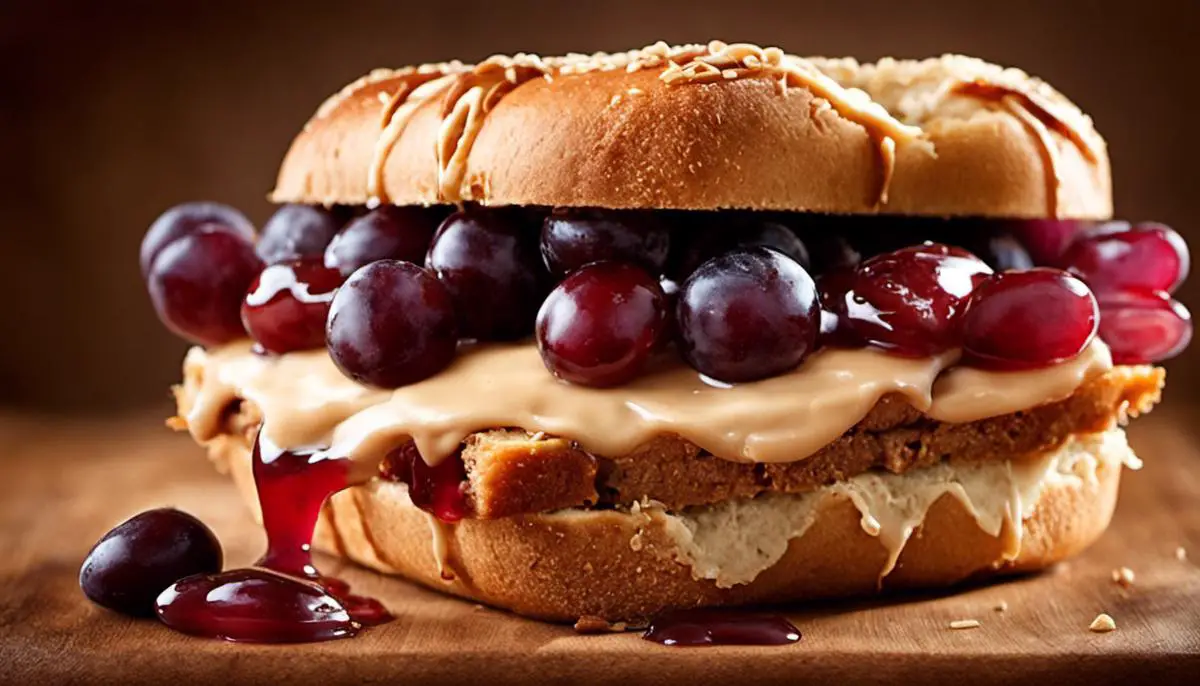
A delicious peanut butter and jelly sandwich, ready to be enjoyed by all

Adding a Personal Twist

The Unique & Tasty PB&J: A New Twist To An Old Classic

Everybody loves a good classic peanut butter and jelly sandwich. It’s a staple in many households and has been passed down from generation to generation, providing comfort, sustenance, and an opportunity for precious family time. We’ve already talked about selecting the right bread and peanut butter, and we’ve covered the crucial role of jelly in your sandwich. Now let’s take a leap beyond the traditional PB&J and start exploring some really fun and delicious possibilities to take your sandwich up a notch.

Have you ever considered adding fresh fruits to your sandwich? It may sound unconventional, but it’s a wonderful way to add a burst of natural sweetness and some extra nutrients. Thinly-sliced bananas or apples could work beautifully with your peanut butter and jelly sandwich. The sweetness and texture of the fruit harmonize perfectly with both the chunky and smooth peanut butter, creating an exciting balance in every bite.

For the adventurous food explorers out there, how about introducing a little salty crunch? Pretzels or potato chips might seem like a surprising addition, but the crunch and salt kick can add a pleasantly unforgettable dimension. Just remember to add your chips or pretzels right before you eat the sandwich, to keep their crunch intact!

Even the method of assembling your sandwich can make a difference. Experimenting with layering can yield results that are visually appealing and taste-wise, a real treat. Try a double-decker PB&J, with three slices of bread and alternating layers of peanut butter and jam. The double-decker is not only impressive to look at but also burst in flavor. It definitely isn’t your everyday sandwich!

Let’s not forget – the whole point of making a PB&J sandwich is to enjoy the process and have fun. So, why not get creative with the shape of your sandwich? Use cookie cutters to create different shapes – stars, hearts, teddy bears, the options are plenty. It can be a special and fun activity for your little ones, nourishing their creativity and appetite at the same time!

As you embark on this journey of making your own unique and tasty PB&J sandwiches, remember each assembly is a work of art. Whichever additions or changes you choose to make, do it with love. You’re not just making a sandwich; you’re creating an experience and wonderful memories to cherish with your family. Enjoy every moment of it! Who knew a simple PB&J sandwich could offer so much fun and originality!

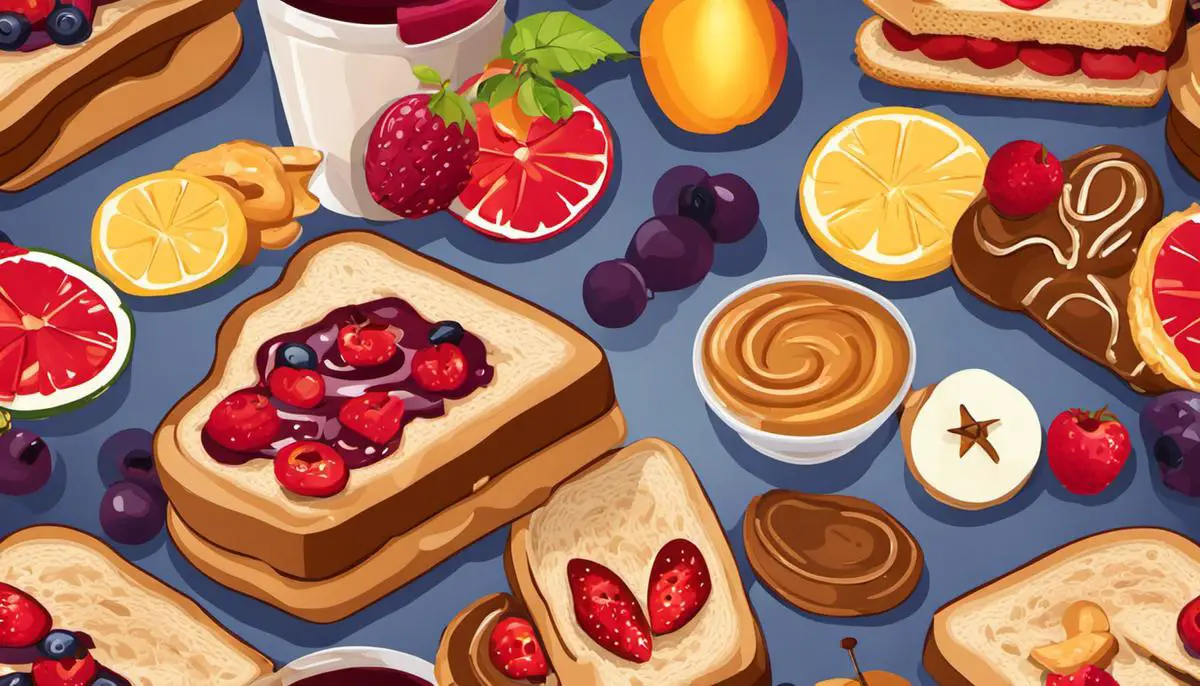
Illustration of a peanut butter and jelly sandwich with fruits, pretzels, and shaped bread, showcasing the various suggested additions and modifications to the classic sandwich.

Having explored the many realms of the PB&J world, we now see this humble sandwich in a new light. From understanding the nutritional content and unique characteristics of different breads, peanut butters, and jellies, to mastering the art of its assembly and adding a personal twist, we are now equipped to create a peanut butter and jelly sandwich that is far from ordinary. Whether you’ve added banana slices for a pop of freshness, sprinkled some chia seeds for added crunch or discovered a regional variation that piques your curiosity, the beauty of this sandwich lies in its versatility and the joy you find in its creation. Remember, the journey to a perfect PB&J is as much a personal exploration of taste and creativity as it is about savoring the final bite.

Categories
Cooking

Unleash Your Inner Chef: A Gym Lover’s Guide to Utensils

Embracing a health-conscious lifestyle is about more than just gym sessions and balanced diets; it permeates through every aspect of your life, including your kitchen utensils. Seamless integration of high-quality, durable kitchen tools is indispensable for every fitness enthusiast’s kitchen set-up. These tools hold the key to preparing nutritious meals that are pivotal to your fitness journey, whether you’re in the cutting, bulking or maintaining phase. In this discourse, we’ll delve into the selection of these essential utensils, their role in efficient meal preparation and vital information on their care and maintenance for longevity. We’ll unpack the significance of each utensil and how they can turn meal prep from a chore into an invigorating experience that perfectly complements your workout routine.

Choosing Utensils for a Health-Conscious Kitchen

A keen gym enthusiast knows the importance of a fine-tuned, well-equipped kitchen. It’s essentially the refuelling centre – that magical place where we transform our raw fuel into potent energy-givers. But what are those tools of the trade, those must-have utensils that you can’t do without? Well, buckle up because we’re about to take a tour around a gym enthusiast’s kitchen!

First on our list is a high-speed blender. Whatever the time, location, or intensity of your workout, a quality blender is absolutely crucial to blend up that quick protein shake or a refreshing post-workout smoothie. They’re versatile, efficient, and can whip up supercharged meals in an instant.

Next, you need a reliable set of measuring cups and spoons. When it comes to fitness nutrition, precision is the name of the game. Know your portions, measure your macros, folks! Never underestimate the importance of exact proportions, especially when following specific diet plans.

Finally, let us not forget the gem of athletic nutrition: the slow cooker. Its magical ability to tenderise meats into protein-packed, mouth-watering meals, while preserving all those precious vitamins and nutrients, will make it your new best friend in no time. Plus, batch cooking potential? Absolute game changer! Remember, gym life is not merely about the reps and sets; the true magic happens in the kitchen. Let’s get those utensils ready and prepare to fuel greatness!

Using Utensils for Efficient Meal Prep

Let’s take a leap into the hands-on nitty-gritty of meal prep with some serious game-changer gadgets.

Picture this, you’re dashing about, hand blender in one hand, chopping with the other, your kitchen a whirlwind of high-energy culinary chaos.

Then, you lay your eyes on it; the beautiful food processor!

These little power-houses aren’t just for crushing ice or pureeing soup; they’re genuine time-savers!

Embrace them to chop your batches of vegetables or mince your lean proteins which would typically leave your arms aching.

They can even knead dough for your homemade protein-packed pizza bases!

A solid food processor can take you from base ingredients to chopped and mixed with minimal fuss, cleaning, or risk of injury.

Another ‘must-have’ is the ever-versatile rice cooker.

To many, it perhaps sounds like a luxury item, but for a person who takes fitness seriously, it is indeed a necessity.

Firstly, it’ll cook your meal without constantly stirring and watching over it, which frees up time for more effective stuff like a quick skipping workout or a stretching routine.

Similar to a ‘rockstar’ slow cooker mentioned in the previous conversation, rice cookers aren’t just for rice.

Go wild with your quinoa, lentils, chickpeas, and even some steamed veggies!

Yes, you heard it right – you could steam vegetables while your rice cooks beneath.

Talk about multi-tasking.

Finally, let’s give some credit to the microwave (often forgotten by many gym enthusiasts).

With microwave steamer containers, you can prep and steam your veggies in minutes rather than waiting for a steamer or a boiling pot of water.

It’s time-saving, efficient, and preserves the nutrients in the veggies.

Plus, it can quickly reheat your meals without losing the flavours or moistness.

Resourceful and efficient kitchen gadgets are not just for convenience but also reinforce your commitment to maintaining a healthy lifestyle.

They save time, reduce stress, and, most crucially, they free up more space in your busy schedule for pumping those iron stacks!

Now that’s what we call ‘working smart’!

Maintaining Your Kitchen Utensils for Longevity

In the sphere of fitness, much is said about working out, and rightly so, but the unsung hero that deserves equal limelight is the maintenance of these kitchen tools that make our healthy food prep. tasks so much easier. Proper utensil maintenance is analogous to that rest day in our fitness routine – less glamorous but vital to keep the show on the road!

Caring for utensils properly can significantly increase their lifespan, allowing for long-term usage without needing to replace them frequently. For instance, sharpening a kitchen knife periodically not only helps it cut more efficiently, but it can also reduce the risk of it going dull sooner than expected. Similarly, cleaning gadgets such as the food processor immediately after use can prevent food residues from hardening. Neglecting this easy step can result in the blades becoming dull and less effective. Oh, and don’t forget about keeping that blender in check – giving it a thorough cleanse after churning those protein shakes or smoothies ensures it’ll always be ready for the next mix and mash session.

Proper care of the tools not only elongates their life but also contributes to their efficiency. A slow cooker, for example, will perform at its best when its pot isn’t chipped and the heat is evenly distributed. Proper maintenance helps to ensure that the cooker is in top-notch condition, providing perfectly tender and nutrient-rich meals every time. The same could be said for appliances like a microwave or rice cooker, where regular cleaning can prevent build-up that might compromise their functionality over time. Simple steps like these can make a massive difference in a kitchen’s productivity, enabling our fitness enthusiasts to reap the rewards of their nutritional efforts, whilst having more time to focus on other fitness activities.


The pivot to a health-conscious lifestyle is a trajectory that’s richly rewarding, with meal preparation routines playing a crucial role. The choice and usage of kitchen utensils underscore this switch, becoming partners in this journey rather than mere tools. Selecting the right utensils ensures your meals are not only nutritious but also delicious; their efficient usage aids in streamlining your meal prep process whilst their proper maintenance guarantees their longevity. So, immerse yourself in this transition, let your utensils become extensions of your health-conscious self, shaping the way you engage with food. After all, it’s not just about feeding your body, but nourishing your soul.

Categories
Cooking

A Gourmet’s Guide to Pasta

Imagine the beautifully woven tapestry of the history and evolution of one of the most versatile and beloved foods across the globe – pasta. From the rustic kitchen tables in Italy to international gourmet plates, pasta has made a delicious journey through the pages of our culinary evolution. The early pastas, crafted meticulously using traditional methods, set a foundation for the myriad of varieties we enjoy today. This fascinating exploration will also take us through an array of diverse pasta shapes, each possessing unique characteristics lending themselves to specific cooking methods and sauces. Equally important are the traditional and inventive methods of pasta preparation and accompanying recipes that appeal to palates far and wide. Fasten your apron strings as we embark upon this appetising adventure.

History of Pasta

Origins and Evolution of Pasta

The roots of pasta are deeply embedded in Italian culinary culture. The first concrete records of pasta in Italy date back to the 4th century B.C., where an Etruscan tomb depicted a group of natives making what looks like pasta. This ancient pasta was likely quite different from the pasta we know and love today, as it was made from local grains and water, and then mashed and baked or boiled.

The idea of the pasta we know today – flat noodles made from wheat flour and water – is traditionally associated with the Arab invasions of Sicily in the 9th century. The dry desert conditions of the Arab lands meant that dried pasta made an excellent source of non-perishable, highly transportable, and easy to make food, which was ideal for long journeys and battles.

It wasn’t until the 13th century that Italy began to make a name for itself as the pasta capital of the world. Durum wheat was widely planted in Italy at that time, and new manufacturing techniques were introduced, including the use of bronze dies to extrude the pasta in different shapes.

The 14th century saw the establishment of pasta factories across Italy. These factories made large quantities of dry pasta that could be easily stored and transported. This marked another significant milestone in the history of pasta, and it quickly became a staple in Italian cuisine.

Pasta Production and Its Cultural Significance

Traditional pasta production methods have certainly evolved over the years, but they have maintained their essence. Italian pasta is still made from durum wheat flour, or semolina, and water. The dough is kneaded and then forced through moulds or cut into various shapes.

The significance of pasta in Italian cuisine cannot be overstated. It is central to Italian food culture and has a rich and varied history representative of the different regions of Italy. For example, the northern regions are famous for their fresh pasta, made with eggs; while in the south, dried pasta reigns supreme.

Furthermore, each pasta shape is not dictated by whimsy, but by regional recipes and sauce pairings. While spaghetti or bucatini may be chosen for richer, hearty sauces, more delicate, cream-based sauces might call for flat, broad pasta like pappardelle.

The Journey of Pasta Across the Globe

It was during the 19th century that pasta began to travel beyond the confines of Italy, a development driven predominantly by economic necessity. Italy found itself grappling with economic difficulties, precipitating a surge in emigration. These Italian emigrants took with them their pasta-making knowledge and their passion for the dish to new destinations. Given pasta’s highly adaptable nature, it could be fused with local ingredients, giving rise to unique regional recipes all over the globe.

Fast forward to the 20th century, advancements in technology enabled mass production and worldwide distribution, guaranteeing pasta a fixture in kitchen cupboards globally. As a result, pasta enjoys worldwide admiration today, having morphed into a multitude of forms, tastes, and shapes that seamlessly fit into diverse global cuisines. The universal acclaim that pasta relishes emphasises its simplicity, adaptability and ingrained cultural origins.

Different Types of Pasta

Deciphering Pasta: A Primer on Shapes and Their Culinary Uses

Pasta’s wide array of shapes can indeed be baffling to an untrained eye. Consider for instance, the similar, elongated varieties like spaghetti and linguini. Despite seeming akin, they bear key distinctions. ‘Spaghetti’, stemming from the Italian term ‘spago’ meaning ‘thin string’, is a versatile pasta that can be used in a multitude of dishes spanning from the classic spaghetti Bolognese to the hearty spaghetti Carbonara. Linguini, translating to ‘little tongues’ in Italian, matches the length of spaghetti but differs in its shape. Being flat rather than round, it is better suited to seafood sauces which cling well to its broader surface.

Another category of pasta

is tubular forms such as rigatoni and penne. Penne, meaning ‘quills’ or ‘feathers’ in Italian, are small tube shapes with diagonal cuts at the ends. The versatility of penne lets it hold onto chunky sauces, vegetables or meats, while allowing you to stuff them for baking. Rigatoni, apart from being larger and heftier, has grooves running down their length. These grooves make rigatoni perfect for thicker tomato or meat sauces, as the ridges trap and absorb the sauce, delivering an explosion of taste with every bite.

Swiftly moving to stuffed pastas

ravioli and tortellini lead the pack. Ravioli, often square in shape, are essentially ‘little wraps’ of pasta filled with everything from cheese and vegetables to meat and seafood. They are usually served with a sauce or in broth. Tortellini, affectionately called ‘little twists’, are stuffed pasta rings and typically meat-filled. They are a speciality of the Italian region of Emilia-Romagna. They are most commonly served in a light broth or with cream sauces.

Regional varieties of Pasta

Pasta has regional significance across Italy, each region boasting their own specialties. For instance, tagliatelle, a long, ribbon-like pasta, is a staple in the Emilia-Romagna region, particularly in Bologna where it is often served with a hearty meat ragu. Orecchiette, dubbed as ‘little ears’ for their round, concave shape, are from the Puglia region and commonly dressed with robust sauces and chunky vegetables.

A Whole World of Pasta Awaits

With a staggering array of over 300 unique varieties, the realm of pasta is indeed comprehensive. However, a fundamental understanding of these types and how best to use them can elevate your culinary skills and dining experiences alike. It allows you to savour the subtle distinctions of each shape and the rich gastronomic traditions they reflect. Always remember that selecting the perfect pasta is dictated by its saucy counterpart – robust shapes are ideal for thick, hearty sauces as they can carry and enhance their flavours, whereas fine, delicate types of pasta are an excellent choice for lighter, smoother sauces.

Pasta Preparation and Recipes

Basics of Pasta Preparation: The Art of Boiling

The culinary journey with pasta begins with its boiling. The tried and tested approach involves bringing a generous quantity of water to a vigorous boil in a sizeable pot. A well-established guideline for the quantity of water is approximately 1 litre for every 100g of pasta. Once the water reaches its boiling peak, it’s time to add the salt. Incorporate around one tablespoon of salt into each litre of water—this simple step adds a much-needed flavour boost to the pasta. Then it’s time to gently add the pasta to the boiling water, stirring occasionally to prevent it sticking. Bear in mind that various pasta types come with different cooking times, so it’s vital to consult the pasta packet for specific preparation details.

Advanced Pasta Preparation: Sautéing

For a more advanced pasta preparation technique, consider sautéing. This process involves cooking pasta in a pan with a small amount of oil or butter. Sautéing pasta after it has been boiled can add a different texture to the dish; for instance, it can make the pasta crispy. To sauté pasta, heat a small amount of oil or butter in a pan over medium heat, then add the boiled pasta and cook until it reaches the desired texture. One popular dish that utilises this technique is pasta aglio e olio, a simple yet delicious dish that consists of sautéed pasta with garlic and olive oil.

Pasta Sauces and Pairings

When it comes to sauces and pairings, the type of pasta you’re cooking can guide your choices. As a general rule, hearty, thick sauces like Bolognese or beef ragu pair well with robust pasta types like tagliatelle or pappardelle, which can hold up to the weight of the sauce. On the other hand, more delicate pasta types like angel hair or linguine are better suited to lighter, oil-based sauces or a simple pot of mussels.

Traditional Pasta Recipes

Traditional pasta dishes abound and give you plenty to try out in your kitchen. For example, spaghetti carbonara is a traditional Italian dish that features a creamy sauce made from eggs, cheese, pancetta, and black pepper. This dish pairs best with spaghetti because the thin, long noodles can effectively hold onto the rich, creamy sauce. Likewise, pasta primavera, another popular pasta dish, consists of sautéed spring vegetables and pasta tossed with olive oil and Parmesan cheese. This dish pairs well with a variety of pasta types but is commonly served with penne, fusilli or farfalle.

Innovative Pasta Recipes

If you’re seeking to experiment, there are plenty of innovative pasta recipes to explore. You might exchange traditional Italian ingredients for those inspired by other cuisines. For instance, you could try a fusion recipe like Spaghetti with Thai-spiced Pesto or a Creamy Avocado and Spinach Pasta. The former dish integrates Thai flavours into the traditional pesto recipe—think cilantro, lime juice, and peanuts—while the latter provides a healthier twist on classic creamy pasta dishes, using puréed avocado and spinach in place of heavy cream.

With the condensed historical backdrop, one can better appreciate both the cultural impact and the culinary intricacies of the simple yet diverse universe of pasta. Its evolution from long and thin strands to stuffed parcels of joy, each type offering an unforgettable sensory experience, is a testament to the creativity and culinary genius of the humans behind it. From boiling to sautéing, the methods of preparing pasta unleash a palette of flavours that astound the taste buds. Furthermore, the array of sauces and pairings served with these shapes opens doors to the global kitchen, fusing traditions and innovation with recipes. Our journey through pasta’s mouth-watering world exhibits how this simple staple has transfigured into a global phenomenon capturing hearts, one delicious bite at a time.

Categories
Cooking

Nailing Basics in 60: Comprehensive Guide to Cooking for Toddlers

Diving into the fascinating realm of cooking for toddlers can be as rewarding as it is crucial, particularly from a nutritional standpoint. Crafting not just meals, but experiences that fulfil their growing needs is no small task as a responsible adult. Fundamentally, the discourse encircles not only nutritional needs and creating balanced meals but also safe cooking and food handling practices. Comprehending the nutritional necessities of toddlers for optimal growth, acquainting oneself with appropriate food pyramid guidelines, portion sizes, and avoidance of specific food items, transforms into a critical knowledge arsenal. Similarly understanding the art of concocting meals that carry an amalgamation of taste, nutrition, and appeal, matching the ever-changing toddler taste palate, becomes a pivotal aspect.

Nutritional needs of toddlers

Understanding Nutritional Needs of Toddlers

Toddlers, typically classified as children between the ages of 1 and 3 years old, need a broad range of nutrients for optimal growth and development. This includes proteins, carbohydrates, fats, vitamins and minerals. Each of these are vital in their own way, for example, proteins foster growth and cell repair, carbohydrates provide vital energy, and fats are crucial for brain development.

The Toddler Food Pyramid

For a clear understanding of how these nutrients should be balanced, one can refer to the toddler food pyramid. This pyramid is divided into several sections, each symbolising a different type of food. The largest section at the base of the pyramid includes grains and cereals, indicating that a sizable portion of a toddler’s diet should consist of these. As you move up the pyramid, you encounter fruits and vegetables, dairy products, meat and proteins, and finally a small peak for sweet and fatty foods which should be limited within the toddler’s diet.

Recommended Portion Sizes

When it comes to portion sizes, it is essential to remember that toddlers’ dietary requirements are much smaller than adults. Approximately 1,000 to 1,400 calories per day split between three meals and two or three snacks is usually enough. For instance, one portion of fruit or vegetables could be a small handful, while a portion of meat should be around the size of a toddler’s palm.

Incorporating Healthy Foods

Including a variety of healthy foods is also important. This ensures a full range of different nutrients, which contribute to various kinds of growth. Of course, it’s beneficial to include foods from all groups of the food pyramid. Variety also helps toddlers learn to enjoy different tastes and textures, which will encourage healthy eating habits as they grow older.

Foods to Avoid for Toddlers

Certain foods need to be avoided or handled carefully when feeding toddlers. Honey should be avoided until children are over one year old, as it can contain bacteria harmful. Also, certain raw and hard foods like large chunks of raw vegetables or whole nuts pose a choking risk and should either be avoided or cut into very small, manageable pieces. Similarly, limit sugary drinks and foods like sweets and chocolates, as they can lead to weight gain and affect dental health.

By keeping these tips in mind, you can ensure a balanced and optimal diet for a toddler’s growth and development. It offers them the best opportunity for a healthy and strong future as they continue to grow.

Creating balanced, appetizing meals

Recognising the Nutritional Needs of Toddlers

Toddlers have specific nutritional needs to ensure they grow healthily and robustly. A balanced daily diet should comprise carbohydrates, proteins, fats, vitamins, and minerals, all tuned for their body needs. Meal planning for toddlers must therefore incorporate these food groups.

Making Meals Appealing for Toddlers

Appealing to the young, developing aesthetic senses of toddlers can make meal times less of a struggle. Use brightly coloured fruits and vegetables, both raw and cooked, to enhance food presentation. Cut foods into bite-size pieces to help toddlers learn to eat independently and also ensure they can safely manage the food. Child-friendly cutlery and food moulds can be used to make meal times more exciting. Create shapes such as stars, hearts, and animals out of sandwiches or pancakes. You can also serve food in different coloured bowls or plates to stimulate their interest further.

Introducing New Tastes and Textures

As toddlers grow, it is crucial to gradually introduce new flavours and textures into their meals. This is part of shaping their early food experiences. A diverse range of flavours and textures can naturally come from wholesome ingredients such as whole grains, fruits, vegetables, lean meats, dairy, and legumes. Help your toddler explore their palate by introducing one new food at a time, while also including familiar foods in the meal.

Creating Balanced and Nutritious Toddler Meals

Start a typical day with carbs and protein for breakfast, which may include whole grain toast or pancakes, scrambled egg, and a few fruit slices. Lunch can contain smaller portions of protein such as tuna, chicken or beans, served with colourful vegetables and whole grain bread or pasta. For dinner, opt for lean proteins like fish or poultry alongside a variety of vegetables and a serving of rice or pasta. Fruit or yoghurt-based dessert can be served occasionally. Remember, consultation with a paediatrician or a child nutritionist will ensure your toddler’s unique dietary needs are met.

Handling Picky Eating

Be patient with picky eaters, and don’t worry if your toddler refuses to eat a new food. It may take multiple tries before a child accepts a novel taste or texture. Making meal times a positive experience by not forcing foods but rather encouraging a ‘try-it’ bite can work wonders. Involving your toddler in food preparation, even with simple tasks, can increase their interest in trying what they’ve helped to make.

Hydration and Snacks

Providing your toddler with enough fluids, preferably water, throughout the day is essential. Freshly squeezed fruit juices can be offered occasionally, but be aware of their sugar content. Healthy snacks between meals can keep your toddler energised and cover their nutritional needs. These can include pieces of fresh fruit, vegetable sticks, cheese cubes, yoghurt, or wholemeal crackers.

Safe cooking practices and food handling

Understanding Safe Food Practices for Toddlers

When cooking for toddlers, the first crucial step involves safe food handling and storage. This ensures that the foods consumed by the toddler are free from any harmful bacteria or viruses that could cause illnesses.

Raw meats, including poultry, fish, and shellfish, should be stored separately from other foods to prevent cross-contamination. They should be properly sealed and kept in a refrigerated condition or frozen. Fresh fruits and vegetables should be washed thoroughly before being refrigerated. Packaged foods should be stored according to the instructions given on the package.

Food Processing and Cleaning for Toddlers

Before cooking, all foods, especially fruits and vegetables, ought to be cleaned thoroughly with clean, running water. This is to ensure any residual dirt, chemicals, or bacteria are rinsed away. Cleaning also extends to the utensils, cutlery, and surfaces used while cooking. They require thorough washing and sanitising. You may also consider peeling the skin off fruits and vegetables when suitable to further reduce risk of contamination.

Correct Cooking Temperatures

Knowing the right cooking temperatures is essential for certain foods to guarantee that any present harmful bacteria or parasites are properly killed. Make use of a food thermometer to ensure the food reaches the correct internal temperature. For instance, poultry should be cooked to an internal temperature of 74 degrees Celsius, while other meats such as pork, veal and lamb should reach 71 degrees Celsius. Remember to ensure that foods for toddlers are cooked until they are soft enough for easy digestion.

Appropriate Cooling and Serving Temperatures

Once a meal has been cooked, it shouldn’t be left at room temperature for more than two hours, as bacteria can multiply quickly in the ‘danger zone’ between 5 and 60 degrees Celsius. In line with this, it’s vital to promptly refrigerate any leftovers.

When serving foods to toddlers, it’s crucial to remember to cool any hot foods to a suitable temperature to avoid burning their tender mouths.

In conclusion

Safe food practices while cooking for toddlers is paramount in safeguarding their health. By ensuring proper food storage, thorough cleaning, correct cooking temperatures and appropriate cooling and serving temperatures, you can lessen the risk of foodborne illnesses. Be conscious of these guidelines to help ensure the wellbeing of your toddlers.

The bountiful journey of cooking for toddlers, while entailing its challenges, handsomely rewards when armed with the right knowledge and practices. It’s fundamentally about being a nurturing companion, assisting in their magical journey of growth by sprinkling joy onto their plat through dishes imbued with optimal nourishment. It reaffirms that whether it’s strategizing to make food pieces toddler-friendly or conscientiously following safety measures in cooking and food handling, the utmost goal is to provide them with a healthy, balanced diet. It’s the delicate balance of being both an artisan of delicious, appealing meals and a diligent custodian of nutrition and wellness that lends this journey its unique flavor and fulfilment.

Categories
Cooking

Delicious BBQ Chicken Pizza: An Ultimate Guide

A culinary exploration of everyone’s all-time favourite, BBQ Chicken Pizza, brings much to one’s tastebuds. From the tantalising BBQ chicken to the soft, crispy crust, it is a riot of flavours that leaves one craving for more. Even more so, when one unlocks the pleasure in personal creation. Hence, this guide is a result of much research and development with two primary goals: perfect execution and maximum enjoyment. In the coming sections, you will be furnished with the knowledge on the right ingredients, their alternatives, and the most efficient yet flavourful preparation processes. Moreover, to design that quintessential BBQ Chicken Pizza experience, we’ve also highlighted various technique details and shared fantastic serving suggestions.

Ingredients and Preparation of BBQ Chicken Pizza

Ingredients Required for BBQ Chicken Pizza

  • Pizza dough – You can use pre-made dough from the store or make your own using flour, yeast, water, salt and a bit of olive oil.
  • BBQ sauce – Depending on your preference, you can choose your favourite BBQ sauce brand, or if preferred, you could also prepare it from scratch using ingredients such as ketchup, apple cider vinegar, brown sugar, Worcestershire sauce, mustard and salt.
  • Chicken – The best kind of chicken to use for this pizza is boneless and skinless chicken breast, but thighs can be used as well. If you are a vegetarian or vegan, you can substitute the chicken with tofu or your preferred plant-based protein.
  • Mozzarella cheese – This cheese is great for pizzas due to its melty and stretchy nature. You can use pre-grated cheese or grate a block of mozzarella.
  • Red onions and Cilantro – Fresh ingredients enhance the flavour of the pizza.

Preparation of BBQ Chicken Pizza

  1. First you need to prepare the chicken. It should be cooked in advance, either by grilling or pan-frying. Season the chicken with salt, pepper and, if desired, some BBQ sauce, then cook until it is no longer pink inside. Once the chicken is cooked and cooled down a bit, it should be shredded or cut into bite-sized pieces.
  2. If you are making your dough from scratch, mix the yeast and lukewarm water, then add the flour and salt to form a dough. Knead the dough until it is smooth and elastic, then let it rest for a few hours to rise.
  3. Preheat your oven to its highest temperature, usually around 250 degrees Celsius. If you are using a pizza stone, place it in the oven while it preheats.
  4. Roll out your dough on a floured surface until it reaches your desired thickness. Remember, the dough will rise a bit while cooking, especially at high heat.
  5. Brush the dough with a bit of olive oil, then spread a layer of BBQ sauce, leaving a border for the crust.
  6. Sprinkle over a layer of mozzarella cheese, then top with the cooked chicken pieces and sliced onions.
  7. Bake the pizza in the preheated oven for about 12-15 minutes, or until the crust is golden and the cheese is bubbling and slightly browned.
  8. Once removed from the oven, let the pizza cool for a few minutes to allow the cheese to set, then sprinkle with fresh cilantro before slicing and serving.

Different Cooking Methods

This pizza can be cooked in an oven, on a grill, or on a stovetop. The oven is the most common and easiest method, with the advantage of easy temperature control and even cooking.

Grilling your pizza will add a unique, smoky flavour to it. It can be a bit tricky as you need to control the heat to not burn the crust, but with some patience and practice, you can definitely master it.

Cooking pizza on a stovetop is also possible, although not as common. In this method, you cook one side of the dough on a heated skillet, then flip it, add your toppings, cover the skillet and let it cook on low heat until the cheese is melted and the toppings are heated through.

In Summary

Crafting a BBQ chicken pizza at home is a straightforward and highly adaptable process. By making your own, you have the flexibility to dictate the levels of sauce, cheese, and toppings to better suit your palate. Besides, hosting a homemade pizza evening could serve as an engaging activity with loved ones. Savour the experience!

Techniques for Perfect BBQ Chicken Pizza

Mastering the Art of BBQ Chicken Pizza: A Closer Look

BBQ chicken pizza, a flavoursome variation on the traditional pizza base, has gained significant popularity over the course of time. The tantalising blend of tender chicken, zesty barbecue sauce, molten cheese, and a variety of charming toppings is an irresistible meal choice for many. Nevertheless, the perfection of this dish largely relies on the high standard of individual elements and the techniques utilised in its preparation.

Creating the Perfect Dough

The first step in creating an exceptional BBQ chicken pizza rests on crafting the perfect pizza dough. Whether you resort to buying pre-made dough or making it from scratch, ensuring that it has a nice, pliable texture is key. This allows it to stretch to your preferred size, while still retaining its structure enough to hold the toppings without crumbling.

If opting for home-made dough, a simple combination of flour, water, yeast, olive oil, and a touch of salt and sugar usually does the trick. The mixture should be kneaded until it attains a smooth and elastic texture. Afterwards, it should be left to rest and rise until it doubles in size.

Grilling or Roasting the Chicken

BBQ chicken pizza wouldn’t be complete without the flavourful and tender chicken. The best technique for preparing the chicken to impart maximum flavour and maintain a juicy texture is either grilling or roasting.

Grilling adds a smoky, robust flavour that complements the BBQ sauce beautifully. The key here is to ensure the grill is pre-heated and to frequently turn the chicken to get it evenly cooked without charring it.

On the other hand, roasting can be done in the oven with a light coating of olive oil and your preferred chicken seasoning. It should be allowed to cook until it’s fully done and lightly browned.

After preparing your chicken, it should be diced into bite-sized pieces ready for topping.

Layering Your Ingredients for Maximum Flavour

Now that you have your dough and chicken ready, it’s time to assemble the BBQ chicken pizza.

First, roll your pizza dough out to your desired thickness. Then, generously spread a layer of BBQ sauce making sure to extend it to the edges. This acts as a flavourful foundation for the rest of the toppings.

Next, sprinkle a layer of shredded mozzarella cheese over the sauce. This helps the toppings bind together upon melting.

Distribute your diced chicken evenly over the cheese to ensure it’s present in every slice.

Finally, add your choice of other toppings. Popular toppings for BBQ chicken pizza include sliced red onion, fresh cilantro, and crispy bacon bits. Once your pizza is all dressed up and ready to go, bake in a pre-heated oven until the cheese is melted and bubbly, and the crust turns golden-brown.

In Conclusion

By adhering to the right techniques, your BBQ chicken pizza can be taken to gourmet heights, sure to impress the most discerning pizza aficionados. It all boils down to precision, the use of top-notch ingredients, and the orderly layering process that forms a perfect harmony of dough, chicken, and delightful toppings. Thus, the next time you find yourself craving a sublime pizza experience, heed these techniques and craft your perfect BBQ chicken pizza.

Pairings and Serving Suggestions for BBQ Chicken Pizza

A Companion to BBQ Chicken Pizza: A Culinary Guide

The BBQ Chicken Pizza, with its tantalising blend of sharp barbecue sauce, juicy grilled chicken, melting cheese and sweet onions caramelized to perfection, is a symphony of flavours admired worldwide. But what could possibly make this scrumptious dish even more appealing? The perfect side dishes, beverage pairings, and presentation are the elements that can transform a humble pizza meal into a culinary sensation.

Drink Pairings

When it comes to pairing beverages with BBQ chicken pizza, a lot depends on personal preference. However, there are a few steadfast combinations:

Wines

For wine lovers, the ideal choice would be a full-bodied red like Zinfandel or Syrah. These wines are rich enough to balance the strong flavours of barbecue sauce and red onion, while also complementing the smoky sweetness of the chicken.

Beers

If you’re more of a beer person, the maltiness of brown ales or the slight spiciness of amber ale will complement the barbecue flavours well. You could also opt for lagers, which offer a refreshing contrast to the richness of the pizza.

Non-alcoholic Beverages

For those preferring non-alcoholic beverages, a lemon iced tea or a glass of sparkling apple orchard could add a refreshing palate-cleanser to your pizza indulgence.

Side Dishes

Side dishes for BBQ chicken pizza should be light and refreshing, keeping the pizza as the star of the show.

A simple green salad with a citrus dressing is a great accompaniment, providing a fresh contrast to the rich flavours of the pizza. Coleslaw, with its tangy dressing, also pairs well with BBQ flavours. Garlic bread or breadsticks offer a hearty option for those with bigger appetites.

Desserts

Desserts that pair well with BBQ chicken pizza tend to be on the lighter side. A refreshing fruit salad or a tangy lemon sorbet could serve as a delightful end to the meal. If you have a sweeter tooth, a caramel apple tart could complement the barbecue flavours of the pizza.

Serving and Presentation Tips

BBQ chicken pizza is vibrant and inviting in its own right. When serving, it can be cut into small, snack-able squares for informal gatherings or presented whole for more formal meals. The pizza could be garnished with freshly chopped parsley or basil for an added pop of colour.

For a rustic appeal, serve pizza on a wooden board and accompany it with side dishes in earth-toned ceramics.

Bringing a personal touch to your spread – whether it’s quirky napkins, decorative drinks stirrers or home-made desserts – can give your meal a charming appeal and turn an ordinary pizza occasion into a memorable gourmet experience.

The key to perfect pairings and presentation is balance – allowing each component to shine without overpowering the others. With these tips, your BBQ Chicken Pizza will not only taste fantastic, but it’ll impress your guests too.

After traversing the gastronomic journey through BBQ Chicken Pizza, the aim is clear—to equip you with enough knowledge and skill to prepare an unforgettable pizza experience. However, the crown jewel is the freedom to experiment and make the recipe uniquely your own. The bevvy of techniques, pairings, and serving suggestions shared should add layers of finesse to your homemade delight. The allure of BBQ Chicken Pizza is not just in its fantastic flavour, but it’s also the joy it brings to the table—a shared delight between you and your loved ones. So, go beyond the norm, explore various nuances, and who knows? You may just create your signature BBQ Chicken Pizza that is nothing short of perfection.