Categories
Sneakers

Prevent Shin Splints for Runners

Identify Proper Running Footwear

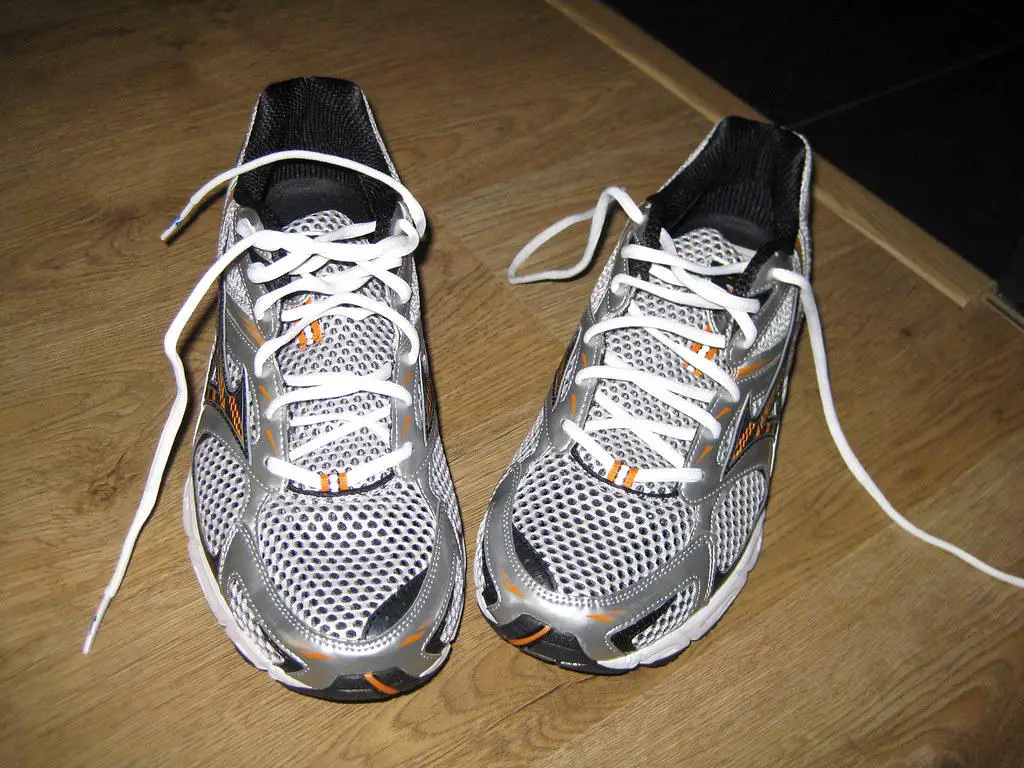
Choosing the right running shoes is crucial for protecting your shins and enjoying a comfortable running experience. Start by considering the level of cushioning, which should provide appropriate shock absorption to reduce the impact on your shins, especially when running on hard surfaces like concrete.

Next, address the support your feet need based on your arch type. High arches may require more arch support, while overpronation (excessive inward rolling of the foot) may call for stability features. A gait analysis at a specialty running store or consultation with a podiatrist can help identify your foot type and specific needs.

Flexibility and material are also important factors. The shoes should allow for natural foot motion while reducing the workload on your shins. When trying on shoes, ensure they flex at the forefoot, indicating they will encourage natural movement.

Consider customization options, such as orthotic-friendly shoes or custom-made insoles, to ensure the best fit for your unique feet. Comfort and functionality should go hand in hand when selecting your running footwear.

Take the time to explore your options and invest in a pair of running shoes that prioritize shin safety and overall comfort. These shoes will be your partners in preventing shin splints and promoting a healthy running experience.

Running shoes designed to prevent shin splints, with appropriate cushioning, support, and flexibility

Optimize Running Technique

Proper running form is essential for preventing shin splints and other running-related injuries. Focus on maintaining an efficient stride length, which should be neither too long nor too short. Overextending your stride can place excessive stress on your shins, while a stride that’s too short causes your legs to work harder than necessary. Aim to land your foot directly underneath your body for optimal balance and stress distribution.

Pay attention to your foot strike patterns as well. A heel strike can send a shockwave up your legs, increasing the risk of shin splints. Training towards a midfoot or forefoot strike can create a smoother transition and dispersion of force, reducing the impact on your shins.

Maintain an upright yet relaxed body posture, keeping a straight line from your head through your spine and hips. This alignment minimizes undue tension and helps your body work more efficiently, easing the workload on your shins.

Integrate these insights into your running form gradually, making subtle adjustments over time. Listen to your body’s signals and responses to find the stride, foot strike, and posture that feel best for your personal anatomy and biomechanics. By tuning into your body and making mindful changes, you can develop a sustainable and healthy running form that promotes shin health and overall well-being.

A runner demonstrating proper running form to prevent shin splints

Incorporate Strengthening Exercises

Incorporating specific strengthening exercises into your routine can help alleviate and prevent shin splints. These exercises target the muscles around your shins, supporting and stabilizing your lower legs during runs and increasing your overall endurance.

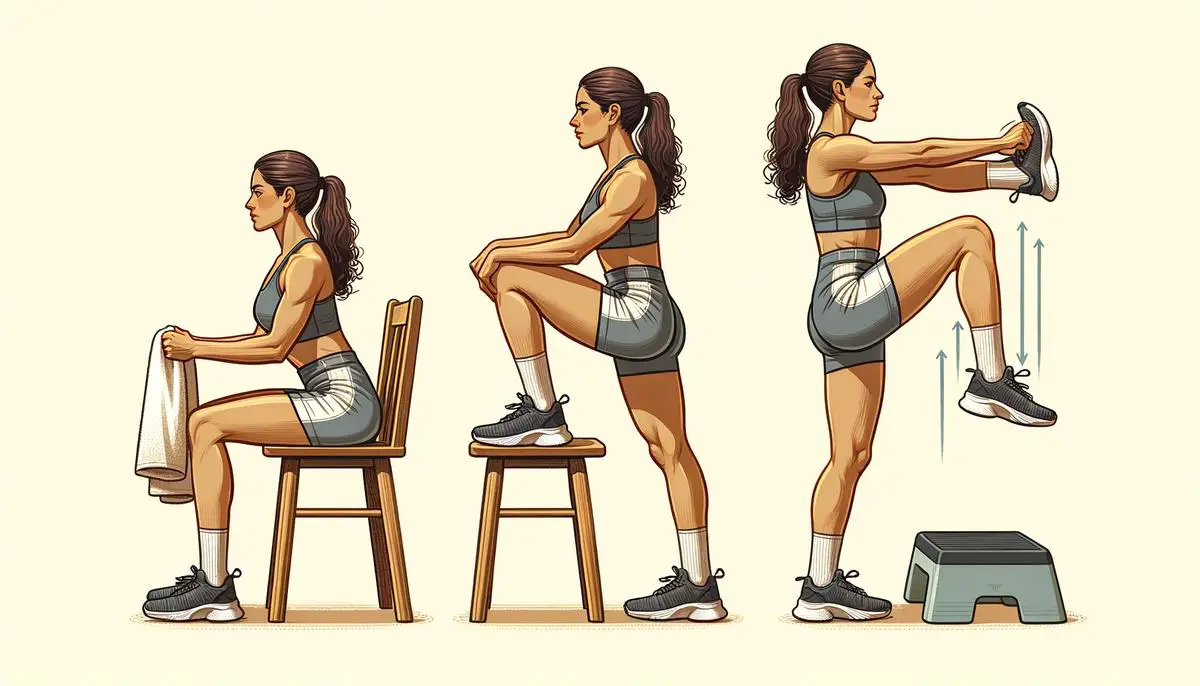
  1. Toe curls: Sit on a chair with a small towel on the floor in front of your feet. Using only your toes, grab and pull the towel towards you, then release and repeat 10-15 times per foot. This exercise strengthens the small muscles in your feet and lower shin muscles, which are crucial for impact absorption.
  2. Heel drops: Stand on a step or raised platform with only the forefoot of one foot on the edge and your heel hanging off. Gently lower your heel below the step level, then push back up to the starting position in a slow, controlled motion. Perform 10-15 repetitions on each foot to foster strength and resilience in your calves and around your shins.
  3. Calf raises: Stand straight on flat ground or use a step for an increased challenge. Rise on your tiptoes, lifting your heels off the ground as high as possible, pause briefly at the top, then slowly lower back down. Repeat this 20 times, and consider adding weights or wearing a backpack for an enhanced effect.

Implement these exercises 2-3 times a week to fortify the muscles that absorb shock during running. By consistently integrating these strengthening exercises into your fitness routine, you prepare your shins to handle the demands of running and promote overall leg stability and strength.

A person performing strengthening exercises to prevent shin splints, such as toe curls, heel drops, and calf raises

Understand Progressive Training

To safeguard against shin splints, adopting a progressive training approach is key. This method involves gradually increasing the intensity and volume of your runs, allowing your body, especially your shins, to adapt without the risk of injury.

Start with manageable distances at a moderate pace, focusing on form and building endurance. As your body adapts, increase both the distance and pace in small increments, such as 10% per week.1 This gradual progression allows your muscles, bones, and tendons, including those in your shins, to build the necessary strength to handle increased stress without pain or injury.

Incorporating variations like interval training can also be effective. Interval training combines short bursts of high-intensity running with relaxed running or walking intervals. Begin with shorter high-intensity periods and slowly increase their duration to condition your shins gradually and efficiently.

Another technique within progressive training is systematically altering run terrain and texture. Transitioning from smoother surfaces like tracks to more uneven settings such as light trails can help your shins adapt to different impacts, preventing overuse injuries.2 Introduce these changes discreetly and strategically as your overall physical capacity develops.

Rest days are an essential component of a well-designed progressive training plan. Allowing sufficient recovery time prevents the cumulative effects of fatigue from leading to injury. Even as you push harder in certain sessions, compensate with lighter activity or complete rest on other days to maintain shin health and overall well-being.

By consistently adhering to a thoughtfully designed progressive training plan, you can nurture running efficiency while guarding against shin splints. This balanced approach ensures you enjoy every mile with enthusiasm and strength.

A runner progressively training to prevent shin splints, gradually increasing distance and intensity
  1. Johnston CAM, Taunton JE, Lloyd-Smith DR, McKenzie DC. Preventing running injuries. Practical approach for family doctors. Can Fam Physician. 2003;49:1101-1109.
  2. Hreljac A. Impact and overuse injuries in runners. Med Sci Sports Exerc. 2004;36(5):845-849.
Categories
Sneakers

Postnatal Workout Tips for UK Moms

Navigating the journey back to fitness after giving birth can be both exhilarating and daunting. As you consider the path ahead, the key mantra to embrace is ‘progress, not perfection’. With the right guidance, starting a postnatal fitness routine can pave the way for renewed strength and well-being. This is not just about reclaiming the body you had pre-pregnancy; it’s about nurturing and respecting the body that has just achieved something monumental. In this comprehensive guide, we will walk alongside you as you take those initial steps. We understand the complexities of your body’s transformation and the importance of consulting health care professionals before embarking on this fitness journey. Together, we’ll explore gentle yet effective exercises designed to restore your core strength, enhance your stamina, and most importantly, align with the new rhythms of your life as a parent.

Getting Started with Postnatal Fitness

New Moms: Safe Steps Back into Fitness After Baby

Hey there, new moms! Congratulations on your newest family member! With all the joy a new baby brings, it’s also totally normal to be itching to jump back into your fitness routine. Before you do, let’s talk about how to get back at it safely, ’cause your body’s been through a marathon and it needs some extra TLC.

First things first, give yourself a big pat on the back for bringing that bundle of joy into the world. Now, remember, check in with your doctor before starting any workout routine post-birth. When you get the all-clear, start slow – we’re talking baby steps. Begin with gentle exercises like walking or pelvic floor moves (kegels are your friend!). These will get your muscles waking up and help your body remember what it’s like to move and groove.

Next up, it’s time to think about core strength. Having a baby means your abs have been stretched big time, and jumping into intense workouts could harm more than help. So take it easy with some low-impact core exercises that support your recovery. We’re not going for six-pack-abs overnight here. And listen up, your body’s changed, and that’s more than okay. So go with exercises that feel good, and skip what doesn’t. Balance is key, and consistency will be your best buddy on this road back to fitness.

Alright! You’ve got this, mama! Remember, it’s not a race, it’s a journey back to strength and health. Keep your head up, your movements steady, and before you know it, you’ll be feeling like yourself again—one strong and badass mom!

Creating a Postpartum Exercise Plan

Jumping back into working out after having a baby is a big deal. You gotta be smart about it. It’s not just about getting back in shape, but also about healing right. So, what’s the deal for new moms who want to get their sweat on? It’s about crafting a balanced exercise plan.

First things first, ease into cardio. We’re not talking a full-on sprint, alright? Think of stuff like swimming or low-impact aerobics. These are your best buddies because they get your heart going without slamming your joints. And don’t forget strength training – real important. But keep it light and straightforward; think bodyweight exercises, resistance bands, or light dumbbells. These moves help strengthen muscles and boost metabolism, plus they help with all the lifting and carrying you’ll be doing with your little one.

Now, remember, your body’s hormonal levels are still adjusting after birth. Ligaments and joints might be looser, making you more prone to injuries. So go easy, and don’t push for those heavyweights right off the bat. Make sure your routine includes balance and flexibility work, too. Things like yoga or Pilates can be spot on for this. They help improve core strength, reduce stress, and increase flexibility. Keep workouts short and sweet, around 20-30 minutes, and spread them out throughout the week. Your body’s rebuilding itself, so rest is just as key as the workouts.

At the end of the day, it’s about staying safe and feeling good. Don’t rush it. Your body’s done something amazing, so give it the respect and time it needs to bounce back. Keep at it, and you’ll be on track to finding your strength and groove again.

Nutrition and Hydration for Postnatal Recovery

When it comes to getting your fitness on track after having a baby, it’s not just about the workouts – what you put into your body matters big time. After giving birth, your body’s doing a whole lot of repair work, and just like a car needs the right fuel to run right, you need the proper nutrition to heal up and power through those mommy workouts.

We’re talkin’ proteins, carbs, and fats – but pick the good ones! Lean meats, whole grains, and those heart-healthy fats from things like avocado and nuts, they’ll give your muscles the oomph to rebuild and get stronger after baby.

And hey, don’t forget about staying hydrated! Your body just did one of the most awesome things it can do, and now it needs water like nobody’s business, especially if you’re nursing. Chugging the H2O helps keep everything in your body ticking like a clock, from your digestion to your skin. Plus, hydration helps keep that energy up so you can keep up with both your little one and your fitness goals. Remember, when you’re nursing, your water needs go up, so keep a bottle handy at all times. Guzzle it down – your body will thank you, and you’ll be feeling like a boss in no time, ready to tackle motherhood and your fitness routine with all you’ve got!

Embarking on a journey towards postnatal fitness is a testament to your resilience and dedication as you adapt to the new dynamics of motherhood. By embracing the alliance of exercise, nutrition, and self-care, you forge a path towards not only physical recovery but holistic well-being. Remember, this is a personal journey; it unfolds at your pace, on your terms. As you rise to meet the everyday challenges of parenting, let your fitness routine be a source of strength, a ritual of self-care, and a celebration of the new chapter you have begun. Your body has already accomplished the incredible, and with patience and persistence, it will continue to amaze you every day.

Categories
Sneakers

How to Tie Shoelaces: Quick & Simple Guide

Tying shoelaces may seem like a simple task, but with various knot techniques and types of shoelaces available, it can be more complex than you think. In this guide, you will learn about different types of shoelaces, how to prepare your shoes for tying, and practice several knot-tying methods. Additionally, you will explore knot variations, troubleshoot common mistakes, and improve your shoelace tying skills through practice. Grab your favorite pair of shoes and let’s dive in!

Understanding Shoelace Types

Introduction:

Before learning how to tie your shoelaces, it’s essential to understand the different types of shoelaces and how to choose the right ones for your shoes. With various materials, lengths, and designs available, you want to make sure you select the best option for your specific needs. In this guide, we’ll discuss several kinds of shoelaces and provide tips on choosing the right size and type for your shoes.

Flat Shoelaces:

Flat shoelaces are the most common type of laces that you’ll find in sneakers and casual shoes. They are wide, thin, and usually have a polyester or cotton construction. Flat laces lay comfortably on the shoe and provide a clean appearance.

Round Shoelaces:

Round shoelaces are generally found in dress shoes, boots, and some athletic shoes. These laces have a tubular shape, which gives them a more formal look and offer more durability. Round laces can be made of various materials like cotton, nylon, or waxed cotton.

Waxed Shoelaces:

Waxed shoelaces add an extra layer of protection for the laces, making them more resistant to water, fraying, and breaking. They are ideal for dress shoes or outdoor footwear, as the wax helps maintain their shape and structure. The waxed finish provides a slightly shiny appearance and also offers more grip when tying.

No-tie Shoelaces:

No-tie shoelaces are an innovative solution for those who may have difficulty tying shoelaces or are looking for a more streamlined and hassle-free option. They utilize an elastic lace material that securely attaches to the eyelets with plastic or metal anchors. You can slip your shoes on and off effortlessly without having to tie and untie laces.

Coiled Elastic Shoelaces:

Coiled elastic shoelaces are designed to stretch and contract, allowing users to slip their shoes on and off without needing to tie them. These laces are typically used in athletic shoes and are popular among runners who don’t want to worry about their laces coming undone during their workout.

Tips on Choosing the Right Shoelace Size and Type:

  • Length: Measure the total number of eyelets on your shoes, and then check the shoelace packaging or manufacturer’s website for a sizing guide. Most shoelace brands offer a range of lengths to accommodate various shoe sizes and eyelet numbers.
  • Material: Consider the specific needs of your shoes and your typical activities when selecting a shoelace material. Cotton laces are breathable and soft, ideal for casual shoes. Polyester or nylon laces are more durable and weather-resistant, making them suitable for athletic or outdoor footwear.
  • Color and Design: Select a shoelace color and design that matches your personal style and the color of your shoes. You can choose from solid colors, patterns, or even reflective shoelaces for added visibility during nighttime activities.
  • Ease of Use: If you have trouble tying shoelaces, consider opting for no-tie or coiled elastic shoelaces to simplify the process.

Conclusion:

Understanding the different shoelace types will help you choose the best option for your shoes and ensure a comfortable, secure fit. Pay attention to length, material, color, design, and ease of use when selecting the right shoelaces for your needs. Now that you know which laces are best suited for your shoes, you can learn to tie them confidently and securely.

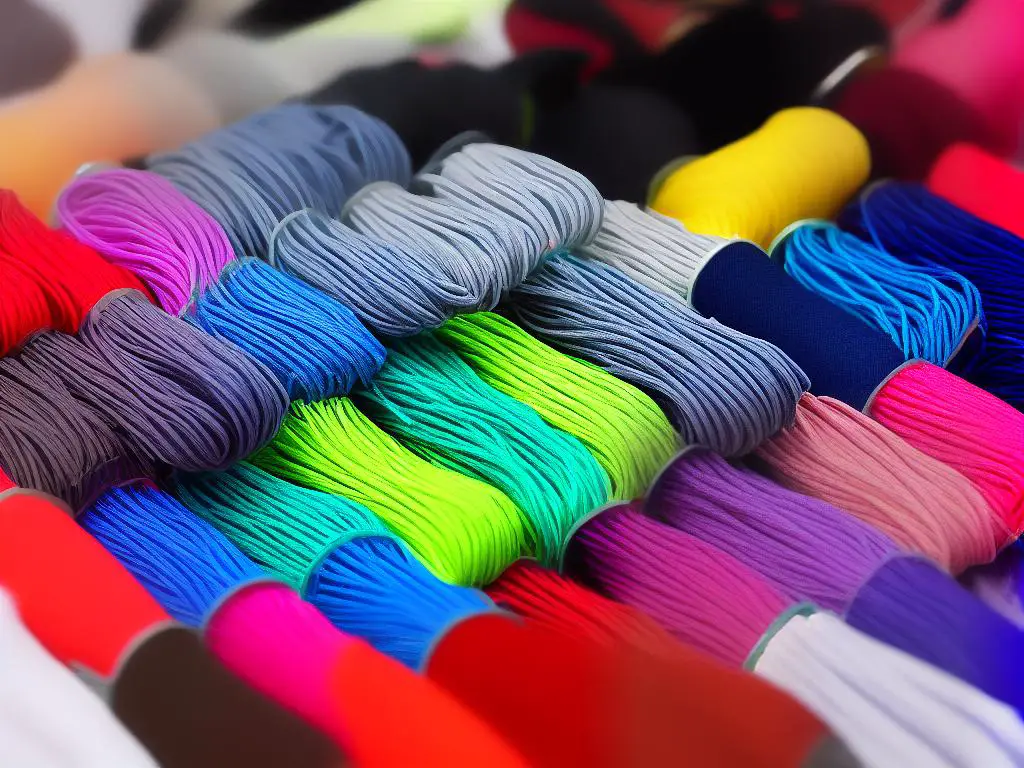
An image of different types of shoelaces lined up next to each other to illustrate the different options available.

Preparation for Tying

Step 1: Gather your materials

To begin, you’ll need a pair of shoes with eyelets along the sides, and a pair of shoelaces that are of appropriate length for your shoes.

Step 2: Insert the shoelaces

Take one end of the shoelace and insert it through the bottom eyelet (the one closest to your toes) on one side of the shoe, from the outside in. Then, take the other end of the shoelace and insert it through the bottom eyelet on the other side of the shoe, also from the outside in. Make sure that the laces are of equal length on both sides.

Step 3: Cross the laces

Next, take the left lace and cross it over the right lace, creating an “X” shape. Thread the left lace through the next available eyelet on the right side, going from the outside in. Do the same for the right lace, threading it through the next available eyelet on the left side.

Step 4: Continue lacing

Repeat step 3 for the remaining eyelets, making sure to cross the laces over each other and threading them through the eyelets from the outside in. Be consistent with your pattern, either crossing the left lace over the right lace or vice versa, for a neat appearance.

Step 5: Check your progress

As you lace your shoes, make sure the laces lay flat and don’t twist. This will ensure a comfortable and secure fit when tying.

Step 6: Finishing up

Once you’ve threaded the laces through all the eyelets, give them a gentle tug to ensure that they’re securely in place and evenly tightened. You should now have two laces of equal length emerging from the top of your shoe, and you’re ready to begin tying your shoes.

Now that you know how to properly thread your shoelaces through the eyelets of your shoes, you can practice tying different knots like the standard bow knot, double knot, or even more advanced techniques. Keep practicing, and this skill will soon become second nature.

An image of a shoe with laces.

The Basic Bow Knot

Step 1: Prepare your shoes
Place your shoes on a flat surface with the shoelaces fully untied and making sure the ends are of equal length.Step 2: The Starting Knot
Grab both ends of the shoelaces, one end in each hand. Cross the right end over the left, creating an “X” shape, and then pull the right end through the bottom of the “X” and pull tight. This will create a basic starting knot that will help keep your laces together as you continue with the bow knot.Step 3: Form the First Loop
Hold the right shoelace with your right hand, between your thumb and index finger, and use your other fingers to cradle the lace while folding it back on itself to form a loop. This loop is often referred to as the “bunny ear.”Step 4: Wrap the Second Lace
With the left shoelace in your left hand, wrap it around the “bunny ear” loop you created with the right lace. As you wrap, make sure to keep it tight and close to the base of the loop.Step 5: Form the Second Loop
While still holding the left lace, pinch it with your right thumb and index finger, and make sure to keep it snug against the base of the right loop. Now, use your left hand to fold the remaining part of the left lace back onto itself to create a second “bunny ear” loop.Step 6: Thread and Tighten
With both “bunny ear” loops in hand, use your left thumb and index finger to push the left loop through the small opening created when you wrapped the left lace around the right loop. Gently pull both loops away from each other to tighten the bow knot. Be sure to adjust and tighten the loops to your desired size and tightness.Step 7: Check Your Work
Check to ensure the bow knot is secure and even. If needed, tighten or adjust the loops and the starting knot to achieve a secure and comfortable fit.

Now you have successfully tied your shoelaces using the basic bow knot method! Repeat these steps on your other shoe, and you’re ready to go.

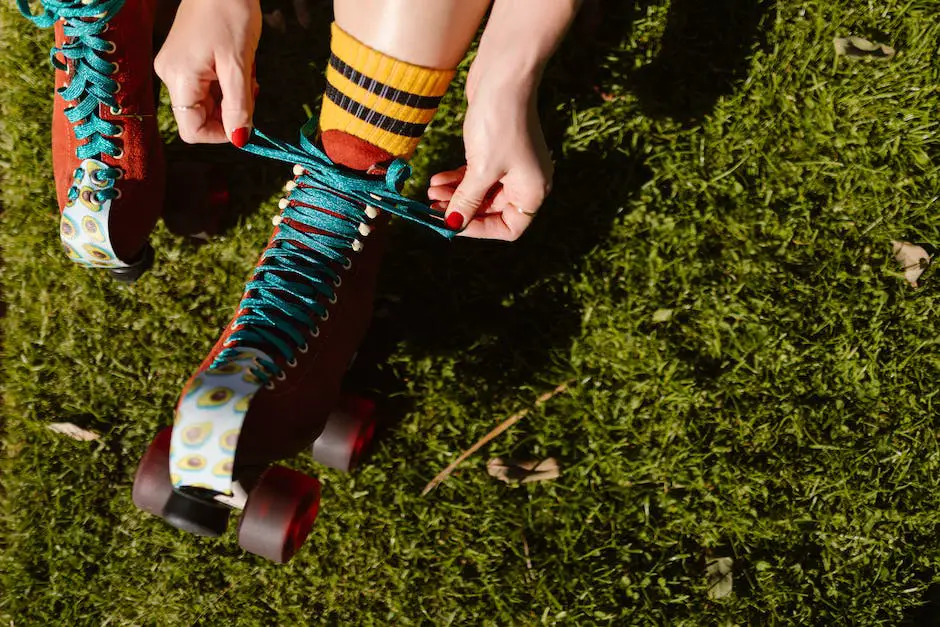
An illustration of someone tying their shoelaces step-by-step.

The Two Loop Knot

Start by preparing your shoes: Make sure your shoes are on your feet, and the shoelaces are untied, straightened, and threaded through all the necessary holes or eyelets.

  1. Hold both ends of the shoelaces: With one end of the shoelace in each hand, make sure the laces are approximately even in length. You may need to adjust the laces slightly to ensure they are even.
  2. Make the starting knot: Cross one lace over the other, then tuck the lace on top through the hole created at the bottom, pulling both ends tight. This will create a simple starting knot.
  3. Create the first loop (bunny ear): Hold one end of the shoelace between the thumb and pointer finger of one hand, pinching it in the middle to create a small loop. This loop should resemble a bunny ear, with the end of the loop hanging down.
  4. Create the second loop (bunny ear): With your other hand, do the same pinch on the other shoelace to create a second loop. Both hands should now be holding a bunny ear.
  5. Cross the two loops: Bring the loops close to each other and cross one loop over the other, just like you did with the laces in step 3.
  6. Tuck a loop through the hole: This is where the loops become the knot. Carefully tuck one of the loops through the hole created between the two crossed loops.
  7. Tighten the knot: Gently pull on both loops and ends of the laces to tighten the knot. Make sure to keep holding onto the loops as you do this to ensure a secure knot.
  8. Adjust the knot as needed: Once the knot is tight, you can adjust the size of the loops and ends to your liking. Ensure that the knot is secure and will not easily come undone.

Congratulations! You have now learned how to tie shoelaces using the Two Loop Knot or Bunny Ears technique. Practice this method a few more times to perfect your skills, and you’ll be able to tie your shoelaces with ease.

Illustration of hands tying shoelaces using the Two Loop Knot or Bunny Ears technique.

The Ian Knot

To begin, place your shoes on a flat surface and make sure the laces are fully untied and even on both sides of each shoe.Hold one end of the shoelace in each hand. Grip the lace with your thumb and index finger while making sure your palms are facing each other. You should be holding the shoelaces similar to how you would hold a piece of paper with both hands facing each other.Begin by making a loop with both ends of the shoelace, leaving about 2-3 inches of the lace as the loop’s tail. The right loop should be over the left loop. This will form the basic shape of the Ian Knot.Next, cross the loops over one another by bringing the right loop across the left loop with your right hand, and vice versa with your left hand. The tails of the laces should switch hands in the process.As you cross the loops, adjust your fingers so they can grab the tail of the other lace. Your index fingers should be pointing at the tail of the other lace, while your thumb should be behind it.Now, pinch the tail of the other loop with your thumb and index finger while keeping the loops crossed. This will create a small opening in the center of the knot as you pinch the tails.Once you’ve pinched the tails of each loop, gently pull your hands apart to tighten the knot. As you do this, the knot will become more secure and visually resemble a traditional shoelace knot.Adjust the knot to your desired tightness by pulling on the loops or tails as needed. You may need to practice the Ian Knot a few times to get comfortable with the technique, but once you’ve mastered it, you’ll be able to tie your shoes more efficiently.Congratulations, you’ve now learned the Ian Knot! Practice this technique on both shoes, and you’ll be speeding through your shoelace tying in no time.Remember, practice makes perfect. The more you practice the Ian knot, the quicker and more proficient you’ll become at tying your shoelaces.

A picture of a person tying their shoelaces using the Ian Knot technique.

Understanding Knot Variations

Knots have played an important role since ancient times, and they continue to be a crucial part of everyday life, especially when it comes to tying shoelaces. There are various knot variations that can make your shoelace tying experience more efficient, secure, and even fun. In this guide, we will explore different knot variations for tying shoelaces.

Standard Bow Knot:

This is the most common and widely used method for tying shoelaces.

  • Start by crossing the two ends of the laces (A and B) and pull them tight to form a simple half-knot.
  • Create a loop with one end (A) by folding it back on itself.
  • Wrap the other end (B) around the loop, forming a second loop behind the first loop.
  • Pull both loops tight to form a completed bow knot.

Double Slip Knot:

This variation provides extra security by adding a second loop to the standard bow knot.

  • Start with a standard bow knot but instead of forming just one loop with each end, create two loops by folding each end back on itself twice.
  • Wrap one looped end around the other looped end, then pull both loops tight to form a completed double slip knot.

Ian Knot:

This variation is known as the world’s fastest shoelace knot; it saves time and provides a secure hold.

  • Start by holding one end of the lace (A) in your left hand, and the other end (B) in your right hand.
  • Create a loop with both ends (A and B) by folding each end back on itself.
  • Cross the loops over each other as if tying a regular bow knot.
  • Reach through each loop with your opposite hand and grab the standing part of the opposite lace.
  • Pull both ends tight to form a completed Ian knot.

Surgeon’s Knot:

This variation is particularly helpful for slippery shoelaces since it adds extra friction to keep the knot secure.

  • Start with a standard half-knot, but add an extra twist by wrapping one end of the lace (A) around the other (B) one more time.
  • Create a loop with each end, as if tying a regular bow knot.
  • Wrap one loop around the other and pull both loops tight to form a completed Surgeon’s knot.

Loop Knots:

This is a decorative shoelace knot wherein both ends are tucked away, giving the knot a clean look.

  • Start with a standard half-knot.
  • With one end (A), create a loop by folding it back on itself.
  • Wrap the other end (B) around the loop (A), then pass the end (B) through the loop it formed by wrapping around the loop (A).
  • Pull both loops tight to form a completed loop knot. Tuck the untied ends underneath the knot for a cleaner look.

Keep practicing these different knot variations until you find the one that provides the ideal combination of efficiency, security, and aesthetics for your specific needs. With time and patience, you will undoubtedly master these variations and enhance your shoelace tying experience!

An image of various shoelace knots, including the standard bow knot, double slip knot, Ian knot, surgeon's knot, and loop knots.

Troubleshooting Common Mistakes

When learning to tie shoelaces, it’s common to encounter a few hurdles along the way. Below are some common mistakes and solutions to ensure a secure and tight knot every time.

Mistake 1: Twisted laces

If your laces are twisted when you try to tie them, the knot won’t hold as secure and might come undone over time.

Solution: Before you start tying, take a moment to straighten your laces by running your fingers along their length. This will ensure they lie flat and smooth when you tie the knot.

Mistake 2: Too tight or too loose loops

If your shoelace loops are either too tight or too loose, your knot might not hold well, and the shoes won’t feel comfortable on your feet.

Solution: When you make the loops (“bunny ears”) for your knot, pay attention to their size. Remember that the loops should not be bigger than your thumb or smaller than your pinky finger. Make sure the tension is consistent throughout your knot.

Mistake 3: Uneven laces

When you finish tying your shoelaces, you might notice that one side of the knot has a long lace end while the other has a short one.

Solution: To fix this, begin by undoing the knot. Then, adjust the starting point of the knot by pulling more or less of the lace through the top eyelets of your shoe. Aim for equal lace lengths on both sides before tying the knot.

Mistake 4: Knot comes undone easily

If you find that your shoelaces are coming untied during the day, you might be tying a “slippery” knot.

Solution: Make sure you’re tying a standard or “secure” shoelace knot, also known as the square knot or double knot. Begin by tying the “bunny ears” once, then wrapping one loop around the other to complete a second knot. This should give you a more secure knot that stays tied throughout the day.

Mistake 5: Difficulty with “bunny ears” method

Some people struggle with the “bunny ears” method to tie their shoelaces, causing frustration and knots that come undone easily.

Solution: If the “bunny ears” method isn’t working for you, try learning the “loop, swoop, and pull” method. This method involves creating one loop (or “bunny ear”) and then wrapping the other lace around it before pulling it through to create the second loop. This alternative method might feel more natural for some people to perform.

In conclusion, tying your shoelaces correctly can help ensure a comfortable fit and prevent your shoes from coming untied during the day. By addressing these common mistakes and following the solutions provided, you should be able to achieve a secure and tight knot every time.

A pair of children's shoes with untied shoelaces laying on the ground next to a colorful shoelace tying chart.

Practicing Shoelace Tying

Gather your materials: To practice tying shoelaces, you will need a pair of shoes with laces that are long enough to practice with, or a piece of rope or string to simulate a shoelace.Find a comfortable space: Choose a well-lit and quiet area where you can sit and comfortably work with your hands.Review the basic steps: Familiarize yourself with the basic process of tying shoelaces by breaking it down into steps. The standard method includes:
– Crossing the laces to create an ‘X’
– Looping one lace under the other and pulling it tight to create a starting knot
– Creating two “rabbit ears” or loops with both laces
– Crossing the loops and tucking one under the other to create the bow
– Pulling both loops tight to secure the knotPractice with your dominant hand: Start practicing your shoelace-tying skills using your dominant hand to hold one lace and guide the other. Repeat the entire process several times to get the hang of it.Switch hands: Practice tying your shoelaces using your non-dominant hand to hold one lace and guide the other. This might feel awkward at first, but with practice, you will become more comfortable using both hands.Speed up: Once you feel confident with the basic steps, try increasing your speed. Challenge yourself to tie both shoelaces faster and more efficiently.One-handed tying: For an extra challenge, try tying your shoelaces using only one hand. This can be a helpful skill to learn for those with limited mobility in one hand or arm.Repeat the process: Continue practicing your shoelace tying skills daily or as often as necessary. The more you practice, the more precise and efficient you will become.Alternate methods: Try learning different methods of tying shoelaces, such as the “two-loop” method or the “Ian Knot.” By learning various techniques, you can find the most comfortable and efficient method for you.Stay patient: Learning and mastering any skill takes time, and shoelace tying is no exception. Be patient with yourself, and don’t get discouraged if you don’t see immediate improvement. Keep practicing, and you’ll get better over time.

An illustration of the basic steps for tying shoelaces in order: crossing the laces, creating a knot, making 'rabbit ears', crossing the loops, and pulling tight to secure.

By taking the time to explore various shoelace types and knot techniques, you are now equipped with the knowledge to efficiently and securely tie your shoelaces. Use these new skills to your advantage, whether it’s for daily life or to add a touch of personal style to your footwear. Remember that, like any skill, practice makes perfect, so don’t hesitate to experiment with different techniques and continue improving your shoelace tying abilities.

Categories
Sneakers

Master the Art of Tying Shoelaces: Step-by-Step Guide

Tying shoelaces is a universal skill that most individuals learn during their childhood. The seemingly simple task not only ensures that your shoes stay firmly on your feet but also adds a touch of personal style to your footwear. This article will guide you through the world of shoelace tying, helping you understand different materials, choose the right length, learn basic and alternative tying methods, discover life hacks and solutions to common shoelace problems, and hone your shoelace tying prowess.

Understand different shoelace materials

Before learning how to tie shoelaces, it’s essential to know about different types of shoelace materials. The material used to make shoelaces can impact the tying process and how well your shoelaces will stay tied throughout the day. Here is an overview of some common shoelace materials and their properties:

Cotton shoelaces:

  • Cotton shoelaces are soft and flexible, making them easy to tie and adjust
  • However, they tend to become dirty, wear out, and fray relatively quickly.
  • Cotton laces are often used for casual shoes or sneakers and may lose tension as you go about your day, requiring retying.

Polyester shoelaces:

  • Polyester laces are durable, lightweight, and resistant to moisture and wear.
  • They offer a good balance between flexibility and strength, making them a popular choice for various types of shoes.
  • This type of shoelace is easy to tie and holds knots well, so you don’t need to worry about frequently retying your shoes.

Nylon shoelaces:

  • Nylon shoelaces are strong, durable, and have a smooth texture.
  • Due to their slick surface, nylon laces may be more challenging to tie, and the knots may slip or come undone more easily than other materials.
  • However, once properly tied, they hold tension well.
  • They are often used for athletic shoes or heavy-duty footwear (such as work boots or hiking boots) because of their strength and resistance to wear.

Now that you know the different types of shoelace materials, here’s a step-by-step guide on how to tie your shoelaces:

  1. Begin by threading the shoelaces through the bottom eyelets of your shoes, with the ends pointing outwards. Make sure that the lace lengths are even on both sides.
  2. Cross the left lace (let’s say it’s Lace A) over the right lace (Lace B), creating an ‘X’ shape. Then, thread Lace A under Lace B and pull both laces tight to form a snug knot at the base of the shoe.
  3. Pinch the middle of Lace A between your thumb and index finger, creating a small loop (also known as a ‘bunny ear’).
  4. Hold the loop in place securely using your left hand. With your right hand, take Lace B and wrap it around the ‘bunny ear’ loop (counterclockwise) that you’ve created with Lace A.
  5. As you wrap Lace B around Lace A’s loop, push a portion of Lace B through the gap between the two laces (where you crossed Lace B over Lace A) to create a second loop.
  6. Hold the new loop you created with Lace B, and pull both the original loop (Lace A) and the new loop (Lace B) tight. This should form a secure bow.
  7. Adjust your bow to the desired size, ensuring the knot is tight enough to hold its position throughout the day.

Now that you know how to tie shoelaces and understand how different shoelace materials may affect the tying process, you can confidently tackle any shoe with ease. Practice tying and untying your shoelaces with various materials to get a feel for the differences in grip and tension.

A picture of different shoelace materials, including cotton, polyester, and nylon shoelaces.

Choose the right shoelace length

To choose the right shoelace length for your shoes, follow these instructions:

  1. Determine your shoe type: Different types of shoes, such as running shoes, casual shoes, or boots, may require different lengths of shoelaces. This is because they have a varying number of eyelets or may need extra length for additional support.
  2. Count the number of eyelets on your shoe: Count the number of eyelets on one side of your shoe, then multiply by 2 to get the total number of eyelets. For example, if your shoe has 4 eyelets on one side, the total number of eyelets would be 8.
  3. Measure your current shoelaces (optional): If you have a pair of shoes with the correct length of shoelaces, simply measure the length of one of the laces and use it as a reference for purchasing new ones.
  4. Consult a shoelace length chart: There are various shoelace length charts available online that provide suggested shoelace lengths based on the number of eyelets and type of shoe. These charts can help you determine the right length of shoelaces for your shoes.
  5. Here’s a general guideline based on the total number of eyelets for your shoes:
    • 4-5 eyelets: 27-36 inches (68-91 cm)
    • 6-7 eyelets: 36-45 inches (91-114 cm)
    • 8-9 eyelets: 45-54 inches (114-137 cm)
    • 10-12 eyelets: 54-63 inches (137-160 cm)
    • 12-14 eyelets: 63-72 inches (160-183 cm)

    Please note that these are approximate lengths and can vary slightly depending on your preference for how long you want the ends of the shoelaces to be after tying.

  6. Consider the width of your shoelaces: Generally, athletic shoes require wider shoelaces, while dress shoes and casual shoes use thinner laces. Make sure to choose the right width of shoelaces for your specific shoes.

After choosing the right shoelace length, you are now ready to tie them. With practice, you’ll be able to master the art of tying shoelaces and feel confident in your footwear.

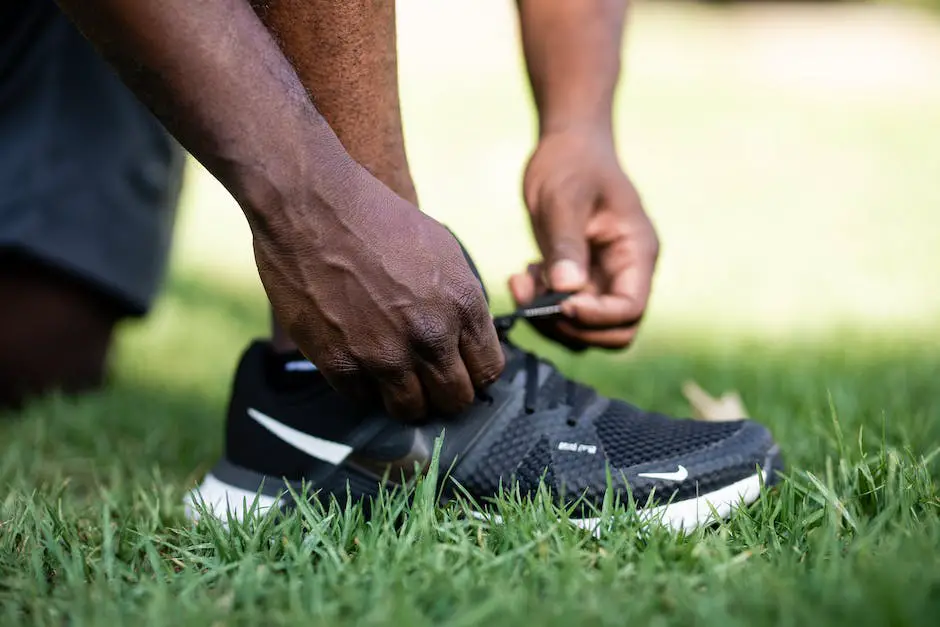
A person's hands are seen touching shoelaces, preparing to tie them up.

Basic shoelace tying method

Begin with your shoe on your foot, ensuring that your shoelaces are threaded properly through all the eyelets and that they are even on both sides.Grab both ends of the shoelaces, one in each hand, with your thumbs facing down and your index fingers pointing towards your toes.Cross the right shoelace over the left shoelace, forming an “X” shape. Tuck the right shoelace under the left shoelace, pulling it through the hole formed where the two laces overlap.Pull both shoelaces tightly to create a simple knot at the base of your shoe.Hold the right shoelace up with your thumbs facing up and your index fingers facing away from you. Pinch the lace between your thumbs and index fingers, creating a loop about the size of the final bow you desire. This will be referred to as the “right loop.”Repeat step 5 with the left shoelace, forming the “left loop.” Make sure both loops are of similar size.Cross the right loop over the left loop, forming another “X” shape, just as you did in step 3.Tuck the right loop under the left loop, pulling it through the hole formed where the two loops overlap. Maintain a firm grip on the loops as you tighten the knot to form a secure bow.Adjust the size of the loops and the length of the loose shoelace ends by gently pulling on them until the desired size and look is achieved.Congratulations! You have successfully tied your shoelaces using the standard method. Now, go out and enjoy your securely fastened shoes.

An image of someone tying shoelaces step-by-step with illustrations of the X and bow shapes.

Alternative shoelace tying methods

Alternative Shoelace Tying Methods

Bunny Ear Method:

Step 1: Starting with the shoelaces already threaded through the holes in the shoes, and flat against the surface of the shoes, pull both ends of the shoelaces outwards to tighten them.

Step 2: Cross the two ends of the shoelaces over one another, forming an X shape. Thread one end of the shoelace through the gap created by the X, then pull them tight.

Step 3: Create two loops (the ‘bunny ears’) on each of the shoelace ends by simply folding the laces back onto themselves without twisting them.

Step 4: Cross the ‘bunny ears’ over each other, again forming an X shape.

Step 5: Thread one of the ‘bunny ears’ through the gap in the X, just as in step 2, and pull both loops tightly. You now have a securely tied bow on your shoes.

Reef Knot Method:

Step 1: Begin by making sure your shoelaces are already threaded through the holes in the shoes, and lying flat against the surface of the shoes.

Step 2: Pull both ends of the shoelaces outwards to tighten them.

Step 3: Cross one end of the shoelaces over the other, forming an X shape. Thread the end of the lace on top through the gap created by the X, and pull both ends tight.

Step 4: Cross the same end that was on top in step 3, over the other end, forming another X shape. Thread the now bottom lace through the gap created by the X and pull tight.

Step 5: You have now tied a secure reef knot, which is known for its symmetrical appearance and ease of untying when needed. To avoid slips, make sure the ends of the shoelaces are long enough to ensure the knot stays in place.

Quick-Release Method:

Step 1: As with the other methods, start by making sure your shoelaces are threaded through the holes in the shoes and lying flat against the surface.

Step 2: Pull both ends of the shoelaces outward to tighten.

Step 3: Bend one end of the shoelace back towards the shoe, leaving a small loop at its tip. Hold this loop in place with your thumb and index finger.

Step 4: Take the other end of the shoelace and wrap it around the loop you created in step 3. Pull it tight, so the loop of the lace stays in place.

Step 5: Create another loop with the now free end of the shoelace by folding the lace back on itself. Hold this loop with your thumb and index finger.

Step 6: Hold the shoelace in place and gently pull both loops outward.

Step 7: The quick-release knot can now be easily undone by simply pulling both ends of the shoelaces. This method is particularly useful for those who need to remove their shoes quickly, such as athletes or medical personnel.

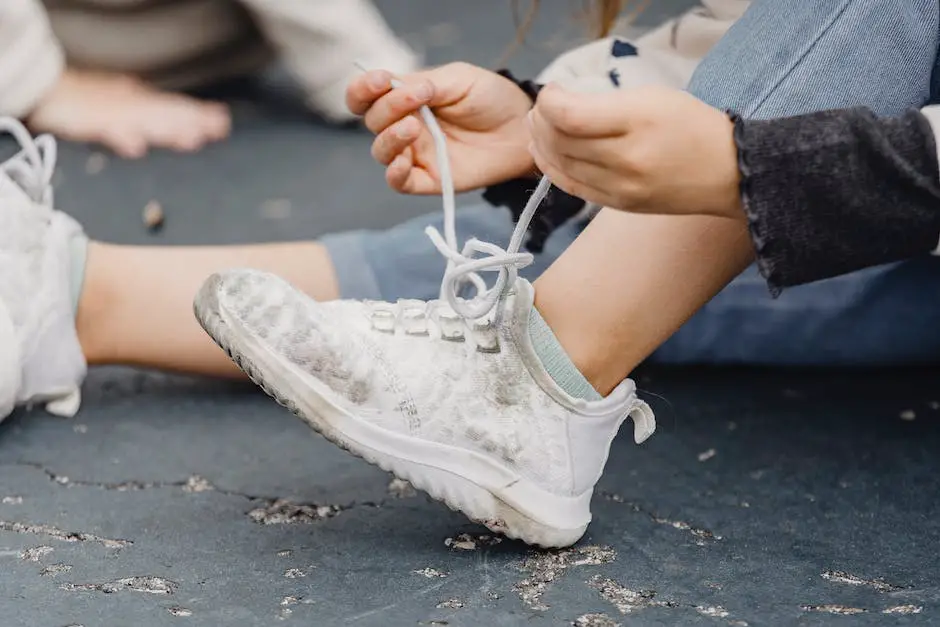
A child tying shoelaces using the bunny ear shoelace tying method.

Shoelace tying life hacks

Tying shoelaces is a basic yet essential life skill that everyone should learn. Many people learn to tie their shoes as kids, but not everyone knows the various tricks and techniques for tying shoelaces quickly, securing loose ends, and preventing knots or tangles. In this guide, we will explore different shoelace tying life hacks to help you lace up like a pro.

The Bunny Ear Method:

Perhaps the simplest shoelace tying technique, the Bunny Ear method is easy to learn and quick to execute.

  1. Start with your laces properly threaded through the eyelets of your shoes.
  2. Pull both ends of the lace and cross one end over the other, pulling it through the loop.
  3. Make two loops (bunny ears) with both ends of the lace.
  4. Cross the bunny ears over each other and pull the one farthest from you through the loop created by the other.
  5. Pull both bunny ears to tighten the knot securely.

The Ian Knot:

Touted as the world’s fastest shoelace knot, the Ian Knot can save you time and effort when tying your shoes.

  1. Start with your laces properly threaded through the eyelets of your shoes.
  2. Hold both ends of the laces between your thumbs and index fingers.
  3. Cross your hands to create an “X” shape with your laces.
  4. Using your free fingers, pull a loop of each lace through the center of the “X.”
  5. Carefully pull the loops outward to tighten the knot.

Tuck in loose ends:

Loose ends can cause tripping and look untidy. To secure loose ends, you can tuck them into the sides of your shoes or underneath your laces.

  1. Adjust your laces to ensure they are equal in length on both sides.
  2. Tie your chosen shoelace knot securely.
  3. Tuck the loose ends of the laces into the sides of your shoes, or thread them under the horizontal sections of your laces and pull snugly.

Use a “lace lock” to prevent knot slippage:

A lace lock is an easy way to secure your shoelaces and prevent them from coming undone during the day.

  1. Before tying your shoelace knot, create a loop with each lace and hold them in each hand.
  2. Cross the loops and pull one loop through the hole created by the other loop.
  3. Pull the loops tight to create a lock.
  4. Tie your preferred knot on top of the lace lock to ensure that it stays secure.

Double knots for extra security:

If you have particularly slippery laces or are worried about your shoelace knots coming undone, try using a double knot for extra security.

  1. Tie your preferred shoelace knot as usual.
  2. Create a simple overhand knot by crossing the two loose ends again and snuggly pulling one end through the loop created by the other end.
  3. Pull tight to secure the double knot.

Tying shoelaces doesn’t have to be a chore or a source of frustration. With these shoelace tying life hacks, you can secure your shoes quickly and easily, ensuring that you stay comfortable and safe throughout your day. From the Bunny Ear method to the Ian Knot, experiment with these techniques to find your favorite way to lace up your shoes like a pro.

A person tying their shoelaces using the Bunny Ear Method

Common shoelace problems and solutions

Uneven Shoelace Lengths – If you find that one end of your shoelace is significantly longer than the other, this could lead to difficulty in tying a balanced and secure knot. To fix this problem, first untie your shoelaces completely. Next, pull both ends of the shoelace to ensure that they are even at the center of the shoe, where the laces cross. Adjust the laces accordingly, ensuring that the shoe remains snug and comfortable on your foot. Lastly, tie your shoelace like you normally would, and you should have evenly balanced lace lengths.Broken or Frayed Shoelace Tips – Broken or frayed shoelace tips can make it difficult to lace or unlace your shoes, as well as create an untidy appearance. To repair a broken aglet, you can use one of the following methods: Apply clear nail polish or glue to the frayed ends of the shoelace and twist it tightly to form a new, sealed aglet. Allow it to dry completely before using the shoelace. Use heat shrink tubing. Cut a small piece of heat shrink tubing, that is just slightly longer than the damaged aglet. Place the tubing over the frayed lace end, and then carefully apply heat (using a lighter or a hairdryer) to the tubing until it shrinks tightly around the lace.Shoelaces Keep Coming Untied – If your shoelaces continually come undone, it’s likely that you’re not tying them securely enough, or you’re using a method that loosens easily. Try using the ‘double-loop’ or ‘bunny ears’ method to create a more secure knot. Begin by tying a regular starting knot, looping one lace end over the other and pulling tight. Create a loop with each end by simply folding the lace back onto itself. Cross the two loops over each other, just as you would in a regular knot. Tuck one loop under the other and pull tight. This should result in a secure, double-looped knot that should stay in place throughout the day.Difficulty Lacing Shoes When the Laces Are Too Short – When shoe laces are too short, it can be difficult to lace your shoes and tie them properly, resulting in discomfort or ill-fitting shoes. The simplest solution is to purchase longer shoelaces that better suit the size of your shoe and the lacing style you prefer. Alternatively, you can try adjusting your lacing method. For example, you can skip an eyelet or use a smaller crisscross pattern to save lace length. Also consider trying ‘straight bar lacing’ for a more minimalist look while using less lace.Shoelaces Are Too Long – Long shoelaces can create a messy appearance and can be a tripping hazard if they drag on the ground. If your shoelaces are too long, you can either trim them to a shorter length and secure the cut ends with clear nail polish or glue to prevent fraying, or purchase shorter shoelaces designed for your specific type of shoe. Another option is to tie an additional knot or two after tying your regular bow, which will use up some of the excess length and keep the ends off the ground.

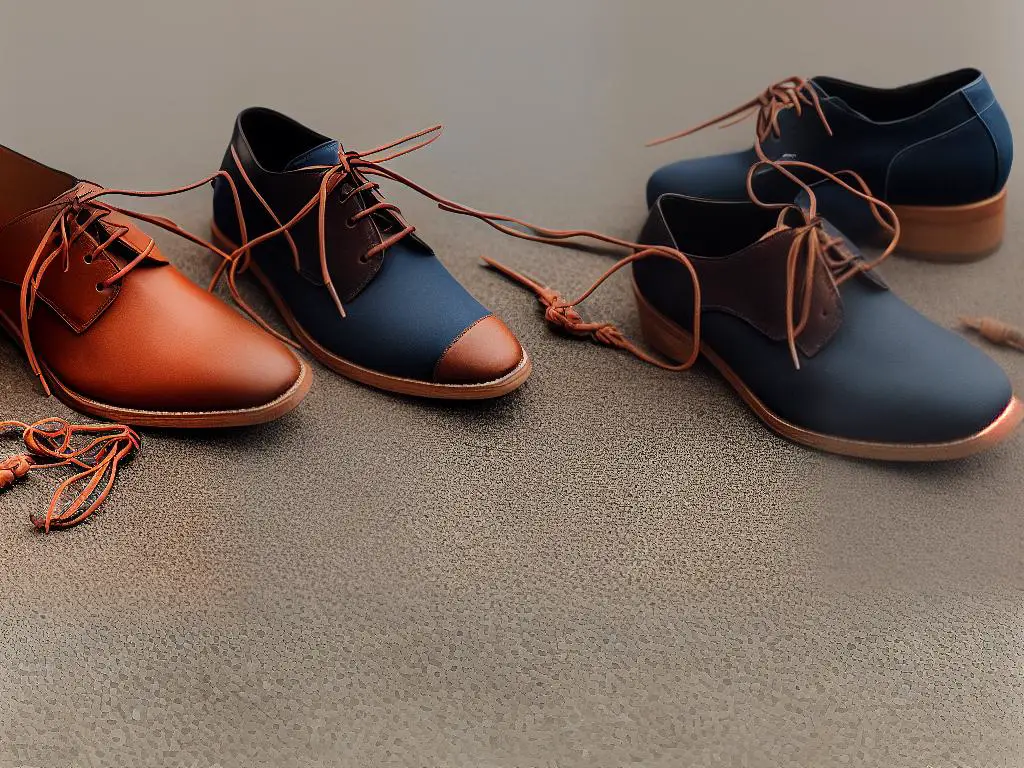
A picture of a pair of shoes, with one shoe having a seemingly tangled knot and the other shoe with a neatly tied bow.

Practicing and perfecting shoelace tying

Gather your materials: To start practicing, you’ll need a pair of shoes with laces or a shoelace board. Make sure the laces are long enough to tie easily without being too long. You can use shoes that you wear daily or an old pair that you no longer wear.Find a comfortable spot: Have a comfortable chair to sit on while practicing shoelace tying. Good posture and proper height will make it easier for you to see and reach your shoelaces.Start with the basic knot: Hold one lace in each hand. Cross the right lace over the left lace, then pull the right lace under the left lace, making a simple twist. Tighten the laces by pulling both ends away from each other.Create the loops: Make a loop with the right lace by folding it back on itself. Hold the loop between your right thumb and index finger. Using your left hand, grab the left lace and wrap it around the right loop, moving from right to left.Complete the bow: While holding the left lace wrapped around the right loop, use your left index finger and thumb to push a small section of the left lace through the opening between the two loops. Pull both loops tight to finish the bow.Repeat the process: The key to perfecting your shoelace tying skills is repetition. Practice tying your shoelaces multiple times to develop muscle memory and to become more comfortable with the process.Try different tying methods: There are several ways to tie shoelaces, such as the ‘bunny ears’ method or the ‘Ian Knot.’ Experiment with these different techniques to find the one that works best for you.Test your skills on different types of shoes: Practice tying shoelaces on various shoes, including athletic shoes, dress shoes, and boots. Each type of shoe may have slightly different lace lengths, eyelet spacing, or stiffness, which can affect the feel of tying your shoelaces.Increase your speed: As you become more comfortable with shoelace tying, challenge yourself to tie your shoelaces more quickly and efficiently. Set a timer and practice tying your shoes as quickly as possible while maintaining a secure knot.Teach others: One of the best ways to solidify your understanding is by teaching someone else how to tie their shoelaces. This will help you reinforce your knowledge and identify any areas of the process you might still need to work on.Remember, practice makes perfect. Continue practicing these steps regularly, and you’ll become an expert at tying shoelaces in no time.

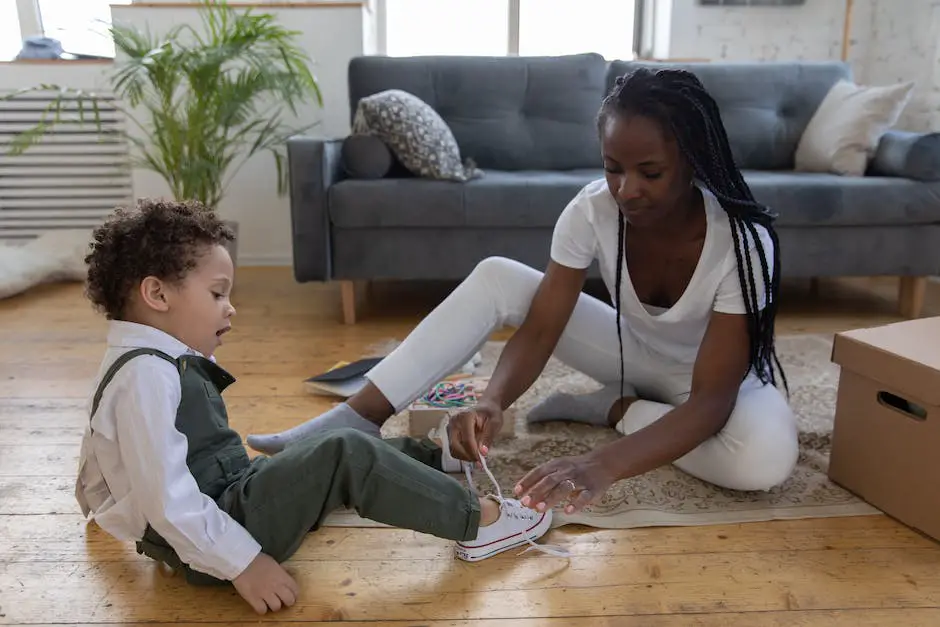
A picture of someone's hands tying their shoelaces step by step.

Armed with the knowledge and skills presented in this guide, you are now prepared to confidently tie your shoelaces in various ways and address any shoelace-related challenges that may arise. Remember that practice makes perfect, so don’t be afraid to experiment and try new techniques. Soon enough, you’ll be an expert at keeping your kicks secured and cruising through life with style and ease.

Categories
Sneakers

Slip-On vs Lace-Up Shoes: Ultimate Comparison

Deciding between slip-on shoes and lace-up shoes can be a challenging task, as both styles offer unique advantages and disadvantages. This article aims to inform you about the history, design, and construction of both types of shoes, as well as their benefits and drawbacks, so you can choose the right footwear for your needs and preferences.

History and Evolution

The history and evolution of slip-on shoes can be traced back thousands of years. The earliest known slip-on shoes were sandals worn by ancient Egyptians and Romans, who appreciated their ease of use and breathability. Throughout the centuries, slip-on shoes continued to evolve and diversify to meet the needs of different cultures and climates. For example, the traditional Japanese “geta” sandal was created as a convenient slip-on footwear solution for walking on wet or uneven surfaces. In more recent times, slip-on styles such as loafers, ballet flats, and espadrilles have gained popularity around the world for their versatile mix of comfort, style, and functionality.

Lace-up shoes, in contrast, have roots that can be traced back to the 16th century. Balmoral (Oxford) shoes and Blücher (Derby) shoes, two predominant styles of lace-up shoes, both originated in Europe as military footwear. The use of lace-up closures allowed soldiers to adjust the tightness of their shoes for a secure and comfortable fit on long marches. Over time, lace-up shoes crossed over from military use to everyday wear and became a fashionable choice for both men and women. In the Victorian era, lace-up boots became a popular option for women seeking both style and support. Today, lace-up shoes have expanded to encompass a wide variety of footwear styles, including sneakers, dress shoes, and hiking boots.

Throughout various cultures, the decision to wear slip-on shoes versus lace-up shoes has grown to represent more than just an individual’s personal taste. In certain situations, the differences between these two footwear styles can symbolize social class or occupation. For instance, during the 19th century in England, lace-up shoes were commonly associated with the upper classes, whereas slip-on shoes were considered fitting for working-class laborers. Currently, we see similar distinctions in professional attire, with lace-up shoes being regarded as more formal and slip-on shoes appearing as more casual and laid-back. In the end, the development of both slip-on and lace-up shoes has presented us with a diverse and abundant selection of footwear, enabling everyone to find the ideal pair based on their specific needs and preferences.
A man wearing slip-on shoes looking at a timeline of footwear with ancient Egyptian and Roman-inspired sandals on one end and modern slip-on shoes on the other end.

Design and Construction

Slip-on Shoes

Designed for convenience and easy wear, slip-on shoes require no laces to be tied. Crafted from various materials, such as canvas, leather, or synthetic fabrics, they come in numerous styles that include loafers, moccasins, boat shoes, and sneakers. To provide a better fit, comfort features like elastic inserts, padded collars, and cushioned insoles are often incorporated in slip-on shoes. These design elements cater to the wearer’s unique footwear needs and allow for a seamless transition when considering both slip-on and lace-up options.

Lace-up Shoes

Lace-up shoes, on the other hand, require laces to fasten the shoe securely onto the foot, offering a more adjustable and supportive fit for various foot sizes and shapes. Lace-up shoes come in many styles such as dress shoes, casual wear, and athletic footwear. The lace-up system provides more support and stability, particularly for athletic pursuits or jobs that require a lot of walking or standing. Lace-up shoes may feature decorative or functional details such as broguing, wingtips, or toe caps to provide a unique design.

Construction Methods

Slip-on shoes and lace-up shoes have distinct construction methods that impact their appearance and functionality. Slip-on shoes typically use glue or stitching to attach the upper to the sole, resulting in fewer seams or a more minimalistic look. On the other hand, lace-up shoes require additional reinforcements due to the strain caused by the tension of the laces. As a result, the uppers of lace-up shoes often have more intricate designs, featuring eyelets and other decorative or functional elements.
A picture of a person's foot inserting easily into a slip-on shoe without any requirement to tie laces.

Advantages of Slip-On Shoes

When comparing slip-on shoes with lace-up shoes, the convenience and ease of wear stand out as a key advantage for slip-on shoes. With no laces to tie or untangle, slip-ons are perfect for fast-paced individuals or those who struggle with tying laces. Additionally, slip-on shoes can be swiftly removed, making them practical for situations where shoes need to be frequently taken on and off, such as going through airport security or entering specific cultural or religious spaces. In contrast, lace-up shoes may require more time and effort to put on or remove, making them less suitable for such circumstances.

Another advantage of slip-on shoes is their flexibility in sizes. Given that they often have an elastic upper or a stretchable material, they may accommodate a wider range of foot sizes and shapes, providing a comfortable fit for people with slightly wider or narrower foot dimensions than standard sizes. This flexibility can also give more room for feet to swell or contract throughout the day, ensuring consistent comfort.

Slip-on shoes provide an easy and casual option for various occasions due to their relaxed and laid-back vibe. Their versatility, combined with a wide range of designs such as sneakers, loafers, and sandals, make them an adaptable and fashionable accessory in one’s wardrobe for different settings and outfits.
A picture of someone wearing slip-on shoes, which can be quickly and easily removed.

Advantages of Lace-Up Shoes

On the other hand, lace-up shoes offer a significant advantage in terms of fit and support compared to slip-on shoes. The adjustable laces cater to the unique contours of an individual’s feet, resulting in a more secure, snug fit. This prevents the shoes from slipping off, a common issue with slip-on shoes. The additional support provided by lace-up shoes makes them suitable for a broader range of activities including sports, hiking, and long walks, as they help minimize the risk of injury.

Another notable benefit of lace-up shoes is their customizability, as laces can be easily swapped out for different styles, colors, and lengths to suit the wearer’s preferences. This flexibility allows individuals to personalize their footwear, adding an element of distinctiveness to their overall ensemble. Additionally, lace-up shoes are available in various styles, making them highly versatile for dressing up or down. Their suitability for both casual and formal occasions sets them apart from slip-on shoes, which tend to lean more towards informal settings.

Lace-up shoes offer style versatility, catering to a wide range of wardrobe options, from timeless classics to trendy contemporary pieces. This adaptability makes lace-up shoes a popular choice for men and women when selecting footwear for work, social engagements, and special occasions. For instance, a pair of oxfords, brogues, or pumps can be dressed up or down for business or black-tie events, while casual sneakers and boots can easily complement jeans and skirts for everyday wear. In contrast, slip-on shoes may not be as appropriate for specific formal events or intricate dress codes.
A picture of a person wearing a pair of lace-up shoes.

Disadvantages of Slip-On Shoes

Aside from style considerations, lace-up shoes also provide an advantage in terms of foot health. While slip-on shoes can be comfortable and convenient, they often lack adequate support and cushioning for the foot’s arch, leading to discomfort and even long-term damage. Additionally, slip-ons tend to have a looser fit than lace-up shoes, increasing the chances of developing blisters or corns from friction. Conversely, lace-up shoes offer a more customizable and secure fit, which can help to minimize irritation and promote proper foot alignment, ensuring long-lasting comfort and well-being.

Another disadvantage of slip-on shoes is their limited stability, particularly when engaging in any physical activities or walking on uneven surfaces. The looser fit of slip-ons makes it more likely for the shoe to slip off or twist on the foot, increasing the risk of injuries such as sprained ankles or unexpected falls. Lace-up shoes, however, provide a more secure and stable fit. This is particularly important for those who are active, have balance issues, or need additional foot support due to medical conditions.

Slip-on shoes are generally perceived as less formal compared to lace-up shoes, which can be limiting in professional or dressy settings where a refined and polished appearance is crucial. The more casual aesthetic of slip-on shoes makes them less suitable for events requiring formal attire or in workplaces with a strict dress code. In contrast, lace-up shoes are often associated with a higher level of formality and sophistication, making them a more versatile and appropriate choice for various occasions.

Imagine walking on sand with footprints that show the arch of the foot. Slip-on shoes lack the support that helps keep the arch in place, which can cause discomfort and long-term damage to the feet.

Disadvantages of Lace-Up Shoes

However, one notable disadvantage of lace-up shoes in comparison to slip-on shoes is the time-consuming process of tying and untying laces. This can be particularly inconvenient for individuals in a rush, those with limited mobility or dexterity, or young children who have not yet mastered the skill of tying shoelaces. In contrast, slip-on shoes offer a quick and hassle-free option, as they can be simply stepped into without any additional fastening required. This allows for a more efficient getting dressed routine and less time spent on adjusting footwear throughout the day.

Lace-up shoes also present the potential issue of lace damage, which can be both frustrating and costly in the long run. Laces can fray, break, or become tangled over time, requiring replacement or repair. Additionally, the repeated process of tying and untying can contribute to the overall wear and tear of the footwear, which may lead to a shortened lifespan for the shoes themselves. Slip-on shoes, on the other hand, do not have laces to worry about, making them a more durable and low-maintenance choice.

One major advantage of slip-on shoes over lace-up shoes is their convenience in certain situations, such as passing through security checkpoints at airports. Lace-up shoes require untying and retying, which can be time-consuming and frustrating. Moreover, lace-up shoes may not provide the same level of comfort as slip-on shoes, as laces can sometimes be tied too tightly, causing irritation or discomfort. Therefore, slip-on shoes offer a more efficient and comfortable alternative to their lace-up counterparts.
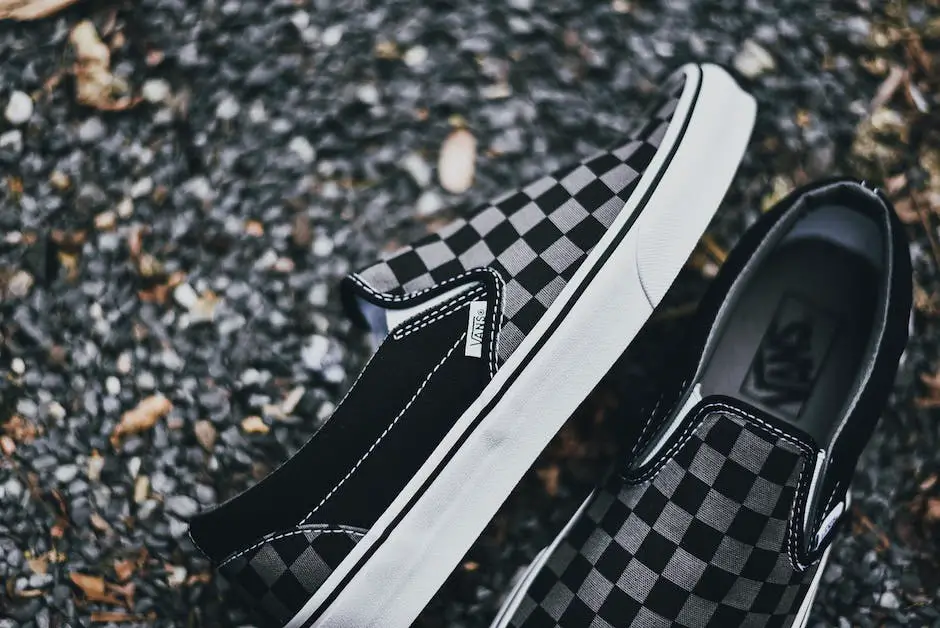
Illustration showing the differences between putting on lace-up shoes and slip-on shoes, with slip-on shoes being the easier and quicker option.

Popular Brands and Styles

There are several popular brands offering a variety of slip-on shoes to choose from, such as Vans, Skechers, and TOMS. Vans has been a leading brand since the 1970s with their iconic Classic Slip-On, featuring a wide selection of materials, patterns, and colors. Skechers caters to those who prioritize comfort and cushioning, offering athletic and comfort-oriented slip-ons with their line of GoWalk and Equalizer shoes. TOMS, known for their social mission, provides lightweight canvas slip-on shoes in various colors and patterns. These slip-on shoes are typically priced between $40 and $80, offering an affordable and functional alternative to lace-up shoes.

Lace-up shoes come in a variety of styles and price points, which can cater to a wide range of consumers. Popular brands in this category include Nike, Adidas, and Converse. Nike and Adidas offer a multitude of athletic and casual sneakers, both high-end and affordable, that are perfect for daily wear as well as fitness activities. These brands have made significant strides in integrating performance technology and design, with popular styles such as the Nike Air Force 1, Adidas Ultra Boost, and Adidas Originals Superstar. Converse, a classic and casual brand, is best known for their Chuck Taylor All-Star shoe. This simple, canvas sneaker has been a wardrobe staple for decades and remains a timeless option for many. Lace-up shoes from these brands can range anywhere from $40 to well over $200 for limited edition and high-end releases.

When it comes to style and versatility, Sperry and Cole Haan are two brands that offer a well-rounded selection of both slip-on and lace-up shoes. Sperry, known for their Original Boat Shoe, provides a variety of lace-up and slip-on boat shoes in various materials and colors, catering to those in search of a preppy, coastal, or casual style. Cole Haan, on the other hand, boasts a diverse collection of casual and dress options, including the ØriginalGrand Ultra Wingtip Oxford and the Nantucket Loafer. With a price range spanning from $50 to over $200, these brands offer something for every budget.

A chart showing the various shoe brands for slip-on and lace-up shoes and their respective prices.

Choosing the Right Shoe

When selecting the perfect shoe, several factors come into play, such as the occasion, comfort, personal style, and foot health. Both slip-on and lace-up shoes have their distinct benefits and drawbacks, depending on these considerations. Slip-on shoes are ideal for casual situations, offering the convenience of being easily put on and removed. They make the perfect choice for quick errands or relaxed gatherings. Conversely, lace-up shoes cater to more formal occasions, sports, and activities requiring a secure fit. Providing superior foot support, lace-up shoes are seen as a more suitable option for professional environments.

Comfort and foot health are important elements to think about when choosing between slip-on and lace-up shoes. While slip-on shoes provide quick comfort, they might not offer adequate support for individuals with specific foot or arch issues. Properly fitted lace-up shoes can give better control over the snugness of the fit, which can be beneficial for those with foot ailments, as well as for athletes who require stability during their sports activities. Moreover, lace-up shoes also enable the use of specific lacing techniques catered to a person’s foot shape and needs, providing a more customized fit.

Personal style plays a significant role in choosing between slip-on and lace-up shoes. Fashion preferences differ from one individual to another, and there is a wide range of both slip-on and lace-up shoe styles available on the market, from classic to trendy. In general, slip-on shoes tend to have a more casual and laid-back appearance, while lace-up shoes are often associated with a polished and professional look. However, some shoe designs combine elements from both types, offering stylish options for those who want the best of both worlds. It is crucial to pick a shoe that complements one’s wardrobe and provides the desired aesthetic without compromising comfort and foot health.

A young boy is trying on two pairs of shoes, one pair of slip-on shoes and the other a pair of lace-up shoes, to decide which one he should wear.

Ultimately, the decision between slip-on shoes and lace-up shoes depends on your personal preferences, comfort, and the specific occasion. By understanding the history, design, and advantages and disadvantages of both types of shoes, you can make an informed decision and find the perfect shoe that best suits your individual style and needs. Remember, never compromise on comfort and foot health when selecting a shoe that’s right for you.