Categories
Uncategorized

Mastering Dragon Tattoos: Designs, Symbolism & Techniques

Dragons have fascinated humans for centuries, featuring prominently in folklore, mythology, and art across various civilizations. Dragon tattoos have become a popular means of expressing one’s affinity for these powerful and mysterious creatures, often carrying deep symbolic significance and personal meaning. As industry experts in tattoos, we aim to provide an in-depth exploration of the history, symbolism, and various designs associated with dragon tattoos, as well as guidance on choosing the right artist and ensuring proper aftercare for a long-lasting, impactful tattoo.

History of Dragon Tattoos

Dragon Tattoo History:

In Chinese culture, the dragon is a revered, mythical creature that is believed to bring good fortune, prosperity, and power. Dragon tattoos have a long history that dates back to ancient China, where they were seen as symbols of authority and protection. The mythical creature was often depicted as a snake-like, wingless creature with four legs and sharp claws. In Chinese mythology, dragons were believed to control natural elements such as water and rain, making them powerful symbols in a predominantly agrarian society. Chinese emperors were often associated with the dragon, using it as a crowning emblem of their imperial power. Thus, the dragon’s image was profoundly embedded in Chinese art, culture, and tradition, including tattoo artistry.

Japanese Dragon Tattoos:

Similarly, in Japanese culture, dragons have been a vital part of the country’s mythos, representing strength, wisdom, and protection. The Japanese dragon, or ryū, is inspired by both indigenous Japanese legends and Chinese dragon mythology, resulting in a unique representation that differs from its Chinese counterpart. Japanese dragons often have three claws and are associated with water deities. Dragon tattoos have been an essential aspect of Irezumi, the traditional Japanese tattoo art form. Dragons were used in tattoos to symbolize power, strength, and protection; they were especially popular among samurai warriors.

Norse Dragons:

In Norse mythology, dragons were both formidable and feared creatures. One of the most well-known dragons in Norse myth is Nidhogg, a monstrous serpent that gnawed on the roots of Yggdrasil – the world tree – in an attempt to destroy it. Dragons in Norse mythology were typically depicted as serpentine, wingless creatures with distinctive features such as horns or large teeth. These creatures embodied primal forces and chaos, aligning with their feared and destructive reputation in Norse myth. Viking warriors who embraced this chaotic force would often etch dragon tattoos on their bodies to instill fear in their enemies and demonstrate their unfaltering courage.

Celtic Dragons:

Although not as prevalent as the Chinese and Japanese dragon tattoos, Celtic dragon designs are still an integral part of tattoo history. Often depicted in intricate knotwork designs, Celtic dragons are a blend of the sinuous, snake-like aspects seen in Chinese dragons and the winged creatures from western mythology. Celtic dragons were believed to represent the power of the natural world, wisdom, and sovereignty, making them popular choices for tattoos by those who sought to embrace these qualities.

Modern Dragon Tattoos:

Dragon tattoos have long been a popular choice for those looking to make a powerful and lasting statement with their body art. In modern times, they continue to be popular across the globe and are often selected for their powerful, mythological symbolism and captivating aesthetics. Known for their immense size, mythical nature, and deep-rooted history in numerous cultures around the world, dragons carry complex symbolism that often varies among individuals.

A man's back covered in a large dragon tattoo with intricate details and vivid colors

Dragon Tattoo Symbolism

Dragon Tattoos Across Cultures:

For many, these creatures represent power, wisdom, protection, and transformation, both in their physical form and the meanings they hold for the wearer of the tattoo. As various cultures have depicted dragons differently, individuals can choose from a vast array of dragon tattoo designs that range from the traditional Chinese or Japanese designs to the bold, intimidating Norse depictions and intricate Celtic knotwork. Ultimately, the history of dragon tattoos is a testimony to their timeless appeal, striking visuals, and multi-layered cultural significance.

Power

One commonly held belief regarding dragon symbolism is the association with power. In various cultures, dragons are often depicted as rulers of the earth, sky, and sea, and their immense strength and raw energy are unparalleled. As such, individuals with dragon tattoos may seek to embody the inherent power and strength these creatures possess, often choosing designs that emphasize the dragon’s fierce or menacing appearance.

Wisdom

In addition to their power, dragons are often associated with wisdom. Many legends and mythologies throughout history—particularly those of Eastern origins—depict dragons as intelligent beings that impart knowledge and counsel to humans. Indeed, Chinese dragons frequently symbolize wisdom and knowledge, as well as the ability to communicate and understand. Those who choose dragon tattoos with an emphasis on wisdom may opt for designs that feature the dragon’s large, knowing eyes, or depict it alongside symbols of wisdom, such as books or scrolls.

Protection

The protective nature of dragons is another aspect of the symbolism that people often seek when selecting a dragon tattoo. In many Eastern cultures, dragons are seen as benevolent protectors who guard against evil forces and offer guidance to humans on their spiritual journeys. This protective symbolism is often manifested in tattoos that feature a dragon wrapped around or guarding an individual or object of importance to the wearer, such as a family crest or loved one’s initials.

Transformation

One of the most important aspects to consider when examining the symbolism of dragon tattoos is the transformative nature of dragons. Often depicted as shape-shifters, dragons are capable of taking on multiple forms, granting them the ability to traverse the realms of earth, sky, and sea. Dragon tattoos, therefore, represent transformation and personal growth, reminding the wearer of their own power to evolve and change. Unique design elements, such as a dragon shedding its skin or taking on multiple forms within a single tattoo, can effectively convey this symbolism. In essence, dragon tattoos serve as potent symbols for the diverse traits and characteristics associated with these mythical creatures, allowing individuals to explore their personal connections to power, wisdom, protection, and transformation.

A person with a dragon tattoo on their arm making the 'rock on' hand gesture.

Photo by krspk on Unsplash

Popular Dragon Tattoo Styles and Designs

Tribal Dragons

As a popular variation of dragon tattoos, tribal dragons effortlessly blend fierceness and grace through their bold, swirling black lines and distinct design elements. These designs frequently draw inspiration from Maori, Polynesian, and Celtic cultures, with each offering their own unique take on the tribal dragon motif. Sharp angles and elegant curves typically characterize tribal dragon tattoos, thus showcasing both strength and beauty. This style is especially suitable for those seeking a captivating design that is also deeply rooted in ancient traditions and cultural connections, further enhancing the symbolisms of power, wisdom, protection, and transformation.

Traditional Dragons

Traditional dragons, inspired by East Asian cultures, are another popular design choice among dragon tattoo enthusiasts. These dragons often feature long, slender, and serpentine bodies, accompanied by dramatic and detailed scales, claws, and whiskers. Traditional Chinese dragons are believed to possess great wisdom and power, while Japanese dragons often symbolize balance and harmony. This style is highly versatile, as tattoo artists can create a range of expressions and poses for the dragon, making each tattoo unique and meaningful to its wearer.

Realism Dragons

Realism is another highly sought-after style in the realm of dragon tattoos. As the name suggests, this style aims to bring out a lifelike rendition of a dragon, with intricate shadows and textures that emphasize the fantastical nature of the mythical beast. This design often features brightly colored scales, realistically rendered fire or lightning, and detailed anatomical features to help bring the dragon to life. Some artists might create their dragon depictions based on stories from literature, movies, or even video games, while others might craft a unique, lifelike design that is entirely their own. Regardless, a realistic dragon tattoo ensures a captivating, artistic statement that is truly memorable.

Neo-Traditional Dragons

Neo-traditional dragon tattoos offer a more modern and creative interpretation of dragon designs. These tattoos often infuse a blend of artistic styles and elements seen from both traditional East Asian and contemporary Western cultures. The neo-traditional style focuses on bold, vibrant colors and a unique, artistic flair that is distinct from other dragon designs. The result is a stunning amalgamation of time-honored imagery and progressive design, creating a standout piece that is bound to intrigue and fascinate observers.

Watercolor Dragons

Watercolor dragon tattoos are a vibrant and ethereal representation of the mythical creatures, offering a unique twist to traditional body art. This style mimics the fluidity and color play of watercolor paintings, enabling tattoo artists to create the illusion of a dragon gracefully emerging from an otherworldly realm. Watercolor dragons often feature abstract, swirling designs that naturally flow with the contours of the human body, resulting in a captivating tattoo. As more people embrace this innovative style, watercolor dragons continue to push the boundaries of creativity and self-expression within the world of body art.

A black and white image of a person's arm with a detailed dragon tattoo

Photo by krspk on Unsplash

Dragon Tattoo Placement

In deciding to get a dragon tattoo, one of the most important factors to consider is the ideal location for the ink on the body. A common preference is the upper arm and shoulder area, as this provides both visibility and concealment, depending on the individual’s choice of clothing. Moreover, the generous space in this area allows the tattoo artist to capture the intricate details of the dragon’s design. The upper arm’s shape can accommodate both horizontal and vertical compositions, ensuring a well-balanced tattoo. Besides, the natural musculature of the arm can further enhance the dragon’s mighty appearance.

Another prominent location for dragon tattoo placement is the back. A large, horizontal dragon tattoo, which could span the width of the shoulder blades, provides an imposing and eye-catching visual. This placement option is typically more easily hidden under clothing, lending a more dramatic reveal when intentionally shown. Since the back offers a vast and flat area for tattooing, an artist has the freedom to create a highly detailed and sizable design that accurately conveys the essence of the dragon.

Some individuals prefer a more discreet yet impactful placement for a dragon tattoo: the chest. As a central and personal area of the body, a dragon tattoo on the chest symbolizes protection and empowerment. This location also allows for either a single dragon or a mirrored set, with each dragon resting on either side of the chest. Moreover, chest tattoos are more easily covered by clothing, permitting the wearer to choose when to reveal or conceal their artwork.

Astoundingly, leg placements have gained increasing popularity in recent years for dragon tattoos. Both the calf and thigh regions provide ample space for intricate designs and retain the option for significant visibility or concealment, depending on the wearer’s preferences. An impressive dragon inked along the leg’s length can showcase the creature’s elongated form and convey movement, as if the dragon is coiling itself around the leg or about to strike. However, it’s essential to consider that the pain tolerance for tattooing varies depending on the individual and location. Relatively, the aforementioned areas are considered less painful compared to bony regions, such as the ribs or collarbone.

When selecting a placement for a dragon tattoo, it’s essential to consider pain tolerance. Bony areas, such as the ribs or collarbone, can result in a higher degree of discomfort during the tattooing process, but the end results are often remarkably stunning and powerful. On the other hand, areas with thicker skin or more muscle, like the thighs or upper arms, may provide a more tolerable pain level while still offering an impressive canvas for the tattoo artist. It is crucial to weigh factors such as size, visibility, and individual pain thresholds when determining the ideal location for a dragon tattoo that will be cherished for a lifetime.

Image of different body placements for dragon tattoos

Choosing the Right Artist

Finding the Right Dragon Tattoo Artist

Once you have determined the perfect placement for your dragon tattoo, the next step is to find a skilled tattoo artist to bring your vision to life. It’s vital to examine their portfolios thoroughly, looking for consistent quality, attention to detail, and a variety of styles. As dragon tattoos are a popular design choice, many seasoned tattoo artists are likely to have experience in creating them. While reviewing an artist’s portfolio, take note of the intricacy of the dragons, the line work, shading, and the use of color. The more skilled an artist is, the better equipped they will be to capture the unique qualities of a dragon and convey the style you desire.

Expertise of the Potential Artist

A crucial factor to consider is the expertise of the potential artist. You can gain insights into their expertise not only by examining their portfolio but through online reviews, customer testimonials, and referrals from acquaintances who have had work done by that artist. Look for artists who specialize in the particular style you’re interested in, whether that’s traditional, Japanese, realistic, or geometric, as they’ll have greater experience creating the desired effect. Furthermore, if you require a cover-up tattoo or one with specific requirements, it’s essential to find an artist who has expertise in handling such detailed work.

Effective Communication

Effective communication between you and your tattoo artist is vital for the success of the tattooing process. Your artist should be receptive to your ideas and willing to discuss various design options, offering suggestions based on their experience. Additionally, a good artist will explain the necessary aftercare procedures and provide guidance on how to maintain your dragon tattoo in the long run, ensuring that you’re satisfied with their work for years to come.

The Tattoo Studio

Another important aspect to consider is the tattoo studio itself. A reputable studio will adhere to strict hygiene and safety guidelines, use quality equipment, ink, and materials, and boast a comfortable and welcoming environment for clients. You should schedule a consultation at the studio before committing to the tattoo, which will allow you to ask any questions you may have and assess the studio’s cleanliness and ambiance.

Trusting Your Instincts

When it comes to becoming an expert on dragon tattoos, trust your instincts in selecting the right tattoo artist for your design. You should feel confident that the artist understands your vision and can bring it to life with their skills and creativity. Remember that a tattoo is a lifelong commitment, so take your time in choosing the right artist for you – it’s always better to be patient and find someone who can create the perfect dragon tattoo that you’ll be proud to show off for years to come.

A close-up image of a dragon tattoo on a person's arm, showcasing intricate details of line work, shading, and color.

Photo by seteph on Unsplash

Inking Techniques and Aftercare

Dragon Tattoo Inking Techniques

As you delve deeper into the world of dragon tattoos, it’s important to familiarize yourself with the various inking techniques. Among the diverse range of techniques utilized in the tattoo industry, traditional, realism, and blackwork are particularly favored for the intricate detailing and shading required in dragon tattoos.

  • Traditional, also known as Old School, is characterized by bold lines, vibrant colors, and simple shading, making it a popular choice for those seeking a classic and eye-catching dragon design.
  • Realism, on the other hand, focuses on accurately replicating realistic images on the body, thereby enabling the creation of lifelike and visually striking dragon tattoos.
  • Lastly, blackwork primarily uses black ink and negative space to create bold, high-contrast designs that highlight the elaborate features and formidable presence often associated with dragons.

Proper Needle Placement and Aftercare

While the inking technique is responsible for the initial visual appeal of a dragon tattoo, proper needle placement and depth are also crucial factors that determine the tattoo’s longevity.

An accomplished tattoo artist skillfully punctures the skin at the optimal depth to insert the ink into the dermis layer, ensuring that the artwork remains vivid and resistant to fading over time.

Experienced artists also focus on minimizing skin damage by adhering to standardized sanitation procedures and avoiding excessive needle penetration, leading to a reduced risk of infection and scarring.

Once the inking is complete, aftercare becomes a decisive element in the tattoo’s healing process and preserving its long-term appearance. The tattoo artist will typically provide detailed aftercare instructions that need to be followed rigorously.

Dragon Tattoo Aftercare

This includes gently washing the tattoo with a mild, fragrance-free soap several times a day and keeping the area moisturized with a tattoo-specific ointment.

Additionally, it is crucial to refrain from picking at scabs, soaking the tattoo in water, or exposing it to direct sunlight during the initial healing period, which typically lasts about two to three weeks.

Not only do these preventive measures help minimize the risk of infection, but they also contribute to optimal ink retention and vibrancy.

Maintaining Your Dragon Tattoo

In order to maintain the tattoo’s appearance even after the initial healing period, clients should make an effort to care for their dragon artwork long-term.

This entails regularly applying broad-spectrum sunscreen with a high SPF rating before any sun exposure, as UV rays can cause the ink to fade and blur over time.

Moreover, keeping the skin moisturized and healthy will further help to preserve the tattoo’s sharpness and saturation, allowing the dragon design to remain a prominent and cherished symbol on the body for years to come.

Conclusion

While proper application and aftercare are essential for all tattoos, the intricate and visually stunning nature of dragon designs makes it especially significant for maintaining their vibrancy and longevity.

The combination of a skilled tattoo artist, a suitable inking technique, and strict adherence to aftercare instructions ensures that the wearer’s dragon tattoo remains a striking and lasting piece of body art.

In addition, long-term attention to the preservation of skin health is fundamental in making certain that the artistic and symbolic value of the dragon endures, just as these mythical creatures have endured in the cultural imagination for centuries.

A dragon tattoo design featuring intricate detailing and shading, with bold lines and vibrant colors. The dragon is depicted with its mouth open in a fierce expression, with sharp claws and wings.

Throughout this exploration of dragon tattoos, we have delved into their rich historical and cultural significance, various symbolic meanings, and popular design styles. Moreover, we have offered insights into the best practices for tattoo placement, choosing the right artist, and ensuring proper aftercare for optimal results. By understanding the intricate and fascinating world of dragon tattoos, one can truly appreciate the artistry and symbolism behind these majestic creatures, immortalized through unique, personal expressions of ink.
Categories
Uncategorized

Top Toothpaste Brands

Oral hygiene plays a crucial role in our overall health, and choosing the right toothpaste can significantly impact the effectiveness of our daily dental care routine. With countless brands and specialized toothpaste options in the market, it can be overwhelming to make an informed choice. We’ve done the research and compiled a list of top toothpaste brands, highlighting their unique features, benefits, and targeted concerns to make it easier for you to find the perfect toothpaste to suit your needs.

Colgate

Colgate: Providing the Best in Oral Health

If you’re looking to maintain a healthy and radiant smile, Colgate has undoubtedly been a go-to brand for many households worldwide. Established in 1873, this household name has a long-standing dedication to oral care, consistently innovating to provide consumers with the best products for their teeth and gums.

Preventing Cavities with Colgate

But what sets Colgate apart from other toothpaste brands? First and foremost, Colgate is committed to fighting cavities with their rigorously tested fluoride formula. This vital ingredient strengthens tooth enamel and prevents cavity formation, giving you a confident smile and enhancing your overall oral health.

Toothpaste Tailored to Your Needs

Moreover, Colgate truly understands that not all mouths are created equal. That’s why they’ve developed an impressive range of toothpaste options tailored to specific dental concerns. For those with sensitive teeth, Colgate’s Sensitive Pro-Relief toothpaste offers instant and lasting relief by sealing open channels in the teeth that lead to sensitivity. Dreaming of a brighter, whiter smile? Colgate’s Optic White toothpaste contains hydrogen peroxide, a professionally recommended whitening ingredient that effectively breaks down and removes surface stains from your teeth.

Tired of dealing with pesky enamel erosion or noticing your gum health could use a boost? Don’t worry, Colgate has your back. The Enamel Health toothpaste aids in replenishing and polishing your enamel, while Colgate’s Total Gum Health toothpaste targets issues like gingivitis and halitosis to ensure your gums stay in tip-top shape.

Essential Ingredients for Lasting Oral Health

Packed with essential minerals and ingredients alongside fluoride, Colgate toothpaste not only leaves your mouth feeling fresh and clean but also works around the clock to protect your pearly whites from daily wear and tear.

Choose Colgate for the Best in Oral Care

So, the next time you’re standing in the toothpaste aisle, pondering which brand to choose, remember that Colgate’s diverse selection of products has something for everyone. With their unwavering commitment to oral care, it’s no wonder Colgate has remained a staple in bathrooms around the globe.

Colgate logo - blue and red with white lettering

Crest

Crest: A Smile’s Best Friend

If you’ve ever dreamed of having a stunning, Hollywood-worthy smile, Crest is a brand that should be on your radar. With their impressive series of 3D White toothpastes, achieving a noticeably whiter smile is just a brush away. These toothpastes work their magic by gently lifting surface stains, leaving your teeth sparkly and giving you the confidence to smile wide.

But Crest isn’t just about getting those pearly whites looking fantastic; the brand is also heavily committed to ensuring your overall oral health is top-notch. They understand that a beautiful smile isn’t much use if it’s not also a healthy one, and that’s why they focus on developing toothpaste to target different areas of oral care.

Do you find yourself frequently dealing with puffy, red gums? Crest has a toothpaste for that, specifically formulated to improve gum health and reduce inflammation. For those seeking added protection against tooth decay, Crest offers toothpastes designed to prevent cavities, surrounding your teeth with a barrier of cavity-fighting power.

And let’s face it, few things are more off-putting than bad breath. Luckily, Crest has you (and your mouth) covered with toothpastes that also focus on freshening breath, ensuring you can get up close and personal with confidence.

With Crest’s comprehensive line of targeted toothpastes, you can rest assured that your oral care needs are well taken care of. All while you enjoy your beautiful, whiter smile.

Crest toothpaste sitting on a white surface with a toothbrush and a cup of water next to it

Sensodyne

Sensodyne: The Toothpaste for Sensitive Teeth

If you’re one of the many people who cringe at the thought of sipping on a piping hot cup of coffee or biting into a freezing cold scoop of ice cream, Sensodyne might just be the dental hero you’ve been waiting for. This popular toothpaste brand has swooped in to save the day (and your sensitive teeth), making sure you no longer have to dread those extreme temperatures.

Sensodyne’s range of products is formulated specifically for those dealing with sensitive teeth by offering much-needed relief and long-lasting protection. Say hello to a world where enjoying your favorite foods and drinks doesn’t have to come with an involuntary wince or ouch.

Product Range

Looking for more than just relief from sensitivity? Sensodyne has you covered there, too. Their toothpaste options cater to various needs, including strengthening enamel, caring for your gums, and repairing and protecting sensitive areas. No matter what your dental concerns are, Sensodyne might just have a product tailored to support your oral hygiene journey.

Indulge Confidently

Tired of tiptoeing around tasty treats and delicious beverages in fear of the discomfort that may follow? Give Sensodyne a try and enjoy the freedom of indulging confidently in your favorite tastes, all while knowing that you’re doing your part to protect your sensitive teeth and maintain a happy, healthy smile.

A product shot of a Sensodyne toothpaste tube and a toothbrush. The tube has a label stating 'Sensodyne' and 'Introducing Rapid Relief'.

Arm & Hammer

Discover the Baking Soda Magic with Arm & Hammer Toothpaste

Did you ever think baking soda could be the superhero of your dental care? Well, Arm & Hammer sure did! This mighty brand taps into the extraordinary power of baking soda in all of their toothpaste formulations, providing you with a refreshing way to maintain a stunning smile.

Arm & Hammer toothpaste doesn’t just give you a clean mouth, it’s on a mission to neutralize those sneaky acids that can lead to tooth decay and gum problems. By harnessing the strength of this common household ingredient, you can experience a whole new level of oral care.

“But what kind of toothpaste should I choose?” you might ask. Fret not! Arm & Hammer has a range of options to suit every need and preference. Whether you’re on the lookout for deep cleaning, plaque removal, whitening, or enamel strengthening, they have got you covered.

Are you a fan of natural ingredients and want to avoid harsh chemicals in your toothpaste? Arm & Hammer’s charcoal toothpaste is just what you need. Made with activated charcoal and baking soda, it’ll not only remove surface stains for a sparkling smile but also help maintain your enamel health.

Not only will Arm & Hammer toothpaste help you maintain a clean and healthy mouth, but you’ll also enjoy the rejuvenating sensation of freshly-brushed teeth. The brand’s distinct baking soda formulations are known for their powerful cleaning ability, leaving your teeth feeling like they’ve had a professional-level polish.

Say goodbye to dental woes and hello to a dazzling grin with Arm & Hammer toothpaste as part of your daily oral care ritual!

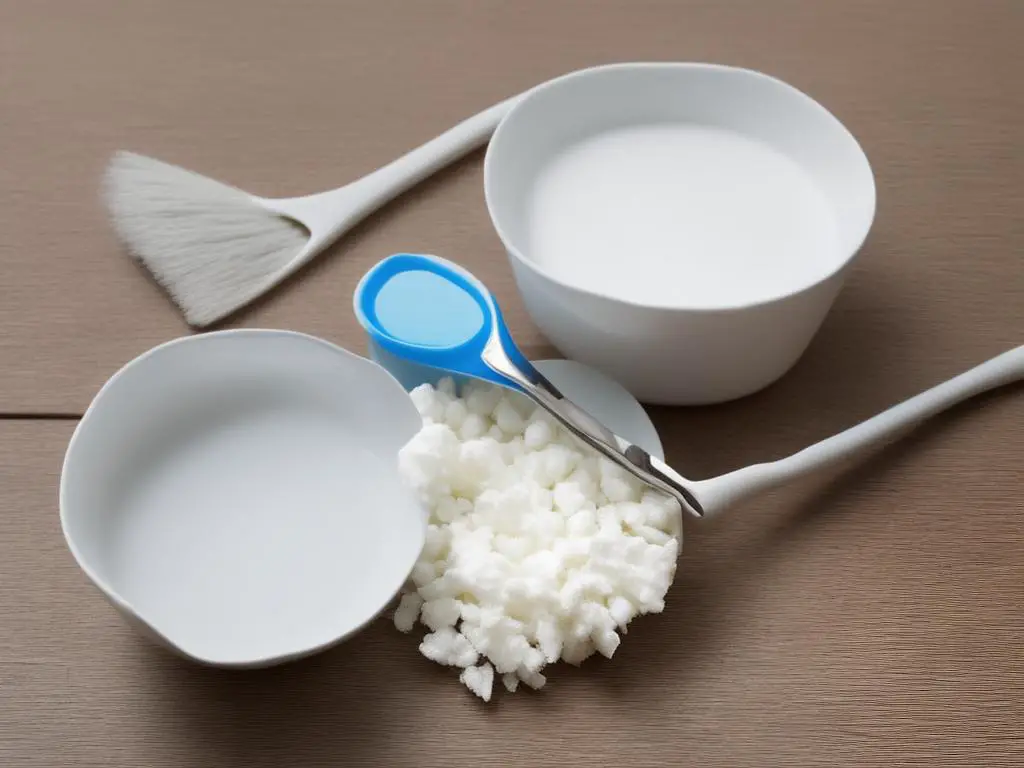
Toothpaste tube with Arm & Hammer logo, a toothbrush and a small bowl of white powder next to it on a white background

Tom’s of Maine

Tom’s of Maine: Your Eco-Friendly Toothpaste Solution

Are you on the hunt for a toothpaste brand that prioritizes not only your dental health but also the environment? Look no further than Tom’s of Maine!

Founded in 1970, this trailblazing company is dedicated to producing toothpaste that champions both sustainability and effectiveness. With a focus on using natural ingredients, Tom’s of Maine’s products are perfect for those who want an eco-conscious, yet powerful, means to maintain their oral hygiene.

Diverse Dental Needs, Eco-Friendly Solutions

Tom’s of Maine offers a variety of options catering to diverse dental needs – all without compromising the eco-friendly aspect. If you are looking to avoid fluoride in your toothpaste, they have fluoride-free choices that still provide adequate protection against cavities, plus gum health improvement. Similarly, if you need a natural or organic toothpaste, Tom’s of Maine has got you covered.

Additionally, this remarkable brand doesn’t skimp on features. You can find toothpaste specially designed for whitening, ensuring a dazzling smile while staying true to a natural lifestyle. And to further demonstrate their commitment to our planet, Tom’s of Maine also utilizes recycled packaging for their toothpaste products.

The Switch to Tom’s of Maine Makes a Difference

So why not make the switch to Tom’s of Maine toothpaste? You’ll be making a conscious decision to support a company that puts both your dental health and the environment at the forefront of their mission.

Tom's of Maine toothpaste and packaging, showcasing their eco-friendly commitment

Parodontax

Parodontax: A Savior for Your Gums

Have you ever experienced that alarming moment when you spot a hint of blood while brushing your teeth in the morning? If so, you’re not alone. Gum health issues, especially ones like bleeding gums, are more common than you think, and this is where Parodontax comes to the rescue!

This specialized toothpaste brand focuses on helping individuals facing gum health issues by addressing the root of the problem – plaque buildup. Their secret weapon is stannous fluoride – an ingredient known for its effectiveness against plaque and support for overall gum health. So not only do you get a fresh, clean feeling after brushing with Parodontax, but you’re also actively fighting those pesky gum issues.

And if you’re one of those people blessed (or cursed, depending on your view) with sensitive teeth, Parodontax has your back, too! They offer a targeted toothpaste with all the gum health-boosting benefits, along with additional sensitive teeth care. So now you can enjoy your morning coffee and ice-cold beverages without wincing in pain!

Not only does Parodontax bring you a breath of fresh air with their unique toothpaste lineup, but it’s also backed by scientific research to ensure their products’ effectiveness. Ready to bid farewell to those troublesome gum issues? Give Parodontax a try and join the journey towards improved gum health and a confident smile!

A tube of Parodontax toothpaste with red and white packaging

Hello

Meet Hello – The Natural, Cruelty-Free, and Vegan-Friendly Toothpaste Choice!

Are you seeking a more environmentally-friendly, ethical option for your daily oral care routine? Hello toothpaste brand may be your perfect match! Hello prides itself on being cruelty-free and vegan, ensuring that no animals are harmed in the making of their products.

Putting natural ingredients at the forefront, Hello skips the chemicals by eliminating artificial sweeteners, dyes, and preservatives in their toothpaste formulations. Instead, you’ll find an array of naturally derived components that work to keep your teeth and gums both clean and healthy.

But that’s not all! Hello also caters to those who prefer toothpaste that’s fluoride-free or contains activated charcoal. Charcoal-based toothpaste has surged in popularity thanks to its natural teeth whitening properties, and Hello has got you covered on that front.

Best of all, the brand ensures that your gum health is taken care of, as their toothpastes help prevent plaque buildup, bad breath, and gum diseases.

So, when it’s time to replenish your toothpaste stock, consider giving Hello a try. You’ll experience the power of natural ingredients while showing love to the planet and its creatures. This brand will undoubtedly refresh your oral care routine, leaving you feeling good about your choice and your smile!

Hello toothpaste tube and toothbrush on a green background.

Pronamel

Pronamel: The Protection Your Teeth Need

Did you know that the foods and drinks we consume daily can have a significant impact on our teeth’s enamel? That’s where Pronamel comes into play! This toothpaste brand is specifically designed to maintain and strengthen enamel, providing a protective barrier against the harmful effects of acid erosion.

The Real Deal for Acidic Substance Lovers

For those who frequently indulge in acidic foods and beverages, Pronamel is the real deal. The toothpaste’s unique formula actively guards your pearly whites from the wear and tear caused by acidic substances, reducing the risk of tooth sensitivity and cavities. So, go ahead and enjoy that orange juice or sip on your favourite glass of wine, knowing full well that Pronamel has got your back (or should we say, your teeth?).

Promoting Overall Oral Health

Not only does this toothpaste brand protect your teeth from the damaging potential of acidity, but it also promotes overall oral health. With a range of products designed to suit your specific dental needs, you can trust Pronamel to help you maintain a bright and healthy smile.

Your Daily Dental Hygiene Routine Essential

In a world where oral care is of utmost importance, add Pronamel to your daily dental hygiene routine and experience the benefits of strong and resilient enamel.

A man holding a tube of Pronamel toothpaste and smiling

In this fast-paced world, taking care of our teeth and gums is of utmost importance to lead a healthy lifestyle. The wide range of available toothpaste brands has made it easier to cater to various dental needs. From traditional brands like Colgate and Crest to those focusing on natural ingredients like Tom’s of Maine and Hello, there’s a toothpaste tailored for everyone’s personal preferences and oral care requirements. So, make an informed decision and choose a toothpaste that best suits your needs, ensuring a confident and radiant smile every day.

Categories
Food

Tasty Journey Through Chocolate Ice Cream

Chocolate ice cream, a scrumptious and beloved dessert, has delighted taste buds around the world for centuries. With a rich history, diverse range of flavors, and complexities in production, it has evolved into a delectable treat enjoyed by people of all ages. In this exploration, we will delve into the origins, ingredients, production process, nutritional facts, and popular brands of chocolate ice cream, as well as give an insight into homemade options for this delicious dessert.

History of Chocolate Ice Cream

The history of chocolate ice cream can be traced back to the 17th century, when the Italian aristocrat Antonio Latini first combined chocolate and ice cream. Latini, who served as a steward in the Spanish Viceroy of Naples, is credited with creating a frozen dessert that combined cocoa, sugar, and snow – the precursor to modern chocolate ice cream. This creation was a marriage of two distinct flavors and cultural influences: the delicious taste of chocolate from the New World, and the cool, refreshing texture of Italian gelato.

In the 18th century, the popularity of chocolate ice cream spread to France, where it was served at the Parisian Café Procope, a popular destination for artists and intellectuals of the time such as Voltaire, Benjamin Franklin, and Thomas Jefferson. It was at this café that chocolate ice cream was first made using milk instead of snow, creating a smoother, richer texture. The addition of milk to the recipe marked a significant turning point in the history of chocolate ice cream, as it shifted the focus from a novel, expensive treat enjoyed by the elite, to a more accessible treat that could be enjoyed by the masses.

As ice cream gained popularity in Europe, it eventually made its way across the Atlantic to the American colonies. Thomas Jefferson, who had developed a taste for the dessert while living in France, was among the first to serve ice cream in the United States. As ice cream became increasingly popular in America, so too did the flavor of chocolate ice cream, which competed with vanilla and strawberry for the title of ‘most popular ice cream flavor.’ Ice cream culture continued to grow in the United States, with the rise of ice cream parlors in the 19th century and the invention of new technologies that allowed for mass production and distribution.

The development of the ice cream cone at the 1904 St. Louis World’s Fair further solidified the dessert’s place as a favorite American treat, allowing people to walk around and enjoy their ice cream while on-the-go. As a result, the ice cream industry thrived throughout the 20th century, with the introduction of new, innovative chocolate ice cream flavors and novelty ice cream products. The availability of pre-packaged ice cream in supermarkets also contributed to the popularization of this delicious dessert, making it a staple in households around the world.

Chocolate ice cream has evolved in recent years to adapt to changing tastes and consumer preferences, with new artisanal chocolate ice cream brands prioritizing high-quality ingredients and imaginative flavor combinations. The growth of the global ice cream market has brought this delicious dessert to new parts of the world, where it continues to enchant people of all ages and backgrounds. The rich and indulgent taste of chocolate ice cream remains a testament to this culinary icon that has delighted generations of ice cream lovers across the globe.

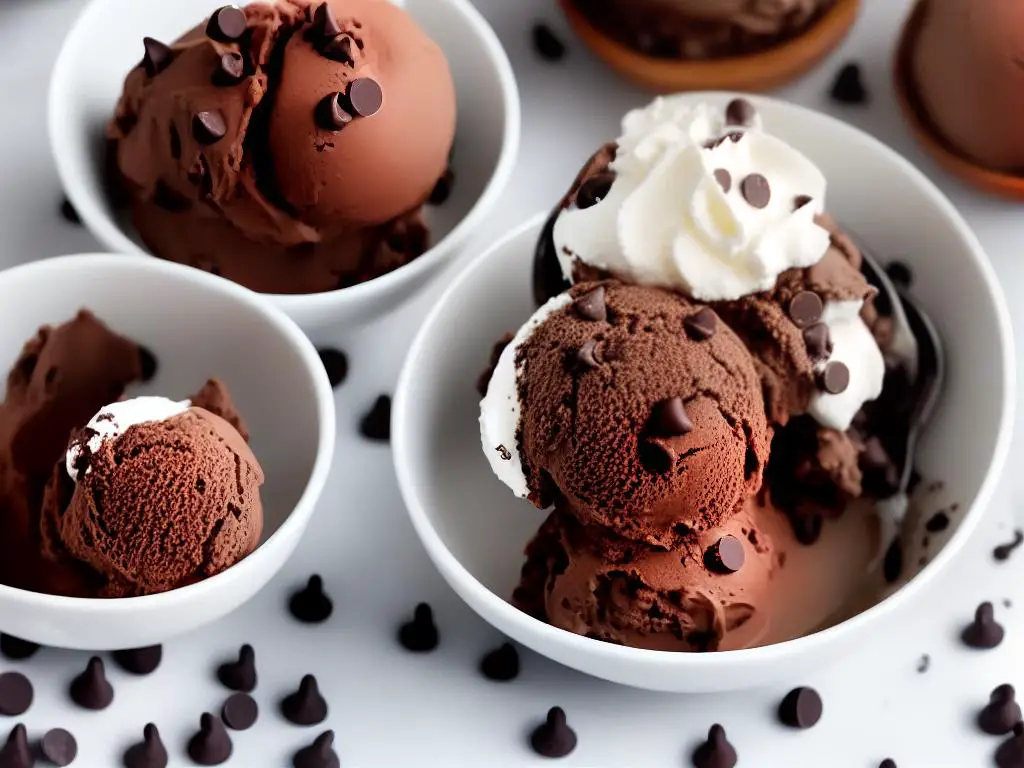
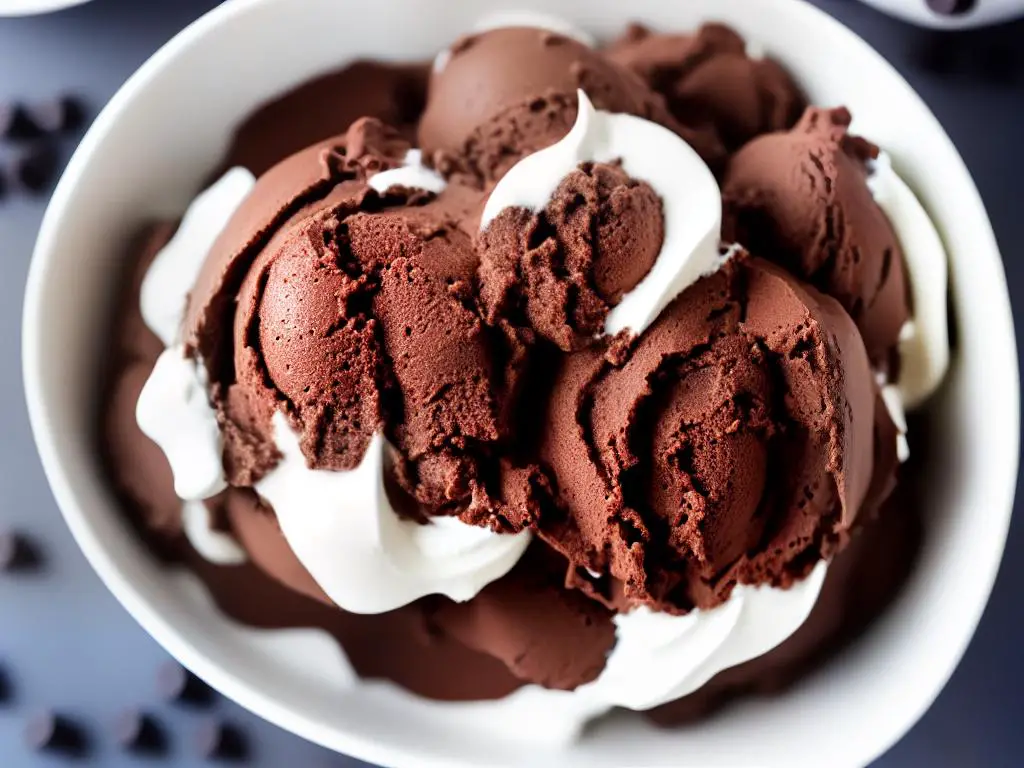
A bowl of chocolate ice cream topped with chocolate chips and whipped cream on a white background.

Ingredients and Flavors

This delightful frozen dessert, enjoyed by both children and adults, is made using key ingredients such as milk, cream, sugar, and cocoa powder or chocolate. The type of chocolate used can vary depending on the desired flavor, with options like dark, milk, or white chocolate. Each type of chocolate offers a distinct taste, with dark chocolate providing a rich and bitter flavor, milk chocolate giving a creamy and sweet experience, and white chocolate delivering a smooth and light taste to the ice cream.

In addition to the chocolate, other ingredients may be added to enhance the flavor and texture of the ice cream. One popular addition is vanilla, as it complements the chocolate taste and adds depth to the overall flavor. Furthermore, some recipes also call for the use of eggs or egg yolks. These not only help to create a custard-like base for the ice cream but also give it a richer and creamier texture. The choice of sweeteners may also vary, with some opting for granulated sugar, while others may use alternative sweeteners such as honey, maple syrup, or corn syrup.

There are numerous variations of chocolate ice cream that incorporate different mix-ins, such as nuts and fruits. For example, adding chopped almonds, pecans, or hazelnuts can give the ice cream a delightful crunch and nutty flavor. Similarly, incorporating dried fruits like cherries, raisins, or cranberries can create a unique flavor combination and added texture. Alternatively, adding pieces of cookies, brownies, or chocolate chips can also elevate the ice cream to new heights, making it even more indulgent and delicious.

Some chocolate ice cream recipes utilize different flavor combinations or techniques to create a distinct taste. For example, the use of spices like cinnamon, nutmeg, or chili powder can add an interesting kick to the chocolate flavor. Some may also experiment with incorporating coffee or liqueurs such as rum or Irish cream for a more sophisticated, adult-friendly taste. Another innovative variation is the use of unconventional ingredients like avocado or coconut milk, which can create a dairy-free and vegan-friendly chocolate ice cream option.

Chocolate ice cream is a popular frozen dessert that combines the rich flavors of chocolate and cream. It is made by blending milk, cream, sugar, and cocoa powder, and then freezing and churning the mixture to create a smooth and creamy texture. Chocolate ice cream is beloved by many for its indulgent taste and can be enjoyed in a variety of forms, such as in a cone, a cup, or even in a sundae with delicious toppings.

A bowl of chocolate ice cream with chocolate chips and whipped cream on top.

Production Process

An alternative to traditional chocolate ice cream is chocolate frozen yogurt. Made with yogurt instead of milk and cream, it is a lower-fat option that offers the same delicious chocolate flavor. The tangy taste of yogurt gives frozen yogurt a distinctive, lighter texture than ice cream, making it a unique and refreshing dessert choice. As with ice cream, there can be various mix-ins added to frozen yogurt, opening up the possibilities for an assortment of flavor combinations and customizations to enjoy while savoring this frozen treat.

Preparation of Base Mixture

The first step in making chocolate ice cream involves preparing the base mixture. The base typically consists of milk, cream, and sugar. The milk and cream are heated to a specific temperature, which helps in dissolving the sugar completely. Next, cocoa powder or melted chocolate is added to the mixture, giving it the signature chocolate flavor. It is essential to blend the ingredients well to ensure a smooth and consistent texture. Some recipes might also include egg yolks, which are whisked and slowly incorporated into the base mixture for a richer and creamier texture.

Freezing and Churning

Once the base mixture is prepared, it is important to allow it to cool down before the freezing process. The mixture is usually refrigerated for a few hours, or even better, overnight. This step helps the flavors meld together and ensures that the mixture is cold enough for churning. Churning is the process of adding air and breaking up ice crystals, which is crucial for creating the desired creamy and smooth texture in the ice cream.

After the base mixture has been adequately chilled, it is poured into an ice cream maker or churner. As the mixture freezes, the machine continuously churns and aerates the ice cream. The churning process can take anywhere from 20 to 45 minutes, depending on the ice cream maker being used. Watch closely for the mixture to reach a soft-serve consistency, which indicates that the churning process is complete.

Final Freezing and Add-ins

Once the churning process is finished, the chocolate ice cream is transferred to an airtight container for the final freezing stage. The ice cream is typically stored in a freezer for several hours or overnight to reach a firm consistency. The final product should have a rich chocolate flavor, with a smooth and creamy texture.

In addition to the essential steps described above, various add-ins or flavor enhancers can be incorporated into the chocolate ice cream recipe. Examples include chocolate chips, nuts, marshmallows, or swirls of caramel or fudge. These ingredients should be gently folded into the ice cream during the final moments of churning or after the churning process is complete, just before transferring the ice cream to its final storage container. Experimenting with different flavor combinations and add-ins allows for a myriad of delicious chocolate ice cream creations to enjoy.

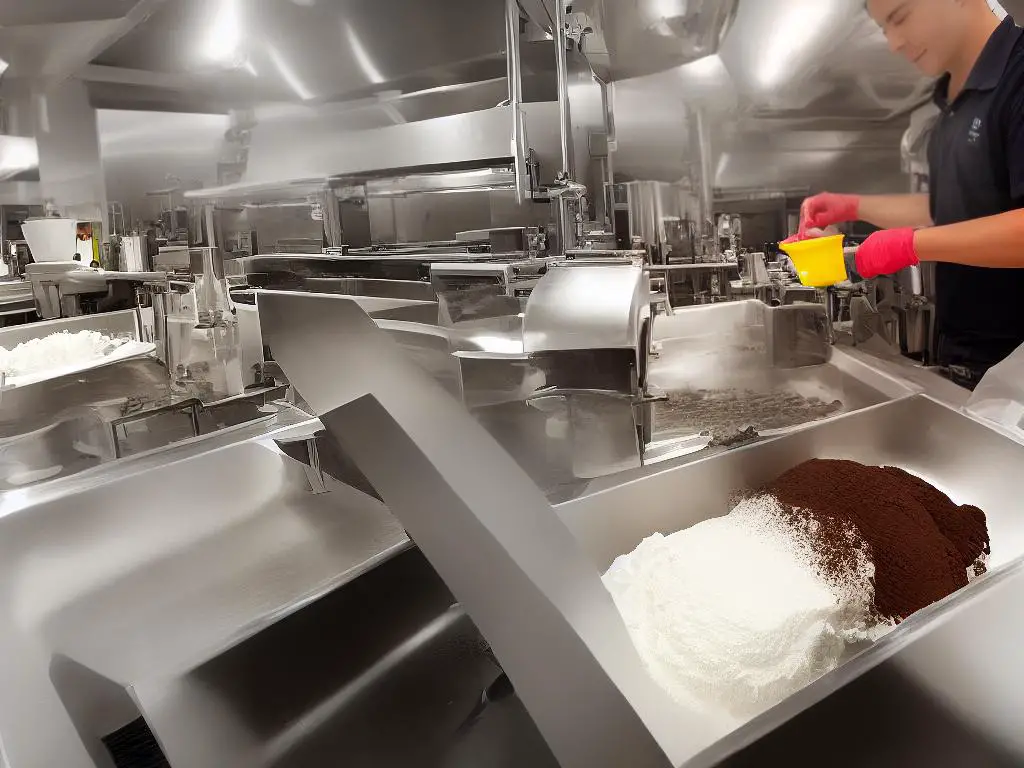
The production process of chocolate ice cream involves several important steps, including the preparation of the base and flavoring, freezing and churning, and the final packaging and presentation.

Nutritional Facts and Health Impact

As a beloved dessert for people of all ages, chocolate ice cream’s nutritional content is essential to consider. One of the main components of its nutritional content is the calorie count. One serving, which is typically around 1/2 cup, contains approximately 150 to 250 calories. This can vary depending on the brand and recipe, with lower calorie options often available. However, it’s important to remember that consuming excess calories can contribute to weight gain. So, it’s best to enjoy the delicious and versatile chocolate ice cream in moderation, taking advantage of the creative add-ins and flavors without compromising your health.

Another important aspect of chocolate ice cream’s nutritional content is its fat content. Most of the fat found in this dessert is saturated fat, which can raise levels of LDL, or "bad," cholesterol in the body. One serving of chocolate ice cream can contain anywhere from 8 to 12 grams of total fat, with around 4 to 6 grams of saturated fat. Because high LDL cholesterol levels can increase the risk of heart disease, it’s recommended to limit saturated fat intake to less than 10% of total caloric intake per day.

Sugar, another key component of chocolate ice cream’s nutritional profile, is also a major concern for many people. One serving of this dessert can have around 15 to 25 grams of sugar, which is equivalent to about 5-9 teaspoons. Consuming too much sugar can lead to several health issues, such as obesity, type 2 diabetes, and tooth decay. Therefore, it’s essential to monitor and limit your sugar intake, regardless of whether it comes from chocolate ice cream or other sources.

In terms of protein, chocolate ice cream typically offers a modest dose, ranging from 2 to 5 grams per serving. While each serving may not contribute significantly to your daily protein needs, it can still be considered a source of this essential nutrient. Protein is important for maintaining muscle mass, supporting the immune system, and providing energy, among other functions.

Chocolate ice cream, a favorite dessert for many, does contain some healthful components despite its nutritional drawbacks. For example, chocolate has antioxidants known as flavonoids, which may help protect the body against the damaging effects of free radicals. Additionally, the milk in ice cream provides calcium, essential for strong bones and teeth, and vitamin D, which aids in calcium absorption. However, these nutrients should not be used as justification for overindulging in chocolate ice cream. Enjoy this treat in moderation as part of a well-rounded, nutritious diet.

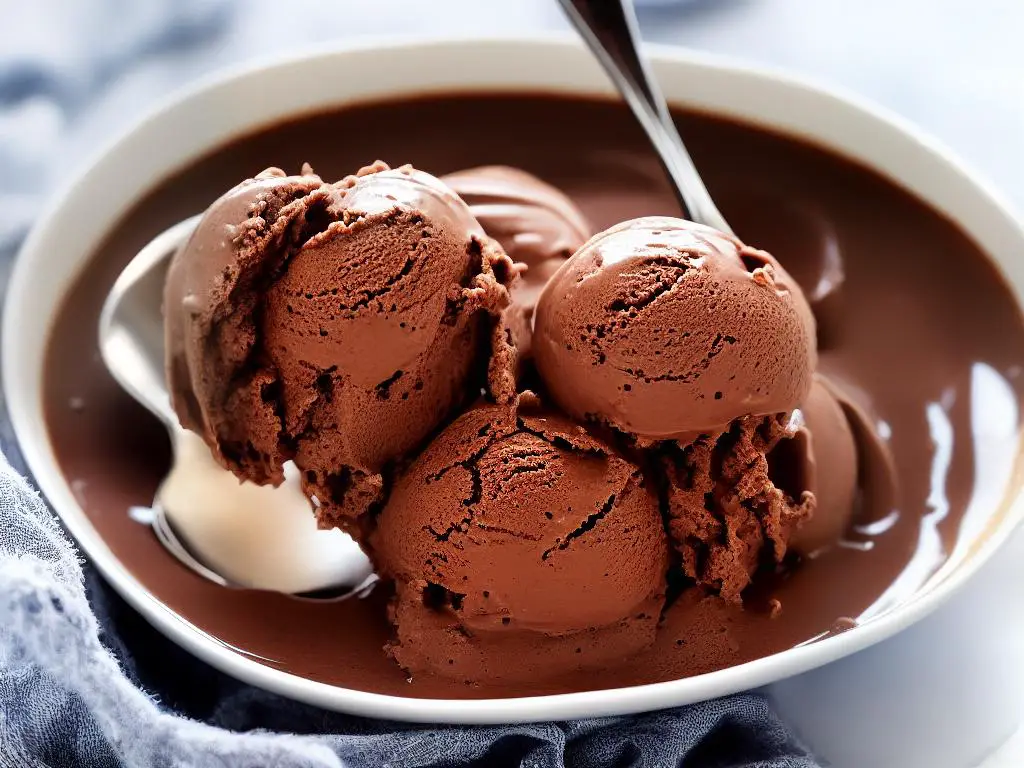
A bowl of chocolate ice cream with a spoon on top.

Popular Brands and Homemade Options

A perfect example of irresistible chocolate ice cream treats is the widely loved American brand, Ben & Jerry’s, which offers a range of delectable chocolate ice cream flavors. One of their popular flavors is ‘Chocolate Fudge Brownie,’ a delightful mix of rich chocolate ice cream with chunks of fudgy brownies incorporated. This flavor is a favorite among chocolate lovers due to its intense chocolate taste and satisfying mix of textures.

Another unique and mouth-watering flavor offered by Ben & Jerry’s is ‘Chocolate Therapy,’ which blends chocolate ice cream with chocolate cookies and swirls of chocolate pudding. Fans of chocolaty indulgence find this concoction absolutely satisfying and enjoyable.

Another popular brand, Häagen-Dazs, is known for its velvety-smooth chocolate ice cream.

Their “Chocolate Chocolate Chip” ice cream combines a rich, creamy chocolate base with numerous chocolate chips dispersed throughout.

The result is a well-balanced chocolate flavor that has an equal amount of creaminess and chocolate intensity.

Häagen-Dazs also offers a “Midnight Cookies & Cream” flavor, which mixes deep, dark chocolate ice cream with generous chunks of chocolate cookie.

This combination creates a delightful contrast between the smooth chocolate base and the crunchy cookies.

Breyers is another American favorite when it comes to chocolate ice cream.

One of their standout flavors is the classic “Chocolate,” which features a simpler, more straightforward chocolate profile compared to the more indulgent flavors offered by Ben & Jerry’s and Häagen-Dazs.

Breyers chocolate ice cream is known for its light and airy texture due to their incorporation of more air in the churning process.

This results in a less dense but still satisfying chocolate ice cream experience.

Moreover, Breyers places a strong emphasis on using natural ingredients, which means that their ice cream contains no artificial flavors or colors.

For those who prefer a more hands-on approach, making homemade chocolate ice cream is an excellent way to tailor the flavor and texture to personal preferences.

Classic recipes typically call for a combination of heavy cream, milk, sugar, chocolate (either cocoa powder or melted chocolate), and a touch of vanilla extract.

By controlling the ratio of cream to milk, the final product can be adjusted to have a desired level of richness.

Additionally, when making chocolate ice cream from scratch, the type and quality of chocolate used can dramatically influence the end result.

Aside from experimenting with ingredients, homemade chocolate ice cream can be taken to the next level by incorporating various mix-ins and toppings.

Popular options include brownie chunks, chocolate chips, cookie dough pieces, or even swirls of caramel or fudge.

Another creative idea is to infuse the ice cream base with unique flavors, such as chili, spices, or herbs, to create an unexpected twist on the classic chocolate ice cream.

The possibilities are endless when it comes to making a one-of-a-kind batch of frozen deliciousness.

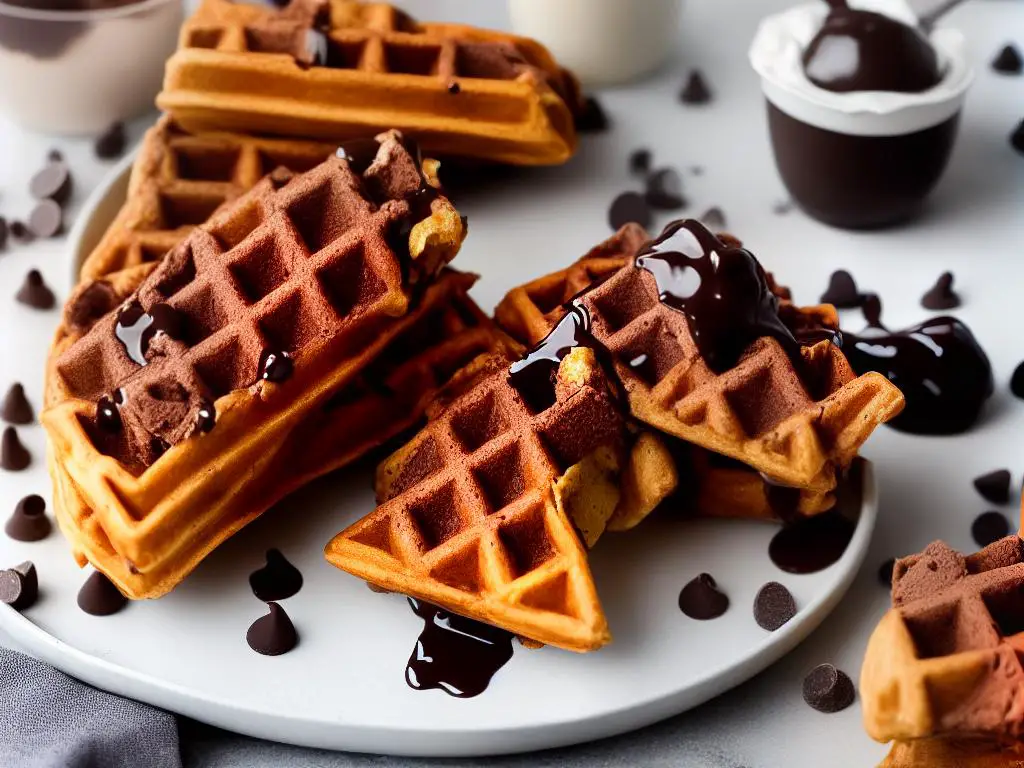
A scoop of chocolate ice cream in a waffle cone with chocolate chips and chocolate sauce drizzled on top.

Through this exploration, we have discovered the fascinating history behind chocolate ice cream, the various ingredients and flavors that contribute to its delightful taste, and the meticulous processes involved in its production. We also discussed the nutritional aspects of this dessert and the impact it has on our health, and took a look at popular brands along with homemade options. The next time you enjoy a scoop of chocolate ice cream, take a moment to appreciate the incredible journey it has undergone to become the mouth-watering dessert that we all know and love today.

Categories
Food

Chocolate Dessert Ideas

Indulging in a luscious chocolate dessert is a surefire way to satisfy any sweet tooth, and with a wide variety of chocolate creations available, there’s something to please every palate. From rich and velvety chocolate fondues to the satisfying crunch of chocolate chip cookies, this delightful and delectable list showcases some of the very best chocolate dessert ideas that are perfect for any occasion. Whether you’re an avid baker or just want to enjoy a chocolatey treat at the end of a long day, these desserts will leave you and your taste buds feeling absolutely blissful.

Chocolate Fondue

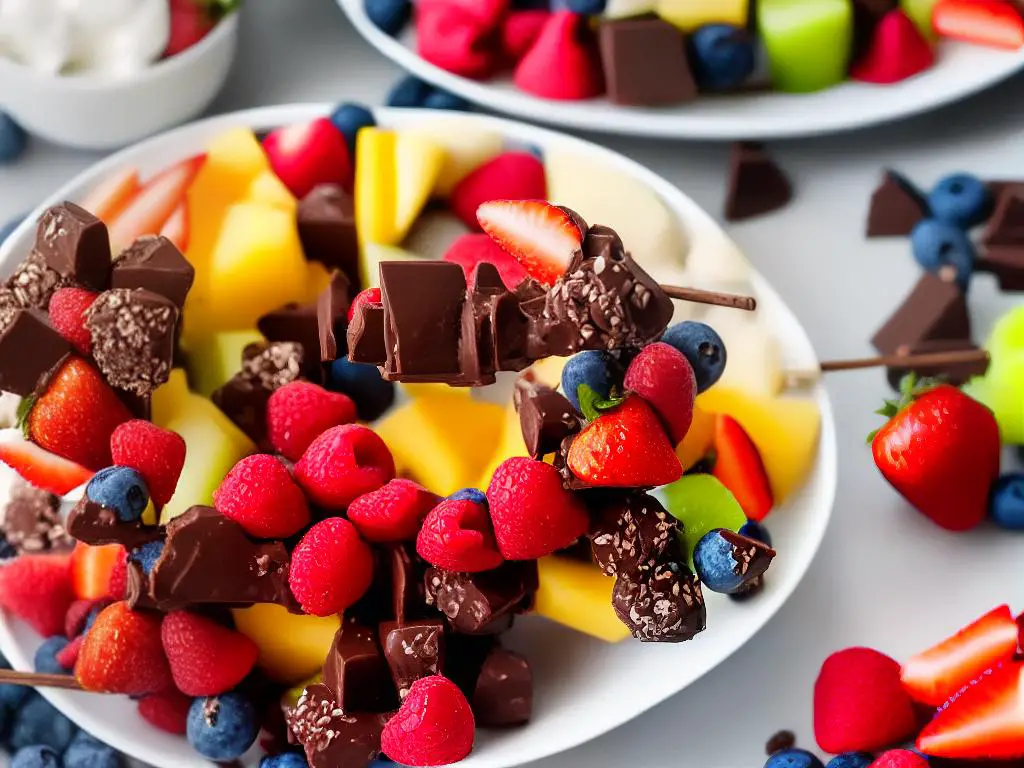
Did you know that you can transform a simple dessert affair into an ultra-decadent experience with chocolate fondue? This rich and smooth melted chocolate sauce takes your dessert game up a notch, as it provides the perfect medium for dipping your favorite fruits, marshmallows, and other sweet delights. Plus, it’s a great group dessert, allowing everyone to gather around and dip their desired treats into the velvety chocolate.Feeling creative? You can elevate this dessert even further by adding a splash of liqueur for an extra kick. Imagine orange liqueur-infused chocolate fondue enveloping a bite of juicy strawberry or the combination of coffee liqueur with a marshmallow cloud. The possibilities are truly endless!Now, let’s talk about the type of chocolate you use. While milk chocolate is a classic choice, don’t hesitate in exploring the realms of dark and white chocolate. Love the intensity of dark chocolate? It adds a sophisticated depth to your fondue, ensuring that your guests savor every. single. bite. On the other hand, white chocolate offers a creamy and delicate alternative that pairs brilliantly with fruits like raspberries and blueberries.Another perk of the chocolate fondue experience? You get to dress up your dessert table! Set up a chocolate fondue station complete with bowls of different chocolates, arranged aesthetically. Alongside the chocolates, array the dipping options. Think fruit kebabs, pretzel sticks, cookies, and more! And, of course, provide skewers or fondue forks for your guests to dip with ease.So why not treat yourself and your guests to a luxurious chocolate fondue dessert experience at your next gathering? It’s a surefire way to make everyone feel like royalty while enjoying the simple pleasure of bonding over a shared love for chocolate.

A bowl of melted chocolate with an assortment of fruits, cookies, and pretzels on skewers surrounding it.

Molten Lava Cake

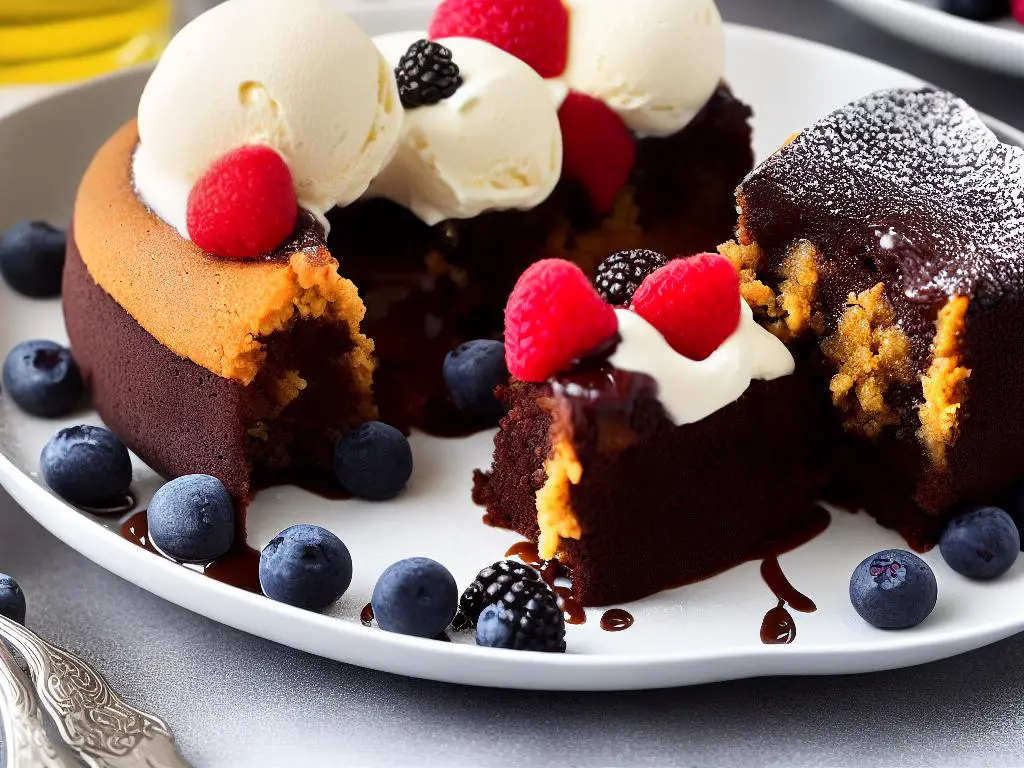
Get ready to experience the irresistible delight that is Molten Lava Cake! This warm and gooey chocolate-infused cake has won the hearts of dessert lovers everywhere, making it a popular choice among sweet treat enthusiasts.

As you cut into its fluffy exterior, be prepared for the rich, molten chocolate center to ooze out and create an irresistible puddle of chocolaty goodness.

There’s just something magical about this unique combination of textures and flavors that can only be found in a molten lava cake. The outer layer is a soft yet ever-so-slightly crispy sponge cake, while the inside reveals a luscious, velvety chocolate ganache – a true match made in dessert heaven.

But wait, it gets even better! Pair your molten lava cake with a scoop of creamy vanilla ice cream for an incredible contrast in temperatures that’ll make every bite even more memorable. The coldness of the ice cream works incredibly well as it slowly melts on top of the warm cake, adding another layer of creamy indulgence to this already exquisite treat.

And let’s not forget the finishing touches to make this dessert even more tantalizing – a garnish of plump, fresh berries will add a pop of vibrant color and natural sweetness to your plate. Choose your favorite combination of raspberries, strawberries, blueberries, or blackberries to complete this flawless dish.

Next time you find yourself craving a sumptuous chocolate dessert, don’t hesitate to give molten lava cake a try. This heavenly creation is guaranteed to satisfy your taste buds and leave you with a smile on your face. Prepare to fall in love with every single spoonful!

Picture of a slice of molten lava cake with a runny chocolate center, topped with vanilla ice cream and fresh berries

Chocolate Brownies

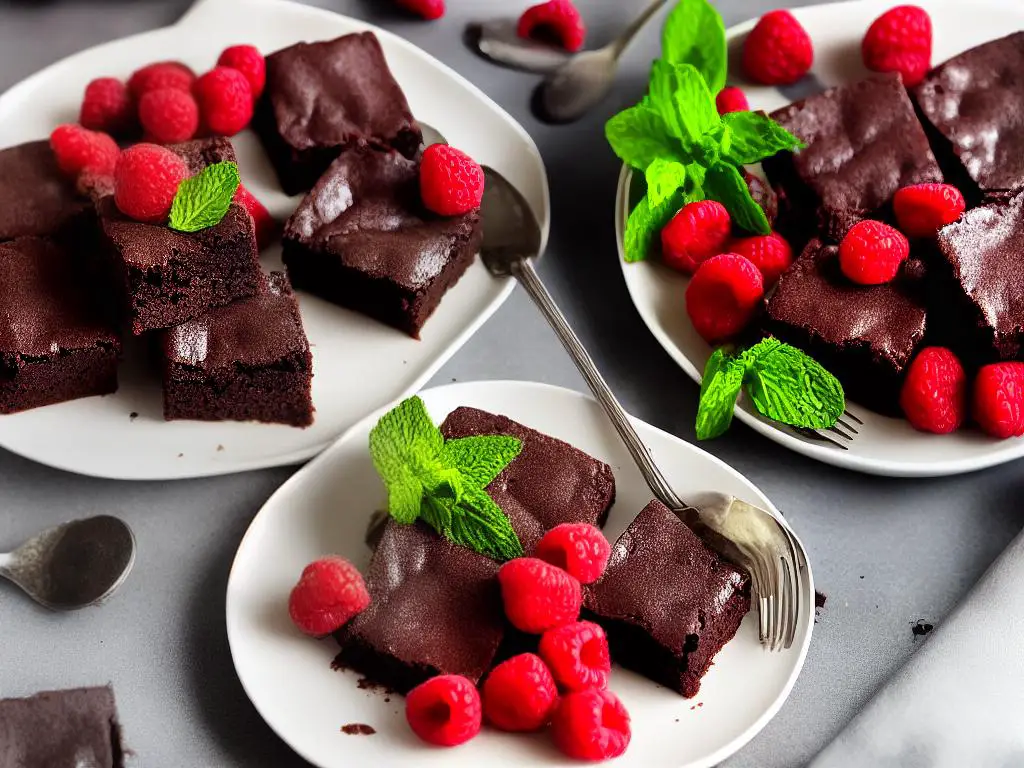
When it comes to satisfying your sweet tooth and celebrating life’s special moments, nothing quite hits the spot like a delicious, gooey, and indulgent chocolate brownie. This classic dessert has captured the hearts of chocolate lovers worldwide, tempting us with its dense and fudgy texture and rich cocoa flavor. Whether you’re baking for friends, family, or simply treating yourself, chocolate brownies are a surefire way to make any occasion a touch sweeter.A chocolate brownie’s versatility is part of its charm, as it can be customized to suit your personal preferences or the tastes of your guests. Plain and simple brownies are always a crowd-pleaser, but you can easily elevate them by adding a mix-in of your choice. Nuts, like walnuts or pecans, provide extra crunch and a delightful contrast to the chewy texture of the brownie. For the ultimate chocolate experience, consider sprinkling in chocolate chips or even chunks of your favorite chocolate bar. This added layer of decadence is bound to impress and leave everyone craving seconds.For those looking for an extraordinary twist on the traditional chocolate brownie, why not try swirling cream cheese into the batter? This simple trick creates a stunning marbled effect, as well as adding a rich and creamy contrast to the deep cocoa flavor of the brownies. No one will be able to resist a slice of this mouthwatering masterpiece!If you’re hosting a gathering and want to provide a more sophisticated touch to your dessert table, brownie bites make for a perfect option. These mini versions of the traditional brownie are not only adorable but also easier to serve and enjoy. Paired with fresh fruit or a dollop of whipped cream, these small treats are sure to be the talk of the party.Without a doubt, chocolate brownies are a beloved sweet treat that continues to hold a special place in the hearts and stomachs of dessert enthusiasts everywhere. With endless possibilities at your fingertips, why not whip up a batch of these scrumptious goodies and remind yourself, and those around you, why this classic dessert has remained a favorite for generations?

A picture of a plate of chocolate brownies with a drizzle of chocolate syrup on top, surrounded by fresh raspberries and mint leaves.

Chocolate Truffles

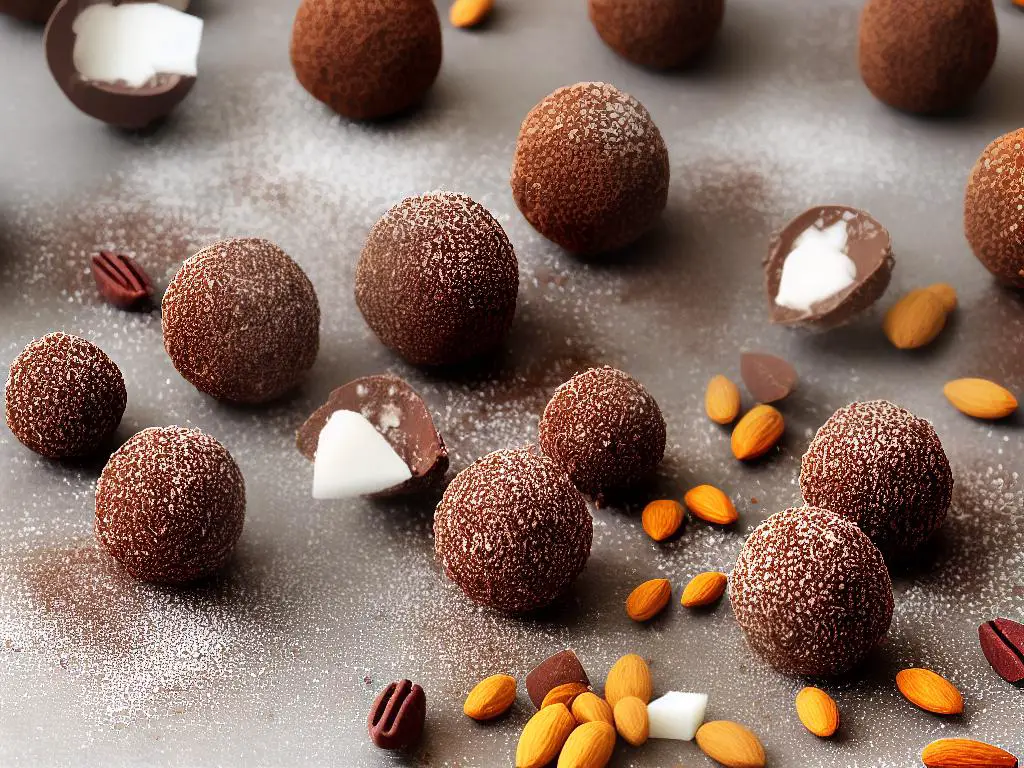
If the thought of biting into a rich, velvety smooth chocolate treat sends your taste buds into overdrive, then you’ll fall head over heels for chocolate truffles.Crafting these exquisite treats consists of a blend of chocolate, luscious cream, and butter.The beauty of chocolate truffles is that they can be customized to accentuate different flavors, opening the door to a world of gastronomic creativity.On the more experimental side, chocolate truffles can also be spiked with a dash of liqueur or infused with spices such as cinnamon or chili, introducing a sensuous dance of heat and sweet to the palate.From rolling the truffles in crushed nuts or dried fruit to coating them in shredded coconut or powdered sugar, the sky’s the limit when it comes to dressing up these delightful treats.Not only will these lavish chocolate truffles have you swooning in chocolatey bliss, but they also make for a fun, culinary adventure.

An image of various chocolate truffles dusted with cocoa powder and decorated with nuts and coconut shavings.

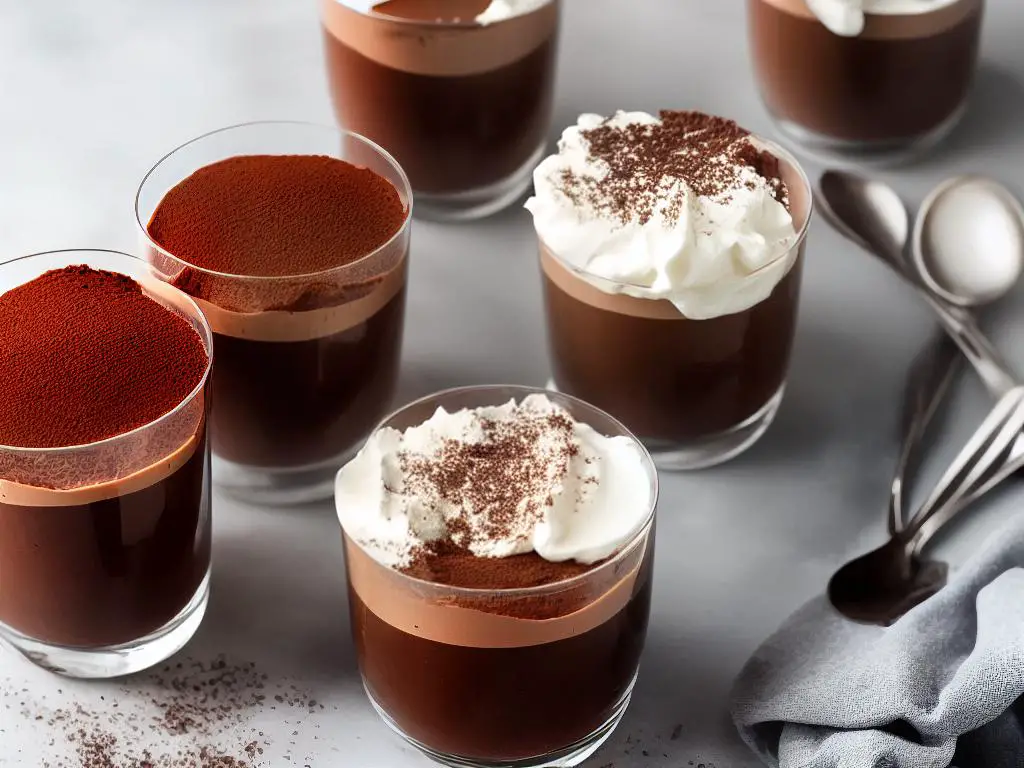
Chocolate Mousse

Looking for that perfect chocolate dessert that will leave your guests craving for more? Well, look no further! Chocolate Mousse is the ultimate choice for satisfying your chocolate cravings. This light and airy dessert will transport you to a heavenly chocolate paradise with each spoonful.

Chocolate Mousse is the result of a beautiful union between whipped cream and a rich chocolate mixture, ensuring a smooth and velvety texture that simply melts in your mouth. The preparation process is rather simple, making it a favorite choice for home cooks and professionals alike.

The base of the mousse is usually an indulgent chocolate ganache, made by combining melted chocolate and heavy cream. To achieve that airy and light texture, the whipped cream is carefully folded into the ganache. This process traps air bubbles in the mixture, making the final product irresistibly fluffy.

One of the fantastic things about Chocolate Mousse is its versatility. You can tailor the richness and intensity of the chocolate flavor by choosing between dark, milk, or white chocolate. And why stop at just one? Get adventurous and experiment with different percentages of cocoa or combine different types of chocolate for a unique and tantalizing flavor.

Serving Chocolate Mousse individually in elegant glasses not only makes your dessert table look sophisticated, but it also ensures that everyone gets their share. Take your presentation to the next level by artfully garnishing the mousse with additional whipped cream, delicate chocolate shavings, or even fresh fruit like raspberries or strawberries to add a refreshing contrast.

Apart from its simplicity and elegance, Chocolate Mousse can also be prepared in advance – making it an ideal dessert option for dinner parties or special occasions. Just cover the glasses with plastic wrap and refrigerate until ready to serve. The anticipation will only make your guests more eager to dig into the divine chocolate bliss that awaits them.

Whether you’re a committed chocoholic or someone who enjoys the occasional chocolate treat, this Chocolate Mousse is bound to leave a lasting impression. Just one spoonful, and you’ll find yourself floating through a cloud of chocolate heaven – with no sign of that guilt that usually accompanies indulgent desserts. So go ahead and embrace the decadence – you’ll be glad you did!

A delicious looking dessert of fluffy chocolate mousse served in an elegant glass with a dollop of whipped cream and chocolate shavings on top.

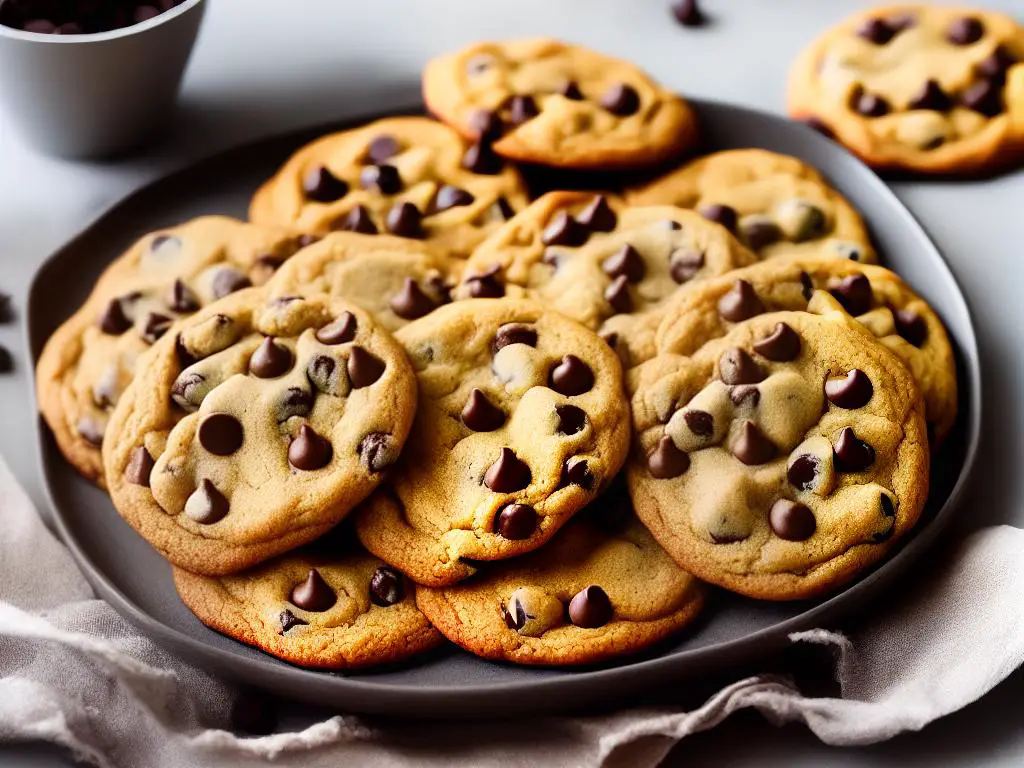
Chocolate Chip Cookies

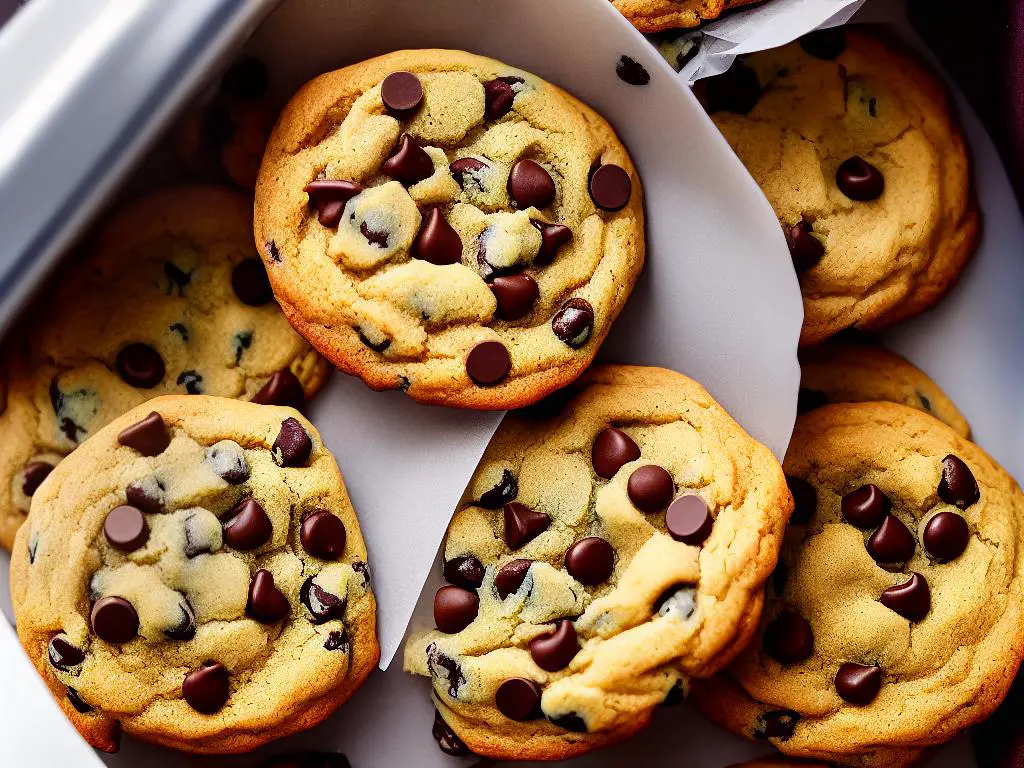
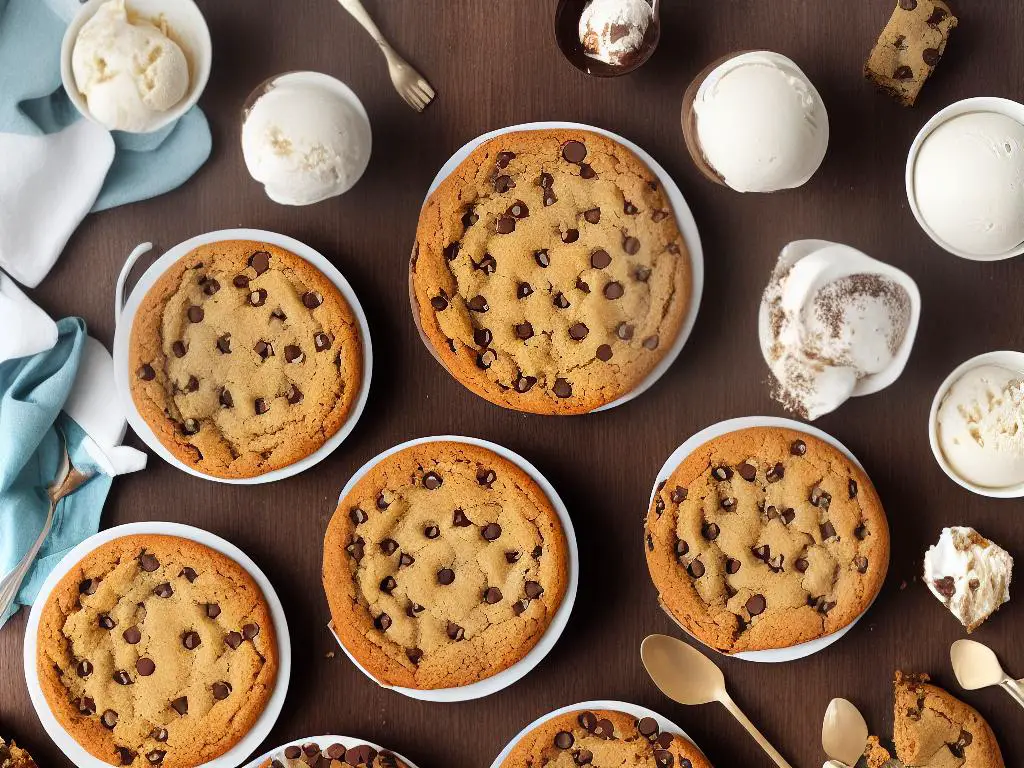
There’s something undeniably satisfying about biting into a warm, gooey chocolate chip cookie. A timeless treat loved by people of all ages, chocolate chip cookies have remained a favorite over the years for their perfect combination of vanilla-scented cookie dough and melty chocolate chips.

The beauty of these cookies lies in their simplicity—the basic recipe requires only a handful of ingredients, making it easy to whip up a batch whenever the mood strikes.

The versatility of chocolate chip cookies is another reason why they’ve earned a spot in the hearts and ovens of millions of bakers around the world. Have a craving for crisp, crunchy cookies that crumble with every bite? Or maybe you prefer them soft and chewy, pulling apart in a satisfyingly gooey mess? Whatever your preference, there’s a bake time and temperature for you. Just a few extra minutes on the timer (or a slightly higher oven temperature) could mean the difference between a soft, tender bite and a crispy, golden edge.

But let’s not forget the countless ways you can customize your chocolate chip cookies. While many consider the classic combination of cookie dough and chocolate chips to be untouchable, others take pleasure in experimenting with various mix-ins. From nuts like walnuts, pecans, or almonds to the comforting texture and taste of oatmeal, the flavors of your cookies are only limited by your imagination. And who says you need to stick to chocolate chips? Whether you prefer milk chocolate, dark chocolate, or white chocolate, there’s a variety of chip options to tickle your taste buds.

We can’t talk about customizing chocolate chip cookies without mentioning the endless possibilities of dried fruit. Plump, juicy raisins or tangy dried cranberries can offer a welcome contrast to the rich chocolate in every bite. Don’t be afraid to get creative and throw in a combination of mix-ins; you never know when you might stumble upon the ultimate flavor pairing.

The next time you find yourself in the mood for a chocolatey treat, let the irresistible aroma of freshly baked chocolate chip cookies fill your kitchen and remember—the only thing better than enjoying a batch of these timeless goodies is sharing them with the people you love. So go on, customize as you see fit, and don’t forget to save one for yourself.

A picture of a chocolate chip cookie with chunks of chocolate and a golden, slightly crunchy exterior

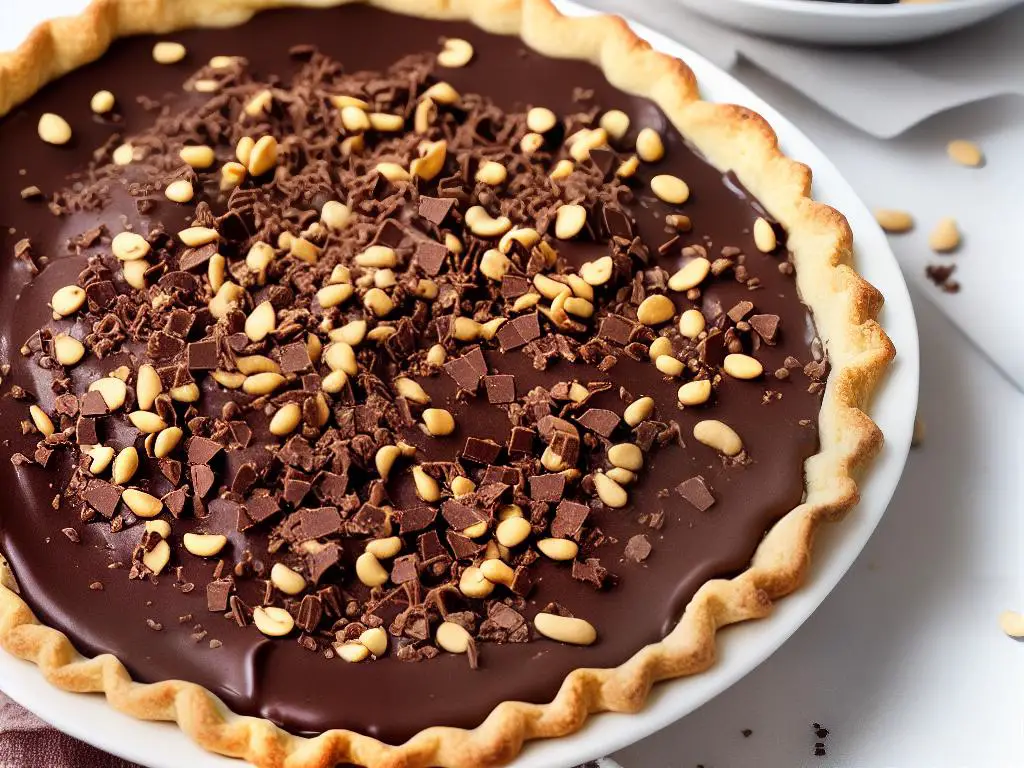
Chocolate Peanut Butter Pie

Are you a fan of the heavenly duo that is chocolate and peanut butter? Look no further, because Chocolate Peanut Butter Pie has your cravings covered! This mouth-watering dessert is the stuff of dreams for anyone who can’t get enough of that irresistible combo, and it’s sure to be a show-stopper at your next gathering.First up is the chocolate cookie crust – made from crushed chocolate cookies and melted butter, this base is crunchy, chocolatey, and the perfect foundation for what’s to come. Pressed into the bottom of a pie dish, the crust is baked briefly, just long enough to set and give it a slightly crispy finish. Already, you know this dessert is going to be something special.The star of the show is, without a doubt, the creamy peanut butter filling. Imagine a luxuriously smooth and velvety mixture of peanut butter, cream cheese, powdered sugar, and whipped cream – this is what dreams are made of. This rich yet airy peanut butter heaven is spooned onto the cooled crust and smoothed out, creating a cloud-like layer that has everyone reaching for seconds.But wait, there’s more! The pie isn’t complete without its crowning glory – a rich chocolate ganache topping. Silky chocolate melds with heavy cream to create a glossy and decadent finish that contrasts beautifully with the peanut butter filling. The final touch? A sprinkle of chopped peanuts or crushed cookies, just for some added texture and pizzazz.Now for the hard part: waiting for it all to set. The Chocolate Peanut Butter Pie needs some chill time in the refrigerator, allowing the flavors to meld and the filling to firm up. It’s a test of patience, but the reward is absolutely worth it. So go ahead, take a bite into decadence, and enjoy the harmony of chocolate and peanut butter in this show-stopping dessert.

A pie with a chocolate cookie crust, creamy peanut butter filling and chocolate ganache topping, sprinkled with chopped peanuts.

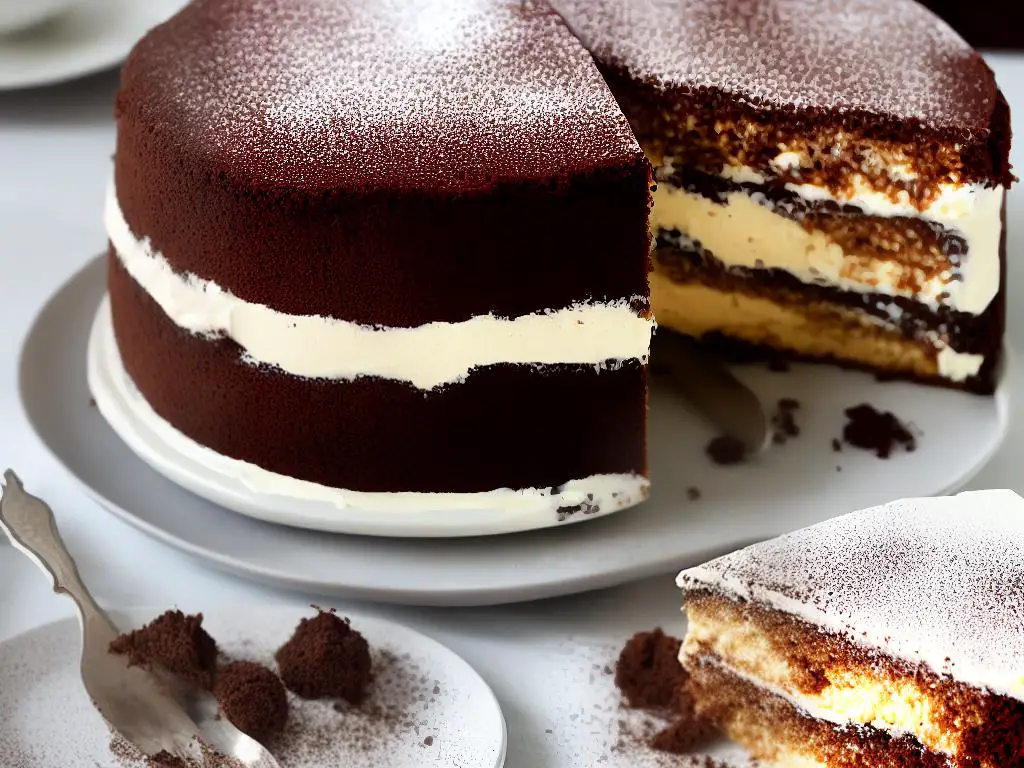
Chocolate Tiramisu

Imagine digging into a sumptuous dessert that combines the velvety smoothness of mascarpone cheese with the delightful crunch of cocoa-dusted ladyfingers, and an unmistakable rich chocolate taste. The Chocolate Tiramisu is a scrumptious twist on the classic Italian dessert that brings together all these delectable flavors and textures, making it an exquisite treat for special occasions.

This luxurious dessert begins with a layer of crisp ladyfingers that are generously dusted with cocoa. These delicate, slightly sweet cookies act as the irresistible base, soaking up the delectable flavors from the luscious chocolate mascarpone mixture that is carefully spread on top.

Next, let’s talk about this heavenly mascarpone mixture. A blend of creamy mascarpone cheese, espresso, and high-quality melted chocolate, this rich and luxurious concoction truly elevates the dessert and makes it stand out as a truly exceptional chocolate indulgence. The subtle hint of espresso adds depth to the chocolate taste, ensuring that each bite is a melange of zesty and smooth flavors.

Finally, the dessert is finished off with a final light dusting of cocoa powder, gracing the top with an almost velvety appearance. This elegant touch makes the Chocolate Tiramisu an exquisite masterpiece that is visually appealing, perfect for serving at a dinner party or celebrating a special occasion.

As you savor each luscious layer of the Chocolate Tiramisu, it’s hard not to be captivated by the divine flavors and textures that come together in this delightful dessert. Trust us – your taste buds will thank you for introducing them to this heavenly chocolate treat. So go ahead and give this incredible chocolate spin on the legendary Italian dessert a try; it is bound to become a favorite among your family and friends!

A delicious Tiramisu cake with multiple intricate layers of cream, dusted with cocoa powder and garnished with chocolate shavings on top.

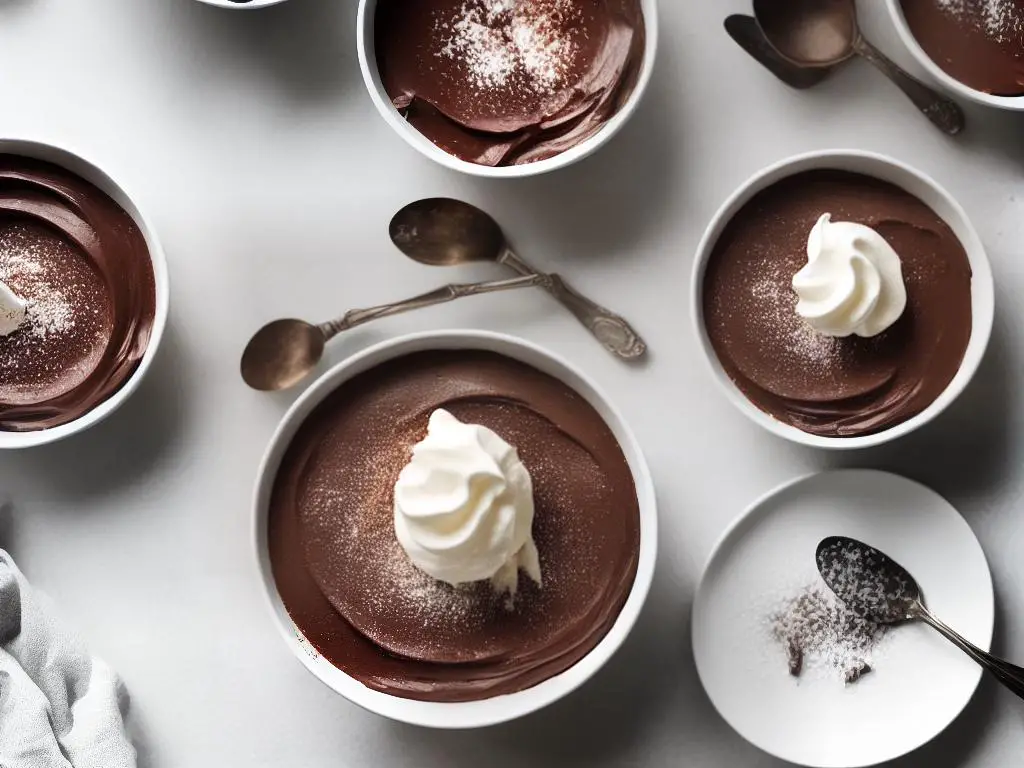
Chocolate Pudding

Chocolate pudding, a velvety and luscious dessert that has been satisfying sweet cravings for centuries, is a true classic in the world of sweet treats.Crafted from a delectable blend of milk, sugar, cocoa powder, and a thickening agent, chocolate pudding presents the perfect balance of richness and sweetness.Served either warm or cold, chocolate pudding is a versatile dessert that can be enjoyed in various ways.To elevate the chocolate pudding experience, consider garnishing your creation with an array of delightful toppings.Chocolate pudding is the perfect treat for all ages and the ideal dessert for any occasion – be it a weeknight family dinner, a potluck with friends, or a romantic date night.

A bowl of chocolate pudding topped with whipped cream and chocolate shavings.

Chocolate-Covered Strawberries

Looking for an easy-to-make dessert that will impress your friends and family? Look no further than the mouthwatering combination of chocolate and strawberries! Chocolate-covered strawberries are a perfect choice for those who want a simple yet impressive dessert, and with endless customization, they are sure to please everyone’s taste buds.

Choosing the Strawberries and Chocolate

Start with fresh, ripe strawberries that have been thoroughly washed and dried. It’s essential to make sure the strawberries are fully dry before applying any chocolate, as the water may cause the chocolate to seize.

Now for the fun part – the chocolate! Choose from a variety of chocolate types to match your personal preferences, such as dark chocolate for a rich and bold flavor, or milk chocolate for a smooth and creamy taste. You can even mix it up with white chocolate or try a combination of different chocolates. Just melt your chosen chocolate in a heatproof bowl set over a saucepan of simmering water, or use a microwave at a low power setting with frequent stirring.

Dipping the Strawberries in Chocolate

Once your chocolate is melted and smooth, hold each strawberry by the stem and dip it into the chocolate, making sure to coat it evenly. Gently shake the excess chocolate and place the strawberries on a parchment-lined tray or baking sheet to harden. Be patient and let the chocolate set at room temperature to keep the luscious sheen.

Adding Decorative Touches

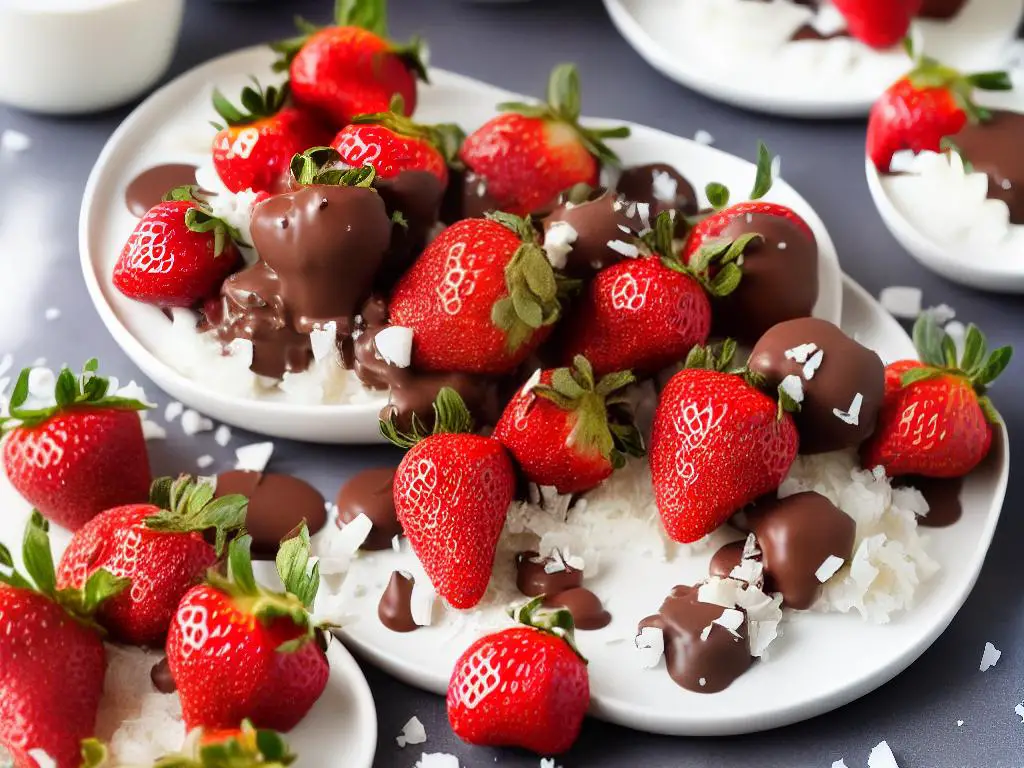
If you want to step up your chocolate-covered strawberries game, add decorative touches to make them look extra fancy. Drizzle them with contrasting chocolate, such as white chocolate over dark chocolate or vice versa, to create an eye-catching pattern. Alternatively, dip the freshly coated strawberries in chopped nuts, shredded coconut, or crushed cookies to add texture and flavor.

Customizing for Special Occasions

These chocolatey delights can become even more festive by customizing them for special occasions. For example, use colored chocolate or add glittery edible decorations for a birthday party. You can even use a piping bag to write messages or draw designs with chocolate, making them personalized and unique.

Conclusion

Chocolate-covered strawberries are not only visually appealing but also taste delightful, making them the ideal dessert to share with your loved ones during a gathering or to indulge by yourself. With so many options to customize and limitless ways to make them your own, chocolate-covered strawberries could become your go-to dessert for any occasion. So grab some strawberries, choose your favorite chocolate, and let your creativity flow!

A picture of chocolate-covered strawberries with varying toppings, such as nuts and coconut flakes, placed on a plate.

As you explore the enticing world of chocolate desserts, you’ll be amazed at the range of textures, flavors, and combinations you can achieve with this versatile ingredient. From effortlessly elegant chocolate truffles to the enticing layers of chocolate tiramisu, these desserts not only taste phenomenal but are sure to impress your friends and family. So, the next time you’re in need of a little indulgence or searching for the perfect dessert to share at a special gathering, consider one of these chocolate masterpieces as your ultimate sweet escape.

Categories
Food

Irresistible Chocolate Covered Strawberries

The delightful world of chocolate-covered strawberries is filled with rich history, luxurious allure, and mouth-watering taste experiences. Known for their romantic connotations and indulgent appeal, these stunningly simple yet elegant delights have captivated taste buds for generations. In this exploration of chocolate-covered strawberries, we will uncover the secrets behind selecting the finest ingredients, mastering the art of melting chocolate, creating show-stopping decorations and presentations, storing these delicacies for ultimate freshness, and introducing unique variations and flavors that promise to enchant all who indulge.

History of Chocolate Covered Strawberries

Chocolate covered strawberries have long been a favorite treat for many, with their delicious combination of sweet chocolate and juicy, ripe strawberries. While it may seem like a simple concept, the origin of this delectable dessert can be traced back to history, when chocolate was first introduced to Europe from South America in the 16th century. Chocolate itself can be traced back even further to the ancient Mayans and Aztecs in Central America, who revered the cacao bean and believed it to have divine properties. Once Europeans discovered chocolate, it quickly became a popular luxury, and it was only a matter of time before people started experimenting with it, pairing it with various other foods to create new and exciting recipes.

The first known instance of strawberries being combined with chocolate likely began in France, where various chocolate shops began experimenting with various fillings for their delicacies. One such establishment, the famous Parisian chocolate shop known as “À la Mère de Famille,” which dates back to 1761, was known for their exceptional chocolate creations, and it is believed that they were one of the first to create chocolate-covered strawberries. The combination of the two flavors proved to be a hit, and the idea quickly spread throughout Europe, and eventually to America.

It wasn’t until the 1960s, however, that chocolate covered strawberries became widely popular, especially in the United States. This popularity is often attributed to Lorraine Lorusso, a sales associate at a gourmet food store in Evanston, Illinois called “Stop and Shop.” Lorusso began dipping fresh strawberries into chocolate that was left over from creating chocolate dipped fruits and introduced the idea to the store’s owner. Together they decided to make them a regular item at the store. Chocolate covered strawberries quickly became a trendy treat and gained popularity as a fancy, yet easy-to-make, dessert.

Chocolate covered strawberries have since become synonymous with luxury and romance. This is perhaps because both chocolate and strawberries have long been associated with love and pleasure. Chocolate contains phenylethylamine, a compound that has been proven to have mood-enhancing properties, while strawberries have long been revered for their heart shape and bright red color. This pairing creates a treat that not only tastes fantastic but also elicits a feeling of indulgence and specialness.

Chocolate covered strawberries have risen to popularity in recent years as a delectable treat and as a staple gift for romantic occasions like Valentine’s Day, anniversaries, and weddings. Chocolatiers and dessert shops offer a delightful variety of chocolate flavors, such as milk, dark, and white chocolate, along with numerous toppings like nuts, coconut flakes, and sprinkles. This enticing blend of flavors and timeless elegance ensures that chocolate covered strawberries continue to impress and delight people everywhere.

A plate of strawberries dipped in chocolate and decorated with various toppings like nuts and sprinkles.

Selecting Quality Ingredients

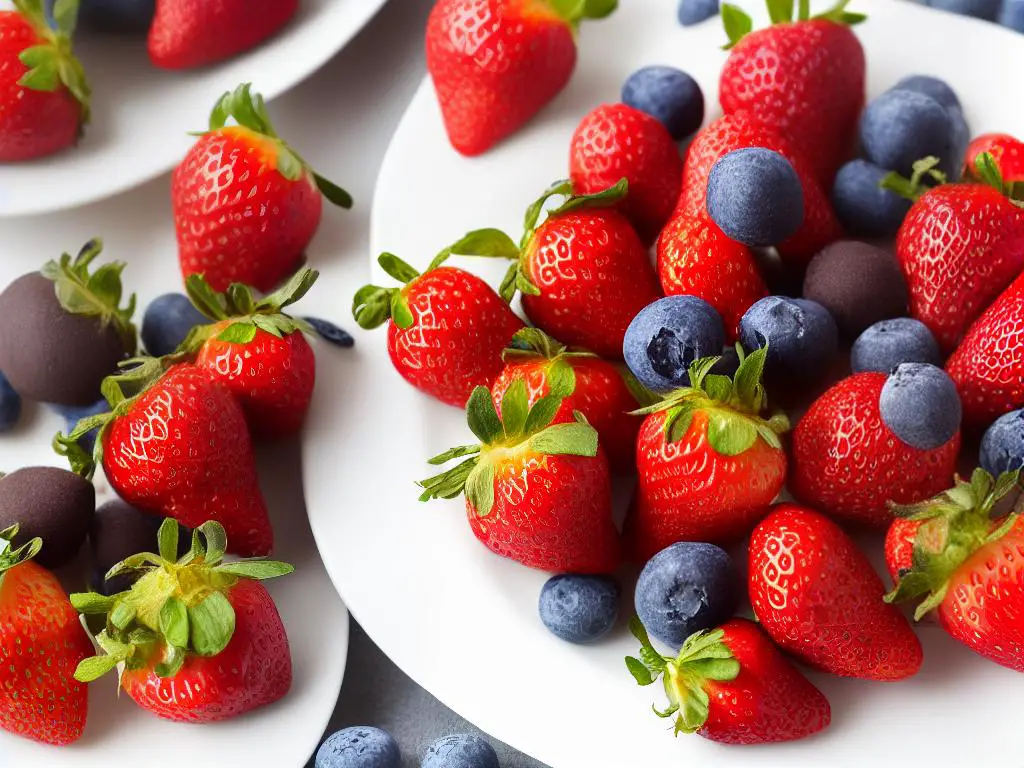
Creating delicious chocolate-covered strawberries involves careful selection of quality ingredients for the optimal flavor combination. The first step is choosing the right strawberries, which should be ripe, plump, bright red, and topped with fresh green leaves. It is essential to avoid overripe or mushy strawberries, as they will not hold up well under a chocolate coating. The second key factor is ensuring that the strawberries are completely dry before dipping them in chocolate. Moisture can cause the chocolate to seize up, resulting in a less than desirable gritty texture.

As for the chocolate, there are many options to consider. Generally, high-quality chocolates with a high cocoa content are preferred, as they melt better and create a smoother coating on the strawberries. You may choose from dark, milk, or white chocolate, depending on personal preference. Dark chocolate has a deep, rich flavor that contrasts well with the sweetness of the strawberries, while milk chocolate is creamier and sweeter. White chocolate, on the other hand, offers a delicate, smooth taste that complements the strawberries.

If you are looking for an even more elevated chocolate-covered strawberry experience, consider opting for organic and fair-trade options. Organic strawberries are grown without the use of harmful pesticides, which may be better for your health and the environment. Fair-trade chocolates, on the other hand, are made with cocoa beans sourced from farmers who are paid a fair price for their labor and products. This practice promotes ethical and sustainable farming practices, supporting better working conditions and protecting the environment.

In addition to ensuring the quality of your ingredients, it is also essential to properly temper the chocolate. This process involves melting and cooling the chocolate to specific temperatures to achieve a glossy, smooth appearance and a desirable snap upon biting into the strawberry. Proper tempering also helps the chocolate set correctly and prevents a dull, streaky appearance. To temper chocolate at home, you can use a double boiler or the microwave method. Both methods involve heating the chocolate to a specific temperature, cooling it slightly, then reheating it to the desired temperature for dipping.

Creating the perfect chocolate-covered strawberries involves a harmonious blend of ripe, juicy strawberries and smooth, high-quality chocolate. Selecting organic and fair-trade options not only elevates the flavor experience but also supports sustainable and ethical farming practices. By paying close attention to detail in the dipping and tempering process, you can craft a delectable treat that is both beautiful and delicious.

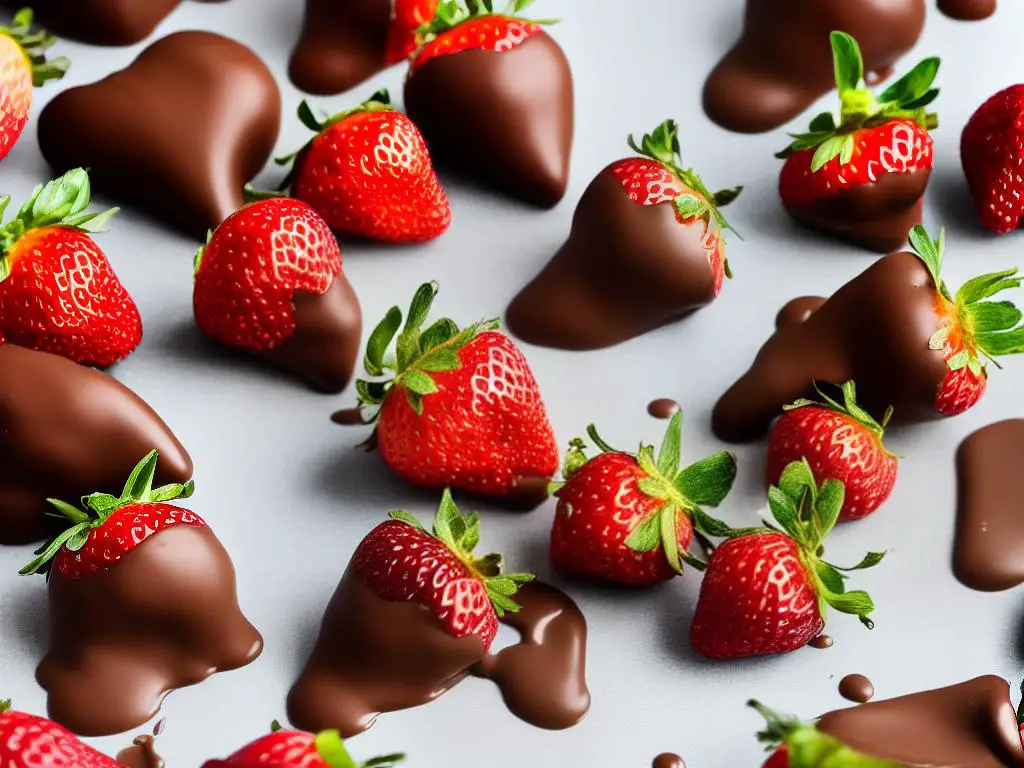
A picture of juicy, ripe strawberries dipped in chocolate

The Art of Melting Chocolate

Mastering the art of melting chocolate is an essential skill when creating chocolate-covered strawberries, as it ensures that the chocolate is smooth and evenly coats the fruit. This skill is particularly important because it contributes to the visual appeal and overall taste sensation of your delightful chocolate-covered treat.

One popular method for melting chocolate is using a double boiler. This method involves placing a heat-safe bowl over a saucepan filled with a few inches of simmering water. The steam from the water gently heats the bowl, allowing the chocolate to melt evenly without scorching. To create perfect chocolate-covered strawberries, be sure to chop the chocolate into small, even-sized pieces and stir frequently to achieve a smooth and glossy finish. Another convenient method for melting chocolate is using a microwave. To achieve the desired consistency, place the chopped chocolate in a microwave-safe bowl and heat it in short intervals, stirring after each round. This helps prevent overheating and maintains an even temperature throughout the melting process, resulting in a consistently smooth and shiny texture. It’s crucial to keep a watchful eye during this process, as overheating the chocolate can cause it to seize, making it difficult to work with and coat the strawberries properly.Tempering chocolate, a process of heating and then cooling chocolate to specific temperatures, plays an important role in achieving chocolate-covered strawberries with a fantastic shine and snap. Properly tempered chocolate sets quickly at room temperature, allowing the chocolate-covered strawberries to maintain their appearance and taste. Un-tempered chocolate, on the other hand, can leave the strawberries with a dull, matte finish or may cause them to develop unsightly white streaks over time. To temper chocolate, begin by melting two-thirds of the needed amount using either the double boiler or microwave method. Once the chocolate reaches a temperature of 110-115°F (43–46°C) for dark chocolate or 105-110°F (40–43°C) for milk and white chocolate, remove it from the heat source and add the remaining one-third of unmelted chocolate. This process, known as seeding, helps to bring down the temperature while also introducing the required crystalline structure for proper tempering. Continue stirring until the chocolate cools down to 88-90°F (31–32°C) for dark chocolate or 84-86°F (29–30°C) for milk and white chocolate.Incorporating various flavors and textures into your chocolate-covered strawberries can take this classic dessert to the next level. Consider rolling the freshly-dipped strawberries in crushed nuts, toasted coconut flakes, or vibrant sprinkles for added crunch and visual appeal. For those looking to venture beyond the traditional, try experimenting with flavored chocolate, such as mint or orange-infused varieties, to create unique and delightful twists on this timeless treat. With no shortage of possibilities, the world of chocolate-covered strawberries invites endless creativity to craft a truly impressive dessert.

Chocolate covered strawberries are a delicious dessert that are easy to make with the right skills.

Decoration and Presentation

A widely-used technique for dipping strawberries involves holding the fruit by the leaves or inserting a toothpick into its top. Carefully dip the strawberry into the melted chocolate, ensuring it is evenly coated by swirling it around. To achieve a smooth chocolate coating, gradually lift the strawberry out of the chocolate, letting any excess drip off. Place the dipped strawberry on a parchment-lined tray, being careful not to let the chocolate touch other strawberries. This method guarantees a uniform chocolate layer, making the strawberries not only scrumptious but visually appealing as well.Chocolate covered strawberries can be further embellished by garnishing with nuts, sprinkles, and other sweet morsels. To incorporate nuts into your chocolate covered strawberries, simply roll the freshly dipped strawberries in a plate filled with finely chopped nuts before placing them on the parchment paper. For an added touch of color and whimsy, press sprinkles, edible glitter, or small candies onto the strawberries’ chocolate coating while it is still wet. The result will be a vibrant and playful presentation that appeals to children and adults alike.Drizzling chocolate is another way to elevate the presentation and taste of your chocolate covered strawberries. To create a textured appearance with contrasting colors, simply use a fork or a piping bag with a tiny hole in the corner to drizzle melted white chocolate, caramel, or additional dark chocolate over the already dipped strawberries. This method can also be used with colored chocolate to further enhance the fruit’s visual appeal. By allowing the drizzles to dry at different angles, the strawberries will boast an elevated and professional look.In addition to various dipping and garnishing techniques, arranging your chocolate covered strawberries on a platter is crucial to creating an attractive presentation. There are numerous ways to create an eye-catching and mouth-watering display, including stacking the strawberries in a pyramid shape or arranging them in a single line around the perimeter of the plate. Placing the strawberries on a raised platter in the center of a dessert table will draw attention to this delicious treat. You can also utilize serving dishes with various heights, sizes, and textures to add visual interest to the overall presentation.For themed events, consider customizing your chocolate covered strawberries to match the event’s colors and vibe. Options such as colored chocolate, glittery sprinkles, or even edible gold leaf can create a luxurious and sophisticated presentation for upscale occasions like weddings or New Year’s Eve parties. On the other hand, the strawberries can be adorned with festive candy decorations, like candy canes or colorful nonpareils, for more whimsical and lively celebrations. Ultimately, the possibilities for decorating and presenting chocolate covered strawberries are endless, so let your imagination run wild!

Picture of two chocolate covered strawberries with some additional pieces of fruit and nuts in the background, arranged neatly on a white plate.

Storage and Shelf Life

Chocolate covered strawberries are scrumptious treats that require proper storage to maintain their quality and freshness. One crucial factor to consider when storing them is temperature. Ideally, the storage environment should be between 55 and 68 degrees Fahrenheit, as higher temperatures might cause the chocolate to melt and compromise the strawberry quality. In addition to temperature control, it is essential to keep these delicious creations away from direct sunlight or heat sources, as these factors can negatively impact the quality and consistency of the chocolate.To prolong the shelf life of your chocolate covered strawberries, it’s recommended to store them in an airtight container. This will prevent moisture and air from affecting the chocolate and causing it to become stale or lose its texture. If you’re planning on consuming the strawberries within a day or two, simply placing the container in a cool, dry place, such as a pantry or a cabinet away from heat sources, should suffice. If the temperature in your home is a bit on the high side, you may want to consider storing them in the refrigerator.If you need to store the chocolate covered strawberries for a longer period of time, you can consider freezing them. To do this, place the strawberries on a baking sheet lined with wax paper, making sure they are not touching one another. Freeze the strawberries for about an hour to ensure that the chocolate has hardened, and then transfer them to a freezer-safe airtight container or wrap them individually with plastic wrap. Keep in mind that freezing the strawberries may slightly alter the texture of the fruit upon thawing, but the taste should remain largely the same.It is important to remember that the shelf life of chocolate covered strawberries is relatively short, as they are made up of both a perishable fruit and a chocolate coating. When stored properly in a cool, dry location or the refrigerator, these treats can last for up to two days. If you choose to freeze the strawberries, they can last for a few months. However, it is recommended to enjoy them as soon as possible to truly appreciate their delightful flavor and texture.To ensure the freshness of chocolate covered strawberries, it is essential to visually inspect them for any signs of spoilage. Pay attention to the appearance of the strawberries; if they seem mushy, discolored, or show any traces of mold, it’s best to throw them away. Also, examine the chocolate for any discoloration or a white film known as ‘bloom.’ Although chocolate bloom is safe to consume, it can be an indication of compromised quality, which may affect the texture and flavor of the treat.

A picture of several fresh strawberries dipped in chocolate with white drizzle on top.

Variations and Flavors

A popular and delightful twist to the traditional chocolate covered strawberry is the use of various types of chocolate, as it enriches the overall flavor profile. White, dark, and milk chocolate each bring unique tastes to the strawberries and, when combined, also create an appealing visual effect. For instance, after dipping the strawberry in one type of chocolate, try drizzling lines of another kind on top for an elegant and delectable finish. Introducing flavored chocolates such as mint, orange, or raspberry can further elevate this classic dessert with a surprising twist.Another exciting idea for a twist on chocolate covered strawberries is to include fillings. This method involves carefully hollowing out the center of the strawberry, filling the cavity with a delicious filling, such as cheesecake, chocolate mousse, or whipped cream, and then dipping the filled strawberry into chocolate. This creates a truly indulgent, multi-layered treat that is sure to delight anyone who tastes it.Coatings and toppings are yet another way to add variety to chocolate covered strawberries. Popular coatings include crushed nuts, sprinkles, shredded coconut, crushed cookies, and candy pieces. To create evenly coated strawberries, simply roll the freshly dipped chocolate strawberries in your topping of choice or gently press the topping onto the strawberries before the chocolate fully sets. This will create a beautiful and flavorful outer layer that complements the chocolate and strawberry combination.Infusing chocolate covered strawberries with alcohol is a unique and elegant way to elevate this classic dessert. To do this, simply inject your strawberry with the liquor of your choice, such as champagne, rum, or amaretto, using a culinary syringe before dipping it into chocolate. This adds a surprising burst of flavor, perfect for celebrations and romantic occasions. Just be mindful of the audience when serving alcohol-infused desserts, as they may not be suitable for everyone.Lastly, a popular trend in recent years is to create chocolate covered strawberry “bouquets” or “roses.” This involves arranging multiple chocolate covered strawberries on a skewer in the shape of a flower, which can then be displayed as a beautiful and edible centerpiece at parties or as a thoughtful, edible gift. With various flavors, fillings, coatings, and presentations, the possibilities for personalization and creativity with chocolate covered strawberries are truly endless.

A plate of chocolate covered strawberries with various types of toppings and coatings.

As we journeyed through the decadent realms of chocolate-covered strawberries, we discovered the extraordinary attention to detail that transforms a seemingly simple confection into a stunning symbol of luxury and romance. With a deeper understanding of the importance of selecting quality ingredients, mastering the art of melting chocolate, perfecting the presentation, and maintaining freshness, it’s clear that successful chocolate-covered strawberries are more than just the sum of their parts. Armed with this knowledge and inspired by the countless flavor variations and creative twists, we can now embark on our own quests to create chocolate-covered strawberries that tempt, tantalize, and transcend the ordinary.

Categories
Food

Ultimate Guide to Chocolate Chip Cookies

Chocolate chip cookies have long been a beloved treat for people around the world. With their delightful blend of flavors and textures, they manage to satisfy many a sweet tooth and evoke warm memories of home-cooked goodness. In this exploration of the world of chocolate chip cookies, we’ll dive into their fascinating history, the roles of key ingredients, the delicious variations and add-ins available, and even some popular recipes and baking tips. Furthermore, we will also discuss best practices for storing and freezing these scrumptious morsels, along with creative serving ideas that are sure to impress.

History of Chocolate Chip Cookies

The history of the chocolate chip cookie, an iconic American treat, dates back to the 1930s when a woman named Ruth Wakefield invented the now-famous cookie recipe. Ruth, a trained dietitian and food lecturer, and her husband, Kenneth, owned and operated the Toll House Inn in Whitman, Massachusetts, a popular restaurant that served home-cooked-style meals.

To provide her patrons with a fresh and delicious dessert option, Ruth decided to create a new type of cookie that incorporated semi-sweet chocolate morsels into a butter-cookie dough.

As the story goes, Ruth intended to create a chocolate-flavored cookie, but instead, found that the chocolate morsels she added did not fully melt, resulting in the distinct chunks of chocolate nestled within the dough that we love today. Although there is some debate over whether the inclusion of chocolate morsels was truly accidental, one thing is certain—the chocolate chip cookie’s popularity took off quickly. In fact, the delicious treat became a household name across the United States, especially after the recipe was featured in a 1938 edition of Marjorie Husted’s radio show “Famous Foods from Famous Eating Places.”

The original Toll House Cookie recipe called for semi-sweet chocolate, which led to a partnership between Ruth Wakefield and the chocolate manufacturer Nestlé. This collaboration ensured that Ruth’s Toll House Cookies would use Nestlé’s Semi-Sweet Chocolate Morsels, and the recipe famously appeared on the packaging of Nestlé’s chocolate morsel bags. Nestlé went on to trademark the term “Toll House” as well, ensuring a strong connection between their product and the delectable cookie.

Throughout the years, the chocolate chip cookie has evolved as many bakers have put their unique spin on the classic, beloved recipe. Some variations include the sizable soft-baked cookies to the more delicate, crispy versions, while others introduced wholesome ingredients, like oats or nuts, to the mix. The humble chocolate chip has inspired countless confections, including cookie cakes, ice cream sandwiches, and cookie dough-filled treats. The chocolate chip cookie’s enduring popularity even led to it being designated as the official state cookie of both Massachusetts and Pennsylvania in the United States.

Chocolate chip cookies hold a special place in American culture as a beloved comfort food and classic dessert. Their nostalgic appeal, stemming from their ubiquity during childhood, makes them a much-loved treat among generations. The enduring popularity of these cookies can also be attributed to their accessibility, versatility, and ease of baking, making them a favored recipe among both home bakers and professionals. With countless variations now available, the legacy of the chocolate chip cookie promises to persist, continuing to bring delight to people around the globe with every scrumptious bite.

A chocolate chip cookie with chunks of chocolate nestled within a butter-cookie dough.

Ingredients and Their Roles

Central to the success of the ubiquitous chocolate chip cookie is one key ingredient: flour. Acting as the structural backbone of the cookie, most recipes call for all-purpose flour due to its medium protein content, which allows for a soft and chewy texture. The quantity of protein in the chosen flour plays a pivotal role in determining the development of gluten, which is essential for achieving the desired texture in the final product. However, several alternative flours are also available for use in cookie recipes, such as cake flour for a more delicate consistency, or bread flour for an even chewier delight. The type of flour selected directly impacts the structure and texture of the resulting chocolate chip cookie.

Another important ingredient in chocolate chip cookies is sugar. Sugar not only adds sweetness to the cookies, but also affects the texture, browning, and spread of the cookies. Two common types of sugar used in these recipes are granulated sugar and brown sugar. Granulated sugar promotes a crispier texture while brown sugar, containing molasses, contributes to a more moist and chewy cookie with a slightly caramel flavor. Often, a combination of these sugars is used in a recipe to achieve the desired balance of sweetness and texture.Fat, typically in the form of butter, is another crucial ingredient in chocolate chip cookies that influences the texture and flavor of the cookies. Butter imparts a rich and buttery taste, while also providing moisture and contributing to the cookie’s spread. Softened or melted butter facilitates the creaming process, which incorporates air into the dough and thus, creates a fluffier and tender end product. Some bakers prefer using shortening or oils, which can render a slightly crumblier or denser cookie, respectively. However, these alternatives may compromise the classic flavor profile of a chocolate chip cookie.Eggs are another essential ingredient in chocolate chip cookies, serving as a binding agent and providing moisture. Eggs also contribute to the structure and leavening of the cookies, as the proteins in the eggs coagulate during baking. Some recipes may call for just the egg yolks to increase the richness and moisture content of the cookies, while those that utilize only egg whites yield a drier and more crumbly texture. It is crucial to adhere to the recipe’s recommended number and ratio of egg parts to ensure the desired outcome.Leavening agents, such as baking soda and baking powder, play a significant role in the texture and rise of chocolate chip cookies. Baking soda, a base, reacts with acidic components like brown sugar or chocolate in the dough, producing carbon dioxide and causing the cookies to rise and spread. In contrast, baking powder, which contains both acidic and basic components, provides an extra lift without dramatically changing the spread of the cookies. The choice of leavening agent, or a combination of both, influences the final height and spread of the chocolate chip cookies, resulting in a variety of textures across different recipes.

A plate of freshly baked chocolate chip cookies with steam rising from them.

Variations and Add-Ins

Chocolate chip cookies, an American classic, are adored for their delightful taste and adaptability. Various versions of this popular treat cater to different preferences.

One such variation is the oatmeal chocolate chip cookie, which combines the best of both worlds by incorporating rolled oats into the dough. These cookies have a chewier texture and slightly nutty taste, offering a perfect choice for those who enjoy the flavor of oatmeal cookies as well as the sweetness of chocolate chips.

The double chocolate chip cookie is another scrumptious twist on the original recipe.

By incorporating cocoa powder or melted chocolate into the dough, these cookies have a rich, chocolatey flavor that truly lives up to its name.

For an extra layer of indulgence, some bakers also opt to use white chocolate chips or even a combination of semisweet, milk, and white chocolate chips, offering a delightful contrast of flavors.

Another way to customize chocolate chip cookies is by adding various nuts, such as walnuts, pecans, or almonds.

Nuts not only contribute their unique flavors to the cookies, but they also impart a pleasing crunchy texture.

Depending on personal preference, nuts can be added whole, chopped, or even ground into a nut butter that is then swirled into the dough for a more subtle taste.

In addition to nuts, there are several popular candy add-ins that can kick chocolate chip cookies up a notch.

For example, incorporating M&Ms, peanut butter chips, or even crushed candy bars such as Snickers or Heath bars can add a fun and unexpected element to these classic treats.

These candy additions create an innovative flavor profile while still maintaining a level of comfort and familiarity that consumers love about chocolate chip cookies.

Lastly, for those seeking a unique flavor combination, incorporating unconventional ingredients such as dried fruits, coconut flakes, or even spices like cinnamon or nutmeg can result in a truly memorable chocolate chip cookie experience.

As tastes evolve and palates expand, experimenting with new flavors and textures can yield exciting and delicious results.

With so many different ways to make chocolate chip cookies your own, the possibilities are truly endless, ensuring that this ubiquitous treat will continue to be a beloved favorite for years to come.

A chocolate chip cookie with chips protruding out of the top with a soft center and crispy edges.

Popular Recipes and Baking Tips

Among the countless variations, one of the most popular chocolate chip cookie recipes is the original ‘Toll House Chocolate Chip Cookies’ recipe, created in the 1930s by Ruth Wakefield. These cookies include the classic ingredients: butter, sugar, brown sugar, eggs, vanilla extract, baking soda, salt, all-purpose flour, and, of course, chocolate chips. Various adaptations of this original recipe have since emerged, including several with added ingredients such as oats, nuts or flavored chips to create a unique and delicious twist on the classic cookie, further proving that the possibilities for inventive chocolate chip cookie creations are truly limitless.

Another famous chocolate chip cookie recipe is the ‘New York Times Chocolate Chip Cookie’, an elevated version of the traditional chocolate chip cookie. This recipe, created by Jacques Torres, requires specific ingredients such as cake flour, bread flour, and two types of chocolate discs – bittersweet and dark chocolate. The dough should be chilled for a minimum of 24 hours and portioned into larger cookie sizes. The result is a huge, soft, gooey cookie with a slightly crispy exterior and a rich chocolate flavor.In achieving the perfect chocolate chip cookie texture and flavor, several baking tips can be employed. Firstly, consider using high-quality chocolate chips or discs, which will have a significant impact on the overall taste of the finished product. When it comes to mixing the dough, avoid over-mixing, as it can result in a tough and flat cookie. Instead, mix the dough until just combined, ensuring that the dry and wet ingredients are evenly distributed.Chilling the dough is another essential step in achieving the perfect chocolate chip cookie. Chilling the dough allows the flavors to develop, resulting in a more complex and delicious cookie. Additionally, chilled dough is easier to handle and shape, reducing the risk of over-spreading while baking. It’s recommended to chill the dough for a minimum of one hour but preferably overnight.

Baking temperature and time are crucial components of chocolate chip cookie success. Preheating the oven to the correct temperature, usually around 350 degrees Fahrenheit, ensures that the cookies begin baking as soon as they hit the oven. Keep an eye on the cookies as they bake, as oven temperatures can vary. Chocolate chip cookies typically take around 8-12 minutes to bake. They should have a slightly golden-brown exterior, while maintaining a soft and chewy center. Lastly, remember to always cool the cookies on a wire rack to prevent them from becoming overly soft or soggy.

A plate filled with freshly baked chocolate chip cookies, showing their golden-brown exterior and the gooey chocolate chips inside.

Storing and Freezing Cookies

Once your cookies have cooled, it’s essential to store them properly in order to retain their freshness and taste. One of the best ways to maintain their flavor is to place the cookies in a tightly sealed, airtight container. It is also important to keep the container at room temperature, away from direct sunlight, and any heat source. By doing so, you can ensure that the cookies remain moist, chewy, and delicious for up to a week.

When it comes to packing cookies for transport, taking care to prevent breakage and maintain freshness is key. The first step is to place a sheet of wax or parchment paper at the bottom of a sturdy container. Then, place a single layer of cookies on the paper, making sure they do not touch one another. If you need to stack multiple layers of cookies, make sure to place a sheet of wax or parchment paper between each layer to prevent them from sticking together. Secure the container with a tight-fitting lid to protect the cookies and prevent them from becoming stale.

Freezing cookies is an excellent method to prolong the shelf life of your homemade chocolate chip cookies. To freeze baked cookies, simply cool them completely and then wrap each cookie individually with plastic wrap. You can also place them in a zip-top freezer bag, making sure to remove any excess air before sealing the bag. This will help to prevent freezer burn and maintain the overall freshness of the cookies. Baked cookies can be stored in the freezer for up to three months.

Another great benefit of freezing chocolate chip cookies is that you can also freeze the dough for later use. To do this, simply portion your dough into individual cookie-sized balls and place them on a parchment-lined baking sheet. Allow the dough balls to freeze for at least an hour, and then transfer them to a zip-top freezer bag, again removing any excess air before sealing. This method allows for convenient baking in the future, as you can place the frozen dough directly onto a prepared baking sheet and bake as usual, adding a few extra minutes to the baking time. Frozen cookie dough can be stored for up to three months.

Discovering the world of chocolate chip cookies can be a delightful journey, complete with various techniques for maintaining freshness, taste, and creative serving ideas. To ensure you can enjoy and share your homemade cookies whenever the craving strikes, it’s important to follow proper storage and freezing techniques. Rest assured that your freshly baked chocolate chip cookies will be perfectly preserved for future enjoyment when these best practices are implemented.

A picture of a container with chocolate chip cookies inside, with a lid on, and the container's edges sealed tightly.

Fun and Creative Serving Ideas

One innovative and exciting way to serve chocolate chip cookies is by transforming them into delightful cookie cakes. To create a chocolate chip cookie cake, simply prepare your favorite cookie dough recipe and, instead of shaping it into individual cookies, spread it evenly in a greased cake pan. You can even create multiple layers, adding frosting or whipped cream between each layer for extra indulgence. Once baked and cooled, decorate the top with icing or powdered sugar for a visually appealing and delectable treat that is perfect for birthdays or special occasions.

Another creative approach to serving chocolate chip cookies is to craft scrumptious ice cream sandwiches. Start by baking your cookies to your desired level of crispiness, then allow them to completely cool. Once cooled, pair the cookies in similar sizes and shape. Choose your favorite ice cream flavor (vanilla and chocolate work especially well) and place a scoop between two cookies, gently pressing them together to create the perfect ice cream sandwich. Roll the edges in extra chocolate chips, sprinkles, or nuts for added texture and visual appeal. Wrap each sandwich in plastic wrap and freeze briefly to set before serving.If you’re looking to create a mouthwatering dessert for a party or gathering, consider making chocolate chip cookie bars. This simple and crowd-pleasing idea starts with baking a large batch of chocolate chip cookie dough in a sheet pan or large baking dish. Once cooled, cut the giant cookie into smaller bars, which can be served as is, or dressed up with various toppings such as caramel or chocolate drizzle, whipped cream, and fresh fruit. Cookie bars can also be layered with different types of dough, like peanut butter or oatmeal, for a fun twist on a classic dessert.In addition to cookie cakes, ice cream sandwiches, and cookie bars, chocolate chip cookies can also be used to concoct indulgent dessert parfaits. To assemble a chocolate chip cookie parfait, crumble your freshly baked cookies and layer them in a glass with your favorite pudding or mousse. Add in layers of whipped cream, chocolate chips, or fruit for added flavor and texture. These handheld delights make for a stunning dessert presentation that will have your guests eagerly reaching for seconds.Finally, if you’re seeking a clever way to serve chocolate chip cookies to a crowd, try constructing an edible cookie bowl. Use a standard muffin tin and place small balls of chocolate chip cookie dough over the bottom of each cup, shaping it to fit the curves of the tin. Bake as directed, and once cooled, carefully remove from the tin to create miniature cookie bowls. Fill these edible cups with ice cream, fruit, whipped cream, or another favorite treat for a creative and whimsical dessert offering that is sure to delight.

A plate full of delectable chocolate chip cookie desserts including cookie cake, ice cream sandwich, cookie bars, parfait, and cookie bowl.

As our journey through the world of chocolate chip cookies comes to an end, we can truly appreciate the depth and diversity of this classic treat. From their humble beginnings and the importance of each ingredient, to the countless variations and creative serving options, it is clear that chocolate chip cookies hold a special place in the hearts of many. The next time you indulge in a warm, gooey cookie, take a moment to savor the flavors and textures that have captivated the world for decades, and perhaps even gain inspiration to create your own chocolate chip cookie masterpiece.

Categories
Sneakers

How to Tie Shoelaces: Quick & Simple Guide

Tying shoelaces may seem like a simple task, but with various knot techniques and types of shoelaces available, it can be more complex than you think. In this guide, you will learn about different types of shoelaces, how to prepare your shoes for tying, and practice several knot-tying methods. Additionally, you will explore knot variations, troubleshoot common mistakes, and improve your shoelace tying skills through practice. Grab your favorite pair of shoes and let’s dive in!

Understanding Shoelace Types

Introduction:

Before learning how to tie your shoelaces, it’s essential to understand the different types of shoelaces and how to choose the right ones for your shoes. With various materials, lengths, and designs available, you want to make sure you select the best option for your specific needs. In this guide, we’ll discuss several kinds of shoelaces and provide tips on choosing the right size and type for your shoes.

Flat Shoelaces:

Flat shoelaces are the most common type of laces that you’ll find in sneakers and casual shoes. They are wide, thin, and usually have a polyester or cotton construction. Flat laces lay comfortably on the shoe and provide a clean appearance.

Round Shoelaces:

Round shoelaces are generally found in dress shoes, boots, and some athletic shoes. These laces have a tubular shape, which gives them a more formal look and offer more durability. Round laces can be made of various materials like cotton, nylon, or waxed cotton.

Waxed Shoelaces:

Waxed shoelaces add an extra layer of protection for the laces, making them more resistant to water, fraying, and breaking. They are ideal for dress shoes or outdoor footwear, as the wax helps maintain their shape and structure. The waxed finish provides a slightly shiny appearance and also offers more grip when tying.

No-tie Shoelaces:

No-tie shoelaces are an innovative solution for those who may have difficulty tying shoelaces or are looking for a more streamlined and hassle-free option. They utilize an elastic lace material that securely attaches to the eyelets with plastic or metal anchors. You can slip your shoes on and off effortlessly without having to tie and untie laces.

Coiled Elastic Shoelaces:

Coiled elastic shoelaces are designed to stretch and contract, allowing users to slip their shoes on and off without needing to tie them. These laces are typically used in athletic shoes and are popular among runners who don’t want to worry about their laces coming undone during their workout.

Tips on Choosing the Right Shoelace Size and Type:

  • Length: Measure the total number of eyelets on your shoes, and then check the shoelace packaging or manufacturer’s website for a sizing guide. Most shoelace brands offer a range of lengths to accommodate various shoe sizes and eyelet numbers.
  • Material: Consider the specific needs of your shoes and your typical activities when selecting a shoelace material. Cotton laces are breathable and soft, ideal for casual shoes. Polyester or nylon laces are more durable and weather-resistant, making them suitable for athletic or outdoor footwear.
  • Color and Design: Select a shoelace color and design that matches your personal style and the color of your shoes. You can choose from solid colors, patterns, or even reflective shoelaces for added visibility during nighttime activities.
  • Ease of Use: If you have trouble tying shoelaces, consider opting for no-tie or coiled elastic shoelaces to simplify the process.

Conclusion:

Understanding the different shoelace types will help you choose the best option for your shoes and ensure a comfortable, secure fit. Pay attention to length, material, color, design, and ease of use when selecting the right shoelaces for your needs. Now that you know which laces are best suited for your shoes, you can learn to tie them confidently and securely.

An image of different types of shoelaces lined up next to each other to illustrate the different options available.

Preparation for Tying

Step 1: Gather your materials

To begin, you’ll need a pair of shoes with eyelets along the sides, and a pair of shoelaces that are of appropriate length for your shoes.

Step 2: Insert the shoelaces

Take one end of the shoelace and insert it through the bottom eyelet (the one closest to your toes) on one side of the shoe, from the outside in. Then, take the other end of the shoelace and insert it through the bottom eyelet on the other side of the shoe, also from the outside in. Make sure that the laces are of equal length on both sides.

Step 3: Cross the laces

Next, take the left lace and cross it over the right lace, creating an “X” shape. Thread the left lace through the next available eyelet on the right side, going from the outside in. Do the same for the right lace, threading it through the next available eyelet on the left side.

Step 4: Continue lacing

Repeat step 3 for the remaining eyelets, making sure to cross the laces over each other and threading them through the eyelets from the outside in. Be consistent with your pattern, either crossing the left lace over the right lace or vice versa, for a neat appearance.

Step 5: Check your progress

As you lace your shoes, make sure the laces lay flat and don’t twist. This will ensure a comfortable and secure fit when tying.

Step 6: Finishing up

Once you’ve threaded the laces through all the eyelets, give them a gentle tug to ensure that they’re securely in place and evenly tightened. You should now have two laces of equal length emerging from the top of your shoe, and you’re ready to begin tying your shoes.

Now that you know how to properly thread your shoelaces through the eyelets of your shoes, you can practice tying different knots like the standard bow knot, double knot, or even more advanced techniques. Keep practicing, and this skill will soon become second nature.

An image of a shoe with laces.

The Basic Bow Knot

Step 1: Prepare your shoes
Place your shoes on a flat surface with the shoelaces fully untied and making sure the ends are of equal length.Step 2: The Starting Knot
Grab both ends of the shoelaces, one end in each hand. Cross the right end over the left, creating an “X” shape, and then pull the right end through the bottom of the “X” and pull tight. This will create a basic starting knot that will help keep your laces together as you continue with the bow knot.Step 3: Form the First Loop
Hold the right shoelace with your right hand, between your thumb and index finger, and use your other fingers to cradle the lace while folding it back on itself to form a loop. This loop is often referred to as the “bunny ear.”Step 4: Wrap the Second Lace
With the left shoelace in your left hand, wrap it around the “bunny ear” loop you created with the right lace. As you wrap, make sure to keep it tight and close to the base of the loop.Step 5: Form the Second Loop
While still holding the left lace, pinch it with your right thumb and index finger, and make sure to keep it snug against the base of the right loop. Now, use your left hand to fold the remaining part of the left lace back onto itself to create a second “bunny ear” loop.Step 6: Thread and Tighten
With both “bunny ear” loops in hand, use your left thumb and index finger to push the left loop through the small opening created when you wrapped the left lace around the right loop. Gently pull both loops away from each other to tighten the bow knot. Be sure to adjust and tighten the loops to your desired size and tightness.Step 7: Check Your Work
Check to ensure the bow knot is secure and even. If needed, tighten or adjust the loops and the starting knot to achieve a secure and comfortable fit.

Now you have successfully tied your shoelaces using the basic bow knot method! Repeat these steps on your other shoe, and you’re ready to go.

An illustration of someone tying their shoelaces step-by-step.

The Two Loop Knot

Start by preparing your shoes: Make sure your shoes are on your feet, and the shoelaces are untied, straightened, and threaded through all the necessary holes or eyelets.

  1. Hold both ends of the shoelaces: With one end of the shoelace in each hand, make sure the laces are approximately even in length. You may need to adjust the laces slightly to ensure they are even.
  2. Make the starting knot: Cross one lace over the other, then tuck the lace on top through the hole created at the bottom, pulling both ends tight. This will create a simple starting knot.
  3. Create the first loop (bunny ear): Hold one end of the shoelace between the thumb and pointer finger of one hand, pinching it in the middle to create a small loop. This loop should resemble a bunny ear, with the end of the loop hanging down.
  4. Create the second loop (bunny ear): With your other hand, do the same pinch on the other shoelace to create a second loop. Both hands should now be holding a bunny ear.
  5. Cross the two loops: Bring the loops close to each other and cross one loop over the other, just like you did with the laces in step 3.
  6. Tuck a loop through the hole: This is where the loops become the knot. Carefully tuck one of the loops through the hole created between the two crossed loops.
  7. Tighten the knot: Gently pull on both loops and ends of the laces to tighten the knot. Make sure to keep holding onto the loops as you do this to ensure a secure knot.
  8. Adjust the knot as needed: Once the knot is tight, you can adjust the size of the loops and ends to your liking. Ensure that the knot is secure and will not easily come undone.

Congratulations! You have now learned how to tie shoelaces using the Two Loop Knot or Bunny Ears technique. Practice this method a few more times to perfect your skills, and you’ll be able to tie your shoelaces with ease.

Illustration of hands tying shoelaces using the Two Loop Knot or Bunny Ears technique.

The Ian Knot

To begin, place your shoes on a flat surface and make sure the laces are fully untied and even on both sides of each shoe.Hold one end of the shoelace in each hand. Grip the lace with your thumb and index finger while making sure your palms are facing each other. You should be holding the shoelaces similar to how you would hold a piece of paper with both hands facing each other.Begin by making a loop with both ends of the shoelace, leaving about 2-3 inches of the lace as the loop’s tail. The right loop should be over the left loop. This will form the basic shape of the Ian Knot.Next, cross the loops over one another by bringing the right loop across the left loop with your right hand, and vice versa with your left hand. The tails of the laces should switch hands in the process.As you cross the loops, adjust your fingers so they can grab the tail of the other lace. Your index fingers should be pointing at the tail of the other lace, while your thumb should be behind it.Now, pinch the tail of the other loop with your thumb and index finger while keeping the loops crossed. This will create a small opening in the center of the knot as you pinch the tails.Once you’ve pinched the tails of each loop, gently pull your hands apart to tighten the knot. As you do this, the knot will become more secure and visually resemble a traditional shoelace knot.Adjust the knot to your desired tightness by pulling on the loops or tails as needed. You may need to practice the Ian Knot a few times to get comfortable with the technique, but once you’ve mastered it, you’ll be able to tie your shoes more efficiently.Congratulations, you’ve now learned the Ian Knot! Practice this technique on both shoes, and you’ll be speeding through your shoelace tying in no time.Remember, practice makes perfect. The more you practice the Ian knot, the quicker and more proficient you’ll become at tying your shoelaces.

A picture of a person tying their shoelaces using the Ian Knot technique.

Understanding Knot Variations

Knots have played an important role since ancient times, and they continue to be a crucial part of everyday life, especially when it comes to tying shoelaces. There are various knot variations that can make your shoelace tying experience more efficient, secure, and even fun. In this guide, we will explore different knot variations for tying shoelaces.

Standard Bow Knot:

This is the most common and widely used method for tying shoelaces.

  • Start by crossing the two ends of the laces (A and B) and pull them tight to form a simple half-knot.
  • Create a loop with one end (A) by folding it back on itself.
  • Wrap the other end (B) around the loop, forming a second loop behind the first loop.
  • Pull both loops tight to form a completed bow knot.

Double Slip Knot:

This variation provides extra security by adding a second loop to the standard bow knot.

  • Start with a standard bow knot but instead of forming just one loop with each end, create two loops by folding each end back on itself twice.
  • Wrap one looped end around the other looped end, then pull both loops tight to form a completed double slip knot.

Ian Knot:

This variation is known as the world’s fastest shoelace knot; it saves time and provides a secure hold.

  • Start by holding one end of the lace (A) in your left hand, and the other end (B) in your right hand.
  • Create a loop with both ends (A and B) by folding each end back on itself.
  • Cross the loops over each other as if tying a regular bow knot.
  • Reach through each loop with your opposite hand and grab the standing part of the opposite lace.
  • Pull both ends tight to form a completed Ian knot.

Surgeon’s Knot:

This variation is particularly helpful for slippery shoelaces since it adds extra friction to keep the knot secure.

  • Start with a standard half-knot, but add an extra twist by wrapping one end of the lace (A) around the other (B) one more time.
  • Create a loop with each end, as if tying a regular bow knot.
  • Wrap one loop around the other and pull both loops tight to form a completed Surgeon’s knot.

Loop Knots:

This is a decorative shoelace knot wherein both ends are tucked away, giving the knot a clean look.

  • Start with a standard half-knot.
  • With one end (A), create a loop by folding it back on itself.
  • Wrap the other end (B) around the loop (A), then pass the end (B) through the loop it formed by wrapping around the loop (A).
  • Pull both loops tight to form a completed loop knot. Tuck the untied ends underneath the knot for a cleaner look.

Keep practicing these different knot variations until you find the one that provides the ideal combination of efficiency, security, and aesthetics for your specific needs. With time and patience, you will undoubtedly master these variations and enhance your shoelace tying experience!

An image of various shoelace knots, including the standard bow knot, double slip knot, Ian knot, surgeon's knot, and loop knots.

Troubleshooting Common Mistakes

When learning to tie shoelaces, it’s common to encounter a few hurdles along the way. Below are some common mistakes and solutions to ensure a secure and tight knot every time.

Mistake 1: Twisted laces

If your laces are twisted when you try to tie them, the knot won’t hold as secure and might come undone over time.

Solution: Before you start tying, take a moment to straighten your laces by running your fingers along their length. This will ensure they lie flat and smooth when you tie the knot.

Mistake 2: Too tight or too loose loops

If your shoelace loops are either too tight or too loose, your knot might not hold well, and the shoes won’t feel comfortable on your feet.

Solution: When you make the loops (“bunny ears”) for your knot, pay attention to their size. Remember that the loops should not be bigger than your thumb or smaller than your pinky finger. Make sure the tension is consistent throughout your knot.

Mistake 3: Uneven laces

When you finish tying your shoelaces, you might notice that one side of the knot has a long lace end while the other has a short one.

Solution: To fix this, begin by undoing the knot. Then, adjust the starting point of the knot by pulling more or less of the lace through the top eyelets of your shoe. Aim for equal lace lengths on both sides before tying the knot.

Mistake 4: Knot comes undone easily

If you find that your shoelaces are coming untied during the day, you might be tying a “slippery” knot.

Solution: Make sure you’re tying a standard or “secure” shoelace knot, also known as the square knot or double knot. Begin by tying the “bunny ears” once, then wrapping one loop around the other to complete a second knot. This should give you a more secure knot that stays tied throughout the day.

Mistake 5: Difficulty with “bunny ears” method

Some people struggle with the “bunny ears” method to tie their shoelaces, causing frustration and knots that come undone easily.

Solution: If the “bunny ears” method isn’t working for you, try learning the “loop, swoop, and pull” method. This method involves creating one loop (or “bunny ear”) and then wrapping the other lace around it before pulling it through to create the second loop. This alternative method might feel more natural for some people to perform.

In conclusion, tying your shoelaces correctly can help ensure a comfortable fit and prevent your shoes from coming untied during the day. By addressing these common mistakes and following the solutions provided, you should be able to achieve a secure and tight knot every time.

A pair of children's shoes with untied shoelaces laying on the ground next to a colorful shoelace tying chart.

Practicing Shoelace Tying

Gather your materials: To practice tying shoelaces, you will need a pair of shoes with laces that are long enough to practice with, or a piece of rope or string to simulate a shoelace.Find a comfortable space: Choose a well-lit and quiet area where you can sit and comfortably work with your hands.Review the basic steps: Familiarize yourself with the basic process of tying shoelaces by breaking it down into steps. The standard method includes:
– Crossing the laces to create an ‘X’
– Looping one lace under the other and pulling it tight to create a starting knot
– Creating two “rabbit ears” or loops with both laces
– Crossing the loops and tucking one under the other to create the bow
– Pulling both loops tight to secure the knotPractice with your dominant hand: Start practicing your shoelace-tying skills using your dominant hand to hold one lace and guide the other. Repeat the entire process several times to get the hang of it.Switch hands: Practice tying your shoelaces using your non-dominant hand to hold one lace and guide the other. This might feel awkward at first, but with practice, you will become more comfortable using both hands.Speed up: Once you feel confident with the basic steps, try increasing your speed. Challenge yourself to tie both shoelaces faster and more efficiently.One-handed tying: For an extra challenge, try tying your shoelaces using only one hand. This can be a helpful skill to learn for those with limited mobility in one hand or arm.Repeat the process: Continue practicing your shoelace tying skills daily or as often as necessary. The more you practice, the more precise and efficient you will become.Alternate methods: Try learning different methods of tying shoelaces, such as the “two-loop” method or the “Ian Knot.” By learning various techniques, you can find the most comfortable and efficient method for you.Stay patient: Learning and mastering any skill takes time, and shoelace tying is no exception. Be patient with yourself, and don’t get discouraged if you don’t see immediate improvement. Keep practicing, and you’ll get better over time.

An illustration of the basic steps for tying shoelaces in order: crossing the laces, creating a knot, making 'rabbit ears', crossing the loops, and pulling tight to secure.

By taking the time to explore various shoelace types and knot techniques, you are now equipped with the knowledge to efficiently and securely tie your shoelaces. Use these new skills to your advantage, whether it’s for daily life or to add a touch of personal style to your footwear. Remember that, like any skill, practice makes perfect, so don’t hesitate to experiment with different techniques and continue improving your shoelace tying abilities.

Categories
Sneakers

Master the Art of Tying Shoelaces: Step-by-Step Guide

Tying shoelaces is a universal skill that most individuals learn during their childhood. The seemingly simple task not only ensures that your shoes stay firmly on your feet but also adds a touch of personal style to your footwear. This article will guide you through the world of shoelace tying, helping you understand different materials, choose the right length, learn basic and alternative tying methods, discover life hacks and solutions to common shoelace problems, and hone your shoelace tying prowess.

Understand different shoelace materials

Before learning how to tie shoelaces, it’s essential to know about different types of shoelace materials. The material used to make shoelaces can impact the tying process and how well your shoelaces will stay tied throughout the day. Here is an overview of some common shoelace materials and their properties:

Cotton shoelaces:

  • Cotton shoelaces are soft and flexible, making them easy to tie and adjust
  • However, they tend to become dirty, wear out, and fray relatively quickly.
  • Cotton laces are often used for casual shoes or sneakers and may lose tension as you go about your day, requiring retying.

Polyester shoelaces:

  • Polyester laces are durable, lightweight, and resistant to moisture and wear.
  • They offer a good balance between flexibility and strength, making them a popular choice for various types of shoes.
  • This type of shoelace is easy to tie and holds knots well, so you don’t need to worry about frequently retying your shoes.

Nylon shoelaces:

  • Nylon shoelaces are strong, durable, and have a smooth texture.
  • Due to their slick surface, nylon laces may be more challenging to tie, and the knots may slip or come undone more easily than other materials.
  • However, once properly tied, they hold tension well.
  • They are often used for athletic shoes or heavy-duty footwear (such as work boots or hiking boots) because of their strength and resistance to wear.

Now that you know the different types of shoelace materials, here’s a step-by-step guide on how to tie your shoelaces:

  1. Begin by threading the shoelaces through the bottom eyelets of your shoes, with the ends pointing outwards. Make sure that the lace lengths are even on both sides.
  2. Cross the left lace (let’s say it’s Lace A) over the right lace (Lace B), creating an ‘X’ shape. Then, thread Lace A under Lace B and pull both laces tight to form a snug knot at the base of the shoe.
  3. Pinch the middle of Lace A between your thumb and index finger, creating a small loop (also known as a ‘bunny ear’).
  4. Hold the loop in place securely using your left hand. With your right hand, take Lace B and wrap it around the ‘bunny ear’ loop (counterclockwise) that you’ve created with Lace A.
  5. As you wrap Lace B around Lace A’s loop, push a portion of Lace B through the gap between the two laces (where you crossed Lace B over Lace A) to create a second loop.
  6. Hold the new loop you created with Lace B, and pull both the original loop (Lace A) and the new loop (Lace B) tight. This should form a secure bow.
  7. Adjust your bow to the desired size, ensuring the knot is tight enough to hold its position throughout the day.

Now that you know how to tie shoelaces and understand how different shoelace materials may affect the tying process, you can confidently tackle any shoe with ease. Practice tying and untying your shoelaces with various materials to get a feel for the differences in grip and tension.

A picture of different shoelace materials, including cotton, polyester, and nylon shoelaces.

Choose the right shoelace length

To choose the right shoelace length for your shoes, follow these instructions:

  1. Determine your shoe type: Different types of shoes, such as running shoes, casual shoes, or boots, may require different lengths of shoelaces. This is because they have a varying number of eyelets or may need extra length for additional support.
  2. Count the number of eyelets on your shoe: Count the number of eyelets on one side of your shoe, then multiply by 2 to get the total number of eyelets. For example, if your shoe has 4 eyelets on one side, the total number of eyelets would be 8.
  3. Measure your current shoelaces (optional): If you have a pair of shoes with the correct length of shoelaces, simply measure the length of one of the laces and use it as a reference for purchasing new ones.
  4. Consult a shoelace length chart: There are various shoelace length charts available online that provide suggested shoelace lengths based on the number of eyelets and type of shoe. These charts can help you determine the right length of shoelaces for your shoes.
  5. Here’s a general guideline based on the total number of eyelets for your shoes:
    • 4-5 eyelets: 27-36 inches (68-91 cm)
    • 6-7 eyelets: 36-45 inches (91-114 cm)
    • 8-9 eyelets: 45-54 inches (114-137 cm)
    • 10-12 eyelets: 54-63 inches (137-160 cm)
    • 12-14 eyelets: 63-72 inches (160-183 cm)

    Please note that these are approximate lengths and can vary slightly depending on your preference for how long you want the ends of the shoelaces to be after tying.

  6. Consider the width of your shoelaces: Generally, athletic shoes require wider shoelaces, while dress shoes and casual shoes use thinner laces. Make sure to choose the right width of shoelaces for your specific shoes.

After choosing the right shoelace length, you are now ready to tie them. With practice, you’ll be able to master the art of tying shoelaces and feel confident in your footwear.

A person's hands are seen touching shoelaces, preparing to tie them up.

Basic shoelace tying method

Begin with your shoe on your foot, ensuring that your shoelaces are threaded properly through all the eyelets and that they are even on both sides.Grab both ends of the shoelaces, one in each hand, with your thumbs facing down and your index fingers pointing towards your toes.Cross the right shoelace over the left shoelace, forming an “X” shape. Tuck the right shoelace under the left shoelace, pulling it through the hole formed where the two laces overlap.Pull both shoelaces tightly to create a simple knot at the base of your shoe.Hold the right shoelace up with your thumbs facing up and your index fingers facing away from you. Pinch the lace between your thumbs and index fingers, creating a loop about the size of the final bow you desire. This will be referred to as the “right loop.”Repeat step 5 with the left shoelace, forming the “left loop.” Make sure both loops are of similar size.Cross the right loop over the left loop, forming another “X” shape, just as you did in step 3.Tuck the right loop under the left loop, pulling it through the hole formed where the two loops overlap. Maintain a firm grip on the loops as you tighten the knot to form a secure bow.Adjust the size of the loops and the length of the loose shoelace ends by gently pulling on them until the desired size and look is achieved.Congratulations! You have successfully tied your shoelaces using the standard method. Now, go out and enjoy your securely fastened shoes.

An image of someone tying shoelaces step-by-step with illustrations of the X and bow shapes.

Alternative shoelace tying methods

Alternative Shoelace Tying Methods

Bunny Ear Method:

Step 1: Starting with the shoelaces already threaded through the holes in the shoes, and flat against the surface of the shoes, pull both ends of the shoelaces outwards to tighten them.

Step 2: Cross the two ends of the shoelaces over one another, forming an X shape. Thread one end of the shoelace through the gap created by the X, then pull them tight.

Step 3: Create two loops (the ‘bunny ears’) on each of the shoelace ends by simply folding the laces back onto themselves without twisting them.

Step 4: Cross the ‘bunny ears’ over each other, again forming an X shape.

Step 5: Thread one of the ‘bunny ears’ through the gap in the X, just as in step 2, and pull both loops tightly. You now have a securely tied bow on your shoes.

Reef Knot Method:

Step 1: Begin by making sure your shoelaces are already threaded through the holes in the shoes, and lying flat against the surface of the shoes.

Step 2: Pull both ends of the shoelaces outwards to tighten them.

Step 3: Cross one end of the shoelaces over the other, forming an X shape. Thread the end of the lace on top through the gap created by the X, and pull both ends tight.

Step 4: Cross the same end that was on top in step 3, over the other end, forming another X shape. Thread the now bottom lace through the gap created by the X and pull tight.

Step 5: You have now tied a secure reef knot, which is known for its symmetrical appearance and ease of untying when needed. To avoid slips, make sure the ends of the shoelaces are long enough to ensure the knot stays in place.

Quick-Release Method:

Step 1: As with the other methods, start by making sure your shoelaces are threaded through the holes in the shoes and lying flat against the surface.

Step 2: Pull both ends of the shoelaces outward to tighten.

Step 3: Bend one end of the shoelace back towards the shoe, leaving a small loop at its tip. Hold this loop in place with your thumb and index finger.

Step 4: Take the other end of the shoelace and wrap it around the loop you created in step 3. Pull it tight, so the loop of the lace stays in place.

Step 5: Create another loop with the now free end of the shoelace by folding the lace back on itself. Hold this loop with your thumb and index finger.

Step 6: Hold the shoelace in place and gently pull both loops outward.

Step 7: The quick-release knot can now be easily undone by simply pulling both ends of the shoelaces. This method is particularly useful for those who need to remove their shoes quickly, such as athletes or medical personnel.

A child tying shoelaces using the bunny ear shoelace tying method.

Shoelace tying life hacks

Tying shoelaces is a basic yet essential life skill that everyone should learn. Many people learn to tie their shoes as kids, but not everyone knows the various tricks and techniques for tying shoelaces quickly, securing loose ends, and preventing knots or tangles. In this guide, we will explore different shoelace tying life hacks to help you lace up like a pro.

The Bunny Ear Method:

Perhaps the simplest shoelace tying technique, the Bunny Ear method is easy to learn and quick to execute.

  1. Start with your laces properly threaded through the eyelets of your shoes.
  2. Pull both ends of the lace and cross one end over the other, pulling it through the loop.
  3. Make two loops (bunny ears) with both ends of the lace.
  4. Cross the bunny ears over each other and pull the one farthest from you through the loop created by the other.
  5. Pull both bunny ears to tighten the knot securely.

The Ian Knot:

Touted as the world’s fastest shoelace knot, the Ian Knot can save you time and effort when tying your shoes.

  1. Start with your laces properly threaded through the eyelets of your shoes.
  2. Hold both ends of the laces between your thumbs and index fingers.
  3. Cross your hands to create an “X” shape with your laces.
  4. Using your free fingers, pull a loop of each lace through the center of the “X.”
  5. Carefully pull the loops outward to tighten the knot.

Tuck in loose ends:

Loose ends can cause tripping and look untidy. To secure loose ends, you can tuck them into the sides of your shoes or underneath your laces.

  1. Adjust your laces to ensure they are equal in length on both sides.
  2. Tie your chosen shoelace knot securely.
  3. Tuck the loose ends of the laces into the sides of your shoes, or thread them under the horizontal sections of your laces and pull snugly.

Use a “lace lock” to prevent knot slippage:

A lace lock is an easy way to secure your shoelaces and prevent them from coming undone during the day.

  1. Before tying your shoelace knot, create a loop with each lace and hold them in each hand.
  2. Cross the loops and pull one loop through the hole created by the other loop.
  3. Pull the loops tight to create a lock.
  4. Tie your preferred knot on top of the lace lock to ensure that it stays secure.

Double knots for extra security:

If you have particularly slippery laces or are worried about your shoelace knots coming undone, try using a double knot for extra security.

  1. Tie your preferred shoelace knot as usual.
  2. Create a simple overhand knot by crossing the two loose ends again and snuggly pulling one end through the loop created by the other end.
  3. Pull tight to secure the double knot.

Tying shoelaces doesn’t have to be a chore or a source of frustration. With these shoelace tying life hacks, you can secure your shoes quickly and easily, ensuring that you stay comfortable and safe throughout your day. From the Bunny Ear method to the Ian Knot, experiment with these techniques to find your favorite way to lace up your shoes like a pro.

A person tying their shoelaces using the Bunny Ear Method

Common shoelace problems and solutions

Uneven Shoelace Lengths – If you find that one end of your shoelace is significantly longer than the other, this could lead to difficulty in tying a balanced and secure knot. To fix this problem, first untie your shoelaces completely. Next, pull both ends of the shoelace to ensure that they are even at the center of the shoe, where the laces cross. Adjust the laces accordingly, ensuring that the shoe remains snug and comfortable on your foot. Lastly, tie your shoelace like you normally would, and you should have evenly balanced lace lengths.Broken or Frayed Shoelace Tips – Broken or frayed shoelace tips can make it difficult to lace or unlace your shoes, as well as create an untidy appearance. To repair a broken aglet, you can use one of the following methods: Apply clear nail polish or glue to the frayed ends of the shoelace and twist it tightly to form a new, sealed aglet. Allow it to dry completely before using the shoelace. Use heat shrink tubing. Cut a small piece of heat shrink tubing, that is just slightly longer than the damaged aglet. Place the tubing over the frayed lace end, and then carefully apply heat (using a lighter or a hairdryer) to the tubing until it shrinks tightly around the lace.Shoelaces Keep Coming Untied – If your shoelaces continually come undone, it’s likely that you’re not tying them securely enough, or you’re using a method that loosens easily. Try using the ‘double-loop’ or ‘bunny ears’ method to create a more secure knot. Begin by tying a regular starting knot, looping one lace end over the other and pulling tight. Create a loop with each end by simply folding the lace back onto itself. Cross the two loops over each other, just as you would in a regular knot. Tuck one loop under the other and pull tight. This should result in a secure, double-looped knot that should stay in place throughout the day.Difficulty Lacing Shoes When the Laces Are Too Short – When shoe laces are too short, it can be difficult to lace your shoes and tie them properly, resulting in discomfort or ill-fitting shoes. The simplest solution is to purchase longer shoelaces that better suit the size of your shoe and the lacing style you prefer. Alternatively, you can try adjusting your lacing method. For example, you can skip an eyelet or use a smaller crisscross pattern to save lace length. Also consider trying ‘straight bar lacing’ for a more minimalist look while using less lace.Shoelaces Are Too Long – Long shoelaces can create a messy appearance and can be a tripping hazard if they drag on the ground. If your shoelaces are too long, you can either trim them to a shorter length and secure the cut ends with clear nail polish or glue to prevent fraying, or purchase shorter shoelaces designed for your specific type of shoe. Another option is to tie an additional knot or two after tying your regular bow, which will use up some of the excess length and keep the ends off the ground.

A picture of a pair of shoes, with one shoe having a seemingly tangled knot and the other shoe with a neatly tied bow.

Practicing and perfecting shoelace tying

Gather your materials: To start practicing, you’ll need a pair of shoes with laces or a shoelace board. Make sure the laces are long enough to tie easily without being too long. You can use shoes that you wear daily or an old pair that you no longer wear.Find a comfortable spot: Have a comfortable chair to sit on while practicing shoelace tying. Good posture and proper height will make it easier for you to see and reach your shoelaces.Start with the basic knot: Hold one lace in each hand. Cross the right lace over the left lace, then pull the right lace under the left lace, making a simple twist. Tighten the laces by pulling both ends away from each other.Create the loops: Make a loop with the right lace by folding it back on itself. Hold the loop between your right thumb and index finger. Using your left hand, grab the left lace and wrap it around the right loop, moving from right to left.Complete the bow: While holding the left lace wrapped around the right loop, use your left index finger and thumb to push a small section of the left lace through the opening between the two loops. Pull both loops tight to finish the bow.Repeat the process: The key to perfecting your shoelace tying skills is repetition. Practice tying your shoelaces multiple times to develop muscle memory and to become more comfortable with the process.Try different tying methods: There are several ways to tie shoelaces, such as the ‘bunny ears’ method or the ‘Ian Knot.’ Experiment with these different techniques to find the one that works best for you.Test your skills on different types of shoes: Practice tying shoelaces on various shoes, including athletic shoes, dress shoes, and boots. Each type of shoe may have slightly different lace lengths, eyelet spacing, or stiffness, which can affect the feel of tying your shoelaces.Increase your speed: As you become more comfortable with shoelace tying, challenge yourself to tie your shoelaces more quickly and efficiently. Set a timer and practice tying your shoes as quickly as possible while maintaining a secure knot.Teach others: One of the best ways to solidify your understanding is by teaching someone else how to tie their shoelaces. This will help you reinforce your knowledge and identify any areas of the process you might still need to work on.Remember, practice makes perfect. Continue practicing these steps regularly, and you’ll become an expert at tying shoelaces in no time.

A picture of someone's hands tying their shoelaces step by step.

Armed with the knowledge and skills presented in this guide, you are now prepared to confidently tie your shoelaces in various ways and address any shoelace-related challenges that may arise. Remember that practice makes perfect, so don’t be afraid to experiment and try new techniques. Soon enough, you’ll be an expert at keeping your kicks secured and cruising through life with style and ease.

Categories
Food

Tofu: The Ultimate Guide

Tofu, a versatile and nutritious food, has been a staple in Asian cuisines for centuries. In this article, we’ll explore the fascinating history and origin of tofu, as well as its numerous health benefits and various types. From there, we’ll dive into different cooking methods and provide you with an array of delectable tofu recipes for you to try out.

History and Origin of Tofu

Tofu, also known as bean curd, is a popular plant-based protein that originated in China over 2,000 years ago. Although the exact origins of tofu are still debated, it is widely accepted that it was first discovered during the Han dynasty (206 BC–220 AD) in China.It is believed that tofu was accidentally invented when a Chinese cook mixed fresh soy milk with nigari, a form of natural magnesium chloride found in sea water, causing the soy milk to curdle and form soft, white curds.Over time, tofu became a staple ingredient in various Asian cuisines, including Chinese, Japanese, Korean, Vietnamese, and Thai. Tofu was introduced to Japan during the Nara period (710–784) by Buddhist monks and quickly gained popularity as a nutritious and versatile protein source among vegetarians and those following a Buddhist diet, which typically avoids animal products. Meanwhile, in Korea, tofu was first recorded in the Goryeo Dynasty (918–1392) and is now widely used in traditional dishes like sundubu-jjigae and dubu-kimchi.As the popularity of tofu spread across Asia, it eventually made its way to other regions around the world, gaining traction in Western countries during the 20th century. In the United States, the rise of the health food movement and an increasing awareness of plant-based diets have helped tofu become a mainstream ingredient in grocery stores and restaurants.Tofu, enjoyed by millions of people worldwide, is appreciated for its versatility in cooking and its potential health benefits as a high-quality source of plant-based protein.

An illustration of tofu being served in different forms in China, Japan, and Korea reflects tofu's origins and widespread popularity in Asia.

Health Benefits of Tofu

Also known as bean curd, tofu is a versatile and nutritious food derived from soybeans. Its status as an excellent source of plant-based protein makes it an ideal option for those following vegetarian or vegan diets. Besides protein, tofu is packed with essential nutrients like iron, calcium, and magnesium, which contribute to bone health, muscle function, and overall well-being. Moreover, tofu contains unsaturated fats known to help lower cholesterol levels and reduce the risk of heart diseases.

Another health benefit of tofu is its potential to improve digestion and gut health. Tofu contains isoflavones, which are compounds found in soybeans that have been shown to have positive effects on gut bacteria, thereby promoting a healthy digestive system. Furthermore, tofu is low in calories yet high in filling nutrients, making it beneficial for weight management and overall health. The isoflavones in tofu have also been linked to a reduced risk of developing certain types of cancers, including breast and prostate cancer.

Tofu, also known as bean curd, is a versatile, protein-rich food made from the curdled milk of soybeans. Its versatility contributes to its health benefits, as it can be easily incorporated into a wide variety of dishes, making it convenient for those looking to adopt a plant-based or vegetarian lifestyle. Tofu can be pan-fried or grilled, added to soups or smoothies, and even used as a base for desserts. Its mild flavor and various textures enable individuals to adapt it to suit their specific tastes and dietary preferences, providing not only an array of health benefits but also an enjoyable and conscientious eating experience.

A picture of tofu being served on a plate with various vegetables and rice. It is a healthy and versatile food that can be eaten in many different ways.

Types of Tofu

There are several types of tofu available in the market, differing in texture and firmness. Soft tofu, or silken tofu, is made by coagulating soy milk without curdling it, resulting in a smooth, custard-like texture. Silken tofu is softer compared to other types of tofu and is often used in soups, smoothies, and desserts, as it easily blends with other ingredients. By incorporating various types of tofu into one’s diet, people can enjoy diverse and nutritious meal options.

Firm tofu and extra-firm tofu have a denser texture and are made by pressing soybean curds to remove the excess liquid.

Due to their more solid structure, they hold their shape better when cooked and can be sliced, cubed, or crumbled for use in various dishes.

Firm tofu is ideal for stir-fries, grilling, and baking, while extra-firm tofu can be used in recipes that require a substantial texture, such as in hearty stews and meat substitutes.

Both firm and extra-firm tofu can be marinated to enhance their flavors, and they easily absorb the taste of the other ingredients they are cooked with.

Another variety of tofu that has gained popularity in recent years is sprouted tofu.

It is made from sprouted soybeans, which are said to be easier to digest and boast higher levels of nutrients compared to non-sprouted soybeans.

Sprouted tofu is available in different levels of firmness, resembling traditional tofu, and can be used interchangeably in recipes.

No matter the type or texture, tofu is known for its ability to absorb flavors and adapt to a wide range of cuisines, making it a versatile and nutritious addition to various dishes.

There are different types of tofu such as soft tofu, firm tofu and extra-firm tofu with varying textures and firmness.

Cooking Methods for Tofu

One popular cooking method for tofu is frying, which can be done in different ways to achieve varying textures and flavors. Shallow frying or pan-searing tofu involves cooking it in a small amount of oil in a hot pan until it’s golden brown and crispy on all sides. This technique is perfect for incorporating tofu into stir-fries, salads, and wraps. Deep frying, on the other hand, completely submerges the tofu in hot oil, resulting in a crispy outer layer, while maintaining a tender inside. Deep-fried tofu can be enjoyed as a snack, or used in dishes like curry or noodle bowls.

Baking tofu is another excellent method that offers versatility for creating different textures and flavors. To bake tofu, drain and press it to remove excess moisture, then cut it into desired shapes or sizes. To enhance its taste, marinate the tofu in your choice of sauces or spices before baking. Spread the tofu pieces evenly on a lined baking sheet and bake them at 350°F for 25-35 minutes, flipping halfway through, until the desired crispness is attained. Baking tofu provides a healthier alternative to frying, as it requires less oil while still achieving a crispy exterior.Grilling is a fantastic way to prepare tofu, particularly during the warmer seasons when you can enjoy its smoky, charred flavor. Before grilling, make sure to drain, press, and slice the tofu into thick slabs or skewer-friendly cubes. Marinating the tofu adds extra flavor and helps prevent it from sticking to the grill. Preheat the grill and lightly oil the grates to prevent the tofu from sticking. Cook each side for a few minutes until grill marks appear, and the tofu becomes firm and slightly charred on the outside. Grilled tofu is a delicious addition to salads, sandwiches, or as a main course protein served with your favorite side dishes.

Three different images showing tofu being fried, baked, and grilled on a grill pan.

Tofu Recipes

Tofu, or bean curd, is a versatile, nutritious, and protein-rich food made from soy milk. It is a popular ingredient in various cuisines around the world, particularly in Asian dishes. With its subtle taste, tofu serves as the perfect canvas to absorb flavors from other ingredients in a recipe. It comes in different forms, such as silken, soft, firm, and extra-firm, with each type suitable for specific recipes. Beyond grilling, tofu can be pan-fried, stir-fried, baked, and even used in smoothies and desserts, showcasing its incredible versatility.

When it comes to tofu dishes, the options are plenty and cater to various taste preferences. For savory dishes, tofu can be marinated and pan-fried, then incorporated into salads, sandwiches, or grain bowls. As a plant-based protein option, it works well in popular dishes like tofu scramble (a vegan alternative to scrambled eggs), tacos, or pasta dishes. In Asian cuisines, tofu is often used in dishes such as mapo tofu (a spicy Sichuan dish with tofu and ground meat in a chili sauce), agedashi tofu (a Japanese appetizer with crispy fried tofu served in a soy-based sauce), and miso soup (with tofu cubes and seaweed). Tofu can also be used as a meat substitute in curries, stir-fries, and noodle dishes, making it ideal for vegetarian and vegan diets.

Moreover, tofu can also be used in a variety of dessert recipes, proving its exceptional adaptability as an ingredient. Silken tofu, known for its smooth, creamy texture, works exceptionally well in non-dairy and vegan desserts like tofu cheesecake, chocolate mousse, and fruit-based smoothies. By blending silken tofu with ingredients like cocoa powder, sugar, and vanilla extract, it transforms into a creamy, indulgent treat that is perfect for satisfying your sweet tooth without any guilt. In Asian confections, tofu is also used to make dishes like douhua (a soft Chinese tofu pudding served with sweet syrup) and taho (a Philippine dessert made of silken tofu, sugar syrup, and tapioca pearls). Whether you choose to explore savory or sweet tofu recipes, one thing is for sure: the possibilities are virtually endless when it comes to creating diverse dishes with this humble ingredient.

A picture of a chef preparing tofu in a wok.

Now that you have a better understanding of tofu’s rich history, its myriad health benefits, and the various types available, you’re well-equipped to incorporate this wonderful ingredient into your cooking repertoire. With a plethora of cooking techniques and delicious recipes at your disposal, there’s no limit to what you can create using tofu. So, go ahead and unleash your inner chef, experimenting with this versatile and nutritious ingredient in your favorite dishes or discovering new ones.

Categories
Sneakers

Slip-On vs Lace-Up Shoes: Ultimate Comparison

Deciding between slip-on shoes and lace-up shoes can be a challenging task, as both styles offer unique advantages and disadvantages. This article aims to inform you about the history, design, and construction of both types of shoes, as well as their benefits and drawbacks, so you can choose the right footwear for your needs and preferences.

History and Evolution

The history and evolution of slip-on shoes can be traced back thousands of years. The earliest known slip-on shoes were sandals worn by ancient Egyptians and Romans, who appreciated their ease of use and breathability. Throughout the centuries, slip-on shoes continued to evolve and diversify to meet the needs of different cultures and climates. For example, the traditional Japanese “geta” sandal was created as a convenient slip-on footwear solution for walking on wet or uneven surfaces. In more recent times, slip-on styles such as loafers, ballet flats, and espadrilles have gained popularity around the world for their versatile mix of comfort, style, and functionality.

Lace-up shoes, in contrast, have roots that can be traced back to the 16th century. Balmoral (Oxford) shoes and Blücher (Derby) shoes, two predominant styles of lace-up shoes, both originated in Europe as military footwear. The use of lace-up closures allowed soldiers to adjust the tightness of their shoes for a secure and comfortable fit on long marches. Over time, lace-up shoes crossed over from military use to everyday wear and became a fashionable choice for both men and women. In the Victorian era, lace-up boots became a popular option for women seeking both style and support. Today, lace-up shoes have expanded to encompass a wide variety of footwear styles, including sneakers, dress shoes, and hiking boots.

Throughout various cultures, the decision to wear slip-on shoes versus lace-up shoes has grown to represent more than just an individual’s personal taste. In certain situations, the differences between these two footwear styles can symbolize social class or occupation. For instance, during the 19th century in England, lace-up shoes were commonly associated with the upper classes, whereas slip-on shoes were considered fitting for working-class laborers. Currently, we see similar distinctions in professional attire, with lace-up shoes being regarded as more formal and slip-on shoes appearing as more casual and laid-back. In the end, the development of both slip-on and lace-up shoes has presented us with a diverse and abundant selection of footwear, enabling everyone to find the ideal pair based on their specific needs and preferences.

A man wearing slip-on shoes looking at a timeline of footwear with ancient Egyptian and Roman-inspired sandals on one end and modern slip-on shoes on the other end.

Design and Construction

Slip-on Shoes

Designed for convenience and easy wear, slip-on shoes require no laces to be tied. Crafted from various materials, such as canvas, leather, or synthetic fabrics, they come in numerous styles that include loafers, moccasins, boat shoes, and sneakers. To provide a better fit, comfort features like elastic inserts, padded collars, and cushioned insoles are often incorporated in slip-on shoes. These design elements cater to the wearer’s unique footwear needs and allow for a seamless transition when considering both slip-on and lace-up options.

Lace-up Shoes

Lace-up shoes, on the other hand, require laces to fasten the shoe securely onto the foot, offering a more adjustable and supportive fit for various foot sizes and shapes. Lace-up shoes come in many styles such as dress shoes, casual wear, and athletic footwear. The lace-up system provides more support and stability, particularly for athletic pursuits or jobs that require a lot of walking or standing. Lace-up shoes may feature decorative or functional details such as broguing, wingtips, or toe caps to provide a unique design.

Construction Methods

Slip-on shoes and lace-up shoes have distinct construction methods that impact their appearance and functionality. Slip-on shoes typically use glue or stitching to attach the upper to the sole, resulting in fewer seams or a more minimalistic look. On the other hand, lace-up shoes require additional reinforcements due to the strain caused by the tension of the laces. As a result, the uppers of lace-up shoes often have more intricate designs, featuring eyelets and other decorative or functional elements.

A picture of a person's foot inserting easily into a slip-on shoe without any requirement to tie laces.

Advantages of Slip-On Shoes

When comparing slip-on shoes with lace-up shoes, the convenience and ease of wear stand out as a key advantage for slip-on shoes. With no laces to tie or untangle, slip-ons are perfect for fast-paced individuals or those who struggle with tying laces. Additionally, slip-on shoes can be swiftly removed, making them practical for situations where shoes need to be frequently taken on and off, such as going through airport security or entering specific cultural or religious spaces. In contrast, lace-up shoes may require more time and effort to put on or remove, making them less suitable for such circumstances.

Another advantage of slip-on shoes is their flexibility in sizes. Given that they often have an elastic upper or a stretchable material, they may accommodate a wider range of foot sizes and shapes, providing a comfortable fit for people with slightly wider or narrower foot dimensions than standard sizes. This flexibility can also give more room for feet to swell or contract throughout the day, ensuring consistent comfort.

Slip-on shoes provide an easy and casual option for various occasions due to their relaxed and laid-back vibe. Their versatility, combined with a wide range of designs such as sneakers, loafers, and sandals, make them an adaptable and fashionable accessory in one’s wardrobe for different settings and outfits.

A picture of someone wearing slip-on shoes, which can be quickly and easily removed.

Advantages of Lace-Up Shoes

On the other hand, lace-up shoes offer a significant advantage in terms of fit and support compared to slip-on shoes. The adjustable laces cater to the unique contours of an individual’s feet, resulting in a more secure, snug fit. This prevents the shoes from slipping off, a common issue with slip-on shoes. The additional support provided by lace-up shoes makes them suitable for a broader range of activities including sports, hiking, and long walks, as they help minimize the risk of injury.

Another notable benefit of lace-up shoes is their customizability, as laces can be easily swapped out for different styles, colors, and lengths to suit the wearer’s preferences. This flexibility allows individuals to personalize their footwear, adding an element of distinctiveness to their overall ensemble. Additionally, lace-up shoes are available in various styles, making them highly versatile for dressing up or down. Their suitability for both casual and formal occasions sets them apart from slip-on shoes, which tend to lean more towards informal settings.

Lace-up shoes offer style versatility, catering to a wide range of wardrobe options, from timeless classics to trendy contemporary pieces. This adaptability makes lace-up shoes a popular choice for men and women when selecting footwear for work, social engagements, and special occasions. For instance, a pair of oxfords, brogues, or pumps can be dressed up or down for business or black-tie events, while casual sneakers and boots can easily complement jeans and skirts for everyday wear. In contrast, slip-on shoes may not be as appropriate for specific formal events or intricate dress codes.

A picture of a person wearing a pair of lace-up shoes.

Disadvantages of Slip-On Shoes

Aside from style considerations, lace-up shoes also provide an advantage in terms of foot health. While slip-on shoes can be comfortable and convenient, they often lack adequate support and cushioning for the foot’s arch, leading to discomfort and even long-term damage. Additionally, slip-ons tend to have a looser fit than lace-up shoes, increasing the chances of developing blisters or corns from friction. Conversely, lace-up shoes offer a more customizable and secure fit, which can help to minimize irritation and promote proper foot alignment, ensuring long-lasting comfort and well-being.

Another disadvantage of slip-on shoes is their limited stability, particularly when engaging in any physical activities or walking on uneven surfaces. The looser fit of slip-ons makes it more likely for the shoe to slip off or twist on the foot, increasing the risk of injuries such as sprained ankles or unexpected falls. Lace-up shoes, however, provide a more secure and stable fit. This is particularly important for those who are active, have balance issues, or need additional foot support due to medical conditions.

Slip-on shoes are generally perceived as less formal compared to lace-up shoes, which can be limiting in professional or dressy settings where a refined and polished appearance is crucial. The more casual aesthetic of slip-on shoes makes them less suitable for events requiring formal attire or in workplaces with a strict dress code. In contrast, lace-up shoes are often associated with a higher level of formality and sophistication, making them a more versatile and appropriate choice for various occasions.

Imagine walking on sand with footprints that show the arch of the foot. Slip-on shoes lack the support that helps keep the arch in place, which can cause discomfort and long-term damage to the feet.

Disadvantages of Lace-Up Shoes

However, one notable disadvantage of lace-up shoes in comparison to slip-on shoes is the time-consuming process of tying and untying laces. This can be particularly inconvenient for individuals in a rush, those with limited mobility or dexterity, or young children who have not yet mastered the skill of tying shoelaces. In contrast, slip-on shoes offer a quick and hassle-free option, as they can be simply stepped into without any additional fastening required. This allows for a more efficient getting dressed routine and less time spent on adjusting footwear throughout the day.

Lace-up shoes also present the potential issue of lace damage, which can be both frustrating and costly in the long run. Laces can fray, break, or become tangled over time, requiring replacement or repair. Additionally, the repeated process of tying and untying can contribute to the overall wear and tear of the footwear, which may lead to a shortened lifespan for the shoes themselves. Slip-on shoes, on the other hand, do not have laces to worry about, making them a more durable and low-maintenance choice.

One major advantage of slip-on shoes over lace-up shoes is their convenience in certain situations, such as passing through security checkpoints at airports. Lace-up shoes require untying and retying, which can be time-consuming and frustrating. Moreover, lace-up shoes may not provide the same level of comfort as slip-on shoes, as laces can sometimes be tied too tightly, causing irritation or discomfort. Therefore, slip-on shoes offer a more efficient and comfortable alternative to their lace-up counterparts.

Illustration showing the differences between putting on lace-up shoes and slip-on shoes, with slip-on shoes being the easier and quicker option.

Popular Brands and Styles

There are several popular brands offering a variety of slip-on shoes to choose from, such as Vans, Skechers, and TOMS. Vans has been a leading brand since the 1970s with their iconic Classic Slip-On, featuring a wide selection of materials, patterns, and colors. Skechers caters to those who prioritize comfort and cushioning, offering athletic and comfort-oriented slip-ons with their line of GoWalk and Equalizer shoes. TOMS, known for their social mission, provides lightweight canvas slip-on shoes in various colors and patterns. These slip-on shoes are typically priced between $40 and $80, offering an affordable and functional alternative to lace-up shoes.

Lace-up shoes come in a variety of styles and price points, which can cater to a wide range of consumers. Popular brands in this category include Nike, Adidas, and Converse. Nike and Adidas offer a multitude of athletic and casual sneakers, both high-end and affordable, that are perfect for daily wear as well as fitness activities. These brands have made significant strides in integrating performance technology and design, with popular styles such as the Nike Air Force 1, Adidas Ultra Boost, and Adidas Originals Superstar. Converse, a classic and casual brand, is best known for their Chuck Taylor All-Star shoe. This simple, canvas sneaker has been a wardrobe staple for decades and remains a timeless option for many. Lace-up shoes from these brands can range anywhere from $40 to well over $200 for limited edition and high-end releases.

When it comes to style and versatility, Sperry and Cole Haan are two brands that offer a well-rounded selection of both slip-on and lace-up shoes. Sperry, known for their Original Boat Shoe, provides a variety of lace-up and slip-on boat shoes in various materials and colors, catering to those in search of a preppy, coastal, or casual style. Cole Haan, on the other hand, boasts a diverse collection of casual and dress options, including the ØriginalGrand Ultra Wingtip Oxford and the Nantucket Loafer. With a price range spanning from $50 to over $200, these brands offer something for every budget.

A chart showing the various shoe brands for slip-on and lace-up shoes and their respective prices.

Choosing the Right Shoe

When selecting the perfect shoe, several factors come into play, such as the occasion, comfort, personal style, and foot health. Both slip-on and lace-up shoes have their distinct benefits and drawbacks, depending on these considerations. Slip-on shoes are ideal for casual situations, offering the convenience of being easily put on and removed. They make the perfect choice for quick errands or relaxed gatherings. Conversely, lace-up shoes cater to more formal occasions, sports, and activities requiring a secure fit. Providing superior foot support, lace-up shoes are seen as a more suitable option for professional environments.

Comfort and foot health are important elements to think about when choosing between slip-on and lace-up shoes. While slip-on shoes provide quick comfort, they might not offer adequate support for individuals with specific foot or arch issues. Properly fitted lace-up shoes can give better control over the snugness of the fit, which can be beneficial for those with foot ailments, as well as for athletes who require stability during their sports activities. Moreover, lace-up shoes also enable the use of specific lacing techniques catered to a person’s foot shape and needs, providing a more customized fit.

Personal style plays a significant role in choosing between slip-on and lace-up shoes. Fashion preferences differ from one individual to another, and there is a wide range of both slip-on and lace-up shoe styles available on the market, from classic to trendy. In general, slip-on shoes tend to have a more casual and laid-back appearance, while lace-up shoes are often associated with a polished and professional look. However, some shoe designs combine elements from both types, offering stylish options for those who want the best of both worlds. It is crucial to pick a shoe that complements one’s wardrobe and provides the desired aesthetic without compromising comfort and foot health.

A young boy is trying on two pairs of shoes, one pair of slip-on shoes and the other a pair of lace-up shoes, to decide which one he should wear.

Ultimately, the decision between slip-on shoes and lace-up shoes depends on your personal preferences, comfort, and the specific occasion. By understanding the history, design, and advantages and disadvantages of both types of shoes, you can make an informed decision and find the perfect shoe that best suits your individual style and needs. Remember, never compromise on comfort and foot health when selecting a shoe that’s right for you.