Categories
Food

Understanding Tofu

Tofu, a versatile and nutritious food made from soybeans, has been a staple in many cultures for centuries. Its rich history, various types, and numerous health benefits make it an important component of a well-balanced diet. Delve into the fascinating world of tofu and discover its role in global cuisine, learn how to prepare and cook it to perfection, and explore the environmental impact and sustainability of this remarkable protein source.

History of Tofu

Tofu, also known as bean curd, is believed to have originated in China over 2,000 years ago. The earliest recorded mention of tofu is found in the Han dynasty, where it was referred to as “doufu.” Ancient Chinese texts written during the Han dynasty mention tofu being produced by curdling fresh soy milk, although the exact origins of the process remain unclear. Some theories suggest that tofu-making techniques were accidentally discovered when a cook added nigari, a seawater-derived natural coagulant, to a pot of soy milk.

Tofu spread from China to other regions, such as Korea and Japan, between the eighth and tenth centuries. In Korea, tofu is believed to have arrived during the Koryo Dynasty, around the same time Buddhism began to spread. Similarly, around the eighth century, tofu was introduced to Japan by Chinese Buddhist monks, becoming widely consumed among the Japanese population by the 10th century. In the period of the Kamakura Shogunate, Japanese Zen monks further popularized tofu consumption as part of their vegetarian lifestyle.

In the 18th century, tofu’s popularity continued to grow, spreading to Southeast Asian countries, like Vietnam and Indonesia, due to increased Chinese immigrant communities in these regions. Tofu became a staple food in their respective cuisines and can still be found in various traditional dishes today. For instance, Indonesia’s tahu goreng (fried tofu), and Vietnam’s dau sot ca (tofu and tomato sauce), are both beloved dishes in their home countries.

During the late 19th and early 20th centuries, tofu made its way to the Americas as Chinese and Japanese immigrants arrived in the United States. Tofu production first started in the United States at a small scale in San Francisco, California, in 1878 by Wo Sing & Co., to serve the Chinese immigrant communities. However, it wasn’t until the 1960s and 1970s that tofu began to gain broader recognition in the United States, in large part due to the growing interest in vegetarianism, along with a new focus on plant-based protein sources.

Tofu, a versatile and globally enjoyed food, is found in a wide variety of dishes ranging from stir-fries and salads to desserts and smoothies. Over time, it has adapted to different culinary preferences and dietary needs, with various types of tofu, such as silken, firm, and extra-firm, being produced. As the world continues to explore and embrace plant-based alternatives to meat and dairy products, tofu remains an important and beloved protein source for people of diverse cultures and lifestyles.

Image of a bowl of tofu with chopsticks laying next to it on a wooden table, to illustrate the rich history and global popularity of tofu.

Tofu Production Process

Also known as bean curd, tofu is a popular plant-based protein derived from soybeans. To create this nutritious food, high-quality non-GMO soybeans are selected, cleaned, and soaked in water for an extended period. This process ensures both a smooth texture and a rich taste that appeal to a wide range of food enthusiasts.

After the soybeans have been soaked and expanded, they are ground into a fine paste. This paste is then combined with water and boiled, allowing it to thicken and create a soymilk-like consistency. The boiling process also helps to deactivate enzymes present in the soybeans, resulting in a milder flavor and smoother texture.

Next, a coagulant is added to the soymilk, causing it to curdle and separate into curds and whey. The most commonly used coagulants are calcium sulfate (also known as gypsum), magnesium chloride (nigari), or glucono delta-lactone (GDL), which are all food-grade substances that react with the proteins in the soymilk to form curds.

Once the curds have formed, they are transferred to a molding container lined with a cheesecloth or a tofu press, which helps to shape the tofu and remove excess whey. The mold is then placed under a heavyweight, which applies even pressure to the curds, forcing out the whey and causing the curds to compact into a solid block of tofu.

After the pressing process, the tofu is removed from the mold and usually packaged immediately in a water-filled container to maintain its freshness. Some tofu varieties may undergo further processing, such as smoking or marinating, to add additional flavors and textures.

Tofu, also known as bean curd, is a versatile and nutritious protein alternative made from soybean milk. A staple in the Asian diet for centuries, this popular food product comes in several varieties that differ in texture and culinary uses, ranging from soft to extra-firm. These varying firmness levels allow for tofu to be incorporated into an array of dishes.
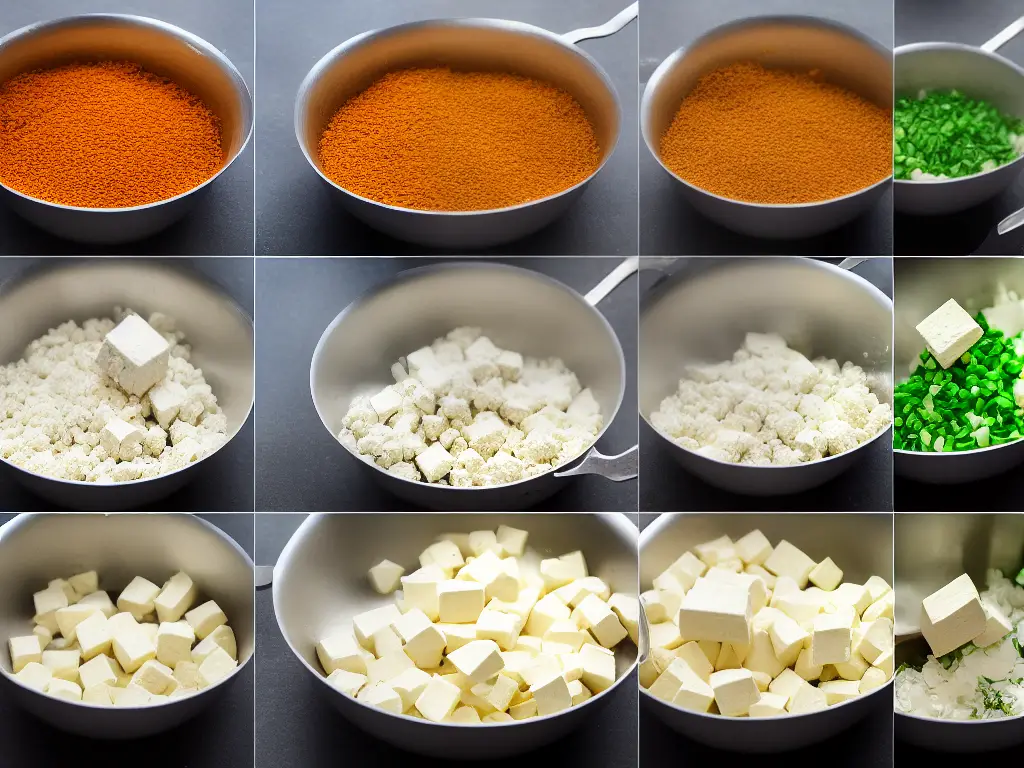
A series of pictures that show the step-by-step process of tofu-making from soaking soybeans to pressing the curds and finally packaging the tofu blocks.

Types of Tofu

From stir-fries and soups to plant-based desserts and beverages, tofu can be a delicious and satisfying addition to any meal. When looking to store tofu, be sure to place it in a water-filled container in the refrigerator, and change the water daily to maintain freshness and extend its shelf life. With its adaptability and numerous health benefits, tofu makes for an excellent choice in adding more plant-based options to your diet.

Soft Tofu (Silken Tofu)

  • Delicate texture similar to custard
  • No need to press out excess liquid during coagulation process
  • Perfect for blending into smoothies, soups, and sauces
  • Used in desserts such as custards and vegan cheesecakes
  • Commonly used in Asian dishes like mapo tofu and agedashi tofu, absorbs the flavors of the dish while maintaining its tender texture

Firm Tofu

  • Slightly denser texture than soft tofu
  • Excess liquid pressed out during coagulation process
  • Holds shape when cooked, works well in stir-fries, grilled, or marinated
  • Can be crumbled and used as a meat substitute in various dishes like tacos and lasagna

Extra-Firm Tofu

  • Densest and least moist option among the three main varieties
  • More water removed during tofu-making process, creating a solid texture
  • Best for pan-frying, stir-frying, or baking, and can retain its shape like kebabs
  • Popular choice for those seeking plant-based protein options as it contains a higher concentration of protein per serving than its softer counterparts

Tofu, also known as bean curd, is a versatile and nutritious food made from soybean curds. One of the most remarkable features of tofu is its rich protein content, making it an excellent addition to a balanced diet, particularly for those who follow a plant-based lifestyle. A 100-gram serving of tofu contains about 8 grams of protein, which helps support the growth and maintenance of healthy tissues, organs, and muscles.

An image showing soft, firm, and extra-firm tofu blocks arranged from left to right, with a bowl of stir-fried vegetables and tofu in the background

Health Benefits and Nutritional Content

There are various types of tofu to choose from, with different textures and flavors. They can be classified by firmness, but beyond that, more specialized types such as pressed tofu (also known as tofu skin or yuba) and fermented tofu exist. Each variety of tofu offers its own unique characteristics, making it a versatile and essential ingredient in both traditional and modern recipes, further highlighting its importance in various cuisines.

Isoflavones are another significant component in tofu, adding to its impressive nutritional profile. These compounds, which fall under the category of phytoestrogens, are believed to offer several health benefits, such as reducing the risk of certain types of cancer, heart disease, and osteoporosis. Genistein and daidzein are the primary isoflavones found in tofu, and their antioxidant properties help neutralize free radicals in the body, promoting overall health and wellbeing.

In addition to its protein and isoflavone content, tofu is a low-fat food that contains essential nutrients like calcium, iron, and vitamins B1, B2, and B3. Calcium is present in tofu due to its preparation method, which involves using calcium sulfate or another coagulant to solidify the soy milk. This makes tofu an excellent source of calcium for individuals who are lactose intolerant or avoiding dairy products. Furthermore, the iron present in tofu helps support the proper functioning of red blood cells, facilitating oxygen transportation throughout the body.

Incorporating tofu into a balanced diet can also contribute to improving cholesterol levels because it is low in saturated fat and contains no cholesterol. Studies have suggested that consuming soy-based products like tofu can help reduce bad LDL cholesterol and, in turn, lower the risk of heart disease. Additionally, tofu is an excellent option for weight management due to its high protein content and low-calorie nature, which can help promote feelings of fullness and reduce overall caloric intake.

Tofu, also known as bean curd, has been a staple ingredient in Asian cuisine for centuries. It is made by coagulating soy milk and then pressing the resulting curds into soft, white blocks. The versatility of tofu is another appealing factor, as it can be prepared in various ways to suit individual preferences and dietary restrictions.

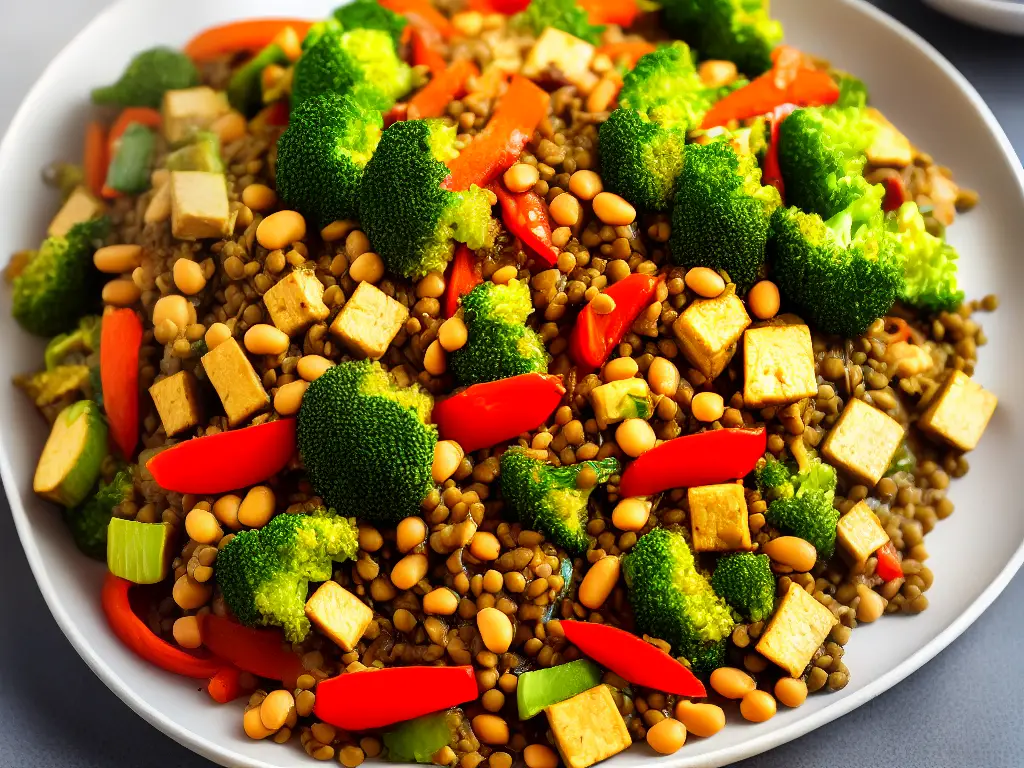
The image shows a variety of tofu dishes such as stir fry, salad and soup. Some of the ingredients are clearly visible including carrot, mushrooms, bean sprouts, tofu cubes, sliced onions and green vegetables. The image depicts a delicious and healthy meal comprising of tofu.

Tofu in Global Cuisine

From being grilled, stir-fried, or scrambled to being added to smoothies and desserts, tofu is a fantastic addition to any meal plan. With its notable health benefits and significant nutritional content, tofu is an excellent option for individuals seeking a wholesome, plant-based protein source that supports a balanced and nourishing diet.

The popularity of tofu can be attributed to its versatility, as it can be prepared in various ways and easily absorbs the flavors of the ingredients it is cooked with. In Asian cuisine, tofu is used in myriad dishes, from stir-fries and soups to desserts and beverages. In Chinese cooking, for example, tofu is often braised with mushrooms and soy sauce, deep-fried and served with a spicy sauce, or gently simmered in a hot pot.

Japanese cuisine similarly embraces tofu’s culinary potential in a variety of dishes, such as miso soup, where delicate cubes of silken tofu are combined with seaweed, green onions, and savory miso paste. Tofu can also be enjoyed cold in dishes like hiyayakko, where it is topped with grated ginger, green onions, and a drizzle of soy sauce. Korea offers dishes like sundubu-jjigae, a spicy soft tofu stew that is cooked directly at the table and features tofu along with vegetables, meat, or seafood.

Tofu’s rise in popularity in Western cuisine is largely due to its association with vegetarian and vegan diets since it serves as an excellent source of protein and essential nutrients. Tofu has been incorporated into various traditional Western dishes as a substitute for meat, dairy, or eggs. For example, tofu can be scrambled for a vegan alternative to scrambled eggs or blended and used as a replacement for ricotta cheese in lasagna. Furthermore, tofu’s ability to take on flavors and textures has resulted in creative dishes like tofu “chicken” nuggets and tofu-based desserts like cheesecake.

Fusion cuisine presents a perfect opportunity for tofu, a versatile and nutritious food made from soybean curds, to be integrated into a variety of culinary traditions. Known for its adaptability in texture, from soft to extra firm, tofu is not only a great source of plant-based protein, calcium, and iron, but it also adopts the flavors and characteristics of the ingredients it is paired with. In this global culinary landscape, tofu transcends its origins and allows chefs from various backgrounds to create innovative and diverse dishes.

A plate of stir-fried tofu with mixed vegetables in a savory sauce

Cooking Techniques and Recipes

For instance, tofu can be marinated with Latin American-inspired spices and grilled, adding a satisfying protein element to dishes like tacos and fajitas. Alternatively, tofu can take center stage in Indian-inspired meals by replacing dairy in a classic palak paneer and pairing it with a creamy spinach sauce. To fully appreciate tofu’s versatility, proper preparation and cooking techniques are essential. These include pan-frying, stir-frying, baking, grilling, and incorporating it into soups and stews. By experimenting with tofu and introducing it to different cuisines, the ingredient demonstrates its remarkable ability to adapt and enhance both traditional and modern dishes.

Pressing tofu

One essential step before cooking tofu is to press it to remove excess water. This can be achieved by placing the tofu block between paper towels or a clean kitchen towel and putting a weighted object on top, such as a pan or canned goods, for at least 30 minutes. Pressing tofu allows for better absorption of flavors and improves its texture when cooked. Another technique is to freeze tofu before pressing, as this helps achieve a firmer and meatier texture.

Marinating tofu

Marinating tofu is an excellent way to infuse flavors, especially because tofu has a subtle taste on its own. Common marinades include soy sauce, garlic, ginger, sesame oil, and rice vinegar, but you can experiment with different seasonings to suit your preferences. Marinating time can range from 30 minutes to a couple of hours, depending on how much flavor you want to infuse into the tofu.

Stir-frying or pan-frying tofu

Stir-frying or pan-frying tofu is a popular method for achieving a crispy exterior with a soft interior. To do this, heat some oil in a non-stick frying pan, wok, or cast-iron skillet over medium-high heat. Cut the tofu into cubes or slices and cook for 2-4 minutes on each side, or until golden brown and crispy. Adding cornstarch or potato starch to tofu before frying can also enhance its crispiness. Once cooked, you can add the tofu to your favorite stir-fry dishes or serve it as a standalone dish with a dipping sauce.

Baking tofu

For a healthier alternative, baking tofu is an excellent choice. Preheat your oven to 350°F (180°C), and line a baking sheet with parchment paper. Cut the tofu into cubes, slices, or even cut it into fun shapes using cookie cutters. Remember to season or marinate the tofu before baking. Spread the tofu onto the baking sheet and bake for 20-30 minutes, flipping halfway through, until golden brown and crispy. Baked tofu can be served as a snack, added to salads, or used as a meat substitute in various dishes.

Grilling tofu

Grilling tofu is a delicious way to prepare it while adding a unique smoky flavor. Ensure that your grill grates are clean and well-oiled to prevent sticking. Cut the tofu into thick slabs, and season or marinate them as desired. Cook the tofu on a medium-high grill for 3-4 minutes per side or until grill marks appear and the tofu develops a slightly crispy crust. Grilled tofu can be served as a main dish alongside grilled vegetables and a dipping sauce, or added to sandwiches and wraps.

A picture of a block of tofu being pressed with a weighted object and elastics to remove excess water before cooking.

Tofu Alternatives and Substitutes

If you’re interested in exploring other soy-based protein options, consider trying tempeh – a popular tofu alternative made from fermented whole soybeans. Tempeh is shaped into a firm, earthy cake, and it boasts a substantial texture, nutty flavor, and high protein content (about 18 grams per 100-gram serving). This makes it an excellent choice for plant-based diets and versatile enough for a variety of dishes. You can slice, crumble or grind tempeh to use in stir-fries, salads, sandwiches, and even veggie burgers. Since it is less processed and considered a whole food, tempeh has a significant health advantage over tofu.

Seitan, also known as wheat meat or wheat gluten, is another popular tofu substitute that is made from vital wheat gluten, the main protein found in wheat. After mixing the vital wheat gluten with water, the dough is formed and cooked. Seitan is notable for its dense, chewy texture that closely resembles that of meat. With a protein content of around 21-25 grams per 100-gram serving, seitan is a potent plant-based protein source. Since it readily absorbs flavors from sauces and marinades, seitan is extremely versatile and can be used in various recipes like stir-fries, stews, and sandwiches. However, it is essential to note that seitan is not suitable for those who are gluten-intolerant or have celiac disease.

Soy-based products aren’t the only plant-based protein options available for those looking to replace tofu. Chickpea flour, for example, is a versatile alternative that’s also known as gram flour, besan, or garbanzo flour. This flour is made by grinding dried chickpeas into a fine powder, creating a high-protein and gluten-free alternative to wheat flour. Chickpea flour can be used to make vegan omelettes, quiches, and frittatas by simply mixing it with water, spices, and desired ingredients until a batter forms, then cooking as desired. Chickpea flour is also an excellent base for various recipes like veggie burgers, pancakes, and flatbreads.

Nuts can also be used as a tofu substitute in select recipes, especially in the case of cashew cheese. Cashews can be soaked in water, then blended with nutritional yeast, lemon juice, and spices until a creamy texture is achieved. Cashew cheese can be used in place of cream cheese, alfredo sauce, or a ricotta-style cheese in various dishes. Almond flour or ground almonds can also add richness and protein to recipes. For these alternatives, keep in mind that the flavor and texture will be different from tofu, but they provide additional protein and nutrients that can still make a dish satisfying and nutritious.

Jackfruit, a large green fruit from Southeast Asia, provides a novel alternative to tofu substitutes. Its growing popularity is attributed to its interesting ability to imitate the texture of shredded meat when cooked and seasoned correctly. It can be incorporated into various dishes such as tacos, barbecue sandwiches, and pulled ‘pork’ sliders. Although jackfruit does not serve as a direct substitute for tofu due to its lower protein content, it offers a unique and creative way to enhance plant-based meals.
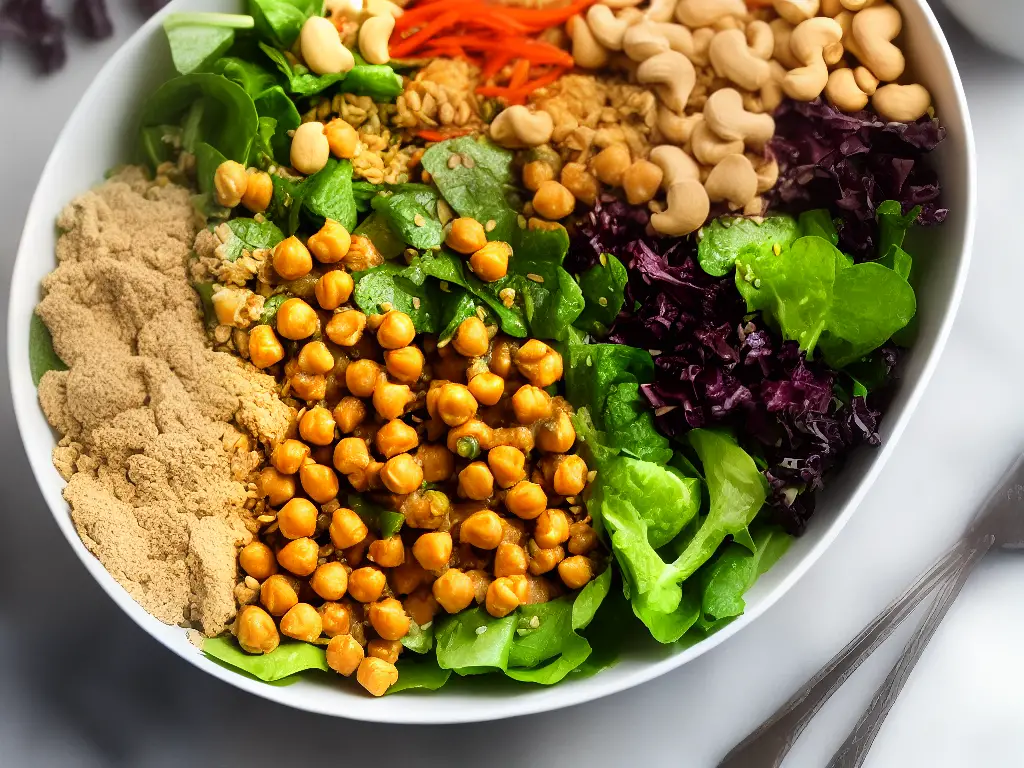
A salad bowl filled with different protein substitutes for tofu, including tempeh, seitan, chickpea flour, cashew cheese, and jackfruit.

Environmental Impact and Sustainability

Moving on to tofu, this popular plant-based protein source is made from soybeans and is also known as bean curd. Tofu boasts a significant advantage over animal-based proteins like meat and dairy due to its considerably lower environmental impact during production. This benefit is particularly essential when considering climate change, land and water use, and overall sustainability. Hence, tofu remains an attractive option for those seeking environmentally-conscious protein sources.

Soybean cultivation requires far less land, water, and other resources compared to the production of animal-based proteins. For example, a 2016 study published in the journal Global Environmental Change found that producing 1 kg of tofu emits approximately 2 kg of carbon dioxide, whereas producing the equivalent amount of beef emits around 27 kg of carbon dioxide. Moreover, the amount of arable land needed to produce one kg of soy protein is found to be only 10% that of land required for an equal amount of beef. This reduces the demand for farmland expansion, which can result in deforestation and habitat destruction.

Water usage is another concern when it comes to the sustainability of protein sources. The production of tofu consumes significantly less water than other animal-based proteins, such as beef and pork. A study in the journal Water found that producing 1 kg of tofu requires approximately 302 liters of water, comparing to a staggering 15,415 liters to produce 1 kg of beef. This makes tofu a much more sustainable option in terms of water use.

Additionally, tofu production generates fewer pollutant emissions and waste byproducts in comparison to animal agriculture. For instance, livestock contributes to the release of methane, a potent greenhouse gas, as a result of enteric fermentation in ruminants. By opting for tofu, people can help contribute to a reduction in methane emissions and their associated environmental impact.

It is also important to note the positive impact of increasing the consumption of tofu on public health. A shift towards a plant-based diet, particularly one that includes soy-based products like tofu, has been associated with lowering the risk of various chronic diseases, such as heart disease and stroke. This, in turn, reduces the pressure on healthcare systems and helps create more sustainable societies in the long run. Therefore, not only is tofu environmentally friendly, but it also contributes to the betterment of public health, allowing individuals to make a meaningful impact in the pursuit of a more sustainable future.

An illustration of tofu blocks arranged in a pyramid shape with green leaves in the foreground, representing the eco-friendliness of choosing tofu as a sustainable protein source.

As we have explored, tofu offers an array of benefits to our health, the environment, and the culinary world. From its humble beginnings in ancient China to its widespread use in cuisines across the globe, tofu plays an essential role in a variety of dishes and meal plans. By understanding the production process, nutritional content, and various types of tofu, we can better appreciate its versatility and integrate it into our own culinary creations. Whether you are a tofu enthusiast or a curious newcomer, there is no denying the impact this protein-rich food has made on our lives and the planet.
Categories
Uncategorized

Strength Training for Runners

Strength training for runners is an essential component of any runner’s training program, whether you’re a recreational jogger or a competitive athlete. By incorporating specific exercises and routines, you can improve your performance, reduce the risk of injury, and ensure that you’re getting the most out of your running practice. This article will guide you through understanding the importance of strength training for runners, as well as provide you with practical advice and exercises to maximize your running potential.

Importance of Strength Training for Runners

Strength training is a vital component of a well-rounded running routine, offering numerous benefits to both novice and experienced runners. By incorporating strength training exercises into your workout regimen, you can improve your running performance, prevent injuries, and boost your overall endurance. In this guide, you will learn about the importance of strength training for runners and how to incorporate it into your routine.

Benefits of Strength Training for Runners:

  • 1. Injury Prevention: Strength training helps to reduce the risk of injuries by enhancing muscle strength, flexibility, and balance. It targets the muscles and tendons used during running, fortifying them to withstand the repetitive impact of running, ultimately resulting in fewer injuries.
  • 2. Improved Running Economy: A crucial aspect of running is the ability to maintain an efficient pace while conserving energy. Strength training aids in enhancing running economy by improving muscle power and enabling smoother movement when running. This translates into the ability to run longer distances with less fatigue.
  • 3. Increased Power and Endurance: Strength training stimulates muscle growth and development, leading to enhanced power and endurance capabilities. This increased strength will allow you to generate more force when pushing off the ground and maintain a stronger pace throughout your run.
  • 4. Better Performance: Incorporating strength training into your routine can help you achieve better race times and overall running performance. Stronger muscles contribute to increased stability and improved running form, which is essential to optimize running efficiency and reduce energy waste.
  • 5. Enhanced Core Stability: A strong core is a vital component of maintaining proper running form and avoiding injuries. Strength training exercises, such as planks and leg raises, can help to develop a stable core, leading to enhanced balance and coordination.

How to Incorporate Strength Training into Your Running Routine:

  1. Schedule strength training sessions: Allocate time for at least two strength training sessions per week, preferably on non-consecutive days. This allows for adequate recovery time between sessions and helps to prevent overuse injuries.
  2. Focus on compound exercises: Incorporate compound exercises into your routine, as these movements work multiple muscle groups simultaneously. Examples of compound exercises include squats, lunges, push-ups, and deadlifts.
  3. Don’t neglect the lower body: It’s important to include lower body exercises in your strength training regimen, as these muscles play a crucial role in running performance. Exercises like calf raises, lunges, and squats can help to improve lower body strength and enhance running form.
  4. Variety is key: Switch up your strength training routine regularly to avoid plateaus and continue challenging your muscles. Experiment with various exercises, weights, and rep ranges to keep your body guessing and prevent adaptation.
  5. Start slow and progress gradually: If you’re new to strength training, it’s essential to start with lighter weights and focus on proper form. As your strength increases, gradually increase the weights to continue challenging your body without risking injury.

Conclusion: Incorporating strength training into your running routine is essential for optimizing performance, reducing injury risks, and improving overall endurance. Start by scheduling regular strength training sessions, focusing on compound exercises, and progressing gradually to reap the benefits of a well-rounded running routine. With consistent effort, you’ll notice improvements in your running abilities and accomplish your running goals with greater ease.

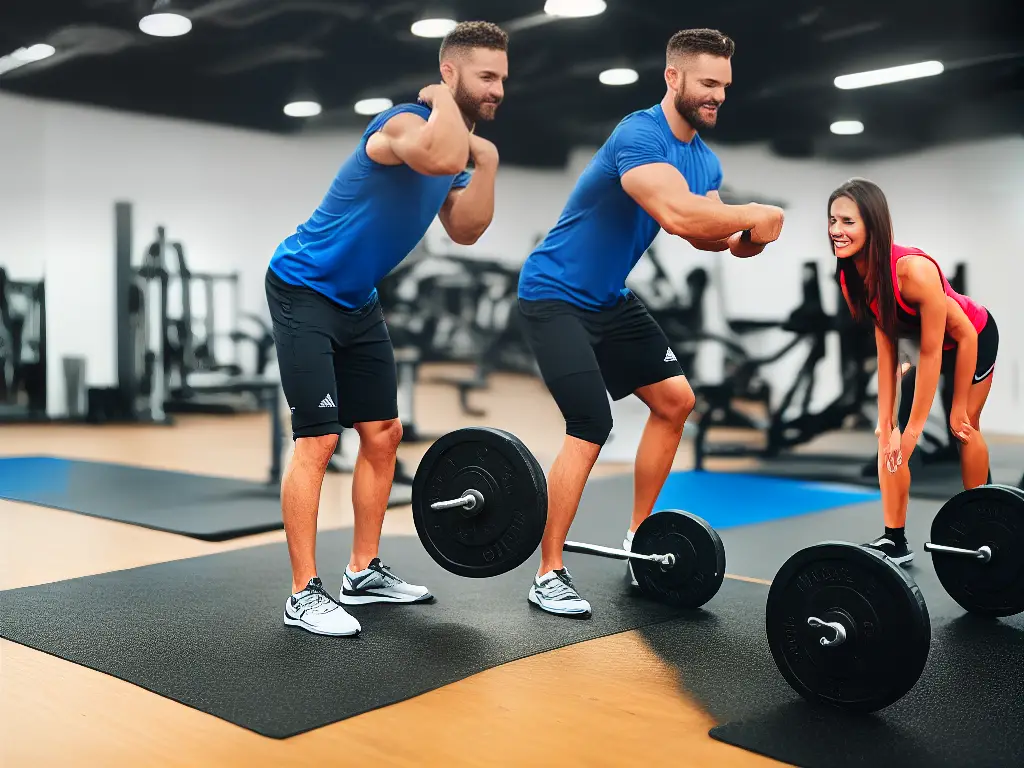
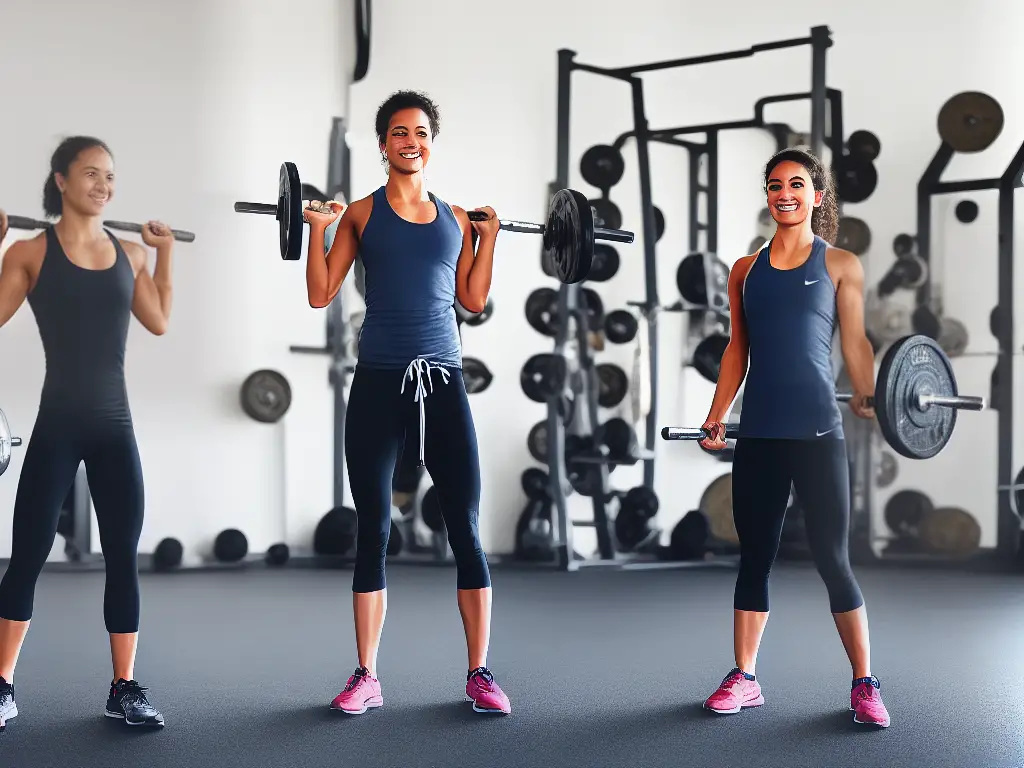
An image of a person in running gear, lifting weights while being supervised by a coach

Running Specific Strength Exercises

Strength training for runners focuses on enhancing the muscles that are crucial for improving our running performance while also reducing the risk of injury. Follow these essential strength training exercises designed specifically for runners:

  1. Squats:
    Squats are a fantastic exercise for runners, as they target multiple muscle groups, including the quadriceps, hamstrings, glutes, and the core.

    Instructions:

    • Stand with your feet hip-width apart, toes pointing forward.
    • Lower your body by bending your knees and pushing your hips back, as if you’re sitting in a chair.
    • Keep your chest high and your back straight.
    • Pause when your thighs are parallel to the ground or lower if possible.
    • Slowly rise back to the starting position.
  2. Lunges:
    Lunges engage the glutes, hamstrings, and quadriceps, which help propel runners forward.

    Instructions:

    • Stand tall with your feet hip-width apart.
    • Take a big step forward with one foot, bending both knees to lower your body.
    • Ensure your front knee stays aligned with your front foot and doesn’t pass your toes.
    • Push through your front heel and straighten your legs to return to your starting position.
    • Repeat on the other side.
  3. Leg Press:
    This exercise strengthens the quadriceps, hamstrings, and glutes.

    Instructions:

    • Position yourself on the leg press machine with your feet hip-width apart on the platform.
    • Lower the safety bars and push the platform away from you, keeping your back pressed against the seat.
    • Slowly lower the platform by bending your knees and bringing them towards your chest.
    • Push the platform back up to the starting position. Make sure not to lock your knees as you straighten your legs.
  4. Calf Raises:
    Calf raises target the calf muscles (gastrocnemius and soleus), which are vital for efficient running.

    Instructions:

    • Stand with your feet hip-width apart, either on the floor or an elevated surface, such as a step or platform.
    • Raise your body by lifting your heels, shifting your weight onto the balls of your feet.
    • Slowly lower down to your starting point.
    • For an added challenge, try single-leg calf raises by lifting one foot off the ground and performing the exercise with one leg at a time.
  5. Single-Leg Deadlifts:
    This movement strengthens the hamstrings, glutes, and hips while improving balance and stability.

    Instructions:

    • Stand on one leg with the other foot hovering slightly above the ground.
    • Engage your core and slowly lower your upper body forward while simultaneously focusing on extending the floating leg behind you.
    • Keep your back straight and your hips level with the ground.
    • Lower your body as far as you can without rounding your back or experiencing discomfort in your hamstring.
    • Push through your supporting foot and return to the starting position. Complete the desired number of reps before switching to the other leg.

Remember to incorporate these exercises into your training routine 2 to 3 times per week, aiming for 3 sets of 8 to 12 repetitions per exercise. Always warm up before beginning your strength training routine to prevent injury and promote flexibility. Additionally, be sure to prioritize proper form over the amount of weight lifted. This will ensure that your muscles are targeted effectively, and the risk of injury is minimized.

A person stretching before running with the sun rising in the background.

Core Strength and Stability

Developing a strong core is crucial for runners as it helps improve running form, posture, and overall stability. A strong core can also help prevent injuries. In this guide, we will discuss the importance of core strength and stability for runners and share key exercises such as planks, Russian twists, and bird dogs.

Importance of Core Strength and Stability for Runners

  1. Improved Running Form and Posture – A strong and stable core allows you to maintain better running form and posture, which can lead to more efficient running and less strain on your muscles and joints.
  2. Enhanced Stability – A strong core keeps your body stable as you run, helping you maintain balance and control.
  3. Injury Prevention – By strengthening your core, you can reduce the risk of injuries related to muscle imbalances and poor form.
  4. Better Performance – A strong and stable core allows you to generate more power and speed, leading to improved running performance.

Essential Exercises for Building Core Strength and Stability

  1. Planks

    A fantastic exercise for building overall core strength and stability, planks target the rectus abdominis, lower back, and oblique muscles.

    Instructions:

    1. Begin by lying face down on the ground with your elbows bent and directly under your shoulders.
    2. Push up onto your toes and forearms, keeping your body in a straight line from head to toe.
    3. Engage your core and hold the position for 30 seconds to one minute. You can increase the duration as you get stronger.
    4. Make sure to breathe during the plank and keep your neck and spine neutral.
  2. Russian Twists

    This exercise targets the obliques and helps improve rotational core strength, which is essential for maintaining balance and stability while running.

    Instructions:

    1. Sit on the ground with your knees bent, heels touching the floor, and your back leaning slightly backward.
    2. Hold your hands together or grip a weight (like a medicine ball or dumbbell) at chest level.
    3. Engage your core and twist your upper body to the right, touching the weight or your hands to the ground next to your right hip.
    4. Repeat the motion to the left side and continue alternating sides for 20 repetitions on each side.
  3. Bird Dogs

    Bird Dogs help in strengthening the lower back, glutes, and hamstrings, which together make up part of the posterior chain – essential for forward propulsion when running.

    Instructions:

    1. Begin on your hands and knees, with your hands directly under your shoulders and your knees under your hips.
    2. Engage your core and simultaneously extend your right arm in front of you and your left leg behind you, keeping both parallel to the ground.
    3. Hold the position for a few seconds, then return to the starting position.
    4. Repeat on the opposite side with your left arm and right leg extended.
    5. Continue alternating sides for a total of 20 repetitions on each side.

Incorporating these core exercises into your training routine will help build your core strength and stability, leading to improved running performance and a reduced chance of injury. Aim to perform these exercises at least two to three times per week for the best results. Remember, consistency is key when it comes to strengthening your core, so stick with it and enjoy the benefits of a stronger, more stable running experience.

An illustration of a runner with a strong core and good posture, with arrows pointing to key muscles including the rectus abdominis, lower back, and obliques.

Upper Body Strength for Runners

Upper body strength may not be the first thing that comes to mind when considering running performance, but it plays a crucial role in maintaining proper form, increasing overall power, and preventing injuries. A strong upper body can aid in stabilizing the core, help maintain balance, and improve arm drive—all of which contribute to a more efficient running experience. In this guide, we will explore the role of upper body strength in running performance and introduce some effective exercises to help build this area, such as push-ups, pull-ups, and row variations.

The Role of Upper Body Strength in Running Performance:

  1. Maintaining proper form: A strong upper body helps maintain an upright torso and efficient arm swing during running, preventing excessive rotation and keeping proper alignment. This allows for a more efficient stride and can help reduce the risk of injury.
  2. Increasing overall power: The arms play a significant role in propelling the body forward during running, particularly when sprinting or running up hills. Stronger arms contribute to greater force generation, which can help improve overall speed and performance.
  3. Preventing injuries: Fatigue can result in a breakdown of running form, leaving runners more susceptible to injuries. Building upper body strength can help maintain form for longer periods, reducing this risk.

Exercises to Build Upper Body Strength for Runners:

  1. Push-ups: A classic exercise that targets the chest, shoulders, and triceps, push-ups are an excellent choice for runners. To perform a push-up, start in a plank position with your hands shoulder-width apart. Lower your body until your chest is close to the ground, then push up, fully extending your arms. Maintain a tight core throughout to avoid sagging at the hips. Aim for 3 sets of 10-15 reps.
  2. Pull-ups: Pull-ups target the upper back, shoulders, and biceps, and can help improve posture and alignment during running. To perform a pull-up, grasp a pull-up bar with an overhand grip, hands slightly wider than shoulder-width. Start from a dead hang with your arms fully extended, then pull your chest up to the bar before lowering back down with control. Aim for 3 sets of 6-10 reps. If pull-ups are too difficult, try using a resistance band or an assisted pull-up machine to build strength.
  3. Row variations: Rows are another great exercise for targeting the upper back and can be performed with dumbbells, a barbell, or a resistance band. For a dumbbell row, stand with your feet shoulder-width apart and knees slightly bent, holding a dumbbell in each hand. Hinge at the hips, keeping your back straight, and bring your chest toward the floor. Keep your elbows close to your body as you row the weights up towards your ribcage, then lower back down. Aim for 3 sets of 10-12 reps.
  4. Plank to push-up: This dynamic exercise engages the core and relies on the shoulders and triceps for stability. Start in a forearm plank with your elbows directly under your shoulders. Push up onto your right hand, followed by your left hand, coming into a push-up position. Return to the forearm plank by lowering onto your right elbow and then your left elbow. Alternate the leading arm and aim for 3 sets of 8-10 reps per side.
  5. Dips: These work the triceps, shoulders, and chest and can be performed on parallel bars or a bench. Place your hands on the bars or edge of the bench, with your legs extended in front of you. Lower your body until your elbows are bent at a 90-degree angle, then push back up to the starting position. Aim for 3 sets of 10-15 reps.

Building upper body strength is an essential component of a well-rounded running program. By incorporating exercises such as push-ups, pull-ups, and row variations into your routine, you can develop a stronger upper body that will support better form, increased power, and reduced injury risk during your runs. Incorporate these exercises alongside your regular running and lower body strength training for a comprehensive approach to improved performance.

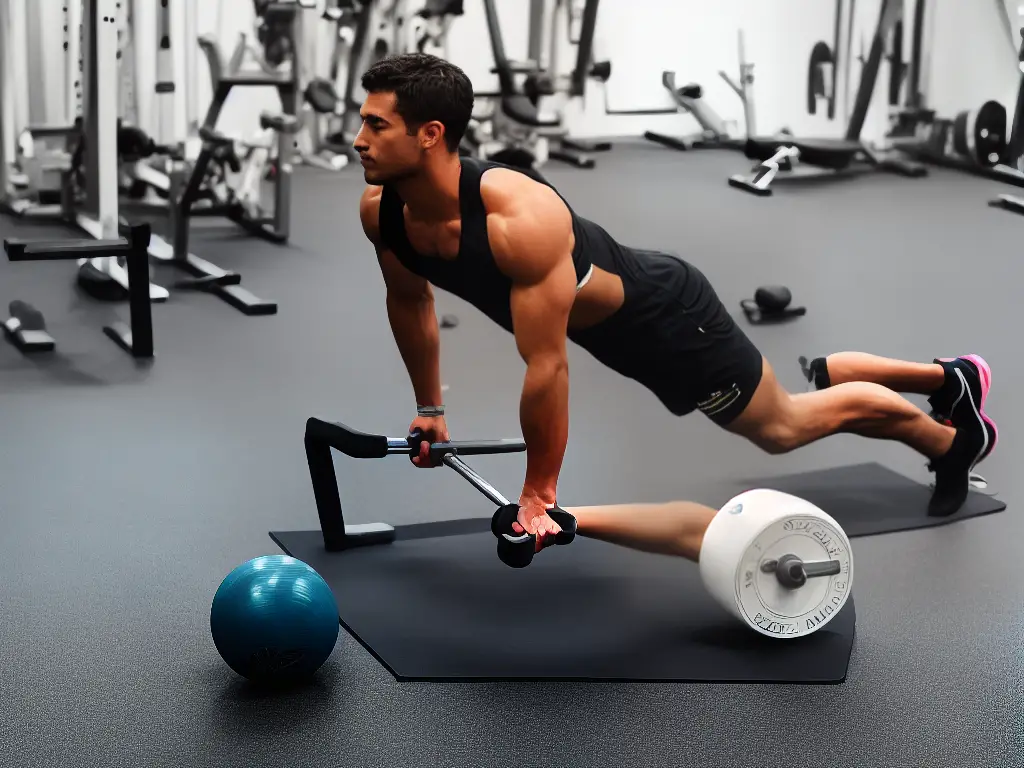
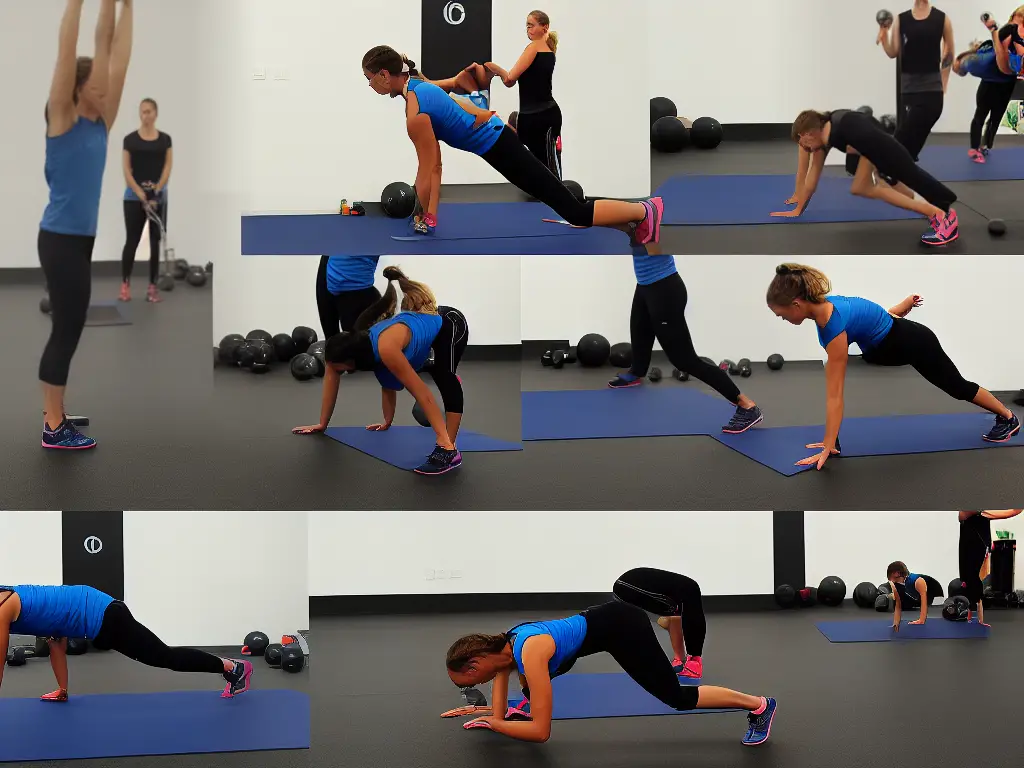
Image of a person performing a push-up with proper form, showing the engaging of chest, shoulders, and triceps muscles.

Plyometric Training

Plyometric training is a type of exercise that involves powerful, explosive movements, typically using body weight, to improve muscular strength, power, and physical performance. This type of training can significantly benefit runners as it helps to develop more efficient movement patterns, increases stride efficiency, and reduces injury risk. The following are steps to learn and incorporate plyometric training into your running routine.

1. Understand the principles of plyometric training.

Plyometric exercises involve three phases: the eccentric (loading) phase, the amortization (transition) phase, and the concentric (explosive) phase. In the eccentric phase, the muscles are lengthened to store potential energy, while in the amortization phase, the muscles transition from lengthening to shortening. Lastly, during the concentric phase, the muscles contract powerfully, releasing the stored energy.

2. Learn about the benefits of plyometric training for runners.

Some benefits of plyometric training for runners include:

  • Increased running economy: Plyometric training helps improve overall running efficiency, allowing you to run faster and farther with less effort.
  • Enhanced muscular strength and power: These exercises help build stronger muscles, allowing runners to generate more force against the ground and propel themselves forward.
  • Improved stride efficiency: Plyometric training increases the elasticity of muscles and tendons, resulting in more efficient strides.
  • Reduced injury risk: Strengthening your muscles and tendons helps to absorb the repetitive forces and impact of running, reducing the risk of injuries such as shin splints and stress fractures.

3. Warm-up properly before starting plyometric exercises.

Always begin your workout with a proper warm-up, such as dynamic stretches and light jogging, to prepare your muscles and prevent injuries.

4. Start with basic plyometric exercises.

There are many plyometric exercises to choose from, but it is essential to start with basic exercises and gradually progress in intensity. Here are some beginner-friendly plyometric exercises for runners:

  • Box Jumps: Stand in front of a sturdy box or platform. Jump onto the box, landing softly with both feet. Step down and repeat.
  • Depth Jumps: Stand on a box or platform (around knee height). Step off the box, landing with both feet before immediately jumping vertically as high as possible. Land softly and reset.
  • Bounding: Run forward while exaggerating your stride length and height, focusing on powerful push-offs and driving your knees upward.

5. Incorporate plyometric exercises into your running training program.

Add plyometric exercises to your training routine one to two times per week, initially focusing on low-intensity and low-volume workouts. Gradually increase intensity and volume as your strength and fitness improve. Ensure adequate rest days between plyometric sessions to allow proper recovery.

6. Monitor your progress and adjust your exercises accordingly.

As you become more comfortable with plyometric training, you can explore more advanced exercises and increase the volume and intensity of your workouts. Keep track of your progress and adjust your exercises accordingly to continue challenging your body and improving your running performance.

Remember, it’s essential to listen to your body and consult with a fitness professional if you’re unsure about an exercise or need guidance on modifying your running training program. With consistent and thoughtful plyometric training, you’ll notice improvements not only in your strength but also in your overall running performance.

An image of a person performing box jumps, one of the beginner-friendly plyometric exercises for runners.

Incorporating Strength Training into Running Routine

Strength training is an essential component of a well-rounded running routine. It enhances your overall performance, reduces the risk of injuries and it also stimulates muscle development and bone strength, contributing to a stronger and a faster runner.

Instructions to Create a Balanced Running and Strength Training Schedule

  1. Determine your goals and current fitness level: Before adding strength training to your running routine, think about what you want to achieve – whether it’s increasing speed, endurance, or simply staying healthy and injury-free. Evaluate your current fitness level and be realistic about the time you have available for training.
  2. Prioritize the workouts: In order to create a balanced running and strength training schedule, prioritize workouts according to your specific goals. For instance, if your primary goal is to increase your running speed, your focus should be on speed work sessions, followed by strength training.
  3. Schedule strength training sessions: Aim to incorporate 2-3 strength training sessions per week. Schedule these sessions on your non-running days or after your easy runs to give your muscles ample time to recover and avoid overtraining. Make sure to maintain at least one rest day each week to allow your body to recover fully.
  4. Choosing strength exercises: Focus on exercises that target the key muscle groups involved in running, such as the quadriceps, hamstrings, glutes, calves, and core. Some effective exercises include lunges, squats, deadlifts, planks, and push-ups.
  5. Warm-up and cool down: Before getting into strength training, it’s essential to warm up properly to prepare your body for the exercises. Start with 5-10 minutes of light cardio, such as jogging or jumping jacks, followed by dynamic stretching to enhance flexibility and mobility. After your strength workout, cool down with static stretching to maintain flexibility and aid in muscle recovery.
  6. Gradually increase the intensity: As your strength improves, gradually increase the intensity of your strength training sessions. This can be achieved by adding more weight, increasing the number of repetitions, or incorporating more advanced exercises.
  7. Listen to your body: Strength training should complement your running routine, not hinder it. If you find that your running performance is suffering or you feel fatigued, reevaluate your strength training workload and adjust it accordingly. Always remember to give your body adequate time to rest and recover.
  8. Incorporate recovery techniques: To optimize your performance and reduce the risk of injury, incorporate recovery techniques into your training routine. Some recovery methods include foam rolling, stretching, massage, and getting enough sleep.

By following these instructions, you will be able to successfully incorporate strength training into your running routine, helping you to become a stronger and more efficient runner. Remember to be patient, committed and consistent with your training, and always listen to your body to avoid overtraining and potential injuries.

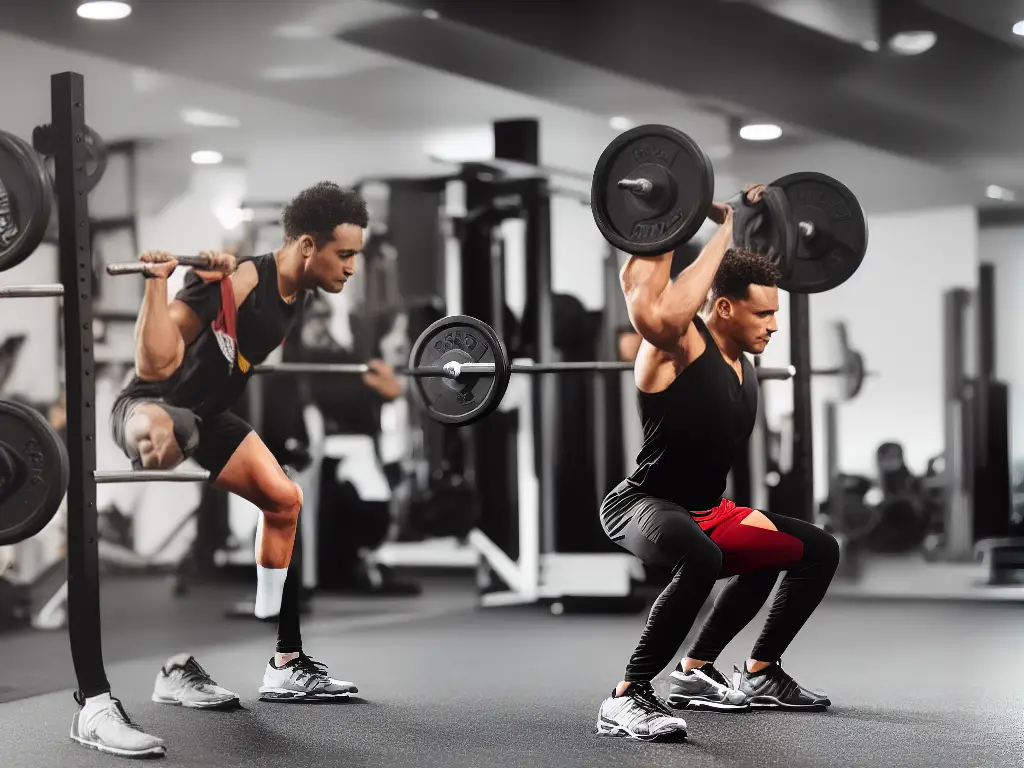
An image of a person doing squats with weights on their shoulders.

Warm-up and Cool-down

A proper warm-up and cool-down routine is essential for runners to prevent injury, enhance recovery, and improve overall performance. These routines usually involve dynamic stretching and foam rolling, which help to increase blood flow, improve flexibility, and prep the muscles for the strenuous activity ahead.

Warm-Up Instructions:

  1. Begin with a light aerobic activity: Start with 5-10 minutes of light aerobic activity, such as brisk walking or slow jogging. This will help to warm your muscles, increase your heart rate, and prepare your body for the strength training exercises.

  2. Perform dynamic stretching: Dynamic stretching involves moving your muscles and joints through a full range of motion, helping to increase flexibility and prevent injury. Perform each of the following stretches for 20-30 seconds.

    • Leg swings: Stand next to a wall or other support, and swing one leg forward and backward, keeping it straight. Switch legs and repeat on the other side.
    • Arm circles: Stand with your feet shoulder-width apart and extend your arms out to your sides. Make small circles with your arms, gradually increasing the size of the circles. Reverse the direction and repeat.
    • Hip circles: Place your hands on your hips and make circles with your hips in a clockwise direction. Reverse and perform counter-clockwise circles.
    • High knees: March in place, lifting your knees as high as possible, engaging your core and pumping your arms.
  3. Practice running drills: Incorporate running-specific exercises to improve your running form and prepare your body for the workout. Perform each of the following exercises for 20-30 seconds.

    • Butt kicks: Jog in place, kicking your heels up towards your glutes.
    • A-skips: Skip in place, lifting your knee up and pulling your foot off the ground. Alternate legs.
    • Grapevines: Step your right foot out to the side, then cross your left foot behind your right. Step your right foot out to the side again and bring your left foot to meet it. Repeat on the other side.

Cool-Down Instructions:

  1. Begin with a light aerobic activity: After your strength training session, spend 5-10 minutes jogging or walking at a slow pace. This helps to remove any built-up lactic acid and begin the recovery process.

  2. Perform static stretching: Unlike dynamic stretching, static stretching involves holding the stretch for 15-30 seconds. Focus on the major muscle groups you have used in your workout, such as the hamstrings, quads, calves, and hip flexors.

  3. Use foam rolling: Foam rolling (or self-myofascial release) is a method of self-massage that helps to release muscle tightness and trigger points. Spend a few minutes rolling each of your major muscle groups (such as quads, calves, and IT band), applying steady pressure and gradually moving the roller up and down the length of the muscle.

An illustration of a person stretching their legs before running. The person has their hands on a wall and has one leg extended behind them while the other is bent in front, stretching their calf muscles.

Nutrition for Strength Training and Running

Strength training and running are essential components for a well-rounded fitness routine. However, many runners often focus solely on their cardiovascular training, neglecting the importance of nutrition and strength training. Proper nutrition is vital for runners who want to improve their performance, increase their strength, and maintain their overall health. This guide will provide you with information on nutrition for strength training and running, including macro and micronutrient intake, as well as pre- and post-workout nutrition strategies.

1. Macronutrient Intake:

Macronutrients are the building blocks of our diet and consist of proteins, fats, and carbohydrates. Here is the recommended macronutrient intake for runners:

  • Protein: Aim to consume 1.2-1.7 grams of protein per kilogram of body weight per day. This will help repair muscle tissue, support muscle growth, and improve recovery. Good protein sources include lean meats, fish, dairy products, eggs, legumes, and soy products.
  • Carbohydrates: Carbohydrate intake depends on your training intensity and duration. For moderate-intensity training, aim for 5-7 grams of carbohydrates per kilogram of body weight per day. For high-intensity training or long-duration runs, aim for 7-10 grams per kilogram of body weight. Carbohydrates provide energy for your muscles and help restore glycogen stores. Good sources include whole grains, fruits, vegetables, and legumes.
  • Fats: Aim for about 20-35% of your daily calorie intake from healthy fats. Fats provide energy and help absorb fat-soluble nutrients. Good sources of healthy fats include avocado, nuts, seeds, olive oil, and fatty fish.

2. Micronutrient Intake:

Micronutrients are essential vitamins and minerals needed for optimal bodily functions and overall health. Some key micronutrients for runners include calcium, iron, magnesium, vitamin D, and vitamin B12. Aim to consume a variety of fruits, vegetables, whole grains, lean proteins, and healthy fats to ensure you are getting sufficient vitamins and minerals.

3. Pre-Workout Nutrition:

To fuel your body for strength training and running, consume a small meal or snack 1-2 hours before your workout. This meal should be rich in carbohydrates for energy, moderate in protein for muscle repair, and low in fat and fiber, as these nutrients may cause gastrointestinal discomfort during exercise.

Example: Whole grain toast with almond butter and banana, a smoothie made with Greek yogurt, berries, and oats, or a bowl of oatmeal with fruit and a scoop of protein powder.

4. Post-Workout Nutrition:

After a workout, it is essential to replenish the lost nutrients and promote muscle repair. Within 30-60 minutes after your workout, consume a meal or snack containing carbohydrates and protein in a 3:1 or 4:1 ratio.

Example: Chocolate milk, a protein shake with fruit, a turkey and cheese sandwich on whole-grain bread, or grilled chicken with quinoa and vegetables.

5. Hydration:

Staying hydrated is crucial for runners as it impacts performance and overall health. Aim to drink at least 2-3 liters of water daily, and consume fluids containing electrolytes during long runs or runs in hot conditions.

Nutrition plays a vital role in enhancing strength training and running performance. To maximize your training benefits, be mindful of your macronutrient and micronutrient intake and focus on proper pre- and post-workout nutrition strategies. Proper nutrition, combined with a well-structured training program, will help you achieve your running and strength training goals.

An image of a training table with healthy food choices like whole grains, fruits, vegetables, lean protein sources, and water on plates and glasses.

Monitoring Progress and Preventing Overtraining

To maximize the benefits of strength training for running performance, it is essential to monitor your progress and prevent overtraining. Overtraining can lead to injury, decreased performance, and burn-out. Here are some steps to help you track your progress, identify signs of overtraining, and maintain a balanced training program:

1. Keep a training log:

  • Write down the details of your strength training and running workouts, including exercises performed, sets, repetitions, weights used, and duration of sessions.
  • Note how you feel during and after each workout (e.g., energy levels, muscle soreness, and mood).
  • Track your running performance indicators, such as pace, distance, and race times.
  • Regularly review your log to help identify trends, patterns, and areas for improvement.

2. Set realistic goals and milestones:

  • Establish short-term and long-term goals related to your running performance and strength training.
  • Break down your goals into smaller, achievable milestones (e.g., increasing weekly mileage, improving maximum lift weight, or completing a race).
  • Regularly evaluate your progress towards these milestones and adjust your training program accordingly.

3. Listen to your body:

  • Pay attention to signals from your body, such as muscle soreness, fatigue, and mood changes.
  • Adjust your training intensity and/or volume as needed, based on your body’s response to workouts.
  • Allow for adequate rest and recovery between workouts, particularly after high-intensity or long-duration sessions.

4. Monitor sleep and nutrition:

  • Ensure that you are getting enough sleep each night, as this is critical for recovery and performance.
  • Maintain a balanced and nutritious diet that supports your training needs, with a focus on quality protein sources, whole grains, fruits, and vegetables.
  • Be mindful of any significant changes in your appetite and energy levels, as these can be indicators of overtraining.

5. Identify signs of overtraining:

  • Common symptoms of overtraining include persistent fatigue, poor sleep, decreased appetite, mood swings, a decline in running performance, frequent illness, and increased risk of injury.
  • If you suspect overtraining, consider reducing your training volume, intensity, or frequency and prioritize rest and recovery.

6. Cross-train and vary your workouts:

  • Incorporate different forms of cardiovascular and strength-based exercises into your training program.
  • Vary the types of strength training exercises you perform, including targeting different muscle groups and employing various training methods (e.g., bodyweight exercises, resistance bands, or free weights).

7. Seek professional guidance:

  • If you are struggling with monitoring your progress or preventing overtraining, consider consulting with a personal trainer, coach, or sports medicine professional.
  • They can provide personalized recommendations and guidance on how to optimize your strength training and running program for your specific needs and goals.

By monitoring your progress and actively working to prevent overtraining, you can ensure that your strength training and running workouts remain productive, enjoyable, and beneficial for your overall performance and well-being.

A checklist for monitoring progress and preventing overtraining in strength training for runners. The image shows a list of the seven steps to take, in bullet form, with checkboxes next to each step. The image also includes illustrations of a runner and weightlifting equipment.

Common Running-Related Injuries and Prevention

Strength training is essential for runners to prevent running-related injuries, improve their form, and enhance their performance. This guide will provide an overview of common running-related injuries, such as runner’s knee and shin splints, as well as effective injury prevention strategies through strength training.

Common Running-Related Injuries:

  1. Runner’s Knee (Patellofemoral Pain Syndrome): This injury results from the kneecap (patella) rubbing against the thigh bone (femur), causing pain around the kneecap. Overuse, muscle imbalances, or inadequate stretching may contribute to this condition.
  2. Shin Splints (Medial Tibial Stress Syndrome): This condition involves pain along the inner edge of the shinbone (tibia) and is caused by repeated stress on the bone and nearby tissues. Overuse, improper footwear, or running on uneven surfaces may contribute to the development of shin splints.
  3. Achilles Tendinitis: This injury is the inflammation of the Achilles tendon, which connects the calf muscles to the heel bone. Overuse, an increase in training intensity or duration, and tight calf muscles may lead to this condition.
  4. Plantar Fasciitis: This injury involves inflammation of the thick band of tissue (plantar fascia) that spans the bottom of the foot, connecting the heel bone to the toes. Overpronation, high arches, or tight calf muscles may contribute to the development of plantar fasciitis.
  5. Iliotibial Band Syndrome (ITBS): This condition is characterized by pain on the outer side of the knee due to inflammation of the iliotibial band, which is a thick fibrous tissue that runs from the hip to the shin. A tight IT band, weak hip muscles, and overpronation may contribute to ITBS.

Injury Prevention Strategies through Strength Training:

  1. Strengthening the Quadriceps: Strong quadriceps muscles help to stabilize the knee joint and prevent runner’s knee. Some effective quadricep strengthening exercises include lunges, squats, step-ups, and leg presses.
  2. Strengthening the Hamstrings: Developing strong hamstrings can improve overall leg strength, balance, and decrease the risk of injuries. Hamstring exercises include hamstring curls, deadlifts, and glute bridges.
  3. Strengthening the Calves: Developing calf muscles can help prevent shin splints, Achilles tendinitis, and plantar fasciitis. Calf raises, seated calf raises, and single-leg hops are effective exercises for calf strengthening.
  4. Strengthening the Hip Muscles: Strong hip muscles can help alleviate IT band syndrome by promoting proper alignment. Side-lying leg lifts, clamshells, and fire hydrants can help target the hip muscles.
  5. Core Strengthening: A strong core helps to maintain proper running posture and form, which can prevent various injuries. Planks, side planks, bird-dogs, and bicycle crunches are great core strengthening exercises.

Other Injury Prevention Tips:

  1. Warm-up and cool down: Properly warm up for 5-10 minutes with dynamic stretches and light jogging. This helps to loosen the muscles, increase blood flow, and prevent injuries. After running, perform static stretches to improve flexibility and prevent muscle tightness.
  2. Gradual increase in training: Follow the 10% rule, which means increasing your weekly running mileage by no more than 10% to avoid overuse injuries.
  3. Use proper running shoes: Replace running shoes every 300-500 miles and choose shoes with adequate support and cushioning to suit your foot type and running style.
  4. Cross-training: Engage in non-running activities such as swimming, cycling, or yoga to develop overall strength and flexibility.

In conclusion, incorporating strength training into your running routine is essential to prevent common running-related injuries. A well-rounded program targeting various muscle groups, along with proper warm-up and cool-down, adequate running shoes, and cross-training can help runners achieve better performance and injury-free running experiences.

Illustration of a runner doing a cross training exercise routine including lunges, squats, step-ups, and leg presses.

By incorporating strength training, core stability, plyometrics, and proper warm-up and cool-down routines into your running regimen, you can unlock your full potential as a runner. Don’t overlook the significance of nutrition and monitoring your progress to keep your body in optimal condition and prevent overtraining. Armed with this knowledge, you’ll be better equipped to tackle any running challenge and achieve your goals with confidence and vigor.

Categories
Uncategorized

Bodyweight Strength Training

Embarking on a journey to improve your strength and fitness is an exciting and rewarding experience. Bodyweight strength training offers an accessible and versatile entry point for people of all fitness levels. By mastering the fundamental exercises and their variations, you will be well on your way to building a strong, lean, and functional physique that will enhance your overall health and well-being. In this guide, we will delve into the essentials of bodyweight training, covering everything from understanding the principles and benefits to mastering the proper form and technique for a myriad of exercises.

Understanding Bodyweight Training

Bodyweight strength training is a form of exercise that uses the weight of your own body as resistance. This type of training has gained significant popularity over the years, owing to its accessibility and effectiveness in improving overall fitness. In this guide, we will provide an overview of bodyweight training, its principles, benefits, and key aspects, such as proper form and warming up.

I. Defining Bodyweight Strength Training

  • Definition: Training that uses the individual’s own bodyweight as resistance
  • Examples: Push-ups, squats, pull-ups and planks

II. Principles of Bodyweight Training

  • Progressive overload: Gradually increasing the difficulty of exercises to promote muscle growth and strength
  • Specificity: Training for the desired outcome, focusing on specific muscle groups for strength, endurance, or flexibility
  • Individualization: Modifying exercises to suit personal fitness level, goals, and abilities
  • Variation: Incorporating a mix of exercises to target different muscle groups and prevent boredom

III. Benefits of Bodyweight Strength Training

  • Accessibility: Requires little to no equipment and can be done anywhere, making it suitable for people of all fitness levels and budgets
  • Functional fitness: Improves movements and activities that are essential for daily living, such as walking, lifting, and bending
  • Muscular strength and endurance: Builds lean muscle mass and stamina by targeting multiple muscle groups at once
  • Flexibility and mobility: Enhances joint health, range of motion, and overall body coordination
  • Mental health benefits: Reduces stress, boosts mood, and promotes mental well-being

IV. Proper Form and Technique

  • Importance: Maintaining proper form prevents injuries and maximizes the effectiveness of each exercise
  • Key aspects: Aligning the body in a neutral position, engaging core muscles, and breathing correctly
  • Learning proper form: Utilizing online resources (videos, articles) or consulting with a fitness professional

V. Importance of Warming Up

  • Benefits: Increases blood flow to muscles, improves range of motion, and reduces the risk of injury
  • How to warm up: Perform 5-10 minutes of light aerobic exercises (e.g., brisk walking, jumping jacks) and dynamic stretching targeting the muscles that will be engaged during the workout

VI. Sample Beginner Bodyweight Training Routine

  • Warm-up: Jumping jacks (2 sets x 30 seconds), walking lunges (2 sets x 10 reps per leg)
  • Main exercises: Push-ups (3 sets x 8-12 reps), bodyweight squats (3 sets x 12-15 reps), plank (3 sets x 30 seconds)
  • Cool down: Light stretching targeting the chest, legs, and core muscles

In conclusion, bodyweight strength training is a versatile and effective way to improve overall body strength, endurance, and mobility. By understanding the principles and key aspects of this practice, including maintaining proper form and warming up, individuals of all fitness levels can reap the benefits of bodyweight training. As always, consult with a fitness professional if you are unsure about specific exercises or techniques and listen to your body to avoid injuries.

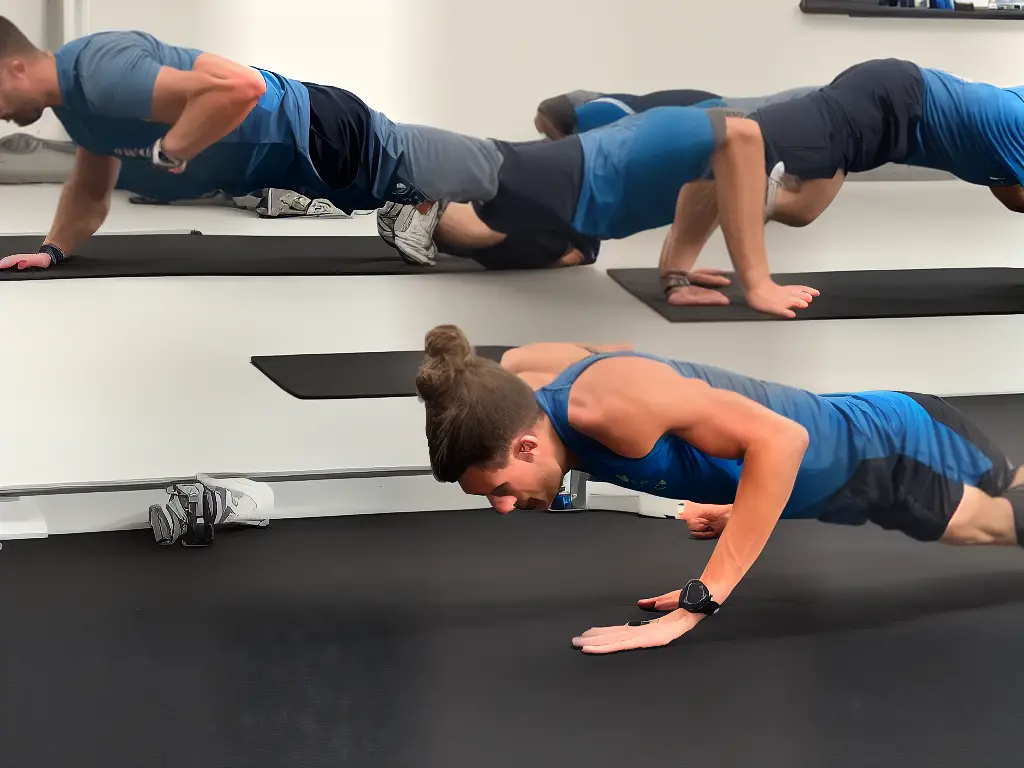
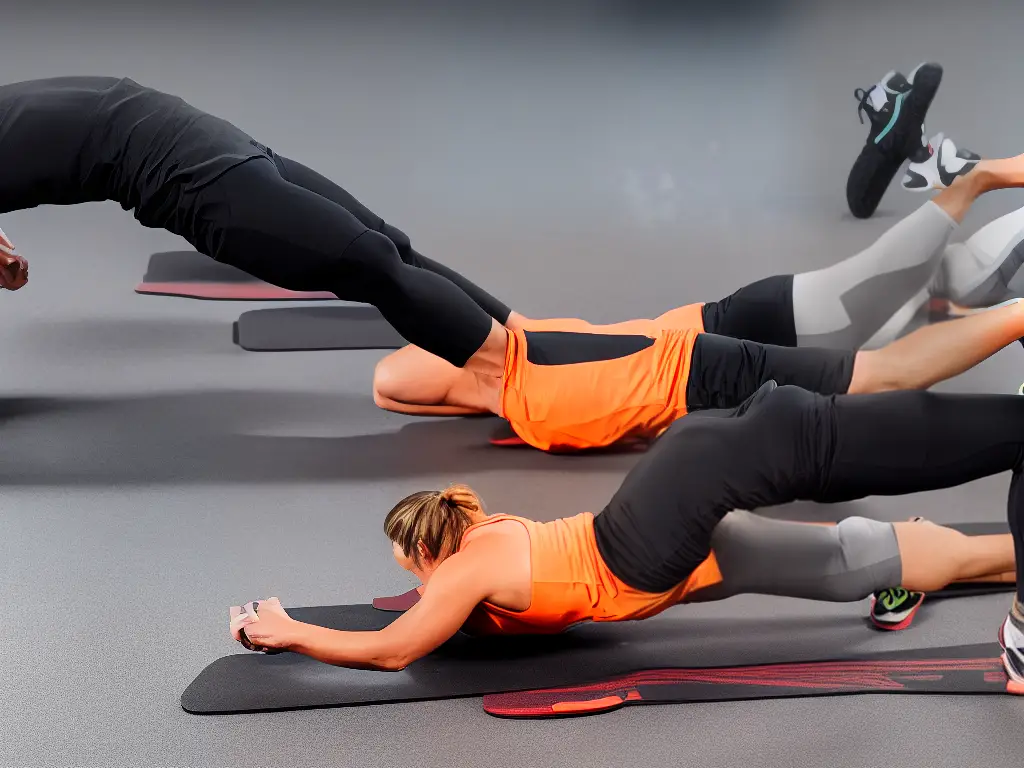
An illustration of a person in a plank position focusing on their core muscles.

Push-Ups

The push-up is one of the best bodyweight exercises that works on various muscle groups, including the chest, shoulders, triceps, and core. Learn how to master the basic push-up form and try out variations to improve overall strength and endurance.

Basic Push-Up Form:

  1. Starting position: Keep your hands slightly wider than your shoulders, palms flat on the ground, and your legs extended back to form a plank position.

  2. Brace your core: Tighten your abdominal muscles and glutes to maintain a straight body alignment.

  3. Lowering phase: Lower your chest to the ground, keeping your elbows close to the body. Inhale as you lower your body.

  4. Push-up: Press your palms into the ground, straighten your elbows to lift your body back to the starting position. Exhale as you push up.

  5. Repeat: Do 10-15 repetitions for best results before trying out different variations.

Variations to Target Different Muscle Groups:

  1. Wide grip push-up: Place your hands further apart, beyond shoulder-width, to work the chest muscles more.

  2. Narrow grip push-up (diamond push-up): Position your hands close together, forming a diamond shape with thumbs and index fingers touching. This variation shifts the focus to triceps and shoulders.

  3. Decline push-up: Place your feet on an elevated surface, such as a bench or box, to increase the challenge on your upper chest and shoulders.

  4. Incline push-up: Position your hands on an elevated surface, with feet on the ground, to target the lower chest and reduce intensity compared to the standard push-up.

  5. Push-up with rotation: Perform a standard push-up, but as you push up, rotate your body to the side and extend your arm to reach towards the ceiling. This engages the oblique and core muscles and challenges stability.

  6. Single leg push-up: Lift one leg off the ground while performing the standard push-up. This variation works on core stability and balance.

Tips to Improve Strength and Endurance:

  • Focus on proper form: Make sure you maintain a straight body alignment and controlled movements with each repetition.

  • Increase repetitions and sets: Start with three to four sets of 10-15 reps, increasing over time as you become comfortable with the exercise.

  • Vary the intensity: Mix in variations that target different muscle groups and increase the intensity of your workout for maximum results.

  • Include additional exercises: Add other strength exercises such as pull-ups, dips, and squats to enhance overall muscle development and functional strength.

  • Monitor progress: Track the number of repetitions, sets, and variations in each workout to monitor your progress over time.

An image illustrating a perfect push-up posture, with a person in a plank position with their hands just wider than their shoulders and arms straight but not locked out. Their body is straight and tight, with no sagging or bending in the hips or lower back.

Pull-Ups

Pull-ups are an excellent bodyweight strength training exercise that targets your upper back muscles, shoulders, and arms. In this guide, we’ll teach you how to perform pull-ups with proper form and introduce you to various grip styles to maximize your workout.

Step 1: Warm up

Begin your workout with a 5-10 minute warm-up to prepare your muscles for the pull-up exercises. You can do dynamic stretches, light cardio, or more straightforward upper body exercises like arm swings or shoulder rolls.

Step 2: Select the right pull-up bar

Find a sturdy pull-up bar that can support your body weight. The bar should be high enough that your feet can’t touch the ground when you hang from it, but low enough that you can grip it comfortably while standing on your toes.

Step 3: Basic pull-up form

  1. Grasp the pull-up bar with your palms facing away from your body (overhand grip) and your hands slightly wider than shoulder-width apart.

  2. Hang from the bar with your arms fully extended, legs crossed behind you, and feet off the ground. This is your starting position.

  3. Engage your abs, shoulder blades, and back muscles while maintaining a slight bend in your elbows to prevent over-extension.

  4. Begin to pull yourself up by bending your elbows and driving them down and back, bringing your chest towards the bar.

  5. Continue to pull yourself up until your chin is above the bar.

  6. Slowly lower yourself back down to the starting position, focusing on controlling your descent and maintaining tension in your muscles.

Note: This description assumes you can already perform a pull-up. If you cannot yet perform a pull-up, you can start by doing negatives (focusing on the slow descent) or using assistance bands to help build strength.

Step 4: Different grip styles

  1. Overhand grip: This is the traditional grip for pull-ups, as mentioned above, where your palms face away from your body. This grip focuses more on the lat muscles, biceps, and forearms.

  2. Underhand grip (Chin-up): In this grip, your palms face towards your body, and your hands are shoulder-width apart or closer. This grip places more emphasis on your biceps and forearms, as you pull yourself up.

  3. Wide grip: The wide grip variation involves placing your hands further apart on the pull-up bar. This grip targets the muscles in your upper back and shoulders more than the traditional grip.

  4. Narrow grip: The narrow grip involves placing your hands closer together on the pull-up bar. This grip focuses on the lower lats and your biceps.

  5. Mixed grip: In the mixed grip, one hand uses an overhand grip while the other uses an underhand grip. This variation helps to equally emphasize both sides of your upper body.

Step 5: Training and progressions

Initially, aim for 3-4 sets of pull-ups, with as many repetitions as you comfortably can do in each set. Make sure to rest for 1-2 minutes between each set. Gradually increase the difficulty over time by adding more repetitions, sets, or incorporating different grip styles.

Pull-ups are a fantastic bodyweight strength training exercise for your upper back, shoulders, and arms. By following these instructions and practicing various grip styles, you’ll not only improve your pull-up form but also increase your overall upper body strength and muscular definition. Stick to a regular workout routine, and you’ll see progress in no time!

A cartoon illustration of a person doing a pull-up on a bar with proper form - arms fully extended and feet off the ground, chin lifted up above the bar - with different colored muscles highlighting the biceps, lats, shoulders, and back.

Bodyweight Squats

Bodyweight squats are an excellent lower body exercise that targets your quadriceps, hamstrings, glutes, and calves. By learning proper form and incorporating different squat variations into your routine, you can effectively strengthen your lower body.

Basic Squat Form:

  1. Stand tall with your feet shoulder-width apart, toes pointing slightly outward.
  2. Engage your core and maintain a straight back throughout the exercise.
  3. Begin the squat by bending at the hips and knees, lowering your body down as if sitting in a chair.
  4. Keep your knees in line with your toes, avoiding any inward or outward movement.
  5. Continue lowering your body until your thighs are parallel to the ground or as close as your flexibility allows.
  6. Press into your heels and push your hips forward, straightening your legs to return to the starting position.
  7. Repeat for the desired number of reps.

Bodyweight Squat Variations:

  • Jumping Squats: This plyometric variation adds explosiveness and intensity to the basic squat, increasing its cardiovascular and strength-building benefits.
    • Perform the basic squat as described above, but as you rise, jump into the air as high as you can.
    • Land softly on your feet, absorbing the impact by bending your knees and smoothly transitioning into the next squat.
    • Repeat for the desired number of reps.
  • Pistol Squats: This advanced variation challenges your balance, flexibility, and leg strength.
    • Stand tall with your feet together, then extend your left leg straight in front of you.
    • Extend your arms straight out in front of you for balance.
    • Begin the squat by bending your right knee while keeping your left leg fully extended and raised in front of you.
    • Lower your body until your right thigh is parallel to the ground, or as close as your flexibility allows.
    • Press into your right heel to rise back to the starting position.
    • Complete the desired number of reps on one leg before switching to the other leg.
  • Sumo Squats: This variation places more emphasis on your inner thighs and glutes.
    • Stand with your feet wider than shoulder-width apart and your toes pointing out at a 45-degree angle.
    • Perform the squat, keeping your knees in line with your toes, and lowering your body until your thighs are parallel to the ground.
    • Press into your heels and push your hips forward to return to the starting position.
    • Repeat for the desired number of reps.

Remember to warm up before beginning your workout and stretch afterward to support muscle recovery and flexibility. Additionally, make sure to maintain proper form throughout each squat variation to prevent injury and ensure the most effective workout.

A person performing a bodyweight squat with proper form, with their feet shoulder-width apart and toes slightly pointed out.

Lunges

Lunges are an excellent bodyweight strength training exercise that primarily targets the lower body, specifically the quadriceps, hamstrings, glutes, and calves. This easy-to-perform exercise also helps improve stability and flexibility.

Basic Lunge:

  1. Stand in an upright position with feet hip-width apart, and engage your core muscles to maintain a straight and stable posture.
  2. Take a step forward with your right foot. Make sure that the step is big enough so that when you lunge, your left knee is almost touching the ground, while your right thigh remains parallel to the ground.
  3. Lower yourself by bending your knees, keeping your upper body straight and shoulders relaxed. Make sure your right knee is aligned with your ankle and not extending past your toes.
  4. Push yourself back up to the starting position via the right heel, using the strength of your glutes, thighs, and core.
  5. Perform the same steps above, but with the left foot stepping forward.
  6. Complete three sets of 10-15 lunges for each leg to start with, and gradually increase the number of sets and repetitions as you progress.

Lunge Variations:

  1. Reverse Lunge: Step backward with your right foot and perform the same movements as in the basic lunge.
  2. Side Lunge: Step to the right with your right foot, keeping toes pointed forward. Bend only the right knee, while keeping the left leg straight. Push off the right heel to return to the starting position.
  3. Walking Lunge: Perform a basic lunge with your right foot, but instead of returning to the starting position, bring your left foot forward to perform the next lunge, “walking” forward with each lunge.
  4. Jumping Lunge: Perform a basic lunge, and then explosively push upwards, jumping off the ground and switching legs mid-air, landing in a lunge position with the opposite leg forward.
  5. Bulgarian Split Squat (also known as rear foot elevated split squat): Place your left foot on an elevated surface, like a step or a bench, behind you. Perform a lunge with your right foot forward, and then return to the starting position.

Remember that as with any exercise, proper form is crucial to prevent injury and effectively work the target muscles. Challenge yourself with variations and increased repetitions for improved lower body strength, stability, and flexibility.

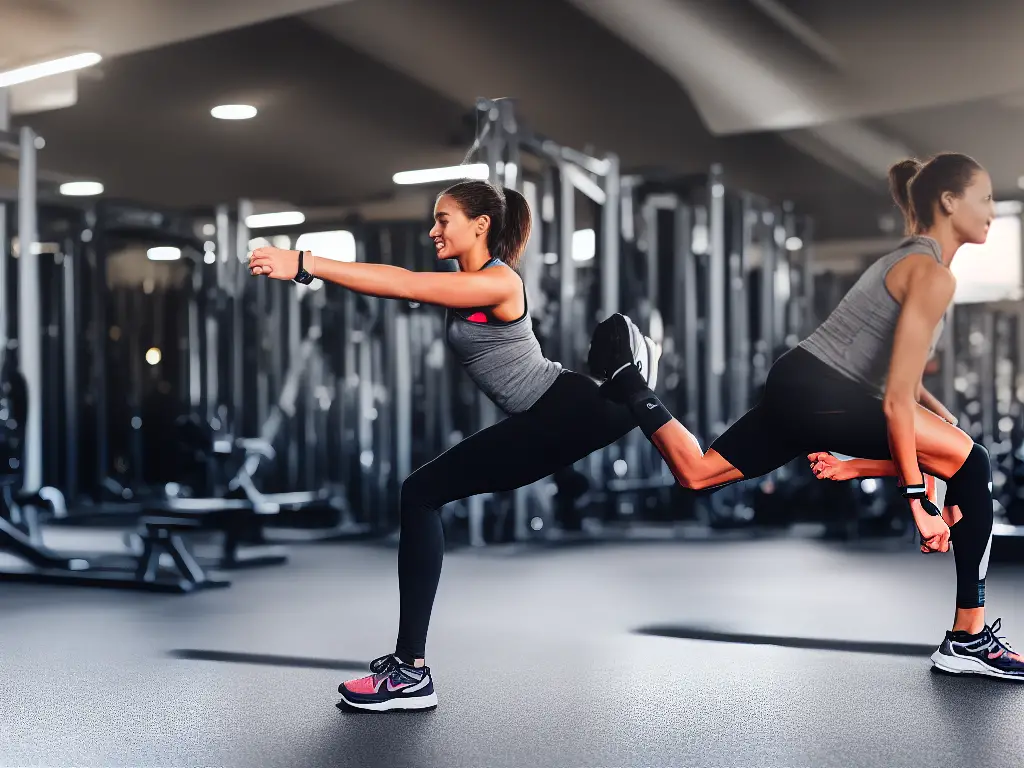
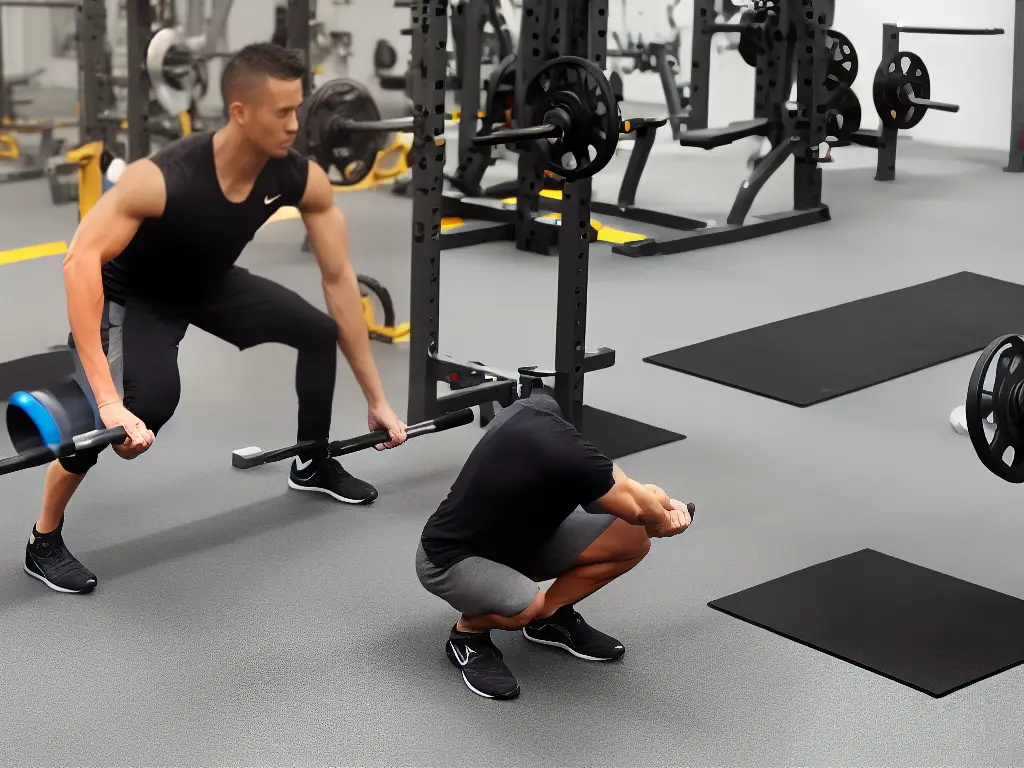
A person performing a lunge exercise with proper form and a stable posture, holding their hands out in front of them for balance.

Planks and Core Exercises

Bodyweight strength training is an effective way to build muscle, increase stability, and improve endurance without the need for gym equipment. In this guide, you will discover different plank variations and other bodyweight core exercises to help you develop strength and endurance in your abdominals, obliques, and lower back.

1. The Basic Plank

The plank is a foundational exercise targeting the muscles of your abdominal wall, lower back, and shoulders.

  • Start in a prone position, lying face down on the ground, with your forearms on the floor and your elbows directly beneath your shoulders.
  • Raise your body off the ground, tightening your core muscles and keeping your back straight. Your body should form a straight line from your head to your heels.
  • Hold this position for as long as you can, aiming for at least 30 seconds. As your core strength increases, work towards holding the plank for 1-2 minutes.

2. Side Plank

The side plank targets your obliques, located on the sides of your torso.

  • Begin by lying on your side, with your body in a straight line and your elbow directly beneath your shoulder.
  • Raise your hips off the ground, forming a straight line from your head to your feet.
  • Hold this position for at least 30 seconds, then switch sides and repeat.

3. Reverse Plank

The reverse plank targets your lower back, glutes, and hamstrings.

  • Sit on the ground with your legs straight out in front of you, hands placed on the floor behind you with fingertips pointing towards your feet.
  • Press your hands and heels into the ground, lifting your hips and torso until your body forms a straight line from shoulders to heels.
  • Hold this position for at least 30 seconds, increasing the duration as your strength improves.

4. Single Leg Plank

The single leg plank adds a challenge to the basic plank by shifting your weight onto one leg.

  • Begin in the basic plank position.
  • Slowly raise one foot off the ground, keeping your leg straight and maintaining a flat back.
  • Hold this position for 15-30 seconds, then switch legs and repeat.

5. Mountain Climbers

This dynamic exercise targets your abdominals, obliques, and hip flexors.

  • Begin in a push-up position with your hands shoulder-width apart and positioned directly beneath your shoulders.
  • Bring one knee towards your chest, engaging your core muscles as you lift.
  • Quickly switch legs, bringing the other knee towards your chest as you return the first leg to its starting position.
  • Continue alternating legs in a fluid motion for 30 seconds to 1 minute.

6. Russian Twists

Russian twists target your obliques and overall core strength.

  • Sit on the ground with your knees bent and feet flat on the floor.
  • Lean slightly back, engaging your abdominals as you lift your feet off the ground and bring your knees towards your chest.
  • Clasp your hands together in front of your chest, and twist your torso to the right, then to the left, tapping the ground beside your hip each time you twist.
  • Continue twisting for 30 seconds to 1 minute, maintaining the raised leg position.

Consistently practicing these plank variations and core exercises will help you develop stability, strength, and endurance in your abdominals, obliques, and lower back. And the best part? You can do them all with just your body weight and a bit of space. So, get started today, and watch your core strength improve.

Illustration of a person doing planks with arrows pointing to their abs, obliques, and lower back muscles

Dips

Dips are an effective bodyweight strength training exercise that works multiple muscle groups, including the triceps, chest, and shoulders. This exercise can be performed using parallel dip bars, a corner of a countertop, or even the edge of a sturdy chair.

In this guide, we’ll introduce you to dips and their variations, helping you strengthen your triceps, chest, and shoulders.

Instructions:

  1. Warm-up: Before starting any exercise routine, it’s crucial to warm up your muscles and joints properly. Perform 5-10 minutes of light cardio, such as jogging in place, jumping jacks, or high knees, followed by some dynamic stretches targeting the chest, triceps, and shoulder muscles.
  2. Find a suitable location for performing dips:
    • Parallel dip bars at a local park or gym
    • A sturdy countertop with a corner
    • Two sturdy chairs placed side by side (be cautious and ensure stability)
  3. Basic Dip Technique:
    1. Position yourself between the bars (or chairs/countertop edge) with your hands firmly gripping the bars and with your palms facing inwards.
    2. Lift your body off the ground, extending your arms fully, supporting your weight on your hands, and keep your legs bent.
    3. Slowly lower your body by bending your elbows until they form a 90-degree angle, keeping your chest up and leaning slightly forward.
    4. Push yourself back up to the starting position, fully extending your arms and repeating the process for the desired number of reps.
  4. Dip Variations:
    • Tricep-focused Dips: Lean your torso more upright as you perform the dip, minimizing the chest and shoulder involvement, and placing more emphasis on the triceps.
    • Chest-focused Dips: When descending, lean further forward and flare your elbows out to the side, lowering your chest towards the bars. This variation places greater emphasis on the chest muscles.
    • Shoulder-focused Dips: Raise your feet off the ground to the nearest parallel surface or on the dip bars themselves. Tuck your knees close to your chest and maintain a more upright torso as you perform the dip.
    • Assisted Dips: If you’re unable to perform a full dip, use a resistance band or an assisted dip machine to reduce the load and work on progressively increasing your strength.
  5. Reps and Sets:
    • As a beginner, aim for 3 sets of 5-10 reps per exercise.
    • As you progress, increase the number of sets and reps or use a weighted vest or dip belt for added resistance.
  6. Progression Tips:
    • Focus on maintaining proper form throughout the exercise.
    • Avoid using momentum or swinging your body to complete the movement.
    • Progress slowly and consistently, increasing the number of reps and/or sets as your strength improves.

In conclusion, dips are a versatile and effective bodyweight exercise that can help you build strength in your triceps, chest, and shoulders. Add them to your workout routine and watch your upper body strength and muscle definition improve over time. Remember always to use proper form, progress steadily, and ensure safety by using sturdy equipment. Good luck on your strength training journey!

Image of a person performing dips on parallel bars with emphasis on proper form, with elbows and arms at a 90-degree angle and feet off the ground.

Burpees

Burpees are an excellent total body exercise that targets multiple muscle groups. It helps to boost your cardiovascular endurance and overall fitness level. Follow these step-by-step instructions to master the burpee and incorporate some variations to keep your routine fresh and challenging.

1. Basic Burpee:

  • Stand with your feet shoulder-width apart and arms by your sides.
  • Squat down quickly and place your hands on the ground in front of your feet.
  • Kick your feet back and perform a push-up.
  • Bring your knees back to your chest and return to a squatting position.
  • Jump up and clap your hands overhead.
  • Land softly and repeat the exercise.

2. Half Burpee (For Beginners or Low Impact):

  • Stand with your feet shoulder-width apart and arms by your sides.
  • Bend your knees and place your hands on the ground.
  • Step or jump your feet back into a plank position.
  • Step or jump your feet back towards your hands.
  • Stand up straight and repeat the exercise.

3. Push-Up Burpee:

  • Follow the steps of the basic burpee, but add an extra push-up each time you drop into the plank position.
  • This variation focuses on your upper body muscles.

4. Jump-to-Squat Burpee:

  • Perform a basic burpee but instead of jumping up, jump forward into a deep squat.
  • This variation focuses on your leg strength and explosiveness and will further challenge your lower body muscles.

5. Mountain Climber Burpee:

  • Perform a half burpee to get into the plank position.
  • Quickly alternate driving your knees towards your chest for four repetitions (two per leg).
  • Jump or step your feet back towards your hands and stand or jump up.
  • This variation adds an extra core challenge and increases cardiovascular intensity.

Remember to practice proper form and build your stamina gradually. Begin with a few repetitions and sets, increasing intensity by adding more reps or incorporating more challenging variations. Before starting any new exercise program, especially with pre-existing health conditions or concerns, seek advice from a qualified healthcare professional.

An image of a person performing a burpee, showing the different stages of the exercise.

Creating a Balanced Workout Routine

Step 1: Assess your fitness level

Before starting any workout routine, you should assess your current fitness level. This will help you understand your strengths, areas that may need improvement, and set realistic workout goals. You can do this by performing a few basic exercises, such as push-ups, squats, and planks, and noting how many repetitions or how long you can maintain each exercise.

Step 2: Set your goals

Determine your fitness goals so you can design a workout plan specifically tailored to your needs. Your goals could include increasing strength, enhancing flexibility, improving endurance, or losing weight. Be specific with your goals, making them measurable and time-bound.

Step 3: Choose your exercises

A balanced workout routine should include exercises that target all major muscle groups, including upper body, lower body, and core. Examples of exercises that can be incorporated into your bodyweight strength training routine are:

  • Upper body exercises: push-ups, dips, pull-ups, and chin-ups.
  • Lower body exercises: squats, lunges, step-ups, and calf raises.
  • Core exercises: planks, leg raises, bicycle crunches, and Russian twists.

Step 4: Plan your workout frequency and duration

Determine how many days per week you will be working out and for how long. It’s essential to give your muscles time to recover between workouts, so aim for at least one rest day between strength training sessions. Beginners should start with 3-4 workout sessions per week, and each session should last around 45-60 minutes.

Step 5: Create your workout plan

Structure your workout by including a warm-up, the main exercise routine, and a cool-down/stretching segment. Here’s a sample workout plan:

  1. Warm-up: Spend 5-10 minutes warming up your muscles with light cardio exercises such as jogging in place, jumping jacks, or high knees.
  2. Main exercise routine: Divide your exercise routine into circuits, with each circuit containing an upper body, lower body, and core exercise. Perform each exercise for a set number of repetitions or a set time, and then move on to the next exercise without resting. Once you’ve completed all exercises in one circuit, rest for one minute before starting the next circuit. Repeat the circuit 2-3 times depending on your fitness level.

    Sample circuit:

    • Push-ups: 10-20 repetitions or for 45 seconds
    • Squats: 15-30 repetitions or for 45 seconds
    • Planks: Hold for 30-60 seconds
  3. Cool-down/stretching: Spend 5-10 minutes cooling down and stretching your muscles to prevent injury and promote flexibility.

Step 6: Track your progress and make adjustments

Keep track of your progress by recording your workouts and any improvements in your performance. This will help you stay motivated and allow you to adjust your workout routine as needed. As you get stronger and more comfortable with the exercises, you can increase the number of repetitions, duration, or sets to continue challenging your muscles and prevent plateaus.

Remember, consistency is key when it comes to achieving your fitness goals. Stay dedicated to your workout routine, and don’t be afraid to make adjustments as needed to keep things fresh and challenging. And most importantly, listen to your body and ensure you are practicing proper form to avoid injuries and maximize results.

An image of a person working out with a big smile on their face and thumbs up, to represent staying motivated during workouts.

Rest, Recovery, and Nutrition

Bodyweight strength training is an effective way to improve your overall fitness levels without the need for gym equipment. However, to maximize the results of these exercises, it is crucial to pay attention to three key factors: rest, recovery, and proper nutrition. These elements are essential not only for preventing injury but also for promoting progress in your strength training journey.

A. Importance of Rest

  1. Prevents overtraining
    • Consistent training without appropriate rest can lead to overtraining, which adversely impacts performance, increases injury risk, and results in burnout.
  2. Promotes muscle repair and growth
    • During rest periods, the body repairs muscle tissue, allowing them to grow stronger and larger.
  3. Improves mental focus
    • Adequate rest is essential for mental clarity and focus during workouts, ensuring the right techniques and mindset are maintained throughout the training.

B. How to Rest Effectively

  1. Schedule rest days
    • Plan at least one or two rest days per week, depending on your training intensity and goals.
  2. Listen to your body
    • If your body feels more fatigued than usual, take additional rest to prevent injury and burnout.
  3. Sleep
    • Aim for at least 7-9 hours of sleep each night, as it is a key component to repair and restore your body.

C. Importance of Recovery

  1. Minimizes muscle soreness
    • Proper recovery techniques help relieve muscle soreness and expedite the healing process.
  2. Increased flexibility and mobility
    • Recovery practices such as stretching and foam rolling can improve flexibility and overall mobility.
  3. Enhances overall performance
    • Allow your body to recover correctly to maintain good strength levels and avoid setbacks in progress.

D. How to Recover Properly

  1. Cool-down and stretching
    • After your workout, perform a 5-10 minute cool-down with gentle movements and stretches to support muscle recovery.
  2. Foam rolling
    • Utilize a foam roller to target tight muscles and relieve muscle tension.
  3. Active recovery
    • On rest days, engage in low-intensity activities, such as walking or yoga, to promote blood flow and help muscles recover more efficiently.

E. Importance of Nutrition

  1. Fuels workouts
    • Consuming the proper nutrients provides the necessary energy to perform bodyweight strength training.
  2. Aids muscle recovery and growth
    • Supplying your body with adequate proteins, carbohydrates, and fat supports muscle growth and recovery.
  3. Enhances overall health
    • A balanced diet improves overall health, making it easier to stay consistent with your workouts.

F. Basic Nutritional Guidelines

  1. Protein
    • Aim to consume 1.2 to 2.0 grams of protein per kilogram of body weight daily, focusing on lean protein sources such as chicken, turkey, fish, legumes, and tofu.
  2. Carbohydrates
    • Carbohydrates should comprise 45-65% of your daily caloric intake. Opt for complex carbohydrates like whole grains, fruits, and vegetables for sustained energy.
  3. Fats
    • Consume around 25-35% of your calories from healthy fats like avocados, nuts, seeds, and olive oil to support hormone production, brain health, and cell functions.
  4. Stay hydrated
    • Drink plenty of water throughout the day. Aim for at least (8) 8-ounce glasses of water daily, and increase your intake during workouts.

By integrating effective rest, recovery, and nutrition practices into your bodyweight strength training regimen, you’ll optimize your progress, minimize the risk of injury, and enjoy a more satisfying workout experience. Remember to listen to your body and adjust your program accordingly to ensure long-term success in your fitness journey.

Image of a person doing a plank on a yoga mat with their arms extended and holding their body up

As you progress on your bodyweight strength training journey, always prioritize proper form and technique to maximize your results and minimize the risk of injury. Remember, consistency and patience are the keys to success. By following the guidelines outlined in this guide, you can develop a balanced and efficient workout routine that works in harmony with your personal goals and lifestyle. Coupled with adequate rest, recovery, and nutrition, you will discover the true power of bodyweight training as an integral part of your daily routine that paves the way to a healthier, stronger you.

Categories
Uncategorized

Powerlifting Techniques

Powerlifting is a strength sport that focuses on maximizing your performance in three key lifts — the squat, bench press, and deadlift. Whether you’re an aspiring competitor or simply looking to challenge yourself and build functional strength, having a solid understanding of powerlifting techniques and principles is essential. This article covers everything from the history of powerlifting and proper technique to equipment and mental preparation, helping you to build a solid foundation and make the most of your training.

Fundamentals of Powerlifting

Powerlifting is a strength sport that focuses on three main lifts: the squat, bench press, and deadlift. It requires a combination of physical strength, mastering the correct technique, and the mental toughness to push through challenging workouts. This guide will take you through the history of powerlifting, its goals, and the importance of proper form and technique.

History of powerlifting:

Powerlifting traces its roots back to early 20th-century strongman competitions, where athletes showcased their incredible strength in various heavy lifting events. However, the modern sport of powerlifting truly took shape in the 1950s and 1960s. In 1972, the International Powerlifting Federation (IPF) was established, which is still one of the most respected and premier powerlifting organizations today.

Goals of powerlifting:

The primary objective in powerlifting is to lift the maximum weight possible for a single repetition in each of the three disciplines: squat, bench press, and deadlift. Athletes compete in different weight classes to ensure a fair competition, and the heaviest successful lift across all three disciplines is added up to form a lifter’s total. The athlete with the highest total in their respective weight class wins.

Importance of proper form and technique:

Developing and maintaining good form and technique is essential for both improving performance and avoiding injury in powerlifting. Proper form ensures that the weight is lifted safely, efficiently, and optimally, while minimizing the risk of injury to the musculoskeletal system. Furthermore, mastering the correct technique allows the body to utilize the right muscle groups and biomechanical pathways to produce maximum force and power.

Learning the techniques – Squat:

  1. Setup: Position yourself under the bar, resting it on the upper back muscles. Grasp the bar with a grip that feels comfortable, while keeping your chest up and head in a neutral position. Make sure your feet are shoulder-width apart.
  2. Descent: Take a deep breath in, brace your core, and bend at the hips and knees to lower the weight until your thighs are at least parallel to the floor. Keep your chest up and the weight balanced on your heels, avoiding any collapse of the knees inward.
  3. Ascent: Drive back up by extending the hips and knees, exhaling and maintaining tightness in the core. Remember to keep your head in a neutral position and the chest up throughout.

Learning the techniques – Bench Press:

  1. Setup: Lie on the bench with your eyes below the bar, grip the bar with a grip slightly wider than shoulder-width. Make sure the feet are flat on the ground.
  2. Descent: Lower the bar to your lower chest, keeping your elbows at around a 75-degree angle relative to your torso. Keep the shoulder blades retracted and the chest elevated.
  3. Ascent: Push the bar up and slightly back, using your chest muscles and triceps’ strength. Keep your butt and upper back in contact with the bench throughout the movement.

Learning the techniques – Deadlift:

  1. Setup: Place your feet hip-width apart, and stand close to the bar with shins nearly touching. Bend at the hips and knees, and grip the bar with either an overhand grip or a mixed grip for heavier weights.
  2. Lift: Take a deep breath, brace your core, and lift the bar by extending the hips and knees until you are standing upright. Make sure to keep the chest up and the back straight throughout the lift.
  3. Lowering: Reverse the movement by bending at the hips and knees, maintaining a neutral spine while moving the weight back to the ground.

Becoming proficient in powerlifting requires dedication, consistency, and a focus on proper technique. As you progress in your training, it’s crucial to frequently assess and adjust your form to ensure safety and continued progress. Remember to consult with experienced lifters, coaches, or trainers for guidance and feedback as you develop your powerlifting skills. Best of luck on your strength journey!

An image of a person lying on a bench with a barbell above them, their arms extended upwards. The person is pushing the bar upwards, and their feet are flat on the ground.

Powerlifting Equipment and Terminology

Powerlifting is a popular sport that tests an individual’s strength in three main lifts: the squat, the bench press, and the deadlift. To improve performance and prevent injury, it’s crucial to understand the essential equipment used in powerlifting and the terminology associated with it. In this guide, we will walk you through the necessary equipment and common terms used in powerlifting training and competition.

Essential Powerlifting Equipment:

  • Weightlifting Belt: A weightlifting belt helps provide additional support to the lumbar spine and abdominal area during heavy lifting. The belt’s rigid material encourages the lifter to brace their core properly, which increases intra-abdominal pressure and stabilizes the spine. The most common types of belts are leather and nylon.
  • Powerlifting Shoes: Powerlifting shoes have a significantly different design than typical sneakers. These shoes have a solid, flat sole and elevated heel to help lifters maintain better positioning during squats and deadlifts. They also provide better grip and stability on the floor while lifting.
  • Knee Sleeves: Knee sleeves are designed to provide compression, warmth, and support to the knee joint during squats and deadlifts. They can be made from materials like neoprene or elastic fabric. Knee sleeves can help improve circulation, reduce inflammation, and provide a sense of stability during training and competition.
  • Wrist Wraps: Wrist wraps are used to support the wrists during bench press exercises. They are designed to reduce the risk of wrist injury and help lifters maintain proper wrist alignment during heavy lifts.
  • Lifting Chalk: Lifting chalk is used to improve grip strength and reduce slippage during lifts. It is made from magnesium carbonate and is applied to the lifter’s hands before performing heavy deadlifts, bench press, or squat exercises.

Common Powerlifting Terminology:

  • Raw Lifting: Raw lifting refers to lifting without the assistance of specialized equipment such as squat suits, bench shirts, and deadlift suits. Raw lifters typically use only the essential equipment listed above.
  • Equipped Lifting: Equipped lifting involves using specialized suits that provide additional support and increase the amount of weight lifted. These suits work by creating resistance and storing kinetic energy, which can be used to help move the weight during the lift.
  • 1RM (One Rep Max): 1RM is the maximum amount of weight an individual can lift for one repetition with proper form. Training programs often use this measurement as a benchmark to determine appropriate training weights.
  • RPE (Rate of Perceived Exertion): RPE is a subjective measure of how hard a lifter feels they are working during a given set or lift. It can be useful for self-regulating intensity and planning training sessions.
  • IPF (International Powerlifting Federation): The International Powerlifting Federation is the global governing body for the sport of powerlifting. They regulate competitions, rules, and equipment specifications.
  • PR (Personal Record): A personal record, also known as a personal best, is the highest weight lifted, or best performance achieved, by an individual within a specific exercise or competition.

Understanding the essential equipment used in powerlifting and the terminology associated with the sport is crucial for anyone participating in or following powerlifting. With this knowledge, you can ensure that you are adequately prepared and able to understand the discussions within the powerlifting community. Good luck on your powerlifting journey!

An image depicting the different equipment used in powerlifting, including a weightlifting belt, powerlifting shoes, knee sleeves, wrist wraps and lifting chalk.

Squat Technique

Powerlifting squats are a fundamental exercise for building overall strength and muscle. They target multiple muscle groups, including the quadriceps, hamstrings, glutes, and lower back. Proper form and technique are essential to ensure maximum benefits and minimize the risk of injury. Follow the steps below to master the squat technique in powerlifting.

1. Warm-up:

  • Before performing powerlifting squats, it is essential to warm up your entire body. Do 5-10 minutes of light cardio and dynamic stretches to increase blood flow and flexibility.

2. Setup:

  • Stand with your feet shoulder-width apart or slightly wider, with your toes pointing slightly outward.
  • Position yourself under the barbell, resting it on your upper back, not your neck.
  • Grip the barbell with your hands slightly wider than shoulder-width apart and palms facing forward.
  • Engage your core and keep your chest lifted, looking straight ahead or slightly upward.

3. Unracking the bar:

  • Take a deep breath, brace your core, and squeeze your shoulder blades together.
  • Straighten your legs to lift the bar off the rack.
  • Take a few small steps back to clear the rack and establish your starting position.

4. Movement Execution:

  • Inhale deeply and tighten your core as you prepare to initiate the squat.
  • Lower your body by bending at the hips and knees while keeping your chest lifted and maintaining a neutral spine.
  • Continue descending until your thighs are parallel to the ground or lower, depending on your flexibility.
  • Pause for a moment at the lowest point before driving through your heels to stand back up.
  • Exhale as you push back up, straightening your knees and hips, returning to the starting position.

5. Racking the bar:

  • Once you’ve completed your set, carefully approach the squat rack and lower the barbell back onto the supports.
  • Ensure the bar is stable and secure before releasing your grip and stepping away.

Tips to Reduce the Risk of Injury:

  • Warm up properly: A good warm-up will prepare your body for a more intense exercise, reducing the risk of injury.
  • Maintain proper form: Focusing on maintaining good form throughout the movement, especially during the descent, will help protect your joints and reduce the risk of injury.
  • Master the bar path: The bar path should be in a straight line during the squat, allowing for optimal force production and safety.
  • Strengthen your core: A strong core is essential for maintaining a neutral spine throughout the squat, which is crucial for injury prevention.
  • Wear appropriate footwear: For powerlifting squats, use footwear with a flat, non-compressible sole to provide a stable base and proper support.
  • Gradually increase weight: Gradually increase the weight you lift over time to avoid overloading your muscles and prevent injury.

Powerlifting squats are a valuable exercise for building overall strength and muscle. By following these instructions and tips, you can ensure proper form, technique, and injury prevention. Remember to always listen to your body, and seek the guidance of a coach or personal trainer if needed. Happy squatting!

An image of a person squatting with the proper form and feet shoulder-width apart, wearing flat non-compressible shoes to protect and support their feet.

Bench Press Technique

The bench press is a fundamental powerlifting exercise that targets the chest, shoulders, and triceps muscles. To maximize your potential in this lift, it is essential to learn proper form and technique, which will also reduce the risk of injury. Here are step-by-step instructions on how to perform the powerlifting bench press with correct form.

1. Set up:

  • Lay down on the bench with your eyes aligned directly below the barbell. This will allow for a proper and safe liftoff.
  • Position your feet flat on the floor and slightly wider than shoulder-width apart, providing a stable base.
  • Arch your lower back slightly, keeping your shoulder blades retracted and firmly planted on the bench. This positioning creates a stable foundation and increases power during the press.

2. Grip:

  • Gripping the barbell correctly is crucial for shoulder stability and force transfer from the chest and triceps.
  • Place your hands on the barbell with a grip slightly wider than shoulder-width.
  • Wrap your thumbs around the barbell for a secure grip. Many powerlifters prefer a “false grip” (thumbless grip), but this can be risky and is not recommended for beginners.
  • Ensure your wrists are straight and aligned with your forearms.

3. Bar path:

  • Take a deep breath, engage your core, and unrack the bar with the assistance of a spotter or with a controlled self-liftoff.
  • Lower the barbell to your lower chest, just below the nipple line, while keeping your elbows at a 45-degree angle from your body.
  • Let the bar gently touch your chest without bouncing. A slight pause may be required in powerlifting competitions to demonstrate control.

4. Press and lockout:

  • Drive the barbell upward in a slightly diagonal path towards your face, using the power generated from your chest, shoulders, and triceps.
  • Keep your elbows underneath the bar and your wrists aligned with your forearms throughout the movement.
  • Fully extend your arms at the top of the lift, achieving a locked-out position with shoulders and triceps engaged.
  • Exhale as you reach the lockout to assist with stability.

Additional Tips:

  • Warm-up thoroughly before attempting heavy bench presses, including dynamic stretching and lighter bench press sets.
  • Gradually increase the weight on the bar as you practice, ensuring that you prioritize maintaining proper form and technique over lifting heavier loads.
  • Always utilize a spotter when performing heavy bench press sets to ensure safety.
  • Incorporate assistance exercises into your training program to address any weaknesses, such as close-grip bench press for tricep strength or paused bench press for increasing strength off the chest.

By consistently practicing proper form and bench press technique, you’ll be on your way to increasing your powerlifting performance and minimizing the risk of injury. Remember, practice patience and prioritize technique over lifting heavy weights initially – your strength gains will follow.

An illustration of a person lying on a bench with a barbell above their chest and their feet on the floor. The person has their lower back arched, and their shoulder blades are retracted and planted firmly on the bench. They have a grip on the barbell with their thumbs wrapped around it, and their elbows are at a 45-degree angle from their body. The bar is lowered to their chest, and they are in the process of lifting the bar back up.

Deadlift Technique

The deadlift is a fundamental powerlifting exercise that targets multiple muscle groups, including the lower back, hamstrings, and glutes. It is important to understand and apply the correct form and technique for both conventional and sumo deadlifts to ensure effective training and prevent injuries.

Conventional Deadlift Technique:

  1. Setup:

    • Stand with your feet hip-width apart, facing the barbell.

    • Position your midfoot under the bar, about 1 inch away from your shins.

    • Keep your chest up and back straight while bending at the hips and slightly at the knees.

    • Grip the bar with both hands outside of your legs, using either a double overhand grip or a mixed grip (one hand over, one hand under).

  2. Lift the bar:

    • Engage your core, lats, and glutes before initiating the lift.

    • Begin the movement by driving your heels into the ground and pushing your hips forward.

    • Keep the bar as close to your body as possible, maintaining a straight bar path.

    • As the bar passes your knees, continue to extend your hips forward.

    • Stand up straight, fully extending your hips, and locking out your knees.

  3. Lower the bar:

    • Begin by slightly bending your knees and pushing your hips back.

    • Maintaining a straight back, lower the barbell down your thighs.

    • Once the bar passes your knees, bend your knees further, and bring the barbell back to the ground.

  4. Tips to remember:

    • Keep your back straight throughout the entire movement.

    • Drive through your heels, not your toes.

    • Engage your core and lats throughout the lift.

    • Keep your head in a neutral position, looking slightly forward and down during setup.

Sumo Deadlift Technique:

  1. Setup:

    • Stand with your feet wider than hip-width apart, toes pointing slightly outward.

    • Position your midfoot under the bar, about 1 inch away from your shins.

    • Squat down, keeping your back straight and chest up, until you can grip the bar with both hands inside of your legs.

    • Use either a double overhand grip or a mixed grip, gripping the bar slightly narrower than your shoulders.

  2. Lift the bar:

    • Engage your core, lats, and glutes before initiating the lift.

    • Begin the movement by driving your heels into the ground and pushing your hips forward.

    • Keep your knees in line with your toes throughout the lift.

    • Keep the bar as close to your body as possible, maintaining a straight bar path.

    • As the bar passes your knees, continue to extend your hips forward.

    • Stand up straight, fully extending your hips, and locking out your knees.

  3. Lower the bar:

    • Begin by slightly bending your knees and pushing your hips back.

    • Maintaining a straight back, lower the bar down your thighs.

    • Once the bar passes your knees, bend your knees further, and bring the barbell back to the ground.

  4. Tips to remember:

    • Maintain a wide stance throughout the lift.

    • Engage your core and lats during the entire movement to maintain stability.

    • Keep your back straight, and avoid rounding your lower back.

    • Maintain a neutral head position, looking slightly forward and down during setup.

Always practice proper technique and start with lighter weights to build up your strength and form before attempting heavier lifts. If you are unsure about your technique or need personalized guidance, consider working with a certified personal trainer or coach experienced in powerlifting.

An image of a person performing a conventional deadlift with correct technique, with arrows pointing to the body parts involved in the exercise.

Accessory Exercises

Powerlifting is a sport that tests your maximal strength in three primary lifts: the squat, bench press, and deadlift. To excel in these lifts and increase overall strength, powerlifters should incorporate accessory exercises into their training routines. Accessory exercises are supplemental movements that focus on specific muscle groups and techniques to improve weaknesses and boost performance in the main lifts. This article will cover essential accessory exercises and their benefits, providing a jumping-off point for incorporating them into your powerlifting regimen.

1. Pause Squats:

Purpose: Improve squat strength, build control, and enhance technique.

Instructions: A. Begin by setting up in the squat rack as you would for a regular squat. B. Descend into the squat, maintaining an upright chest, a tight core, and knees tracking over your toes. C. Once you reach the bottom position, pause for a 2-3 count, maintaining tension and control throughout your body. D. Drive through your heels to return to the starting position, fully extending your hips at the top.

2. Romanian Deadlifts (RDLs):

Purpose: Strengthen the posterior chain (hamstrings and glutes) and lower back, improving deadlift lockout and overall pulling power.

Instructions: Please refer to the text above for the instructions.

3. Close-Grip Bench Press:

Purpose: Strengthen triceps and lockout strength in the bench press.

Instructions: Please refer to the text above for the instructions.

4. Pull-Ups:

Purpose: Increase upper back strength and stability, improve grip strength, and create a stronger base for squat, bench press, and deadlift.

Instructions: Please refer to the text above for the instructions.

5. Face Pulls:

Purpose: Strengthen the rear deltoids and upper back, promoting better shoulder health and stability for all powerlifting lifts.

Instructions: Please refer to the text above for the instructions.

Conclusion: Including accessory exercises into your powerlifting routine can make a substantial impact on your strength and performance in the main lifts. Addressing muscular imbalances and weak points in your technique will contribute to more efficient and powerful lifting. Remember to focus on quality movement, adjust weights and sets to best fit your training goals, and always prioritize safety and proper form.

A cartoon image of a person lifting weights with accessories like a lifting belt, wrist wraps, knee sleeves, etc., showing the different accessory exercises mentioned in the article.

Planning and Programming

Powerlifting is a sport that focuses on three main lifts: the squat, the bench press, and the deadlift. The goal of powerlifting is to lift the heaviest possible weights in each of these three exercises. To achieve this, you need a solid plan and an effective programming strategy. In this guide, we will discuss powerlifting programming strategies, including periodization, intensity, volume, and frequency, to help you maximize your powerlifting results.

1. Periodization

A. Definition:
Periodization is the systematic planning of training phases designed to ensure peak performance at a specific time. This means breaking down your training cycle into smaller segments called “mesocycles,” each with a different training focus.

B. Types of periodization:
There are several types of periodization strategies, but the most common and effective for powerlifting are linear periodization and undulating periodization.

  • i. Linear periodization:
    Linear periodization involves gradually increasing intensity while decreasing volume over the course of a training cycle. This can be done on a weekly, monthly, or even yearly basis. Linear periodization has been proven effective for novice to intermediate lifters.
  • ii. Undulating periodization:
    Undulating periodization involves varying intensity and volume within a single training week or mesocycle. This method is beneficial for more advanced lifters who have reached a plateau using linear periodization.

2. Intensity

A. Definition:
Intensity refers to the percentage of your one-rep max (1RM) weight used during lifting. The appropriate intensity depends on the phase of periodization and your experience level.

B. Guidelines:
i. During high-intensity phases, aim for approximately 85-95% of your 1RM for fewer reps.
ii. During low-intensity phases, use 60-75% of your 1RM with higher reps to build a strength foundation and improve technique.

3. Volume

A. Definition:
Volume refers to the total workload during a training session, typically calculated as the number of sets multiplied by the number of reps.

B. Guidelines:
i. During high-volume phases, perform more sets with fewer reps to focus on hypertrophy and building muscle mass.
ii. During low-volume phases, prioritize heavier weights and fewer total reps to focus on pure strength training.

4. Frequency

A. Definition:
Frequency refers to the number of training sessions per week for a specific lift.

B. Guidelines:
i. Beginners: Train each of the main lifts 2-3 times per week to improve technique and build strength.
ii. Intermediate/Advanced: Train each main lift 1-2 times per week, with adequate recovery time to prevent overtraining and injury.

5. Sample programming schedule combining periodization, intensity, volume, and frequency:

  • – Week 1-4: Linear periodization with high volume and low intensity.
  • – Week 5-8: Linear periodization with moderate volume and moderate intensity.
  • – Week 9-12: Linear periodization with low volume and high intensity.
  • – Week 13: Deload week to recover and prepare for a testing week or competition.
  • – Week 14: Testing week or competition where you attempt new 1RM lifts.

By understanding and implementing periodization, intensity, volume, and frequency in your powerlifting programming, you can maximize your results and achieve the greatest possible gains in strength and muscle mass. Remember to always consult a coach or experienced lifter if you need guidance or have questions about your specific training plan. Happy lifting!

Diagram of a powerlifting programming cycle with mesocycles, periodization, intensity, volume, and frequency labeled.

Nutrition and Recovery

Powerlifting is a physically demanding sport that requires immense strength, concentration, and determination. However, if you are serious about excelling in powerlifting, you must understand the importance of nutrition and recovery in optimizing your performance and preventing injuries.

Nutrition for Powerlifters:

  1. Determine your calorie needs: Proper nutrition demands that you fuel your body with enough energy to power you through intense workouts and aid in muscle building. You can calculate your daily calorie needs using online calculators or by consulting a trained sports nutritionist who can guide you further according to your age, weight, height, and activity level.
  2. Consume sufficient protein: As a powerlifter, your body requires more protein than an average person to facilitate muscle growth and recovery. Consume around 1.2-1.7 grams of protein per kilogram of body weight daily in the form of diverse sources such as lean meat, poultry, fish, dairy products, and protein supplements.
  3. Prioritize complex carbohydrates: Complex carbohydrates offer sustained energy release, which is essential for maintaining optimal performance during powerlifting workouts. Focus on including whole grains, vegetables, and legumes in your diet to meet your energy demands.
  4. Don’t neglect healthy fats: Include unsaturated fats such as fatty fish, olive oil, avocados, and nuts. Moderate your saturated fat intake.
  5. Stay hydrated: Adequate hydration is critical for optimal performance and recovery. Consume at least 3-4 liters of water daily, including during and after workouts. Adjust this amount according to factors such as sweat rate and training intensity.
  6. Consider supplements: Consult a sports nutritionist to understand which supplements would be suitable for you. Creatine and beta-alanine are examples of supplements that can optimize muscle strength and power output and improve endurance.

Recovery for Powerlifters:

  1. Prioritize sleep: Get 7-9 hours of sleep per night, maintaining a consistent schedule. Sleep in a dark, quiet, and comfortable environment, and establish a consistent bedtime routine for optimal mental and physical recovery.
  2. Implement active recovery: Perform low-intensity exercises like walking, cycling, and swimming on rest days for better blood flow and muscle recovery.
  3. Stretch and foam roll: Practice static and dynamic stretches, and foam roll to address tight spots in your muscles, reduce muscle tightness, and improve your range of motion to prevent injuries.
  4. Manage stress: Practice stress management techniques like meditation, deep breathing exercises, or spending time in nature to maintain optimal mental health, reduce stress, and improve recovery.
  5. Listen to your body: Pay attention to your body’s signals. If you experience excessive fatigue, severe muscle soreness, or declining performance, modify your training temporarily or alter your recovery plan accordingly.

The essential powerlifting nutrition tips and critical recovery methods discussed in this guide will significantly improve your performance and reduce the risk of injuries. Therefore, it is crucial to prioritize proper nutrition and recovery along with your training and techniques to excel in powerlifting. Invest in your nutrition and recovery today to unleash your true powerlifting potential.

An image of a powerlifter lifting weights, with a plate of diverse protein sources, vegetables, and whole grains in the foreground.

Mental Preparation and Competing

Powerlifting is as much a mental challenge as it is a physical one. Having a strong mentality, discipline, and focus can make a significant difference in your performance. Here are some strategies for mental preparation and techniques to approach competition day in powerlifting.

Mental Preparation:

  1. Set clear and realistic goals: Before beginning your training, set specific, measurable, and achievable goals. This will help you stay motivated and focused during your training sessions. Keep a log or journal to track your progress and make any necessary adjustments.

  2. Visualization: Regularly visualize yourself performing a successful lift with proper form and technique. This mental rehearsal can help improve your confidence and reduce anxiety before a competition. Spend about 10-15 minutes each day practicing visualization.

  3. Develop a pre-competition routine: Routines can help alleviate pre-competition stress and anxiety. Establish a consistent routine that you perform in the days leading up to a competition. This can include a specific warm-up, listening to motivating music, or repeating positive affirmations.

  4. Stay positive and focused: Maintain a positive attitude during your training and competition preparation. Focus on your goals, visualize your success, and remind yourself of your achievements. Try to eliminate negative self-talk and replace it with positive affirmations and self-encouragement.

  5. Practice mindfulness and relaxation techniques: Engage in regular mindfulness practices, such as meditation or deep breathing exercises, to help you stay calm and focused during your training and on competition day. This can help you develop better concentration and mental resilience.

Competing:

  1. Plan your attempts wisely: Choose your opening lifts based on your current abilities and what you’ve achieved in training. A conservative opener will build your confidence and allow you to gauge how you feel on competition day. For subsequent attempts, select weights that challenge you but are still within your capabilities.

  2. Stick to your plan: Trust your training and follow your pre-determined attempts. Avoid making last-minute changes based on how other competitors are performing or how the crowd reacts. Stay focused on your individual goals and progress.

  3. Manage competition anxiety: Keep your pre-competition routine intact and practice relaxation techniques to manage any nerves or anxiety that may arise. Take deep breaths, listen to calming music, or use positive affirmations to stay centered and focused.

  4. Warm-up properly: Ensure a thorough warm-up, including dynamic stretching, mobility exercises, and lighter lifts. This will help prepare your muscles and joints for the heavier lifts during competition.

  5. Stay hydrated and fueled: Consume adequate water, electrolytes, and nutrients to keep yourself energized and focused during the competition. Plan your meals and snacks accordingly to avoid digestive issues or feeling too full during your lifts.

  6. Maintain a strong mindset during competition: Stay focused and determined throughout the entire event. Take one lift at a time and treat each attempt as an opportunity to perform at your best. Remember, you have trained for this moment, and your success is a result of your hard work and dedication.

In summary, mental preparation and developing a solid competition strategy are crucial for powerlifting success. Utilize visualization, goal-setting, positive self-talk, relaxation techniques, and a consistent pre-competition routine to ensure you’re mentally prepared for the challenge. On competition day, confidently execute your lifts, trust your training, and remain focused on your individual goals.

A powerlifter lifting a heavy barbell with weights on both sides while wearing a powerlifting belt and wrist wraps. The lifter is standing on a lifting platform and is surrounded by other lifters and spectators.

Armed with the knowledge and techniques found throughout this article, you’ll be well-equipped to embark on your powerlifting journey. Remember that consistency, dedication, and proper technique are critical to your success. As you continue to develop your skills and strength, you’ll discover the true potential of this exciting and challenging sport. Happy lifting!

Categories
Uncategorized

Strength Training for the General Public

Strength training, a crucial component of overall health and fitness, offers myriad physical and psychological benefits. By understanding its basic concepts and incorporating it into your routine, you can boost your muscle strength, enhance your physical endurance, and improve your mental well-being. This comprehensive overview of strength training covers essential topics such as muscle anatomy, resistance techniques, workout program design, progressive overload, nutrition, injury prevention, and mental aspects. Armed with this knowledge, you’ll be well-prepared to embark on your strength training journey and reap the rewards that come with a healthier, stronger body and mind.

Introduction to Strength Training

Strength training, also known as resistance training or weight training, is a type of physical exercise that involves various activities that aid in developing the strength and size of the skeletal muscles. It typically requires an individual to use weights or resistance bands that provide external resistance, making it challenging for the muscles to contract against. By doing so, the muscles are forced to adapt and improve in response to the challenge, resulting in increased strength, endurance, and overall physical fitness.

There are numerous benefits to engaging in regular strength training activities. One of the most significant advantages is the improvement of muscle strength and tone. As muscle mass increases, it enhances an individual’s overall body composition and helps in burning more calories at rest, ultimately contributing to weight loss and a more sculpted physique. Additionally, strength training has been proven to increase bone density, reducing the risk of osteoporosis and fractures later in life.

Apart from the physical benefits, strength training can also improve mental health and well-being. It has been shown to reduce symptoms of depression and anxiety while improving cognitive function, making it an essential component of holistic health. Moreover, strength training can prevent or manage various chronic health conditions such as cardiovascular disease, type 2 diabetes, and arthritis. Research has found that engaging in resistance training exercises can improve insulin sensitivity, lipid profiles, and overall heart health.

To develop a well-rounded strength training program, it is essential to target major muscle groups such as the chest, back, arms, shoulders, legs, and core. It is generally recommended that beginners start with two or three sessions per week, allowing a day of rest in between for muscle recovery. It is also crucial to begin with appropriate weights or resistance, gradually progressing over time as the body adapts to the stimulus. The American College of Sports Medicine (ACSM) suggests performing two to four sets of 8-12 repetitions for each exercise, focusing on controlled movements and proper form to prevent injuries.

For optimal overall health and fitness, it’s essential to incorporate strength training activities into your exercise routine, along with cardiovascular exercises. Combining both types of training can help prevent plateaus in progress and ensure that various aspects of physical fitness are maintained. Consulting with fitness professionals, such as personal trainers, can be beneficial in establishing a well-balanced and effective strength training program tailored to individual fitness levels and goals.

A person lifting weights with a trainer nearby, probably in a gym or fitness center.

Muscle Anatomy and Physiology

Understanding muscle anatomy and physiology is crucial when embarking on a strength training journey, as these factors dictate how our muscles respond to various exercises. Our muscles are primarily composed of muscle fibers, which are essentially cells that contract and generate force. These fibers are bundled together within a connective tissue called fascia. Gaining deeper insight into the relationship between muscle composition and exercise can help you make informed decisions when designing a strength training program that aligns with your personal fitness goals.

In general, our skeletal muscles can be categorized into two main types: slow-twitch fibers (Type I) and fast-twitch fibers (Type II). Slow-twitch fibers, also called type I muscle fibers, have a slower contraction rate and are more resistant to fatigue, making them ideal for endurance-based activities. On the other hand, fast-twitch fibers, or type II muscle fibers, are responsible for generating force rapidly, making them better suited for high-intensity, short-duration activities like strength training. Fast-twitch fibers can further be divided into Type IIa, which possess both endurance and power capabilities, and Type IIx, which are purely power-oriented.

Muscle growth, or hypertrophy, occurs when there is an increase in the size of muscle fibers. This process is mainly stimulated by resistance training, which causes micro-damage to the muscle fibers. In response, the body repairs and rebuilds the damaged fibers, resulting in thicker and stronger muscle tissue. The rate of muscle growth is influenced by several factors, including the type of muscle fibers involved, the intensity of the workout, and an individual’s genetic makeup.

In strength training, targeting specific muscle fibers is important for achieving desired results. Since fast-twitch fibers are responsible for generating power, focusing on exercises that engage these fibers can lead to improvements in strength and muscle size. This can be achieved by incorporating lifts with heavy resistance and low repetitions, as well as explosive movements like plyometrics. On the other hand, slow-twitch fibers can be targeted through low-intensity, high-repetition exercises, which may improve muscular endurance but might not yield significant muscle growth.

Understanding the role of muscle fibers in strength training is crucial for tailoring workout routines to an individual’s specific goals and needs. By recognizing the characteristics and functions of different muscle fibers, such as fast-twitch fibers for strength and power development or slow-twitch fibers for endurance enhancement, individuals can optimize their performance and long-term progress. This knowledge can also aid in injury prevention by allowing adjustments to workouts in order to avoid overloading specific muscle groups.

An image showing the muscles of the human body, highlighting the fast-twitch and slow-twitch muscle fibers and where they are located in different muscle groups. The image shows the importance of targeting specific muscle fibers during exercise and how this can lead to better performance and long-term progress. Image filename: muscle-anatomy-and-physiology-exercise_abc.png

Resistance Training Techniques

Resistance training, a key component of fitness programs, is essential for individuals seeking to improve their physical capabilities and overall health. Also known as strength training, it involves the use of resistance or weights to enhance muscular strength, endurance, and power. By incorporating the knowledge of muscle fiber types into resistance training, individuals can create more effective and personalized workout plans, enabling them to achieve their fitness goals in a safe and sustainable manner.

There are several types of resistance training techniques available, each offering unique benefits and catering to individual preferences and fitness level.

Free Weights

Free weights, such as barbells, dumbbells, and kettlebells, are a popular and versatile option for resistance training. They provide an excellent way to focus on specific muscle groups and improve overall muscle coordination.

This type of training requires proper form and technique to ensure muscles are targeted effectively and to minimize the risk of injury.

Free weight exercises range from simple movements, such as bicep curls and bench presses, to more complex exercises like deadlifts and squats, which work multiple muscle groups simultaneously.

Resistance Bands

Resistance bands are another effective form of resistance training that can provide a similar experience to free weights. These bands are typically made of latex or rubber and come in various resistance levels, lengths, and sizes. They are lightweight, portable, and cost-effective, making them a great option for at-home workouts or travel.

Resistance bands can be used for various exercises, including bicep curls, shoulder presses, and squats, and can offer benefits such as improved muscle activation and increased stabilization.

Bodyweight Exercises (Calisthenics)

Bodyweight exercises, also known as calisthenics, are a form of resistance training that uses an individual’s body weight as the primary form of resistance. These exercises can be performed anywhere, making them a convenient option for those with limited access to equipment or space.

Common bodyweight exercises include push-ups, pull-ups, squats, lunges, and planks. These movements target several muscle groups and can improve strength, muscle tone, balance, and flexibility.

There are various methods of strength training, such as weight machines, isometric exercises, and suspension training systems like TRX. Incorporating resistance training into a fitness program requires an understanding of proper exercise techniques to maximize results and prevent injury.

Working with a personal trainer or attending group fitness classes can provide guidance and support for individuals new to strength training. To ensure continuous progress, it is also essential to progressively increase the intensity, volume, and complexity of exercises, thereby challenging the body and promoting muscular growth and improvement.

Illustration of a person lifting a weight with proper form and technique

Designing a Workout Program

In order to design a balanced and effective strength training program, setting clear and realistic goals is crucial, as they will guide the workout plan. Goals can range from increasing muscle mass, improving overall strength, enhancing performance in specific sports, or boosting general health and wellbeing. Establishing a timeline for achieving these goals enables the creation of a tailored and suitable training routine.

Combining the knowledge of various strength training methods with specific goals and timelines ensures that individuals can successfully achieve optimal muscle strength, size, and endurance.

Selecting the right exercises is a critical component of a well-structured strength training program. Typically, it is advisable to incorporate compound exercises targeting multiple muscle groups, such as squats, deadlifts, and bench presses, to maximize results. Additionally, including isolation exercises like bicep curls or tricep extensions is essential for focusing on individual muscles. It is generally recommended to vary exercises and train each muscle group at least twice a week to avoid muscular imbalances and promote balanced muscle development.

Another vital aspect of designing a workout program is determining the appropriate load and repetition ranges for each exercise. The load refers to the amount of weight or resistance applied during an exercise, while the repetitions are the number of times the movement is performed. Generally, a higher load with lower repetitions (e.g., 4-6 repetitions) targets strength gains, whereas a lower load with higher repetitions (e.g., 12-15 repetitions) focuses on muscle endurance. To promote muscle growth or hypertrophy, intermediate load and repetition ranges (e.g., 8-12 repetitions) are often recommended. Continuously adjusting load and repetition ranges every few weeks helps prevent plateaus and ensures continuous progress.

Scheduling workouts effectively is critical to ensure adequate recovery and prevent overtraining. A beginner may opt for a total-body strength workout performed 2-3 times a week, allowing for at least 48 hours between training sessions for recovery. Intermediate and advanced trainees could apply a split routine, targeting specific muscle groups on different days of the week. For example, upper body workouts could be scheduled on Mondays and Thursdays, while lower body workouts could be assigned to Tuesdays and Fridays, with a rest day or active recovery in between.

Monitoring and adjusting the strength training program is crucial for ensuring its efficacy and preventing injuries. To achieve this, it’s vital to assess exercise techniques, log workout progress, and regularly evaluate goals. Integrating stretching exercises, proper nutrition, and sufficient rest into the training plan will contribute to maximizing results and achieving the desired outcomes.

Illustration of a person doing a squat with a barbell on their shoulders, showing correct form and posture.

Progressive Overload and Periodization

One essential aspect of a successful strength training program is the principle of progressive overload. This involves gradually increasing the stress placed on the body during workouts, which can be achieved by increasing resistance using heavier weights, increasing the number of repetitions or sets, or decreasing the rest time between sets. The human body adapts to the physical demands placed on it; hence, these demands must steadily increase over time to continue making progress in strength and muscle mass.

Periodization is another key concept in strength training, which refers to the systematic planning of a training program by breaking it down into specific cycles and phases. The purpose of periodization is to prevent training plateaus and minimize the risk of overtraining by varying the training stimuli and allowing for proper recovery. There are different types of periodization, such as linear, undulating, and block periodization, each with its own specific structure and approach to organizing a training program.

Both progressive overload and periodization work hand in hand to facilitate optimal strength training outcomes. By incorporating these principles in a training program, individuals can steadily and safely progress in their strength and muscle mass goals. Integrating these principles helps ensure that the body is consistently challenged and adapts to the increasing demands placed on it. At the same time, periodization allows for strategic variation in training to maintain motivation, avoid training plateaus, and reduce the risk of overtraining and injury.

For example, a linear periodization approach might involve a 12-week training program broken down into three 4-week mesocycles (phases). In the first mesocycle, the focus could be on building a foundation of strength by using lighter loads and higher repetitions. The second mesocycle could shift the focus toward hypertrophy (muscle growth) by moderately increasing the load and decreasing repetitions. Finally, the third mesocycle could emphasize maximal strength development by further increasing load and performing lower repetitions.

In conclusion, understanding the principles of progressive overload and periodization is essential for anyone looking to achieve long-term success in strength training. By incrementally increasing the demands on the body and strategically planning training phases, individuals can effectively and safely develop strength and muscle mass over time. Utilizing these principles not only promotes physical adaptations but also fosters a consistent and enjoyable training experience, ultimately leading to sustainable progress and achievement of personal fitness goals.

A person lifting weights in a gym with a trainer assisting with form.

Nutrition for Strength Training

Furthermore, proper nutrition plays a significant role in achieving success in strength training as it seamlessly complements the principles of progressive overload and periodization. To support muscle growth and enhance recovery, it is essential to pay attention to your diet and ensure an adequate intake of key nutrients. Among these, macronutrients, including carbohydrates, proteins, and fats, are crucial as they provide energy, help in muscle repair and maintenance processes, and support overall bodily functions. By combining well-planned strength training with proper nutrition, individuals can maximize their progress and achievements in personal fitness goals.

When it comes to macronutrient ratios, the ideal proportion for strength training typically involves a higher protein and fat intake, combined with a moderate carbohydrate consumption. A common recommendation for strength athletes is to consume around 25-35% of daily calorie intake in the form of proteins, 45-55% as carbohydrates, and 20-25% as fats. In terms of protein intake, it is advised to consume around 1.2 to 2.2 grams of protein per kilogram of body weight daily, depending on the training intensity and individual needs. Carbohydrates are also essential in refueling energy stores, especially post-training, and should mainly come from whole, unprocessed sources such as whole grains, fruits, and vegetables.

Pre-workout meals are essential for providing energy and ensuring peak performance during strength training. Consuming a meal or snack 1-3 hours before exercising that consists of complex carbohydrates, lean proteins, and healthy fats can help sustain energy levels and support muscle function. Some examples of pre-workout meals are a turkey sandwich on whole-grain bread, Greek yogurt with fruit, or oatmeal mixed with protein powder and nuts.

Post-workout nutrition is equally important, as it aids in recovery and muscle growth. Consuming a high-protein meal or snack within 30 minutes to two hours after strength training can help stimulate muscle protein synthesis and reduce muscle protein breakdown. This meal should be rich in carbohydrates to replenish muscle glycogen stores and help support recovery. Some options for post-workout nutrition include a protein shake with fruit or a grilled chicken breast with sweet potato and vegetables.

An important aspect to keep in mind for strength training is the role of supplementation, especially when an individual might struggle in meeting their nutritional requirements through their diet alone. Commonly recommended supplements for strength training include protein powder, branched-chain amino acids (BCAAs), creatine monohydrate, and beta-alanine, all of which aim to promote muscle growth, improve performance, and enhance recovery. However, it is crucial to consult a healthcare professional before incorporating these supplements into your regimen and ensuring that they complement a balanced and varied daily diet for maximizing strength training results.

An illustrated guide showing healthy foods: fruits, vegetables, whole grains, lean meats, beans, and nuts, and how they help in strength training.

Injury Prevention and Recovery

Another critical factor for a safe and effective strength training routine is the proper implementation of warm-up and cool-down techniques. Warming up helps increase blood flow to the muscles, preparing the body for exercise and reducing the risk of injuries. Light cardiovascular exercises or dynamic stretching, involving full range-of-motion movements, can help activate the muscle groups targeted in your workout. In contrast, cooling down is essential for helping the body return to a resting state and enabling optimal recovery. Lighter stretches or cardiovascular exercises can be utilized to flush out lactic acid and prevent muscle soreness, ensuring your strength training routine achieves the desired outcomes.

The importance of stretching and mobility in strength training cannot be overstated. Stretching not only improves overall flexibility but also helps maintain muscular balance, preventing some of the most common strength training injuries. To maximize injury prevention, focus on both dynamic stretching (before workouts) and static stretching (after workouts). Dynamic stretching includes exercises such as leg swings, walking lunges, and arm circles, while static stretching involves holding a stretch position for 20-30 seconds. Additionally, incorporating mobility exercises, such as foam rolling, can aid in releasing muscle tightness and preventing muscle imbalances.

Understanding how to prevent common strength training injuries is essential for staying consistent in your fitness journey. Many injuries, such as strains, sprains, and tendonitis, can be avoided. Some key points to consider include using proper form during exercises (consider working with a trainer or coach), progressing gradually with weights and exercise intensity, avoiding excessive repetitions, and including a variety of exercises and movement patterns in your program. Rest and recovery are also vital components in avoiding overtraining, allowing your body to repair and adapt to the demands of your strength program.

In the case of an injury during strength training, early management is crucial. The widely recognized RICE principle (Rest, Ice, Compression, Elevation) is an effective approach to treating injuries such as sprains, strains, or inflammation. Rest is key to prevent further damage to the injured area, while applying ice in intervals can help reduce inflammation. Compression and elevation can also aid in decreasing swelling and promoting faster recovery. In more severe cases, seeking professional advice from a medical practitioner or physiotherapist is highly recommended.

As you start your journey into strength training, it is essential to be informed about proper nutrition and hydration to support recovery from workouts and prevent injuries. Adequate hydration is crucial for healthy muscle function and helps prevent muscle cramps during workouts. Additionally, a balanced diet rich in protein, carbohydrates, and healthy fats can help support muscle repair and growth, providing you with the necessary nutrients to fuel your strength training endeavors effectively. Ensure that you listen and respond to your body’s signals, adapting your training and recovery strategies accordingly, to avoid injuries and setbacks.

Image of a person stretching before a strength training workout to prevent injuries.

Mental and Emotional Aspects

Alongside these physical aspects, strength training offers a wide range of psychological benefits. One primary mental boost experienced by many individuals who engage in strength training is an improvement in self-esteem. Consistently challenging and overcoming physical obstacles in their workouts, individuals often feel a sense of personal accomplishment, which translates into enhanced self-confidence. As you observe increases in your strength and muscle tone, you might also experience an improved self-image, contributing to long-term self-esteem and overall mental wellbeing.

Another essential psychological benefit of strength training is its impact on stress relief. Engaging in physical activity, particularly strength training, has been proven to reduce stress levels by increasing the production of endorphins, which are chemicals in the brain acting as mood elevators and natural painkillers. Strength training also provides an opportunity to focus on something other than daily problems and stress, allowing for mental breaks and a reduction in overall anxiety. By consistently participating in strength training, individuals can better manage stress in their lives, leading to increased mental resilience and a better sense of balance.

Staying motivated and overcoming mental barriers is crucial for anyone looking to maintain a consistent strength training program. Having specific goals in mind, such as increasing weight, improving muscle tone or physique, or enhancing overall functional strength, can inspire individuals to remain dedicated to their workouts. A training partner or personal trainer can also offer valuable support and motivation, helping individuals push through mental barriers and challenging moments in their strength training journey. Celebrating personal milestones and accomplishments is crucial for acknowledging progress and maintaining mental motivation.

Aside from setting specific goals, individuals can greatly boost their motivation by incorporating variety into their training routines. Mixing it up with targeted exercises for different muscle groups and alternating between various types of equipment can keep workouts fresh and engaging, helping to overcome the plateau effect where an individual feels stagnated or less challenged. Incorporating additional mind-body practices such as yoga, meditation, or tai chi can help strengthen the mind-muscle connection, bolster mental focus and discipline, and reduce mental fatigue, which is essential for sustained strength training and overall physical wellbeing.

In conclusion, strength training goes beyond the physical benefits and plays a significant role in enhancing mental and emotional aspects of an individual’s life. By acknowledging the importance of psychological benefits, implementing strategies for staying motivated, and overcoming mental barriers, individuals can build a stronger mind, body, and spirit through consistent strength training experiences. With dedication and enthusiasm, strengthening both physical and mental health will lead to a happier, healthier life.

Illustration of a person lifting weights with a smile, representing the positive mental effects of strength training.

As you venture into the world of strength training, equipped with the essential knowledge of different techniques and best practices, you will pave the way for sustainable progress and self-improvement. Embrace the challenge of unlocking your potential by continuously refining your skills, experimenting with various exercises, and adapting your training regimen to suit your evolving needs. A commitment to proper nutrition, injury prevention, and mental fortitude will undoubtedly contribute to your success in strength training, enhancing the quality of your life in countless ways. So, gear up and embolden yourself to pursue this powerful path towards physical and emotional well-being.

Categories
Food

Watermelon Juice Study

Watermelon juice is a refreshing and nutritious beverage that has gained popularity in recent years for its numerous health benefits and delightful flavor. This fruit has an impressive nutritional profile, containing vitamins, minerals, and antioxidants, making it an ideal choice for a healthy drink. This essay delves into the various aspects of watermelon juice, including nutrition, preparation methods, recipes, commercially available options, cultivation practices, and environmental considerations, as well as the health benefits and potential risks associated with consuming this delicious juice.

Watermelon Juice Nutrition

Watermelon juice is a delicious and refreshing beverage that not only quenches your thirst but also provides various health benefits. As a rich source of vitamins, minerals, and antioxidants, watermelon juice supports your overall wellness, making it the perfect addition to your daily routine. A single cup (about 240 grams) of watermelon juice contains just around 71 calories, making it a low-calorie option for those looking to maintain a healthy weight.

One of the primary health benefits of watermelon juice is its high content of vitamins A and C. These vitamins are essential for maintaining healthy skin, hair, and vision, as well as supporting the immune system. A cup of watermelon juice contains about 26% and 28% of the recommended daily values for vitamin A and vitamin C, respectively. Additionally, watermelon juice is a good source of vitamin B6, which is crucial for proper brain function and the synthesis of various neurotransmitters that regulate mood, appetite, and sleep.

Watermelon juice also contains a variety of essential minerals that aid various bodily functions. One such mineral is potassium, which plays a vital role in regulating blood pressure, maintaining fluid balance, and supporting proper muscle and nerve function. A cup of watermelon juice offers about 320 milligrams of potassium, contributing to the recommended daily intake of 2,500-3,000 milligrams for adults. Other essential minerals found in watermelon juice include calcium, magnesium, and phosphorous – all of which contribute to strong bones and teeth, among other benefits.

The antioxidant content of watermelon juice is another key component of its nutritional value. Watermelons contain a unique compound called lycopene, a carotenoid antioxidant responsible for the fruit’s red color and with powerful health benefits. Lycopene has been linked to reduced risk of chronic diseases such as heart disease and certain types of cancers by neutralizing harmful free radicals in the body. In addition to lycopene, watermelon juice also contains antioxidants such as beta-carotene and vitamin C, which further protect the body from oxidative damage and inflammation.

Besides its impressive vitamin, mineral, and antioxidant content, watermelon juice is also known for its hydrating properties. With a water content of approximately 92%, watermelon juice can help you stay hydrated, especially during hot summer days or after intense workouts. Moreover, it contains natural sugars and electrolytes that replenish energy levels and promote optimal function of your muscles and nerves. By incorporating this tasty and nutritious beverage into your diet, you can support your overall health and wellness.

A glass of watermelon juice beside a sliced watermelon, indicating the source of the juice and the health benefits it offers.

Making Watermelon Juice

Preparing watermelon juice is simple and can be done using a variety of methods, offering a delicious and refreshing addition to your hydration routine. A popular method is using a juicer. To do this, cut the watermelon into chunks, remove the seeds if you are not using a seedless variety, and feed the chunks through a juicer. This technique is efficient as it quickly extracts the maximum amount of juice without the need for straining or blending, allowing you to easily enjoy the benefits of watermelon juice on a regular basis.

Another popular method for making watermelon juice is by using a blender. This process involves roughly chopping the watermelon into small, easy-to-blend pieces, and then placing them in a blender along with a small amount of water. The chunks of watermelon should be well-blended on high speed until the mixture becomes smooth and liquid. After blending, it is recommended to strain the juice through a fine sieve or cheesecloth to remove any remaining pulp or seeds. Depending on preference, the juice can be sweetened with natural sweeteners, such as honey or agave syrup, and the addition of ice cubes can be blended in for a chilled, frothy beverage.

Manual extraction is another option for those who prefer a more hands-on approach to making watermelon juice, or who may not own a juicer or blender. This method involves cutting the watermelon into small, manageable pieces, and then using a fork or potato masher to press and mash the flesh to release the juice. Once the watermelon pieces are fully mashed, the juice can be strained through a fine sieve, cheesecloth, or even a clean dish towel to separate it from the pulp and seeds. This method can require a bit more time and effort, but the result is still a delicious, refreshing juice that can be enjoyed on its own or in a variety of drinks and recipes.

Combinations of the aforementioned methods can also be used to make watermelon juice. For example, a mix of manual extraction and blending can be utilized to create a juice that retains some pulp for added texture and fiber. Alternatively, the watermelon juice can also be flavored with ingredients such as lime or mint leaves to enhance its taste and add a touch of uniqueness to the drink. Whichever method is chosen, it is important to ensure the watermelon is ripe and of good quality to yield the best flavor and most juice possible.

In conclusion, watermelon juice can be prepared using various methods based on personal preferences and the appliances at hand. Whether utilizing a juicer, blender, manual extraction, or a combination of techniques, the end result is a refreshing and delicious beverage that can be enjoyed in numerous ways.

An image of a glass of watermelon juice with a slice of watermelon on the rim of the glass

Watermelon Juice Recipes

Not only can watermelon juice be enjoyed on its own, but it can also serve as a base for cocktails, smoothie bowls, and a variety of culinary creations. There are simple recipes to enjoy the natural taste of watermelon, as well as more complex recipes that combine watermelon with various flavors for a truly unique experience. This versatile juice is especially refreshing and healthy during the summer months when the fruit is at its peak.

One of the simplest ways to make watermelon juice is by blending fresh watermelon chunks until smooth and then straining the liquid to remove any seeds and pulp. This can be simply served over ice or mixed with sparkling water for a refreshing spritzer. To add an extra layer of flavor, you could also try adding a squeeze of fresh lime juice or a pinch of salt to balance out the natural sweetness of the watermelon.

For a more complex and unique option, watermelon can be combined with other fruits for delicious and nutritious drinks. Try blending watermelon with other summer fruits like strawberries, raspberries, or peaches for a fruit-packed smoothie. Or, mix it with pineapple and coconut water for a tropical twist. The key is to experiment with different fruit combinations to find your favorite flavors.

For a more grown-up take on watermelon juice, consider turning it into a delicious cocktail. Watermelon pairs well with various spirits, such as vodka, gin, and tequila. One popular option is a watermelon margarita, made by blending fresh watermelon with tequila, lime juice, and a splash of triple sec. Alternatively, try a watermelon mojito by muddling fresh watermelon with mint, lime, and sugar, then topping it with white rum and soda water.

Watermelon juice is not only delicious, but it’s also packed with a plethora of health benefits. As an excellent source of vitamins A and C, as well as antioxidants like lycopene, it helps protect the body from damage caused by free radicals. Moreover, it naturally contains electrolytes, making it ideal for rehydration after a workout or a day in the sun. For a refreshing and wholesome drink option, consider trying one of the many watermelon juice recipes available, or create your own unique blend.

A refreshing watermelon cocktail garnished with mint leaves and a slice of watermelon

Commercially Available Watermelon Juices

In recent years, watermelon juice has become increasingly popular due to its numerous advantages, such as hydration, rich vitamin and mineral content, and its potential to boost athletic performance. A variety of store-bought watermelon juice brands, including WTRMLN WTR, Tsamma, and 1915 Organic, cater to this growing demand. Each brand possesses its own unique qualities, additives, and processing techniques, ultimately influencing the taste, nutritional value, and overall appeal of their products, giving consumers plenty of options to choose from.

WTRMLN WTR is a prominent watermelon juice brand that sources its watermelons from the United States and uses a cold-pressed extraction method to produce their juice. They utilize any leftover rinds from the watermelon fruit, which is a sustainable practice that dramatically reduces food wastage. One key feature of WTRMLN WTR’s processing method is that it excludes artificial sweeteners, preservatives, and concentrates, allowing for a more natural and healthy product. The ingredients list of their watermelon juice typically includes watermelon flesh, watermelon rind, and organic lemon juice.

Another popular watermelon juice brand, Tsamma, also prides itself on sourcing its watermelons locally within the United States. The brand offers juices in both pure watermelon and blended varieties, with combinations such as watermelon and coconut water, or watermelon with the blueberry flavor. Tsamma’s processing methods retain the natural nutritional benefits of the watermelon fruit, ensuring that their juices are high in electrolytes, antioxidants, and essential amino acids. Tsamma watermelon juices are free from added sugars, artificial preservatives, and colors, providing consumers with a refreshing and nutritious option.

1915 Organic, a brand by Bolthouse Farms, produces a watermelon juice that is a blend of organic watermelon, organic apple, and organic lemon juice. This unique combination provides an exciting flavor profile and additional nutritional benefits. The brand is committed to using non-GMO ingredients, contains no artificial additives, and their processing methods involve cold-pressing to retain its natural goodness. The addition of apple and lemon to the watermelon juice helps balance the sweetness and acidity, making it a delightful thirst quencher.

When it comes to selecting a watermelon juice brand, it is crucial for consumers to verify the product labels and examine the ingredients list to ensure that they are consuming a juice that aligns with their dietary preferences and health goals. Understanding the differences in additives, flavors, and processing methods between various watermelon juice brands will help individuals make educated choices when purchasing a refreshing and nutrient-packed beverage. Despite the variations between brands, a common factor that they all share is their dedication to producing high-quality and healthy watermelon juices.

An image of a cup of watermelon juice with nutritional information surrounding it including calories, sugars, fats, vitamins, and minerals.

Watermelon Cultivation and Selection

To achieve this, the cultivation and selection process of watermelons, scientifically known as Citrullus lanatus, becomes crucial in ensuring the best quality juice. Watermelon is a popular summertime fruit and a rich source of vitamins A, B6, C, and essential minerals. By using high-quality watermelons as the primary ingredient, the watermelon juice not only has a refreshing taste but also offers numerous nutritional benefits to consumers.

Watermelons are usually grown in warm climates, with an average temperature range of 70 to 80 degrees Fahrenheit, and they require approximately 80 days to reach maturity. The cultivation process involves preparing the soil, planting the seeds, and providing proper care in terms of irrigation and nutrition.

Soil Preparation and Planting

To ensure the healthy growth of watermelons, the soil must be well-drained and have a pH between 6 and 6.8. Sandy loam soil is considered ideal for watermelon cultivation. Before planting seeds, farmers should prepare the soil by adding organic matter such as compost or aged manure, and ensuring proper aeration. Once the seedlings are big enough, they are typically transplanted into the field, with each plant spaced approximately 60 to 72 inches apart. Watermelons require regular watering, especially during flowering and fruit development stages. The use of drip irrigation systems is common to minimize water wastage and prevent diseases caused by excessive moisture.

Choosing the Right Variety of Watermelon

Choosing the right variety of watermelon for juice production is important, as certain varieties are more suitable for this purpose. For example, seedless watermelons are often preferred due to their higher juice content and easy-to-process nature. Some popular seedless watermelon varieties include ‘Crimson Sweet,’ ‘Millionaire,’ and ‘Trio.’ When selecting watermelons for juice production, factors like sugar content, texture, and overall quality must be considered to ensure a flavorful and nutritious end product.

Selecting Ripe Watermelons

Selecting ripe watermelons at the peak of their maturity is crucial to producing high-quality juice. Several indicators can be used to determine the ripeness of a watermelon. One common method is to look for a cream-colored or yellowish spot on the watermelon’s bottom, also known as the ground spot. This is where the fruit comes into contact with the ground during the ripening process. A ripe watermelon will also produce a deep, hollow sound when tapped gently. The fruit’s texture should be smooth and firm, with no bumps or dents.

Modern Technology and Watermelon Cultivation

Modern technology has greatly influenced the cultivation and selection process of watermelons. For example, non-destructive techniques such as near-infrared spectroscopy (NIRS) are used to determine the sugar content and overall ripeness of watermelons without causing any harm to the fruit. Moreover, researchers are studying the genetics of watermelons to develop new varieties that are more resistant to diseases, have a higher yield, and a higher juice content. Improvements in watermelon quality benefit both the consumers and the environment by reducing the need for pesticides and increasing overall crop efficiency.

A glass of red watermelon juice with ice cubes on a wooden table.

Environmental Impact

Despite these advancements, it is important to consider the environmental impacts of watermelon production, like any other agricultural activity. One major concern is the use of water in watermelon farming, as this juicy fruit is composed of about 90% water and requires a significant amount of water for growth. Studies have shown that watermelon farming can lead to the depletion of water resources, particularly in water-scarce regions. In addition, chemical fertilizers and pesticides used in watermelon cultivation contribute to water pollution, and have negative consequences on biodiversity and soil health. Therefore, while modern technology enhances watermelon cultivation, it is crucial to address the environmental challenges associated with its production.

One way to minimize the environmental impact of watermelon farming is by adopting sustainable agricultural practices. Drip irrigation systems can help farmers efficiently water their watermelon crops with minimal water waste, ensuring that the water supply is not depleted. Additionally, the use of organic fertilizers and the practice of integrated pest management can reduce the need for chemical interventions, thereby reducing pollution and preserving soil health.

When it comes to consuming watermelon juice, there are several actions individuals can take to minimize their personal carbon footprint. Purchasing locally-grown produce, when available, can significantly reduce the transportation emissions associated with the watermelon’s journey from farm to table. Buying watermelons from local farmers’ markets or directly from the farm also helps support small-scale farmers who may be more likely to practice environmentally-friendly farming techniques.

In addition to sourcing watermelon juice responsibly, consumers can take steps in their own homes to reduce the environmental impact of their consumption. Using a juicer instead of buying pre-packaged juice can significantly cut down on packaging waste, and using reusable water bottles or glasses for your juice can help reduce single-use plastic waste. Composting the leftover watermelon rinds and pulp is another great way to minimize waste and return valuable nutrients to the soil.

Watermelon juice is highly valued for its hydrating properties, as it is composed of over 90% water. This makes it an excellent refresher during hot summer days, as well as an ideal post-workout drink, assisting in efficient muscle recovery. Apart from keeping the body hydrated, watermelon juice is a good source of essential vitamins and minerals, such as vitamin A, vitamin C, and potassium. These nutrients play significant roles in maintaining the overall health of various body systems, including the immune system, vision, and heart function.

A sliced watermelon showing its pink fruit and black seeds.

Health Benefits and Risks

However, it’s equally important to consider the environmental impact of watermelon juice consumption. Supporting policies and programs that encourage sustainable farming practices, invest in research and development of innovative technologies, and provide financial incentives for eco-friendly initiatives can help make the production and consumption of watermelon juice more environmentally friendly for everyone. By purchasing locally-grown watermelons, adopting more sustainable practices in our own homes, and advocating for changes within the industry, we can all help reduce the environmental impact of watermelon juice consumption.

Another key health benefit of watermelon juice is its potential to regulate blood pressure. A particular amino acid called L-citrulline found in watermelon helps to improve blood flow, by relaxing and dilating blood vessels through the production of nitric oxide. Several studies have suggested that regular consumption of watermelon juice may help in reducing hypertension, consequently lowering the risk of heart diseases and stroke. Moreover, the presence of antioxidants, such as lycopene and vitamin C, in watermelon juice can further contribute to cardiovascular health by reducing oxidative stress that can damage blood vessels and other tissues.

Despite its potential health benefits, consumption of watermelon juice may pose some risks for certain populations. One such group includes individuals with diabetes, since watermelon has a high glycemic index, which can cause rapid increase in blood sugar levels. While moderate consumption of watermelon juice, combined with a balanced diet, may not be harmful for most, diabetic individuals should consult their healthcare provider before incorporating it into their regular diet.

Another population that should be cautious about consuming watermelon juice are those with kidney disorders. The high potassium content in watermelon can be detrimental for people with impaired kidney function, as their bodies may be unable to process and eliminate excess potassium properly. High potassium levels in the bloodstream can lead to hyperkalemia, a condition with potentially serious consequences, such as disrupted heart rhythms and even sudden cardiac arrest.

Lastly, it is worth mentioning that watermelon is a known allergen for some people, and its consumption may trigger symptoms, such as itching, swelling, and hives. Those who have a known allergy to watermelon or other members of the Cucurbitaceae family should avoid consuming watermelon juice. If you suspect an allergy but are unsure, it is best to consult with a healthcare professional before incorporating watermelon juice into your diet.

Watermelon juice nutrition facts, showcasing its high water content and key vitamins and minerals.

Throughout this essay, the numerous facets of watermelon juice have been addressed, demonstrating just how versatile and beneficial this fruity beverage can be. By understanding the nutrition, preparation techniques, recipes, commercial options, cultivation methods, and environmental impact, we can make informed decisions about incorporating watermelon juice into our daily lives. Considering the potential health benefits, such as hydration and blood pressure regulation, while being aware of possible risks, allows us to savor this refreshing drink with confidence and appreciation, enjoying every last sip of its sweet, thirst-quenching goodness.

Categories
Uncategorized

Watermelon Salad Preparation

Imagine a hot, sunny day, and you’re craving something light, refreshing, and packed with flavor. A watermelon salad is the perfect choice! This delicious dish combines juicy watermelon with a variety of other ingredients, creating a harmony of taste and texture in every bite. Follow along as we guide you through the process of finding the perfect recipe, selecting your ingredients, and mastering the art of watermelon salad preparation.

Finding a Watermelon Salad Recipe

Begin by searching the internet for watermelon salad recipes. You can use popular search engines like Google, Bing or Yahoo to conduct your search. Type in keywords such as “watermelon salad recipe,” “watermelon feta salad,” or “watermelon mint salad” to find specific variations.

Visit trusted food websites, blogs, or online magazines dedicated to sharing healthy and delicious recipes. Some popular websites include Allrecipes, Food Network, Epicurious, Tasty, and Food52.

Look for websites with user reviews and ratings for their recipes. Reading reviews can give valuable insights into the taste and preparation of the dish, especially if you are trying a new recipe.

When you find a recipe that appeals to your taste, read through the list of ingredients to ensure you have everything or can substitute missing ingredients. The list will include items such as watermelon, greens, cheese (typically feta), herbs such as mint or basil, and dressing ingredients, like olive oil, lemon juice, or vinegar.

Review the measurements of each ingredient to ensure you understand the quantities needed to make the salad. Measurements are typically given in cups, tablespoons, or grams, depending on the recipe. Make sure to follow the measurements accurately to achieve the desired flavor and balance in your salad.

Carefully read the instructions provided in the recipe, including preparation, chopping and mixing methods. Some recipes may require the watermelon to be cut into cubes, while others may call for melon balls or thin slices. Ensure you understand the instructions before proceeding with the recipe.

Make a shopping list of the ingredients you need, ensuring you purchase only fresh, ripe, and high-quality ingredients, such as a seedless watermelon, for the best possible taste.

Assemble all the necessary utensils and tools required to make the salad, such as a cutting board, knife, melon baller, vegetable peeler, measuring cups and spoons, mixing bowls, and serving plates.

Finally, prepare the watermelon salad recipe according to the instructions provided, adjusting the dressing, herbs, or seasoning according to your taste preferences.

Once your watermelon salad is ready, serve and enjoy it as a refreshing appetizer or side dish during hot summer days.

A person holding a big knife and preparing a watermelon by cutting it into cubes.

Selecting a Watermelon and Other Ingredients

Selecting a ripe and juicy watermelon:

  • Look for a firm and symmetrical watermelon: Make sure the watermelon does not have any flat sides, irregular bumps, or dents. This indicates that the fruit has evenly ripened.

  • Check for a creamy-yellow spot: This is the spot where the watermelon was sitting on the ground while ripening. A ripe watermelon will have a creamy-yellow color spot. If it’s white or does not have any spot, it may not be ripe.

  • Look for a uniform color: Choose a watermelon with a dark green and uniform color, without any stripes or spots.

  • Size matters: Pick a watermelon that is neither too big nor too small. Instead, look for a fruit that feels heavy for its size. This indicates that there is plenty of water and sugar, making it ripe and juicy.

  • Knock on it: Gently tap the watermelon with your knuckles. A ripe watermelon will have a deep, hollow sound. If it sounds dull or flat, it may not be ripe yet.

Selecting the right ingredients to go with your watermelon salad:

  • Feta cheese: Look for a good-quality feta cheese, preferably made from sheep or goat milk. It should be creamy and slightly tangy. You can also opt for a low-fat or vegan version if desired.

  • Cucumber: Choose crisp and firm cucumbers without any blemishes, and avoid those that are overly ripe or have soft spots.

  • Mint leaves: Fresh mint leaves are essential in a watermelon salad. Look for bright green leaves without any dark spots or wilting.

  • Red onion: Opt for a medium-sized red onion with a smooth, shiny skin. Make sure it feels firm and has no soft spots.

  • Olive oil: Use a high-quality extra virgin olive oil for a balanced and flavorful taste.

  • Lime or lemon: Get a fresh and firm lime or lemon with a smooth skin. Make sure it does not have any soft spots or blemishes.

  • Salt and pepper: Freshly cracked black pepper and a pinch of sea salt or kosher salt will enhance the flavor of the salad.

Optional ingredients:

  • Balsamic glaze: You can drizzle some balsamic glaze on the salad for an extra touch of sweetness.

  • Arugula or mixed greens: For a more substantial salad, add some fresh arugula or mixed greens for an extra crunch.

  • Toasted almonds or walnuts: For added texture, consider incorporating some toasted almonds or walnuts into your salad.

Now that you have selected a ripe watermelon and the accompanying ingredients, you’re ready to make a delicious watermelon salad. Enjoy!

A photo of a tasty watermelon salad with fresh greens, feta cheese and sliced cucumbers on a white plate.

Preparing the Watermelon

Step 1: Choose a ripe watermelon
Select a watermelon that has a uniform shape, is free from any flat sides or dents, and feels heavy for its size. Look for a white or yellowish spot on the watermelon where it has been sitting on the ground, known as the sugar spot. This indicates it is ripe and sweet.

Step 2: Gather your tools
You’ll need a cutting board, a sharp knife (preferably a chef’s knife or a serrated knife), a spoon, and a large bowl.

Step 3: Wash the watermelon
Clean the surface of the watermelon with water and pat it dry.

Step 4: Cut off the ends
Slice off a small part of both ends of the watermelon to create a flat surface, which will help keep the watermelon stable while cutting.

Step 5: Remove the rind
Stand the watermelon on one of the flat ends. Use your knife to carefully slice off the rind from top to bottom, following the curve of the watermelon. Continue removing the rind, making sure to cut away any remaining white parts as they can be tough and less flavorful.

Step 6: Cut the watermelon in half
Place the watermelon on its side and slice it in half so you have two semi-circle pieces.

Step 7: Quarter the watermelon
Take each half of the watermelon and slice it in half again, resulting in four quarters.

Step 8: Remove the seeds
Using a spoon or the tip of your knife, remove any visible black seeds from each watermelon quarter. Some watermelons may have small white seeds which are edible, but you may choose to remove them as well.

Step 9: Slice the watermelon into strips
With the flesh side up, cut each quarter into 1-inch strips, cutting perpendicular to the length of the watermelon.

Step 10: Cube or chunk the watermelon
Now, cut across the strips to create 1-inch cubes or chunks. Adjust the size of the cubes or chunks to suit your preference for the salad.

Step 11: Collect and store the watermelon
Place the watermelon cubes or chunks in a large bowl. If not using right away, cover the bowl with plastic wrap and refrigerate until needed.

Now that you have prepared, cut, and deseeded the watermelon, you’re ready to make a delicious watermelon salad. Simply mix the watermelon chunks with other fruits, vegetables, herbs, and seasonings of your choice to create a refreshing and healthy dish. Enjoy!

illustration of watermelon split in half with seeds and rind removed

Prepping Other Salad Ingredients

Here are the instructions to prepare a watermelon salad with other salad ingredients like vegetables, fruits, and herbs. This guide will help you learn how to wash, chop, and combine those ingredients for a delicious, fresh watermelon salad.

1. Gather your materials and ingredients:

  • Cutting board
  • Chef’s knife
  • Colander
  • Salad spinner (optional)
  • Large mixing bowl
  • Cucumbers
  • Red onion
  • Feta cheese
  • Mint
  • Basil
  • Lime juice

2. Wash your hands:

Before starting any food preparation, always wash your hands thoroughly with soap and water.

3. Prepare your watermelon:

  • Wash the watermelon under cold running water using a vegetable brush.
  • Dry it and cut off the ends and carefully remove the rind around the flesh.
  • Cut the watermelon into small triangles or bite-size cubes, ensuring no seeds are present.

4. Prepare other fruits and vegetables:

  • Rinse any fruits and vegetables under cold running water.
  • Using a knife, cut off any unwanted parts and chop each ingredient into bite-sized pieces

5. Soak and rinse herbs:

  • Place fresh herbs, such as mint or basil, into a colander and shake under cold running water to remove any dirt or debris.
  • Gently pat the herbs dry with a clean paper towel.

6. Chop herbs:

Finely chop the herbs with your chef’s knife, rocking the blade back and forth while keeping one hand on the handle and the other on the tip. This will ensure a finely chopped, even texture.

7. Combine ingredients:

Place everything in a large mixing bowl and gently toss together.

8. Dress the salad:

In a separate bowl, whisk together lime juice or lemon juice, olive oil, salt, and pepper, and drizzle the dressing over the salad. Toss gently once more.

9. Serve and enjoy:

Your watermelon salad is now ready to be enjoyed! Chill the salad for about 15-20 minutes in the refrigerator before serving for a crisp, refreshing experience.

Remember to keep your work surface clean and sanitized, especially when working with fresh fruits and vegetables.

A picture of a watermelon salad with cubes of watermelon, cucumber, red onion, and basil, topped with crumbled feta cheese and a lime wedge.

Combining Ingredients and Mixing

Ingredients:

  • 4 cups cubed watermelon (seedless or seeds removed)
  • 2 cups diced cucumber (English or seedless)
  • 1/2 cup crumbled feta cheese
  • 1/4 cup thinly sliced red onion
  • 1/4 cup chopped fresh mint
  • 1/4 cup chopped fresh basil
  • 1/4 cup olive oil
  • 2 tablespoons freshly squeezed lime juice
  • Salt and black pepper, to taste

Instructions:

  1. Prepare the ingredients: Ensure that you have all the ingredients ready and properly measured. Make sure your watermelon is cubed, cucumber is diced, feta cheese is crumbled, red onion is thinly sliced, and fresh mint and basil are chopped.
  2. Combine the watermelon and cucumber: In a large mixing bowl, gently combine the cubed watermelon and diced cucumber. Make sure not to apply too much pressure to avoid crushing the watermelon pieces.
  3. Add the feta cheese: Sprinkle the crumbled feta cheese over the watermelon and cucumber mixture. Distribute the cheese evenly throughout the dish.
  4. Incorporate the red onion: Scatter the thinly sliced red onion across the salad, ensuring an even distribution.
  5. Add the fresh herbs: Sprinkle the chopped fresh mint and basil over the salad, making sure they are evenly dispersed.
  6. Mix the dressing: In a separate small bowl or measuring cup, combine the olive oil, freshly squeezed lime juice, salt, and black pepper. Whisk the mixture well to combine and emulsify the ingredients.
  7. Pour the dressing over the salad: Drizzle the dressing evenly over the watermelon salad, taking care to distribute it as evenly as possible.
  8. Gently mix the salad: Using a large spoon or salad tongs, carefully toss the salad to combine all the ingredients and coat them in the dressing. Make sure to be gentle while mixing to prevent bruising or crushing the watermelon and cucumber pieces.
  9. Taste and adjust seasoning: After mixing, taste the salad to see if it needs any additional salt or pepper. Adjust according to your taste preference.
  10. Serve immediately or chill: You can serve the watermelon salad immediately, or you may choose to let it chill in the refrigerator for about 15-30 minutes to allow the flavors to meld together. Enjoy your refreshing watermelon salad!

A refreshing bowl of watermelon salad with cucumbers, feta cheese, red onions, mint, and basil, with a tangy lime and olive oil dressing poured over the top.

Preparing the Salad Dressing

A light and refreshing salad dressing is the perfect accompaniment for a watermelon salad. In this guide, we’ll give you instructions on how to prepare two different salad dressings – a simple citrus vinaigrette and a creamy yogurt-based dressing – to complement your watermelon salad.

Citrus Vinaigrette Dressing:

  • 1/4 cup freshly squeezed lemon or lime juice
  • 1/2 cup extra-virgin olive oil
  • 1 tablespoon honey or maple syrup (optional, for a touch of sweetness)
  • Salt and pepper, to taste

In a small mixing bowl or a jar with a lid, combine the lemon or lime juice, olive oil, and honey or maple syrup (if using). Whisk the mixture until well combined. Alternatively, if using a jar, cover with the lid and shake vigorously to emulsify the dressing. Taste the dressing and add salt and pepper to your liking. Set aside until you’re ready to dress the salad. You can store this vinaigrette in the refrigerator for up to a week in a sealed container. Shake or whisk again before use.

Creamy Yogurt-Based Dressing:

  • 1/2 cup plain Greek yogurt
  • 1/4 cup freshly squeezed lemon or lime juice
  • 1/4 cup chopped fresh cilantro or mint (or a combination of both)
  • 1 tablespoon honey or maple syrup (optional, for a touch of sweetness)
  • Salt and pepper, to taste

In a small mixing bowl, combine the Greek yogurt, lemon or lime juice, chopped herbs, and honey or maple syrup (if using). Whisk the mixture until well combined and smooth. Taste the dressing and add salt and pepper to your liking. Set aside until you’re ready to dress the salad. This dressing can be stored in the refrigerator for up to 3 days in a sealed container.

When you’re ready to serve the watermelon salad, gently toss the watermelon and other ingredients with your chosen dressing until well coated. You can also drizzle the dressing on top of the salad if you prefer a lighter touch.

Image Description: A refreshing watermelon salad with feta cheese and mint leaves in a white bowl on a wooden table.

A refreshing watermelon salad with feta cheese and mint leaves in a white bowl on a wooden table.

Taste Testing and Adjusting

In this guide, we will discuss the process of taste testing and adjusting a watermelon salad to achieve the perfect balance of flavors. This will help you create a delicious and refreshing salad that will impress your friends and family. Keep in mind that taste is subjective, and it’s essential to adjust the salad to your personal preferences.

Materials Needed:

  • Prepared watermelon salad
  • A clean fork or spoon
  • Salt, pepper, and any additional desired seasonings
  • Ingredients for the dressing (such as olive oil, vinegar, honey, or lime juice)

Step 1: Prepare the watermelon salad

Before you can begin taste testing, prepare your watermelon salad according to your chosen recipe. Common ingredients in a watermelon salad might include diced watermelon, crumbled feta cheese, thinly sliced red onion, chopped fresh mint, and arugula or other mixed greens. You can customize the salad to your personal preferences and dietary needs.

Step 2: Taste the salad

Using a clean fork or spoon, take a small bite of the salad, making sure to get a little bit of each ingredient on the fork. This will give you a good idea of the overall flavor balance. Pay attention to the sweetness of the watermelon, the saltiness of the feta, and the tartness of the dressing.

Step 3: Adjust seasoning

If you find that your salad needs more seasoning, feel free to add a pinch of salt, pepper, or other desired seasonings. It’s important to start with a small amount because you can always add more, but you can’t take it out if you over-season.

Step 4: Taste the dressing

If the salad still doesn’t taste quite right, the issue might be with the dressing. Taste the dressing on its own, or dip a piece of watermelon or feta in it to get a better sense of its flavor. If it’s too sweet, you could add more vinegar or lime juice for acidity. If it’s too tart, try adding a bit of honey or sugar to balance it out. If it’s too oily, consider adding more vinegar, lime juice, or other flavorful liquids to balance the oiliness.

Step 5: Re-mix and taste again

After making any adjustments to the seasoning or dressing, mix the salad thoroughly to ensure everything is evenly distributed. Take another bite, making sure to include all the ingredients again. Continue making small adjustments and re-tasting the salad until you achieve the perfect flavor balance.

Step 6: Serve and enjoy

Once you’re satisfied with the taste of your watermelon salad, it’s time to serve and enjoy! Remember, food tastes better when shared, so enjoy your delicious watermelon salad with friends and family.

Achieving the perfect balance of flavors in a watermelon salad is crucial for creating a delicious and refreshing dish. By following these simple steps for taste testing and adjusting, you’ll be able to create a watermelon salad that you and your guests will love. Remember, the key is to customize the salad to your personal preferences, and don’t be afraid to get creative with seasonings and dressings. Happy taste testing!

A bowl of watermelon salad with feta cheese, red onions, and mixed greens, topped with honey-lime dressing.

Plating and Garnishing

Begin by selecting an appropriate plate or serving platter for your watermelon salad. Ideally, choose a large, flat plate with a clean design or a solid color to showcase the vibrant colors and textures of your salad.

Before plating the salad, make sure all the ingredients are prepared and ready. Carefully cut the watermelon into bite-sized cubes or wedges, crumble or cube the feta cheese, and coarsely chop any fresh herbs you want to use for garnishing (such as mint, basil, or cilantro).

To begin plating your watermelon salad, start by layering a few pieces of lettuce or mixed greens on the plate. This will create a visually appealing base for your salad and elevate the other ingredients.

Next, arrange the watermelon pieces on top of the lettuce/greens, either by piling them up in a mound or arranging them in a circular or geometric pattern around the plate.

Sprinkle the crumbled or cubed feta cheese evenly over the watermelon pieces. You can also choose to place larger pieces of feta strategically around the plate for a more dramatic effect.

If you’re using a dressing or vinaigrette for your watermelon salad, drizzle it over the salad sparingly. You can use a spoon or a small squeeze bottle for precision.

Finally, scatter your chosen fresh herbs across the salad, either by sprinkling them or by arranging individual leaves or sprigs in a visually pleasing pattern.

For extra flair, you can add items such as thinly sliced red onions, small edible flowers, or even a final touch of freshly ground black pepper or a pinch of sea salt.

Once your watermelon salad is plated and garnished to your liking, serve it immediately to ensure the flavors and textures are at their best. Enjoy your refreshing, attractively presented watermelon salad!

A watermelon salad plated on a white plate decorated with feta cheese, mint leaves, and a drizzle of olive oil.

Storing and Serving

A refreshing watermelon salad is a delightful and nutritious addition to your meal. To maintain its delicious taste, proper storage and serving techniques are crucial. Following these simple tips will ensure your watermelon salad stays fresh and enjoyable for you and your guests.

Storing Your Watermelon Salad:

  1. Keep it cold: Since watermelon salad has fresh ingredients, it is essential to keep the salad at a cold temperature. Store the salad in the refrigerator at a temperature below 40°F (4°C) to prevent bacteria growth and to help preserve the freshness of the ingredients.

  2. Use an airtight container: To avoid cross-contamination and protect your salad from absorbing unwanted fridge odors, always store your salad in an airtight container. Airtight containers also help maintain the dish’s freshness by preventing excess moisture loss.

  3. Don’t dress the salad ahead of time: If your watermelon salad recipe includes a dressing, avoid adding the dressing to the entire batch of salad before refrigerating. The dressing can make the salad ingredients soggy and less appealing. Instead, store the dressing separately in a smaller airtight container.

  4. Avoid prolonged storage: Although properly stored watermelon salad can last up to 3 days in the refrigerator, consuming it within a day or two is recommended. The longer the salad sits, even in an airtight container, the less fresh and flavorful it becomes.

Serving Your Watermelon Salad:

  1. Bring the salad to room temperature: Before serving, remove the salad from the refrigerator and let it sit for about 10-15 minutes at room temperature. This will help to enhance the flavors of the ingredients without making it too warm.

  2. Dress the salad right before serving: If your watermelon salad recipe includes a dressing, make sure to mix it in just before serving the salad. This helps to avoid sogginess and allows your guests to enjoy the crisp, fresh ingredients.

  3. Garnish for added appeal: Add a touch of visual appeal by garnishing the salad with fresh mint leaves, crumbled feta cheese, or a few thin slices of red onion.

  4. Serve chilled: Although it’s important to let the salad sit at room temperature for a short time, it should still be served chilled. Use a chilled serving bowl to help maintain the crispness of the watermelon and other ingredients.

By following these storing and serving tips, you’ll be able to enjoy your watermelon salad with optimal freshness and flavor. Enjoy your refreshing and delicious salad with friends and family, knowing you’ve taken the steps to preserve its quality.

A bowl of colorful watermelon salad with diced watermelon, feta cheese, and mint garnish on top.

Exploring Variations

Begin your research: Start by browsing through various food websites, blogs, cookbooks, and magazines that offer a variety of watermelon salad recipes. You can also watch cooking videos on platforms like YouTube for visual demonstrations of different combinations and techniques. Take note of the main ingredients and flavors in each recipe, as well as any unique additions or twists that catch your eye.

Create a list of ingredients and flavors: Based on your research, make a list of common ingredients and flavors found in watermelon salad recipes. This may include the watermelon itself, other fruits, vegetables, herbs, cheeses, nuts, dressing ingredients, seasonings, and garnishes.

Experiment with unique combinations: Use your list to mix and match ingredients, creating exciting and unusual combinations for your watermelon salad. For instance, if you notice a recipe that features feta cheese and another one that incorporates blueberries, consider combining both in your salad for a unique flavor mix.

Seek inspiration from other cuisines: Many cultures have their unique takes on classic dishes, and you can learn a lot from them. Look into international interpretations of watermelon salad for new ideas on ingredient pairings and flavor profiles. For instance, you could explore Mediterranean, Thai, or Caribbean variations of watermelon salads.

Focus on seasonal ingredients: Keep in mind that, like watermelon, many fruits, vegetables, and herbs are seasonal – meaning they have their peak of ripeness and flavor at specific times of the year. By incorporating other seasonal ingredients into your watermelon salad, you can create a dish that truly captures the essence of the season.

Experiment with texture: Watermelon is inherently crunchy, juicy, and somewhat soft. To create a more interesting dish, consider the texture of each ingredient you add. For instance, you could add a variety of crunchy, crispy, or chewy elements (like nuts, seeds, or croutons) to your salad to offer a contrast to the watermelon’s texture.

Vary the dressing: While many watermelon salad recipes use a light vinegar-based dressing, don’t be afraid to experiment with different types of dressings, marinades, or sauces. Try using light cream-based dressings, citrusy vinaigrettes, or even incorporating yogurt for a tangy twist.

Use a variety of herbs and spices: Herbs and spices can take your watermelon salad to new heights. Examples of herbs and spices that pair well with watermelon include mint, basil, cilantro, pepper, and chili. Use these ingredients to create exciting new flavor combinations in your salads.

Get creative with presentation: A visually appealing dish can be even more enjoyable to eat. Experiment with different ways of presenting your watermelon salad, such as arranging the ingredients in a specific pattern, layering them, or using unique serving dishes or platters.

Adjust the recipe to suit your taste: As you try out various watermelon salad recipes and combinations, don’t be afraid to adjust the ingredients and flavors to your liking. Your taste buds are the ultimate judge of what makes a delicious and satisfying watermelon salad. Remember that exploring different variations is all about discovering new and delicious ways to enjoy this classic summer dish. Enjoy the process!

A bowl of watermelon salad with mixed berries, feta cheese, and a citrusy vinaigrette dressing, garnished with mint leaves and pistachios.

Once you’ve mastered the basic techniques for creating your delectable watermelon salad, don’t be afraid to venture into new territory. Explore different combinations and flavors to create a unique and personalized dish that will delight your taste buds. Remember that practice makes perfect, so don’t get discouraged if your first attempt isn’t perfect. Enjoy the journey and open yourself up to the infinite possibilities that come with mastering the art of watermelon salad.

Categories
Food

Vegan Bean Dishes

Beans and legumes hold a significant place in the vegan lifestyle, offering a versatile and nutritional source of protein, fiber, and essential nutrients. This essential guide delves into the numerous health benefits of beans and legumes, the diverse variety of beans available, cooking techniques, vegan bean-based protein sources, and the art of seasoning and flavoring bean dishes. From tantalizing soups, stews, and salads to hearty main dishes, finger-licking snacks, and even delicious desserts, this comprehensive exploration of vegan bean dishes will not only inform but inspire you to incorporate more beans into your everyday meals.

The Health Benefits of Beans and Legumes for Vegan Dishes

Beans and legumes have been lauded for their numerous health benefits, making them an ideal protein source for vegan dishes. One of the primary advantages of including these foods in your diet is their high protein content. As vegans do not consume animal-based protein sources, it is essential to seek alternative options to provide the body with the necessary amino acids for growth, repair, and overall well-being. Beans and legumes, including lentils, chickpeas, and black beans, are an excellent source of plant-based proteins, which are a perfect foundation for various vegan bean dishes.

In addition to their high protein content, beans and legumes are packed with essential nutrients that promote overall health. These include vitamins and minerals like iron, magnesium, potassium, and folate, which play crucial roles in maintaining a healthy body. For example, iron helps transport oxygen throughout the body, while magnesium plays a role in nerve and muscle function. Potassium helps regulate fluid and electrolyte balance and prevents high blood pressure, while folate is vital for forming red blood cells and preventing birth defects during pregnancy. Incorporating beans and legumes in vegan dishes ensures that these critical nutrients are consumed regularly.

Another significant health benefit of beans and legumes is their high fiber content. Consuming adequate amounts of fiber is crucial for promoting digestion, preventing constipation, and helping control blood sugar levels. Additionally, fiber helps in reducing the risk of heart disease and certain types of cancers. Research has shown that individuals who regularly consume beans and legumes are less likely to develop colorectal cancer. This underscores the importance of incorporating these foods into vegan dishes to derive maximum benefits from their high fiber content.

Moreover, beans and legumes have a low glycemic index, which means they cause a slow and steady rise in blood sugar levels, preventing sudden spikes and crashes. This characteristic makes them excellent for managing diabetes and promoting overall health. Studies have demonstrated that the regular consumption of beans and legumes helps in reducing the risk of developing type 2 diabetes and improving glycemic control in people with diabetes. Therefore, incorporating vegan bean dishes in one’s diet can help prevent and manage this condition effectively.

Beans and legumes offer immense health benefits and environmentally sustainable food choices. They require less water and produce fewer greenhouse gas emissions compared to animal-based protein sources, making them an excellent choice for individuals striving to reduce their environmental impact and adopt a more planet-friendly lifestyle. Their versatility enables easy inclusion in numerous vegan bean dishes, making it simple to maintain a diet that is both healthy and eco-friendly.

A plate with a variety of vegan dishes made with beans and legumes along with a glass of water.

Types of Beans in Vegan Cuisine

Black beans, known for their earthy flavor and tender texture, are one of the most popular beans in vegan cuisine. They feature prominently in Latin American and Caribbean dishes, such as black bean soup and Cuban black bean rice. These versatile beans can also be crafted into delightful vegan black bean burgers, salads, spreads, and dips. Rich in protein, fiber, vitamins, and minerals, black beans are a nutritious choice for any vegan meal. Their dark color adds visual appeal, while their mild flavor serves as a perfect base to build upon with a variety of spices and herbs.

Another type of bean commonly used in vegan dishes are kidney beans. As the name suggests, they are kidney-shaped and have a deep, dark red color. Kidney beans have a robust and mildly sweet flavor, and their thicker skin gives them a firmer texture, making them popular in Indian and American cuisine. Often found in classic dishes like chili con carne, kidney beans can also be used in a vegan version of chili, incorporating a myriad of vegetables, spices, and meat substitutes. In addition, kidney beans can be included in salads, stews, and casseroles for added nutrition, flavor, and satisfying heartiness.

Pinto beans, known for their speckled appearance and creamy texture, are another versatile bean used in many vegan recipes. These beans are most commonly associated with Mexican cuisine, such as in refried beans or burritos, but their creamy texture and mild flavor make them adaptable to various dishes. Pinto beans can be cooked from dried or canned, and their ability to hold their shape when cooked makes them perfect for soups and stews. Vegans can also enjoy pinto beans mashed or pureed, making a creamy base for a dairy-free bean dip or spread. Packed with protein and fiber, pinto beans are a nutritious addition to any vegan meal.

Chickpeas, also known as garbanzo beans, play an essential role in vegan cuisine, especially in Mediterranean and Middle Eastern dishes. With their firm texture and nutty flavor, chickpeas can be tossed into salads, simmered into soups, roasted as a crunchy snack, or mashed into spreads like hummus. Chickpeas are also a great base for vegan protein-packed salads, as they can be combined with various vegetables, grains, and herbs for a delicious and satisfying meal. Additionally, chickpea flour is utilized in many vegan recipes as a gluten-free alternative to wheat flour, making it perfect for breading and frying vegetables, thickening sauces, or creating delicious flatbreads and fritters.

Lima beans, also known as butter beans due to their buttery flavor and smooth texture, make a great addition to vegan meals. Common in Southern American dishes like succotash, lima beans can also be utilized in various soups, stews, and casseroles. With a mild flavor, lima beans can be easily incorporated into almost any dish to provide plant-based protein and dietary fiber. Additionally, their smooth texture allows for creative uses such as making vegan-friendly dips, spreads, or even a creamy base for a dairy-free sauce. Lima beans are a flavorful and healthy choice to add to any vegan meal planning.

A plate with portions of different types of cooked beans arranged in a circular pattern.

Methods for Preparing Beans for Vegan Dishes

To fully enjoy the benefits lima beans have to offer, proper preparation is essential. One popular method for preparing beans, especially in vegan bean dishes, is soaking and boiling. Soaking beans is important to reduce the cooking time and improve their digestibility. There are two methods for soaking beans: the overnight soak and the quick soak. In the overnight soak, beans are submerged in cold water for at least 8 hours, while in the quicker method, beans are boiled for a few minutes and then left to sit in the hot water for an hour. After soaking, the beans are drained and simmered in fresh water for 1 to 2 hours until they are tender. One advantage of this technique is that it helps to remove some of the indigestible sugars that cause gas and bloating. However, it can be time-consuming, and some nutrients may be lost in the soaking and boiling process. Regardless of the method selected, incorporating lima beans into your vegan dishes will provide a delicious and nutritious element to your meal.

Baking is another method to prepare beans for vegan dishes. Casseroles, such as bean and vegetable bake, are a popular example of baked bean dishes. Beans can be pre-soaked and partially boiled before baking, or they can be baked from dry if the dish has enough moisture and a long enough cooking time. Baking allows for better flavor infusion from spices and herbs and a delightful crust on top of the dish. However, it can be harder to control the consistency of the beans using this method.

Slow cooking techniques, such as using a Crock-Pot or a pressure cooker, can be efficient and convenient for preparing beans for vegan dishes. Slow cookers allow for hands-off cooking, and the long, slow simmering process helps to tenderize the beans and meld flavors, producing delicious and satisfying dishes. Pressure cookers, on the other hand, can cook beans much faster than other methods, even without soaking, due to the high-pressure environment inside the pot. The main disadvantage to using slow cookers is that they can take a long time to cook the beans, while pressure cookers can sometimes overcook the beans if not used properly.

In addition to the aforementioned methods, there’s also the option of using canned beans for vegan dishes, which can save time when it comes to meal preparation. Canned beans have already been soaked, cooked, and are ready to use. However, some disadvantages of using canned beans include the possible presence of added salt and other preservatives, as well as the potential loss of nutrients due to the canning process. To minimize the sodium content and preservatives, consider choosing low-sodium or no-added-salt canned beans and always rinse them well before using.

Vegan diets are on the rise, and many people are looking for alternative sources of protein to make sure they’re meeting their nutritional needs. One of the most popular options for vegans is beans, which are not only high in protein, but also rich in essential nutrients like fiber, iron, and folate. Bean-based protein sources such as tofu, tempeh, and seitan are versatile and make excellent main ingredients in vegan dishes.

A picture of different types of beans in a wooden bowl

Bean-Based Proteins for Vegans

Another interesting method of preparing beans for vegan dishes is sprouting, which enhances the nutritional content. Sprouting increases the availability of certain vitamins and minerals, and makes the beans easier to digest by breaking down complex carbohydrates, thus reducing gas and bloating issues. To sprout beans, soak them in water for a few hours, drain, and then keep moist for a few days until small sprouts appear. Sprouted beans can be eaten raw, stir-fried, or added to salads, soups, and other dishes. However, the main disadvantage of sprouting beans is its time-consuming nature, taking several days to complete the process.

Tofu: Also known as bean curd, tofu is made from soy milk that has been curdled and pressed into various firmness levels. It contains all nine essential amino acids, making it a complete protein, and is available in varying textures, ranging from silken to extra-firm, each suited to different dishes. For instance, silken tofu can be used to make creamy sauces, while extra-firm tofu can be pan-fried or grilled for a chewier, more substantial texture. It readily absorbs the flavors of the other ingredients in the dish, making it suitable for a wide variety of recipes including stir-fries, salads, smoothies, and desserts.

Tempeh: Another soy-based product, tempeh is made by fermenting cooked soybeans with a specific type of fungus. It is higher in protein content than tofu and contains essential vitamins and minerals like magnesium and vitamin B6. With its firm, nutty texture, tempeh works well in dishes that require a hearty, protein-rich ingredient, such as sandwiches, salads, or stir-fries. It is also beneficial for gut health due to the presence of natural probiotics from the fermentation process.

Seitan: Made from wheat gluten, seitan is another bean-based protein option ideal for those who are soy-free. While it is not suitable for those with gluten intolerance, seitan is a great vegan alternative for individuals with no dietary restrictions. With a texture similar to meat, seitan is a versatile ingredient in vegan cooking and can be used in a variety of dishes, such as stews, stir-fries, and even as a substitute for bacon, steak, or chicken. In addition to being high in protein, seitan contains trace amounts of essential nutrients like iron and calcium.

Lentils and chickpeas are not only excellent bean-based proteins but are also versatile legumes that can be incorporated into a wide variety of dishes. Soups, stews, salads, and even plant-based burgers or meatballs are just a few examples of meals that can be enhanced with these nutritious beans. In addition to their health benefits, incorporating more bean-based proteins into your diet contributes to the sustainability of our planet by reducing the demand for animal-based proteins. As such, they are an ideal choice for vegans pursuing a delicious, nutritious, and cruelty-free lifestyle.

A plate of vegan stir-fry with different types of bean-based proteins such as tofu, tempeh, and lentils

The Art of Flavorful Vegan Bean Dishes

Choosing the right herbs is a crucial step in creating a flavorful vegan bean dish. Fresh herbs like cilantro, parsley, and basil can be added just before serving to retain their bright flavors, while dried herbs such as oregano, thyme, and rosemary can be incorporated during the cooking process, allowing their flavors to meld with the beans. By experimenting with various combinations of herbs, you can unlock the full potential of vegan bean dishes, creating unique and satisfying meals that contribute to both your health and the health of the planet.

Spices also bring a depth of flavor to vegan bean dishes. Depending on the types of beans used and the desired taste, you can use spices to add warmth, sweetness, or a kick of heat to a dish. For example, adding cumin, coriander, and paprika can give a smoky and earthy flavor to your beans, while incorporating cinnamon, nutmeg, or cloves adds a slightly sweet note. To add a bit of heat, try incorporating chili powder, cayenne pepper, or ground black pepper to beans. Don’t be afraid to mix and match spices to achieve new and exciting flavors.

Another way to add flavor to vegan bean dishes is by using various cooking techniques. Slow cooking or simmering beans with spices allows the flavors to meld and develop, resulting in a rich, complex taste. Roasting beans in the oven, on the other hand, gives them a crispy texture and a slightly caramelized flavor. Finally, sautéing beans over medium heat with aromatic vegetables, such as onions, garlic, and bell peppers, can draw out the natural flavors of the beans while adding texture and depth to the dish.

Condiments are another essential way to enhance the taste of vegan bean dishes. For a tangy touch, consider adding vinegar, lemon or lime juice, or soy sauce to your beans. These acidic elements elevate the flavors and help balance any excess richness. To boost the savory umami flavor in your dish, consider incorporating tomato paste, miso paste, or nutritional yeast. For a sweeter note, using a touch of maple syrup, agave nectar, or even diced dried fruit like apricots can add a pleasant contrast to savory beans.

A versatile ingredient to consider in vegan bean dishes is coconut milk, which imparts a rich and creamy base to the recipe, without the need for dairy. This works exceptionally well in curries and makes it possible to achieve a lush and velvety texture. Additionally, do not underestimate the importance of salt in bringing out the flavors of your bean dish. While it’s important not to over-salt your food, a well-seasoned bean dish will taste more cohesive and satisfying. Finding the right balance between herbs, spices, and condiments ensures a delectable and delicious vegan bean feast, which can include soups and stews as well.

A picture of various beans and herbs arranged on a wooden table with bowls of spices and condiments in the background

Vegan Bean Soups and Stews

Vegan bean soups and stews are a delicious and nutritious way to enjoy a variety of beans and legumes, as these dishes can also be flavored with coconut milk and well-seasoned. Packed with protein and fiber, they make an excellent choice for those who follow a plant-based diet. Combining different types of beans and legumes with a wide array of herbs, spices, and condiments will make your vegan bean dishes even more enticing and fulfilling, providing a well-rounded meal for you and your loved ones.

One popular vegan bean dish is lentil soup, which typically consists of cooked lentils and various vegetables such as onions, carrots, and celery. Lentil soup is a versatile dish that can be prepared with a wide range of flavors and seasonings, making it appealing to many different palates. Additionally, lentils come in several different varieties, such as green, brown, and red, each adding its unique taste and texture to the soup.

Another flavorful vegan bean dish is chili, which is traditionally made with kidney beans and a rich tomato sauce. Vegan chili can also include other types of beans such as black beans, pinto beans, or even chickpeas for added variety and nutrition. This hearty stew is often prepared with a mix of vegetables and spices for a robust flavor profile. Spices such as chili powder, cumin, and paprika can be added to the dish for a smoky, spicy taste. Toppings such as avocado, nutritional yeast, or vegan cheese can be added to enhance the dish further.

Minestrone is a classic Italian soup that typically contains a mix of vegetables, pasta, and beans. The beans used in minestrone are usually cannellini or Great Northern beans, giving the soup a creamy texture. This dish can be customized in various ways, with additional ingredients such as spinach, zucchini, or bell peppers. Flavorful herbs such as oregano, thyme, and basil add a delicious, fragrant aroma to the dish. To make minestrone soup more satisfying, whole wheat or gluten-free pasta can be added for a filling, high-fiber meal.

Developing rich flavors in vegan bean soups and stews is often achieved through slow cooking methods and layered seasoning. One way to add depth of flavor is by cooking the beans and vegetables in vegetable broth or stock instead of water. This imparts a more savory taste to the dish than water alone. Additionally, adding aromatic vegetables such as onions, garlic, and celery can create a hearty, satisfying base for the soup or stew. Cooking the spices with the vegetables in a bit of oil or vegan butter before adding the liquid can also help to release their flavors and enhance the taste of the dish.

Discovering new and delicious variations of your favorite vegan bean soups and stews is made easy by experimenting with the addition of various herbs, spices, and seasonings, as well as adjusting cooking times and temperatures. The inclusion of vinegars or citrus juices can add a subtle tang that complements the rich flavors of the beans and vegetables. Similarly, using unique ingredients such as sun-dried tomatoes, olives, or capers can add an exciting Mediterranean touch to traditional legume dishes. With endless possibilities for customization, vegan bean soups and stews offer a satisfying, nourishing, and flavorful dining experience.

A bowl of vegan bean soup with lentils, kidney beans, and black beans topped with colorful vegetables and spices.

Vegan Bean Salad Ideas

Moving on from soups and stews, vegan bean salads are the perfect combination of healthy, satisfying, and delicious. One popular example is the three-bean salad, which traditionally consists of green beans, kidney beans, and garbanzo beans (also known as chickpeas). This salad can be easily customized by substituting or adding more types of beans, such as black beans or navy beans. The beans are mixed with chopped vegetables like bell peppers, onions, and celery, then dressed with a tangy vinaigrette made from apple cider vinegar, sugar, and Dijon mustard. This classic salad can be made ahead and gets even better as it marinates in the refrigerator overnight, making it an excellent companion to the aforementioned bean soups and stews.

Another delicious vegan bean salad option is the quinoa and bean salad. Quinoa, a nutritious and gluten-free grain, adds extra protein and fiber to the mix. This salad often highlights black beans, corn, cherry tomatoes, and avocado. The dressing typically uses lime juice, olive oil, cilantro, and seasonings like cumin and chili powder for a fresh and flavorful dish. This salad can be served cold or at room temperature and works great as a standalone meal or a side dish.

Mediterranean chickpea salad combines the wholesome goodness of chickpeas with a variety of vegetables like cucumber, cherry tomatoes, red onion, and Kalamata olives. The salad is seasoned with fresh herbs like parsley and mint, with a dash of salt and pepper. A simple lemon and olive oil vinaigrette further enhances the Mediterranean flavor. For a more substantial meal, this salad can be served atop a bed of baby spinach or mixed greens, or you can add more protein in the form of crumbled tofu or tempeh.

For a unique twist on a vegan bean salad, consider a lentil and sweet potato salad. Perfect for fall and winter, this dish incorporates cooked green lentils and roasted sweet potatoes, along with crunchy elements like pumpkin seeds and pomegranate arils. The dressing is a blend of maple syrup, Dijon mustard, and apple cider vinegar, which perfectly complements the sweet and earthy flavors in the salad. Additionally, this salad is packed with nutrients and vitamins, making it a wholesome and satisfying meal.

A vibrant and refreshing Asian-style edamame and soba noodle salad is an excellent way to enjoy vegan bean dishes. This salad features cooked soba noodles, shelled edamame (young soybeans), shredded vegetables like carrots and red cabbage, and is often garnished with toasted sesame seeds. The dressing is made from a flavorful combination of soy sauce, rice vinegar, ginger, garlic, and sesame oil, giving the salad an umami-rich taste. This versatile noodle salad can be further enhanced with the addition of other ingredients such as tofu or tempeh, making it even more satisfying and enjoyable.

A colorful bowl of vegan three-bean salad with green beans, chickpeas, and kidney beans mixed with chopped veggies and a tangy vinaigrette dressing.

Delicious Vegan Bean Dishes

Moving on to another popular option, veggie burgers remain a classic choice for those seeking delicious and satisfying vegan bean dishes. With beans as the main ingredient, these burgers offer a healthy, high-protein alternative to traditional meat-based patties. Black beans, chickpeas, and even lentils can be used as the base, combined with a variety of spices, grains, and vegetables to create flavorful and filling burgers. Whether grilled outdoors or cooked on the stovetop, vegan bean burgers can be enjoyed on their own, on a bun, or crumbled over a salad to create a versatile centerpiece to any meal.

Bean casseroles also serve as hearty vegan bean-centered dishes, perfect for both weeknight dinners and special occasions. Combining a variety of beans with vegetables, grains, and vegan protein sources like tofu or tempeh creates a nutrient-dense and flavorful casserole that can be adapted to suit your taste preferences. For extra richness, consider adding vegan cheese or a creamy sauce to bind the ingredients together. Bean casseroles can also be customized with seasonally available ingredients and baked in the oven for a warming one-dish meal.

Stuffed peppers are another vegan bean dish that showcases the versatility of beans in plant-based recipes. Many types of beans, such as black beans, kidney beans, or pinto beans, make an excellent filling for hollowed-out bell peppers. These bean-stuffed peppers can be jazzed up with a mixture of spices, grains, vegetables, or vegan meats, like crumbled tofu, tempeh, or veggie crumbles. Baking the stuffed peppers in the oven, with or without a vegan cheese or tomato sauce topping, results in a flavorful and eye-catching dish that’s sure to impress both vegans and non-vegans alike.

Beans can also be incorporated into other vegan main dishes to create filling, protein-rich meals. Consider experimenting with bean-based soups, stews, and chilis for a warm and comforting option, or adding beans to your next stir-fry or curry recipe for extra protein and flavor. Additionally, beans can be mixed with grains, such as rice, quinoa, or couscous, to make satisfying salads or grain-based bowls.

One delightful way to include beans in vegan main dishes is by incorporating them into pasta and noodle recipes. Beans, like chickpeas or cannellini beans, make a delicious and nutritious addition to hearty tomato-based pasta sauces, or even as the base for a vegan pesto. Another option is to use bean-based pasta, like edamame or black bean noodles, which provide a gluten-free and protein-rich alternative to traditional pasta dishes. Pairing these dishes with a variety of vegetables and vegan proteins, like tofu or tempeh, will further bolster the flavor and nutritional value of these bean-centered meals.

Picture of vegan bean burger with black beans, topped with sliced avocado and served with a side salad.

Vegan Snacks and Appetizers with Beans

Moving beyond main dishes, there is a plethora of unique and tasty ways to enjoy beans in the form of vegan snacks and appetizers. A classic and popular bean-based dip is hummus, typically made from chickpeas, tahini, lemon juice, garlic, and olive oil. This versatile appetizer can be paired with an array of foods, such as raw vegetables, pita bread, or tortilla chips. Furthermore, you can customize your hummus by adding a variety of flavors and spices, like roasted red pepper, sun-dried tomatoes, or a spicy kick of jalapeno, connecting back to the creativity found in incorporating beans into pasta dishes.

Another satisfying vegan bean snack is bean dip, which can be made with nearly any type of bean, including black beans, pinto beans, or cannellini beans. Like hummus, bean dips are easy to customize with your favorite spices, herbs, or additional ingredients, such as avocado, tomatoes, and corn. Bean dips provide a satisfying and healthy option on a snack platter, often accompanied by items like corn chips, whole grain crackers, or celery sticks. These dips are not only delicious but also are a valuable source of nutrients, packed with fiber and protein.

Taking a traditional appetizer concept and adding a vegan twist, bean fritters, and patties can be eaten on their own or as the base for sliders or bite-sized sandwiches. For instance, using chickpeas, lentils, or black beans, mix them with your choice of spices, herbs, and vegan binders like flax egg or oat flour to create a dough-like consistency. Shape the dough into patties or balls and then pan-fry, bake or air-fry them until crispy and golden brown. Serve the fritters on their own with a dipping sauce or as part of a mini sandwich with your favorite vegan toppings.

Spiced roasted chickpeas offer another nutritious and delicious option to satisfy your crunchy snack cravings. Start by draining and drying cooked or canned chickpeas, then toss them in a bit of oil and your favorite spices – such as smoked paprika, garlic powder, or cumin. Spread the chickpeas on a baking sheet and bake until they reach the desired level of crispiness. Roasted chickpeas are perfect for on-the-go snacking or can be added to salads for a crunchy, protein-packed element.

Vegan bean dishes are versatile, delicious, and healthy options for those seeking plant-based meals. With endless possibilities for customization and adjusting to personal tastes, bean-based dishes provide the opportunity to get creative while maintaining a wholesome and satisfying vegan diet. Whether you’re hosting a party, looking for an afternoon snack, or simply wanting to incorporate more beans into your meals, these appetizing options are perfect for all occasions.

A plate of vegan snacks and appetizers made with beans, including hummus, bean dip, bean fritters, and spiced roasted chickpeas. Each type of snack is on its own white plate with colorful fruits and vegetables surrounding the plate.

Vegan Bean Desserts

One such bean dish that has gained popularity is black bean brownies, which combine the rich, fudgy taste of a classic brownie with the nutritional benefits of black beans. The beans provide a solid foundation for the chocolatey treat, while also adding fiber, protein, and essential vitamins and minerals. To make black bean brownies, blend cooked black beans with ingredients such as cocoa powder, coconut oil, plant-based milk, and sweeteners like maple syrup or dates. Depending on your taste, you can also incorporate chocolate chips, nuts, or fruits to add extra flavor and texture to this satisfying dessert.

Another tantalizing option for those with a sweet tooth is chickpea cookie dough. Often made by blending cooked chickpeas with ingredients such as nut butter, maple syrup or agave for added sweetness, and vanilla extract for flavor, this vegan treat mimics the taste and texture of classic cookie dough – without the need for raw egg. Rich in protein and low in unhealthy fats, chickpea cookie dough can be enjoyed straight from the blender or refrigerated for a chilled, easy-to-scoop snack. Some popular variations of this dessert include adding chocolate chips, nuts, or dried fruit to resemble traditional cookie varieties.

For a taste of eastern-inspired vegan delights, adzuki bean ice cream is a must-try. Grinding cooked adzuki beans into a paste and incorporating that paste with a base of coconut milk or cashew cream, the outcome is a slightly sweet, flavorful and creamy dessert. The use of natural red bean paste in this dish gives the ice cream a vibrant and irresistible hue. This dish is not only known for its delicious flavor but is also appreciated for its high fiber and nutrient content, which is often not found in traditional ice cream options. To enhance the flavor and texture of adzuki bean ice cream, you can add extras such as crushed nuts or fruits like chopped mangoes.

Beans can be easily incorporated into various dessert options by simply sweetening and flavoring them appropriately. For instance, white beans can be utilized to make a chocolate mousse by blending them with cocoa powder and sweetener, providing a high-protein, silky-smooth dessert. Additionally, red lentils can be cooked down with sugar or maple syrup, creating a vegan caramel sauce that is perfect for drizzling over desserts or adding to other recipes. When it comes to vegan bean dishes, the possibilities are seemingly endless – all it takes is a bit of creativity and a willingness to explore unique flavor combinations.

An image of various desserts made from beans, such as brownies and ice cream, with ingredients such as cocoa powder and fruits on top.

As you now know, vegan bean dishes offer an incredible range of flavors, textures, and culinary possibilities, with endless opportunities to experiment and create wholesome meals. By understanding the health benefits, various bean types, cooking techniques, seasonings, and bean-based proteins, you are fully equipped to craft delicious and nutritious vegan dishes. Whether you are a long-time vegan or just beginning your journey into plant-based eating, incorporating bean dishes into your meal rotation can transform your meals, enhancing both taste and nutritional value. So go ahead, open your pantry, and start exploring the wonderful world of vegan bean cuisine.

Categories
Uncategorized

Fitness Routines for the General Public

Maintaining a healthy lifestyle and staying physically fit is essential for overall well-being. In a world where sedentary lifestyles are increasingly common, finding ways to engage in regular exercise and adopt a balanced approach to fitness is crucial. This informative guide covers various aspects of fitness, ranging from understanding the fundamentals to designing a balanced routine, exploring different exercise types, the role of nutrition, setting goals, and ensuring safety and injury prevention. By gaining comprehensive knowledge in these areas, individuals can successfully embark on a journey towards better health and improved fitness.

Understanding Fitness Basics

Physical fitness is of utmost importance in maintaining a healthy lifestyle and enhancing overall well-being. Engaging in regular exercise has numerous benefits, including reducing the risk of chronic illnesses like heart disease and diabetes, improving mood and mental health, and prolonging life expectancy.

Fitness involves five components, namely:

  • Cardiovascular endurance
  • Muscular strength
  • Muscular endurance
  • Flexibility
  • Body composition

By incorporating these components into a daily fitness routine, optimal health and wellness can be achieved.

Cardiovascular Endurance

Cardiovascular endurance, or aerobic fitness, is the ability to sustain physical activity that requires large muscle groups and an elevated heart rate for a prolonged period. To improve cardiovascular endurance, individuals should engage in activities such as running, biking, swimming, or dancing.

Muscular Strength

Muscular strength refers to the maximum amount of force a muscle or muscle group can generate. To improve muscular strength, individuals should engage in resistance training which incorporates the use of bodyweight exercises, free weights, or machines.

Muscular Endurance

Muscular endurance pertains to the ability of a muscle or muscle group to repeatedly perform a specific movement or maintain a particular position without fatigue. Exercises such as push-ups, squats, lunges, and activities like yoga or Pilates can improve muscular endurance.

Flexibility

Flexibility relates to the range of motion around a particular joint or set of joints. Stretching exercises like static and dynamic stretching, yoga, Pilates, or Tai Chi can effectively promote flexibility.

Body Composition

Body composition is the proportion of fat, muscle, bone, water, and other tissues that make up an individual’s body. Maintaining a healthy body composition is essential for overall well-being. To achieve an optimal body composition and address other fitness components, it’s crucial to design a balanced workout routine that incorporates resistance training, cardiovascular activities, and a nutritious diet.

An image depicting a person running, lifting weights, doing yoga, and measuring their body composition, with a caption 'The Five Components of Fitness'.

Designing a Balanced Workout Routine

A well-rounded workout routine should target various aspects of physical fitness, including cardio, strength training, and flexibility exercises. For example, cardiovascular exercises like running, swimming, or cycling improve heart health and endurance. These activities also increase lung capacity, lower blood pressure, burn calories, and contribute to weight loss and overall health. Aim to include at least 150 minutes of moderate-intensity or 75 minutes of vigorous-intensity cardiovascular activity per week. By combining these exercise types, you can effectively work towards a healthy body composition and overall fitness.

Strength training exercises are vital for building and maintaining lean muscle mass, improving bone density, and preventing age-related muscle loss. These workouts typically involve resistance training using body weight, free weights, or machines. It is crucial to work all major muscle groups, including the legs, back, chest, and arms, to promote muscular balance and prevent injury. Incorporating two or more strength training sessions per week is recommended for optimal results. Make sure to allow at least a 48-hour rest period between targeting the same muscle group to give your muscles time to recover and grow.

Flexibility exercises should also be an integral part of a balanced workout routine, as they ensure a healthy range of motion, improve posture, and decrease the risk of injury. Stretching exercises, yoga, or Pilates are excellent ways to maintain and improve flexibility. It’s also essential to ensure that you stretch all major muscle groups, holding each stretch for 20-30 seconds. Incorporating regular flexibility exercises can help prevent daily aches and pains and improve overall comfort when participating in daily activities and more intense workouts.

Before engaging in any workout, make sure to perform proper warm-up exercises to increase blood flow to the working muscles and prepare them for activity. Warming up can include light cardio movements, such as brisk walking or jumping jacks, and dynamic stretching, like leg swings or arm circles. A thorough warm-up should last at least five to ten minutes and gradually increase in intensity. Similarly, after completing a workout, it is necessary to cool down by reducing your exercise intensity and performing static stretches. This helps prevent injury, decreases soreness, and facilitates recovery by gently returning the body to its resting state.

When embarking on a journey to improve your fitness, it is essential to incorporate a variety of elements such as cardiovascular exercises, strength training, flexibility, warm-up routines, and cool-downs. However, it is crucial not to forget the importance of rest and recovery. Scheduling rest days and ensuring adequate sleep allows the body to repair and rebuild muscles, replenish energy stores, and prevent overtraining, which can lead to decreased performance, fatigue, and injury. Aim to incorporate at least one full rest day per week and listen to your body; adjust your workout routine if you experience excessive soreness or fatigue. By including these essential components, you can optimize your workouts, achieve your fitness goals, and maintain a healthy, balanced lifestyle.

An image of a person exercising with a balance and variety of cardio, strength training, and flexibility exercises.

Cardiovascular Exercises

Focusing on cardiovascular exercises, also known as cardio or aerobic exercises, plays a vital role in promoting overall health and well-being. For instance, running is a popular and accessible form of cardio known for burning calories and improving endurance. As you transition from the importance of rest and recovery to considering cardio routines, bear in mind that proper form and technique are critical for injury prevention and achieving maximum results. This includes maintaining a tall posture, leaning slightly forward, and keeping a steady rhythm in both your arm swing and foot strike. By seamlessly incorporating cardio, such as running, along with the other components mentioned in your fitness routine, you can efficiently progress towards a healthier and fitter lifestyle.

Swimming provides a low-impact and joint-friendly way to incorporate cardiovascular exercise into your routine. The water’s buoyancy eases stress on the joints, making it an ideal option for those recovering from an injury or with chronic joint conditions. Swimming also promotes muscle strength and flexibility as it requires the coordination of various muscles and the involvement of the entire body. It is essential to maintain proper form and technique when swimming, including keeping an elongated body position, an efficient kick, and a well-timed breathing pattern.

Cycling, both indoor and outdoor, offers a fun and challenging way to get the heart pumping. Not only does it improve cardiovascular fitness, but it also strengthens the muscles of the lower body and increases endurance. Proper cycling technique includes keeping a relaxed upper body, maintaining a proper seat position to avoid strain on the knees and back, and ensuring consistent pedaling cadence. Indoor cycling classes, such as spin classes, provide an opportunity to follow a high-energy routine led by an instructor, making it engaging and motivating for many individuals.

High-intensity interval training (HIIT) is a highly efficient form of cardiovascular exercise that alternates between short intervals of intense activity and recovery periods of lower-intensity exercise. HIIT can be easily adapted to a variety of fitness levels and can include activities such as running, cycling, or bodyweight exercises. Studies have shown that HIIT can provide similar cardiovascular benefits as traditional endurance training, but with less time commitment. Proper form and technique are essential for HIIT workouts, as poor form can lead to injury, especially when participating in high-impact exercises. Take the time to learn the correct movement patterns and adjust the intensity of the workout based on your fitness level to reduce the risk of injury.

In conclusion, incorporating a combination of cardiovascular exercises into your fitness routine can significantly enhance your overall health and well-being. Utilizing different forms of cardio helps prevent boredom and injury by engaging various muscle groups and avoiding repetitive stress on the same joints and muscles. Experimenting with a variety of activities enables you to find what works best for your body, preferences, and personal fitness goals, all while providing comprehensive cardiovascular benefits to improve overall health and well-being.

An image that shows a person running, another person swimming, and a third person cycling with HIIT workout equipment in the background.

Strength Training

Moving on to another crucial aspect of a well-rounded fitness routine, strength training, also known as resistance training, involves working your muscles against resistance to build and maintain muscular strength. This type of training complements cardio and flexibility exercises, providing a well-balanced workout plan. Incorporating strength training into your fitness program can help improve muscle mass, metabolism, cardiovascular health, and functional capacity, further enhancing your overall physical condition and well-being.

To achieve these benefits, it is important to understand the fundamentals of strength training, the type of weightlifting exercises, and how to use them in your workouts safely and effectively.

Compound vs. Isolation Exercises

Weightlifting exercises can generally be categorized into two types: compound exercises and isolation exercises. Compound exercises are movements that target multiple muscle groups simultaneously, such as squats, deadlifts, and bench presses. These exercises are considered highly functional, meaning they mimic everyday activities and help to improve overall muscle coordination and strength.

In contrast, isolation exercises target a single muscle group, such as bicep curls, tricep extensions, or hamstring curls. While these exercises are useful for addressing specific muscle imbalances or weaknesses, they may not have the same overall functional benefits as compound exercises.

Creating a Balanced Workout Routine

A good strength training routine will incorporate a mix of compound and isolation exercises to ensure that all muscle groups are stimulated and developed. It is important to create a balanced workout routine, often targeting larger muscle groups like the chest, back, and legs first before moving on to smaller muscle groups such as biceps, triceps, and shoulders.

This helps to ensure that the smaller muscles are not fatigued before the larger muscles, allowing for maximum training efficiency.

Proper Form and Technique

Proper form and technique are critical to avoid injuries in strength training. Learning the correct way to perform each exercise is crucial to safely build strength and encourage muscle growth.

Some important tips for maintaining proper form include keeping a neutral spine during movements, engaging the core, and controlling the speed of the exercise. In addition, using the appropriate equipment and adjusting it to fit individual needs play a significant role in avoiding injuries.

It is recommended to seek the advice of a fitness professional or an experienced lifter to learn the correct form and use of equipment when starting a strength training program, especially for beginners.

Set and Repetition Scheme

While there are many ways to incorporate strength training into a fitness routine, one common method is to follow a set and repetition scheme. This typically involves performing a certain number of repetitions (reps) of an exercise, followed by a period of rest, and then repeating the process for a set number of times (sets).

The specific rep and set scheme will depend on an individual’s goals, fitness level, and the exercises being performed. For example, a beginner might start with 2-3 sets of 8-12 reps, while a more experienced lifter may aim for 4-5 sets of 3-5 reps to focus on building maximum strength.

In order to achieve optimum progress in your fitness journey, it is essential to regularly change the types of exercises, rep and set schemes, and workout structure. This helps prevent plateaus and ensures that your muscles are continually challenged.

A person lifting weights while standing with good posture as another person watches.

Flexibility and Mobility

Additionally, incorporating flexibility and mobility exercises into your fitness routine is crucial for preventing injuries and improving overall fitness levels. Flexibility pertains to the range of motion of a joint or group of joints, whereas mobility is defined as the ability to move freely and effortlessly. Combining these elements not only maintains proper posture and reduces muscle imbalances but also enhances functional movement patterns. Ultimately, by improving muscular flexibility and joint mobility, you will optimize your performance in daily activities and various types of workouts while minimizing the risk of injuries.

One common way to improve flexibility is through stretching exercises. There is a myriad of techniques available, with dynamic stretching and static stretching being the two most popular types. Dynamic stretching involves moving your muscles and joints through their full range of motion in a controlled manner, as a way to warm up before physical activity. Examples include leg swings, arm circles, and walking lunges. Static stretching, on the other hand, requires holding a stretch for a set period of time without movement, which is typically done post-workout. Both methods are crucial for enhancing flexibility, but it is important to differentiate their uses and avoid static stretching before a workout, as it may compromise strength and power outputs.

Foam rolling is another technique that contributes to increased flexibility and mobility. Utilizing a foam roller or other self-myofascial release tools, this technique targets specific muscle groups and helps relieve muscle tightness, reduce inflammation, and promote blood flow. Foam rolling has shown positive effects on improving joint range of motion, muscular flexibility, and alleviating muscle soreness after workouts. Regular practice of foam rolling, along with stretching, can help identify and address potential problem areas, thus preventing injuries and improving overall fitness.

Incorporating flexibility and mobility work into your fitness routine can be done in multiple ways. You can set aside specific days for this type of training, integrate mobility exercises into your warm-up and cooldown routines, or perform short, focused sessions throughout the day. Prioritizing regular practice and consistency is key in order to reap the benefits of improved flexibility and mobility. It is also important to listen to your body and avoid pushing yourself too far or too fast, as doing so may lead to injury.

Ensuring optimal fitness levels involves a combination of proper exercise and efficient recovery techniques. Scheduling regular check-ins with a fitness professional or movement specialist can be beneficial in assessing your current flexibility and mobility levels, pinpointing potential problem areas, and guiding you towards personalized exercises to enhance your progress. With the appropriate balance of stretching, foam rolling, and mobility work, you will be better equipped to optimize your athletic capabilities and reduce the risk of injury on your journey towards greater overall fitness.

Example of a person performing a dynamic stretching exercise for their legs, with their foot extended on a bar. The person's muscles are engaged and their body is slightly leaned forward.

Nutrition for Fitness

Alongside exercise and recovery techniques, nutrition also plays a critical role in achieving fitness goals. Whether your goals are weight loss, muscle gain, or improving athletic performance, a well-planned diet can provide the necessary fuel for workouts, aid in recovery, and promote overall health. Macronutrients, including carbohydrates, proteins, and fats, are essential for energy production and building and repairing tissues. Each macronutrient plays a vital role in supporting different fitness routines, and a proper balance must be maintained for optimal results. By focusing on both physical routines and proper nutrition, you can work towards a healthier and more effective fitness journey.

Carbohydrates are the primary source of energy for the body and are especially important for high-intensity workouts such as weightlifting or sprinting. Consuming enough carbohydrates ensures that the body has adequate fuel to power through demanding exercises without tapping into protein stores. Adequate protein intake is crucial for muscle repair and growth, making it an essential nutrient for athletes or individuals engaging in resistance training. Fats, although often demonized, play an important role in hormone regulation and providing a more long-lasting energy source, making them essential for endurance workouts like long-distance running or cycling.

Micronutrients, such as vitamins and minerals, may not provide energy like macronutrients, but they are just as important in maintaining optimal health and supporting various bodily functions. For instance, calcium and vitamin D are essential for bone health, while B vitamins are crucial for energy metabolism. Consuming a diet rich in a variety of fruits, vegetables, whole grains, lean proteins, and healthy fats is the best way to ensure an adequate intake of essential micronutrients.

Meal planning is crucial in ensuring that the body receives the proper balance of macronutrients and micronutrients. It is important to plan meals according to individual needs, considering factors such as age, sex, body composition, fitness goals, and activity levels. Consuming a well-rounded diet at the right times, such as consuming pre- and post-workout meals, can influence one’s energy levels and the effectiveness of a workout. For example, consuming a meal rich in carbohydrates and protein within an hour after exercising can aid in muscle recovery and replenishment of glycogen stores.

Optimal fitness performance involves various factors, such as proper nutrition and hydration. Ensuring that you are well-hydrated is crucial, as it supports body temperature regulation, cognitive function, and prevention of fatigue. It is generally recommended to drink at least 8-10 glasses of water per day, with additional fluid intake depending on activity levels and climate. Alongside a well-planned fitness routine, incorporating a balanced diet that includes both macro and micronutrients is essential.

An image of a plate with a balanced meal including protein, carbohydrates, fruits, vegetables, and a glass of water.

Staying Motivated and Setting Goals

Another key element in achieving your desired fitness results is staying motivated throughout your journey. Setting SMART (Specific, Measurable, Attainable, Relevant, and Time-bound) goals can greatly enhance your motivation. These goals provide tangible milestones to work towards, offering guidance and ensuring consistency in your fitness efforts. By strategically addressing nutrition, hydration, and motivation, you can create an effective fitness routine tailored to your needs and aspirations.

Consistency is key to making progress in your fitness journey. To establish and maintain consistency, it’s important to develop a regular workout routine that fits your schedule and aligns with your goals. This may include planning specific workout days, times, and activities. Keeping a workout log or using a fitness app can help you track your progress and hold yourself accountable. Additionally, having a workout partner or joining a group fitness class can provide external motivation and support to get you moving on days when your own motivation may be lacking.

Overcoming barriers is a natural part of the fitness journey, and learning how to navigate challenges is essential for long-term success. Common barriers may include lack of time, self-doubt, or lack of knowledge about proper exercise techniques. To address these obstacles, consider implementing time management strategies, seeking guidance from fitness professionals, or enlisting the help of a personal trainer. Acknowledging and addressing challenges as they arise can help you stay on track and maintain motivation.

It’s also essential to find activities that are enjoyable and sustainable for you. If you dread going to the gym or engaging in a particular exercise, it’s much more difficult to stay motivated. Experiment with various types of workouts, such as dance classes, team sports, or outdoor activities, to find the ones that inspire and excite you. The more enjoyable your fitness routine is, the more likely you are to stay committed and motivated.

Celebrating small milestones and accomplishments is a powerful way to stay motivated in your fitness journey. When you reach a goal, such as a personal best in strength training or completing a challenging race, take the time to acknowledge your achievement and reward yourself. Rewards can be as simple as treating yourself to a new workout outfit, enjoying a relaxing spa day, or sharing your success with friends and family on social media. Recognizing and celebrating your progress helps build momentum and fuels your motivation to work towards your fitness goals in a sustainable manner.

A person tying up their shoelaces with a smiling face ready for a workout.

Injury Prevention and Safety

Maintaining this momentum and motivation requires a strong focus on injury prevention and safety as essential aspects of any fitness routine. A well-designed fitness program should incorporate strategies to prevent common injuries, ensure the safe execution of exercises, and promote overall physical health. By understanding the various components of injury prevention and safety, individuals can avoid unnecessary setbacks, improve performance, and maintain long-term fitness goals. In this way, a well-rounded approach to workout regimens blends the excitement of reaching milestones with the essential discipline of safeguarding one’s physical well-being.

One crucial element of injury prevention is a proper warm-up and cool-down for each workout. Warming up helps increase blood flow to the muscles, improving flexibility and reducing the risk of injury. A warm-up may include light aerobic exercises such as jogging or dynamic stretching, targeting the muscles that will be used during the workout. Similarly, cooling down with gentle static stretches and breathing exercises helps relax the muscles, return the body to a pre-exercise state, and minimize post-exercise soreness.

Another important aspect of injury prevention is using the correct form and technique for each exercise. Proper form ensures that the targeted muscles are engaged effectively while minimizing strain on joints and connective tissues. It is crucial to seek guidance from a fitness professional or through reputable sources to learn the appropriate technique for each exercise. Furthermore, having a workout partner or a personal trainer to observe and correct your form provides valuable feedback for continuous improvement.

Gradual progression and listening to one’s body are key factors in avoiding fitness-related injuries. Overloading the muscles too quickly, especially during resistance training, can lead to muscle strains and other issues. It is therefore essential to increase exercise intensity, load, and duration gradually, allowing the body ample time to adapt. Paying attention to signs of discomfort, pain, or excessive fatigue can help pinpoint potential issues, allowing for modifications and adjustments to prevent injury.

Incorporating a well-rounded fitness routine that includes a variety of exercises and training modalities can also enhance injury prevention and safety. Cross-training, which involves mixing different exercises and sports, helps maintain a balanced musculoskeletal system and reduces the risk of overuse injuries. Including activities such as yoga, Pilates, and other forms of flexibility and mobility training can further promote joint health and overall injury resilience.

Finally, proper nutrition and recovery practices are essential for injury prevention. Adequate nutrient intake, hydration, and sleep are crucial for maintaining overall health, supporting muscle growth and repair, and ensuring optimal performance during workouts. Moreover, investing in reliable fitness equipment, appropriate footwear, and protective gear can significantly enhance safety and help prevent accidents while performing fitness routines. By taking a comprehensive approach to injury prevention and safety, individuals can maximize the benefits of their fitness routines and maintain long-term health and wellness.

A cartoon person stretching before their workout with the words 'Injury Prevention' written above them.

Ultimately, becoming informed on fitness routines and various aspects of physical wellness is a vital step in leading a healthier, more balanced life. By understanding the different components of fitness, taking the time to design personalized workout routines, and recognizing the value of proper nutrition, individuals can meaningfully invest in their health. Furthermore, staying motivated and setting realistic goals, coupled with prioritizing safety and injury prevention, can ensure long-term success in one’s fitness journey. Empowered with this knowledge, go forth and embrace a more active and fulfilling lifestyle, reaping the countless benefits of improved physical fitness.

Categories
Uncategorized

UI/UX Design for the General Public

In today’s digital world, the design of user interfaces and user experiences (UI/UX) play a crucial role in shaping how people perceive and interact with various digital products, from websites to mobile apps. As the demand for engaging digital experiences continues to grow, understanding the fundamentals of UI/UX design becomes increasingly important for professionals and enthusiasts alike. In this exploration, we will delve into the essentials of UI/UX design, its principles, and tools, as well as the process of creating interactive and accessible interfaces.

Introduction to UI/UX Design

User Interface (UI) and User Experience (UX) design are interrelated disciplines that are crucial in the development of digital products, such as websites, apps, and software. The primary focus of UI/UX design is to create engaging, intuitive, and user-friendly solutions, ensuring a positive experience for users. Both UI and UX designers work together to create seamless navigation, pleasing aesthetics, and efficient functionality. By understanding the basics of these two areas, one can appreciate their significance in the digital world and the symbiosis between them, as well as the role of a UI/UX designer throughout the design process.

UI Design

UI design refers to the visual and interactive elements of a digital product, such as the layout, typography, color schemes, and buttons. It is the designer’s responsibility to make applications and websites aesthetically pleasing and easily navigable while also fulfilling the intended functionality. The principal goal of UI design is to create an interface where users can interact efficiently and effectively with the digital product, achieving their desired goals with minimal effort and confusion.

UX Design

On the other hand, UX design focuses on the overall experience of the user while using the digital product. UX designers consider the emotions, preferences, and needs of the users, ensuring the product meets their expectations and provides a seamless, enjoyable experience. This involves researching the target audience, creating personas, and identifying pain points and frustrations users may face. By solving these problems and streamlining the user’s journey, UX designers optimize the usability and overall satisfaction of the digital product.

The Role of UI/UX Designer

The role of a UI/UX designer is multifaceted and involves collaboration with various departments including developers, marketing professionals, and product managers. Throughout the design process, the UI/UX designer assesses the clients’ requirements and objectives, researches the target audience, conceptualizes the layout, and iterates the design based on user feedback and testing. By considering both UI and UX aspects, the designer creates a cohesive product with an enticing interface and a smooth overall experience.

User Testing

User testing is a vital aspect of UI/UX design to ensure the product is easy to use, efficient, and enjoyable. This involves conducting various tests with target users to gain insights into their preferences, habits, and potential issues they may encounter. By analyzing user feedback and making iterative improvements, UI/UX designers can refine the design and functionality to create a digital product that meets the needs of its users and achieves its intended purpose.

An image of a designer working on a computer creating a digital product in UI/UX Design.

Principles of UI Design

Applying the core principles of UI design is a key step in achieving a positive user experience. This involves mastering essential aspects such as visual design elements, layout, typography, and color theory. With a comprehensive understanding of these concepts, UI/UX designers can develop aesthetically pleasing and user-friendly interfaces that cater to diverse audiences and use cases. As a result, the iterative improvements informed by user testing are better equipped to create a seamless and engaging digital product that truly meets the needs of its users.

Visual Design Elements

Visual design elements play a significant role in user interface design, as it incorporates shapes, lines, textures, and images to create a harmonious and balanced layout. These elements help guide users through the interface, ensuring seamless navigation and a satisfying user experience. Designers must carefully choose and arrange these components in a strategic manner to achieve an organized and clear visual hierarchy, enabling users to quickly understand the layout’s structure.

Layout

The layout is another fundamental principle of UI design, as it determines the arrangement of visual components on the screen. It plays a crucial role in enhancing usability, readability, and the overall look of the interface. Grid systems, alignment, and consistency are essential in crafting a well-structured and organized layout. Grid systems provide a structural foundation for the interface, while alignment enhances the visual cohesion of elements. Maintaining consistency across layouts is essential for promoting familiarity and ease of use, ensuring users can efficiently navigate and interact with the interface.

Typography

Typography is a critical aspect of UI design, which directly influences legibility, readability, and the overall aesthetic of the interface. It involves selecting the right font, font size, line spacing, and text hierarchy to ensure content is easily consumable and visually appealing. Typography carries an interface’s tone and personality, helping to create a cohesive identity and aesthetic that aligns with the product’s goals and target audience. Designers must carefully consider different typefaces and typographic treatments to ensure effective communication and a pleasing user experience.

Color Theory

Color theory plays an integral role in shaping the visual language and aesthetic of a user interface. It influences user emotions, creates visual cues, and helps establish a clear visual hierarchy. Selecting appropriate color schemes and understanding the psychology of colors is essential in evoking desired emotions and perceptions from users. Designers should also consider color contrast, ensuring text and other design elements are easily distinguishable and legible.

Adapting to User Behavior and Trends

As a member of the general public looking to learn about UI/UX design, it’s essential to understand that staying up-to-date with user behavior and technological advancements is crucial for designing interfaces that cater to users’ needs and preferences. By conducting user research and testing, designers can identify areas for improvement and make informed decisions. This iterative process is essential for creating visually appealing and functional interfaces that consistently deliver positive user experiences.

An illustration of a designer sitting in front of a computer, watching a user interact with their UI design on a tablet.

Principles of UX Design

Moving on to user experience (UX) design, which is the process of creating products that provide meaningful and relevant experiences to users. This involves designing the entire process of acquiring, integrating, and interacting with the product, as well as addressing aspects such as usability, learnability, and human-centered design. Building on the user behavior insights gathered, UX design aims to create a seamless and enjoyable experience for users, which ultimately contributes to building brand loyalty and increasing customer satisfaction.

One of the key aspects of UX design is usability, which deals with the ease with which users can interact with a product or system. Usability ensures that the interface is intuitive, efficient, and easy to navigate, making it accessible for users of varying skill levels. A well-designed interface not only enhances user satisfaction but also increases the likelihood of product adoption and user retention.

Learnability is another important principle for UX design, as it relates to how easily users can learn and understand the product or system. By focusing on learnability, designers can create experiences that are easily grasped by users and help them achieve their goals with minimal frustration. This principle may be achieved by incorporating familiar design patterns, clear instructions, and intuitive interactions within the user interface.

Human-centered design revolves around the idea of designing products or systems that fit the users’ needs, expectations, and limitations. This design approach involves understanding and empathizing with the target audience, considering their preferences, and creating designs that align with their expectations. Techniques such as creating user personas, identifying user needs, and mapping user journeys, allow designers to tailor the design to the end-users effectively.

User personas, fictional characters representing typical users of a product, allow designers to comprehend their target audience better, leading to informed design decisions focused on users’ interests and pain points. Equally important, user journey mapping visualizes the process users go through when interacting with a product or system, thus facilitating the identification of areas for improvement and optimization. By incorporating these techniques, UI/UX designers can create user interfaces that resonate with their audience, ensuring a pleasant and memorable user experience.

An example of a mobile app's interface, designed with human-centered design principles in mind. The layout is intuitive, with clearly labelled buttons and easy-to-follow instructions.

Interaction Design

Building upon these foundations, interaction design becomes a crucial aspect of UI/UX design, concentrating on the interaction between the user and the product. The objective is to create a meaningful, engaging, and easy-to-understand experience for the user. Interaction design achieves a seamless user experience through principles such as consistency, feedback, and flexibility, whether the user interacts with a website or a mobile application.

Principles of Interaction Design

  • Visibility: refers to how easily users can navigate through the interface and find the necessary information, tools, or features.
  • Feedback: deals with the way users receive information on the consequences of their actions (e.g., error messages, confirmation notifications).
  • Constraints: are essential in limiting the possible actions of the user to those that are relevant and practical for the task at hand.
  • Consistency: is crucial in maintaining the same design patterns and conventions throughout the product, making it more predictable and easy to use.
  • Flexibility: ensures that the design accommodates different user preferences, abilities, and situations to cater to a broader audience.

Popular Interaction Design Patterns

Design patterns are tried-and-tested solutions to common design problems. They help to streamline the user experience, making it more efficient, enjoyable, and user-friendly. Knowing these patterns and how to apply them is essential in crafting successful and engaging UI/UX solutions. Examples include using breadcrumbs for navigational purposes on a website or employing a simple login/signup process for mobile applications.

Skills Needed for Interaction Design

In addition to understanding the principles and design patterns, interaction designers must possess good communication, collaboration, and analytical skills. They must empathize with users and cater to their needs to create products that resonate with the target audience. Conducting user research, usability testing, and incorporating feedback into the design process are fundamental in creating products that meet users’ needs.

Understanding UI/UX Design

User Interface (UI) and User Experience (UX) design are intertwined disciplines focused on creating seamless, engaging, and accessible experiences for users across digital platforms. As technology advances and user expectations continue to rise, innovative and effective UI/UX design becomes increasingly critical in setting products apart from their competitors.

An image of a person happily using a website, with various design features and patterns highlighted on the interface.

UI/UX Design Tools

The Role of Interaction Design

Interaction design forms the foundation of user-centered design solutions and plays a crucial role in crafting UI/UX designs that are functional and delightful to use. Many popular tools, such as Sketch, Figma, and Adobe XD, have been developed specifically for UI/UX designers. These tools empower designers to create visually appealing interfaces while iterating on user flow, interactivity, and functionality. Each tool has unique features and capabilities, designed to meet the specific needs of the designer and project at hand.

Sketch

A vector-based design tool mainly used for UI/UX design, has gained immense popularity among professionals for its simple and intuitive interface coupled with a wide range of tools and features. The software enables designers to create wireframes, mockups, and interactive prototypes easily. It offers a plugin system for designers to extend functionalities as needed, along with the option to share designs with team members and clients through its cloud-based feature. Additionally, Sketch supports symbols and styles to encourage consistency across design projects.

Figma

Figma, on the other hand, is a cloud-based UI/UX design tool that facilitates efficient collaboration among team members. This platform allows multiple users to access projects in real-time, streamlining communication during the design process. Figma offers robust prototyping capabilities, design components, and team libraries that make it easy for users to create and optimize wireframes and interactive prototypes. Notably, its web-based nature eliminates the need to download and install any software, making it accessible from any browser on both Windows and macOS.

Adobe XD

Adobe XD is another powerful UI/UX design tool that forms part of the Adobe Creative Cloud suite. It provides a comprehensive set of tools for designing and prototyping, offering seamless integration with other Adobe applications such as Photoshop and Illustrator. Adobe XD stands out for its voice prototyping feature, which enables designers to incorporate voice interactions within their prototypes. It also has the Auto-Animate feature that makes it easy to create micro-interactions and animate UI elements.

In summary, mastering popular UI/UX design tools and their unique features is essential for designers to create engaging and accessible digital platforms. Gaining expertise in creating wireframes, interactive prototypes, and working with these tools is key to staying ahead in the UI/UX design field. Investing time in mastering these tools will not only streamline the design process but also provide greater flexibility and collaboration opportunities within the ever-evolving world of UI/UX design.

A side by side comparison of the three UI/UX design tools: Sketch, Figma, and Adobe XD, highlighting their unique features and capabilities

Responsive Design and Accessibility

Furthermore, responsive design and accessibility play a critical role in UI/UX design as they have a direct impact on the usability and efficiency of web and mobile applications. Responsive design refers to designing interfaces that adapt seamlessly to various screen sizes and devices. In an era where mobile devices have overtaken desktop devices as the primary means of accessing the internet, responsive design has become more important than ever. A well-implemented responsive design ensures that the layout, images, and navigation of a website or application appear optimally on different devices and screen resolutions, offering users a consistent and enjoyable experience across multiple platforms. Thus, incorporating responsive design principles and prioritizing accessibility complement the prowess of using essential UI/UX tools, resulting in a more successful and cohesive product.

Accessibility, on the other hand, is about ensuring that web and mobile applications are usable by individuals with disabilities, such as visual, auditory, cognitive, or motor impairments. Incorporating accessibility into UI/UX design means taking into consideration factors such as color contrast, font size, keyboard navigation, and providing alternative text descriptions for images, among other things. Accessible designs offer an inclusive experience that enables a wider range of users to interact with digital products seamlessly and effortlessly.

Responsive design and accessibility go hand-in-hand in creating a user-friendly experience for all users. A well-implemented responsive design not only accommodates a range of devices and screen sizes but also considers the unique needs of users with disabilities. For instance, responsive designs should ensure that text remains readable and clickable elements are easy to interact with on smaller screens, benefitting both users with limited dexterity and those viewing content on a small device.

In addition to offering a more inclusive user experience, responsive design and accessibility offer numerous other benefits. Accessible websites and applications can help organizations comply with legal requirements, as many jurisdictions have regulations requiring digital content to be accessible to people with disabilities. Moreover, adopting an accessible design can lead to better search engine ranking, as search engines like Google prioritize content that is accessible and user-friendly. Responsive design ensures that your digital product looks great on all devices, increasing user satisfaction and reducing the risk of losing users due to poor usability.

In conclusion, responsive design and accessibility play a crucial role in web and mobile UI/UX design, as they directly influence the overall user experience and adaptability of your digital product. It’s essential to remember that your design should cater to the diverse needs of your users – across multiple platforms and devices, as well as accommodating various disabilities. By focusing on responsive design and incorporating accessibility principles, you can ensure that your digital product is usable, inclusive, and appealing to a wide range of users.

Illustration of a man using a website on multiple devices with accessibility features displayed on the screen

Design Systems and Style Guides

Implementing design systems and style guides are essential to support this level of responsiveness and accessibility. A design system is a collection of reusable components, guidelines, and tools that designers and developers can use to create digital products, while a style guide is part of the design system that explicitly focuses on visual design aspects like typography, color schemes, and icons. These tools optimize design and development processes, ensuring that all team members follow the same principles and, eventually, create a cohesive user experience across different platforms and products. By utilizing these frameworks, you can maintain consistency and coherence in UI/UX design projects, further enhancing your digital product’s overall success.

Using design systems and style guides is highly beneficial, as they speed up the design and development process while ensuring a consistent user experience. By following a set of predefined rules, designers and developers can avoid reinventing the wheel for each new project, saving time and resources. Furthermore, a well-documented design system allows for better collaboration between different teams and helps newcomers quickly understand the project’s design principles. Consistency in design also guarantees a better user experience, as users will encounter familiar patterns and elements while using the product.

Creating a design system and style guide starts by defining the design principles, rules, and guidelines that the project should follow. A good design system should include components like patterns, layouts, and UI elements, as well as visual design elements like colors, typography, and icons. It’s crucial to document these components clearly, either in a digital format or printed format, to make it accessible for all team members. Additionally, having a well-maintained version control system is critical to keep the design system up-to-date as the project evolves.

There are many excellent examples of mature design systems and style guides that beginners can study and get inspiration from. Some notable design systems include Google’s Material Design, IBM’s Carbon Design System, and Atlassian’s Design System. These famous systems consist of comprehensive documentation, code snippets, and examples, making them an excellent resource for learning design systems’ best practices. The Airbnb Design Language System (DLS), for instance, is praised for its simplicity and scalability, as it encompasses a wide range of tools and components that allow designers and developers to create stunning user interfaces while maintaining consistency.

When building a design system, it’s essential to consider tools and frameworks that can help automate and streamline the design and development process. Prototyping tools like Sketch, Figma, and Adobe XD are great resources for creating and maintaining design files efficiently. Furthermore, existing frameworks such as Bootstrap or Semantic UI can provide an excellent foundation for building and customizing your design system, tailored to your project’s unique needs.

An illustration of different UI components from a design system, including buttons, forms, dropdowns, and cards.

User Testing and Iteration

Incorporating user testing and iteration throughout the UI/UX design process ensures a more consistent and user-centered experience. By identifying and addressing usability issues before releasing a final product, designers are able to create a seamless and efficient user experience. Continually focusing on user expectations, preferences, and behaviors allows for the development of a robust design system that meets the needs of users while promoting great user experience.

There are various user testing methods that can be employed within the design process, such as interviews, surveys, usability testing, and A/B testing. Interviews and surveys enable designers to gather qualitative feedback from users, which can provide valuable insights into their expectations and potential pain points. Usability testing involves observing users interact with a prototype or product to identify any issues or areas that need improvement. A/B testing involves presenting users with two different versions of a design element (for example, a button or a website layout) to determine which one performs better.

After conducting user testing, it is crucial for designers to analyze and interpret the results. This may include identifying trends and patterns, converting qualitative input into quantitative data, and prioritizing identified issues based on the severity of their impact on the UX. By understanding the context of the test participants, such as their backgrounds, motivations, and expertise, designers can account for potential biases and make well-informed decisions on how to iterate and improve the design.

To implement improvements based on the user testing results, designers should continually iterate on their designs. This may involve modifying the layout, navigation, colors, typography, or other design elements to better address user needs and preferences. It is also essential to consider the potential trade-offs associated with the changes, such as how a new feature may affect the overall user experience or how it may impact development costs and time. Continuous iteration ensures that designers create a fluid and adaptable user experience even as user needs and technology evolve.

One critical aspect of user testing and iteration is being open to feedback and embracing a mindset of continuous learning. Users’ needs and preferences are constantly evolving, and designers must be open to embracing change and adapting their designs accordingly.

Ultimately, user testing and iteration play a vital role in creating a more effective and engaging user experience. By employing various testing methods and incorporating feedback into the design process, designers can ensure that their products meet the needs and desires of their users. This constant cycle of testing, analysis, and improvement not only leads to a higher-quality product but also results in a more satisfying and lasting user experience.

An illustrative image showing a designer holding a prototype while a group of people look over their shoulder and offer feedback

Ultimately, mastering UI/UX design entails understanding the delicate balance between aesthetics and functionality in creating seamless, engaging, and user-friendly interfaces. By studying the principles of UI and UX design, learning how to effectively use design tools, and incorporating responsive design and accessibility standards, one can significantly improve the overall experience of users interacting with digital products. It is through continuous practice, user testing, and iterative improvements that a UI/UX designer refines their skills and crafts experiences that leave lasting impressions on users, ultimately shaping the future of digital interactions.